
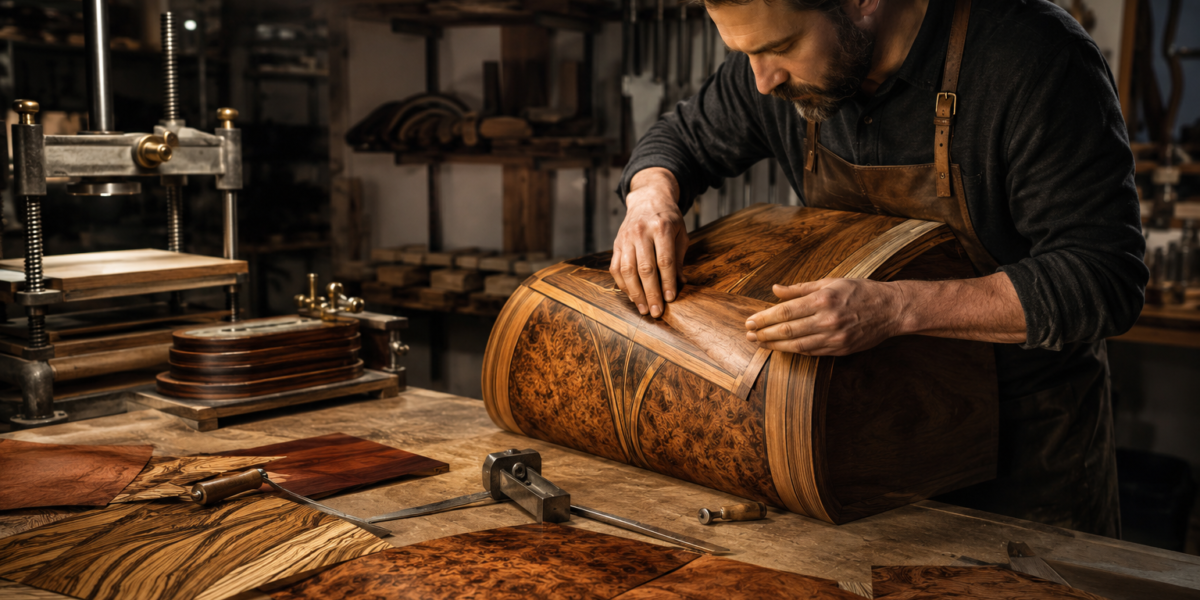

The average furniture maker often faces a dilemma: how to incorporate the breathtaking beauty of rare and expensive woods or create complex decorative patterns without incurring prohibitive costs or structural limitations. Veneering, a technique dating back to ancient Egypt, offers an elegant and practical solution. It unlocks a world of design possibilities, allowing artisans to integrate highly figured exotic woods and intricate designs into their projects with efficiency and stunning visual impact. This article delves into Mastering Veneering for Furniture Makers: Adding Exotic Woods and Patterns to Your Projects, guiding you through the essential steps, tools, and techniques needed to elevate your craftsmanship in 2026.
Key Takeaways
- Veneering allows the use of expensive or rare woods and complex patterns more economically than solid lumber.
- Proper veneer selection, preparation, and substrate choice are critical for successful veneering.
- Various gluing methods, including vacuum presses and cauls, ensure strong, even bonds.
- Precision cutting and assembly techniques are essential for intricate patterns like marquetry and parquetry.
- Effective finishing protects the veneer and enhances its aesthetic appeal.
Understanding Veneer: Selection, Types, and Preparation
The journey to Mastering Veneering for Furniture Makers begins with a thorough understanding of the material itself. Veneer is essentially a thin slice of wood, typically 0.6mm to 3mm thick, cut from a log. This thinness allows for the economical use of valuable timber and minimizes wood movement issues common with solid lumber.

Types of Veneer Cuts
The way a log is sliced significantly impacts the grain pattern of the veneer. Common cuts include:
- Rotary Cut: The log is rotated against a blade, peeling off continuous sheets. This produces a broad, random, and often wild grain pattern, common for utility plywood.
- Plain Sliced (Flat Cut): The log is sliced parallel to the center, producing a cathedral arch pattern. This is a very common and versatile cut.
- Quarter Sliced: The log is quartered and then sliced perpendicular to the growth rings. This yields a straight, striped grain pattern, often seen in woods like oak (creating ray fleck).
- Rift Cut: Similar to quarter-sliced but at a slight angle to minimize ray fleck, producing a more linear, vertical grain.
- Half-Round Sliced: Combines features of rotary and plain-sliced, producing a moderately uniform grain.
Understanding these cuts helps in selecting the right veneer for your desired aesthetic. For example, plain sliced might be ideal for bookmatching, while quarter sliced works well for straight-grain borders.
Selecting Exotic Woods for Veneering
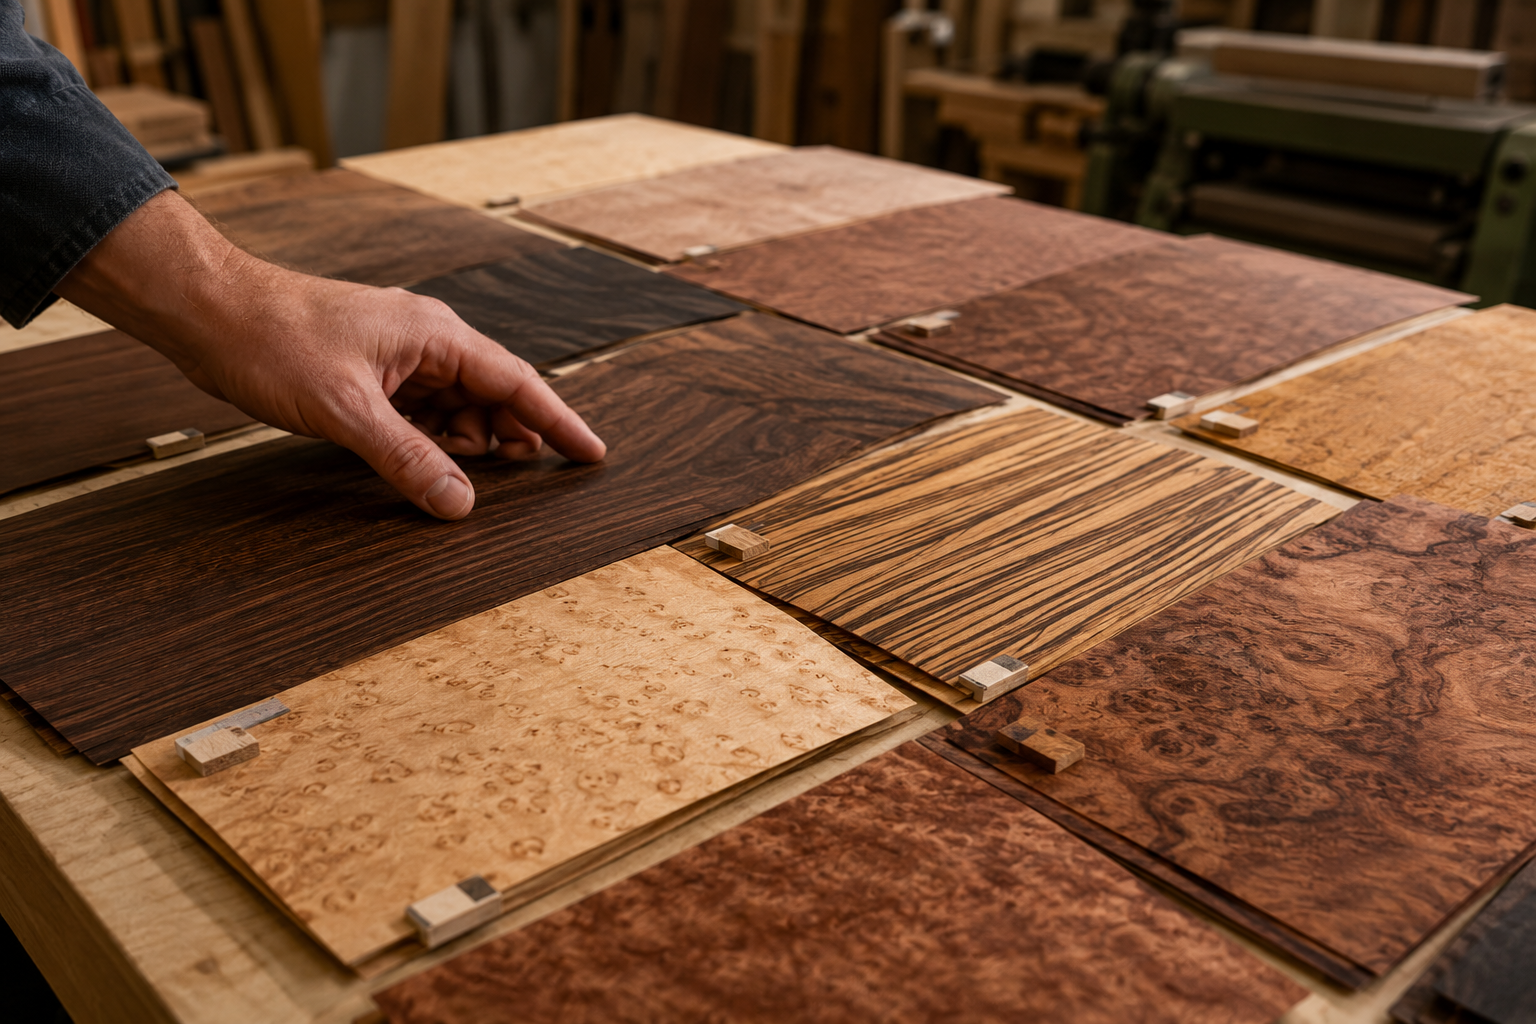
Exotic woods, celebrated for their unique colors, figures, and textures, are often costly and sometimes difficult to work with as solid lumber. Veneering makes these accessible. When selecting, consider:
- Figure: Look for highly figured burls, crotches, quilted, or curly grains that would be impractical or impossible to find in solid stock.
- Color: Exotic woods like Macassar Ebony, Wenge, Zebrawood, Purpleheart, or Bloodwood offer vibrant, distinctive colors that can be used for stunning contrast.
- Availability: Some woods are rarer than others. Source from reputable suppliers to ensure ethical and sustainable practices.
When purchasing, inspect veneers for cracks, tears, or uneven thickness. Store them flat in a climate-controlled environment to prevent warping and drying out.
Preparing the Veneer and Substrate
Proper preparation is paramount for a flawless veneering job.
Veneer Preparation
- Flattening: Veneers often arrive buckled or wavy. Flatten them by sandwiching between cauls with slight pressure, or by lightly misting with water and pressing. For stubborn veneers, a commercial veneer softener or a specialized flattening solution may be required.
- Splicing: If your project requires a wider piece than a single sheet of veneer, you’ll need to splice them together. This can be done using veneer tape, a specialized splicing machine, or even a simple straightedge and knife for a clean joint. Techniques like bookmatching (opening two consecutive sheets like a book) or slipmatching (sliding consecutive sheets side-by-side) create unique patterns.
Substrate Preparation
The substrate is the core material onto which the veneer is glued. A stable, flat substrate is crucial.
Recommended Substrates:
- MDF (Medium Density Fiberboard): Excellent stability, consistent thickness, and smooth surface. It’s often the preferred choice.
- Particleboard: Less stable than MDF but can be used.
- Plywood (Cabinet Grade): Good stability, but ensure it’s void-free and flat. Avoid construction-grade plywood.
- Solid Wood: Can be used, but ensure it’s fully seasoned and stable to prevent movement that could crack the veneer.
Preparation Steps:
- Flattening: Ensure your substrate is perfectly flat. Any imperfections will show through the veneer.
- Sanding: Lightly sand the substrate (150-180 grit) to provide a good key for the adhesive.
- Cleanliness: Remove all dust and debris.
- Balance: Veneer both sides of the substrate, even if one side won’t be visible. This balances the internal stresses and prevents warping.
Veneer Application: Glues, Presses, and Techniques
With the veneer and substrate prepared, the next step in Mastering Veneering for Furniture Makers is the application. The choice of adhesive and pressing method critically impacts the success and longevity of your veneered projects.
Adhesives for Veneering
Several types of glue are suitable for veneering, each with its own characteristics:
- PVA Glues (Polyvinyl Acetate):
- Yellow Wood Glue (Aliphatic Resin Glue): Common, strong bond, relatively fast drying.
- Cold Press Veneer Glue: Formulated specifically for veneering, offering a longer open time and a hard, creep-resistant bond. Often light-colored to minimize bleed-through.
- Urea-Formaldehyde Glue: Excellent for permanent, water-resistant bonds. Requires mixing with a catalyst and has a limited pot life. Ideal for demanding outdoor or high-moisture applications.
- Contact Cement: Provides an instant bond. Less forgiving as there’s no room for adjustment once the veneer touches the substrate. Generally not recommended for high-quality furniture veneering due to creep over time.
- Hide Glue (Animal Glue): Traditional, reversible, and allows for minor adjustments during application. Excellent for traditional marquetry but can be more sensitive to humidity.
Always read the manufacturer’s instructions for open time, clamping pressure, and cure time.
Pressing Methods
Effective clamping pressure is essential to ensure full contact between the veneer and the substrate, preventing air pockets and bubbles.
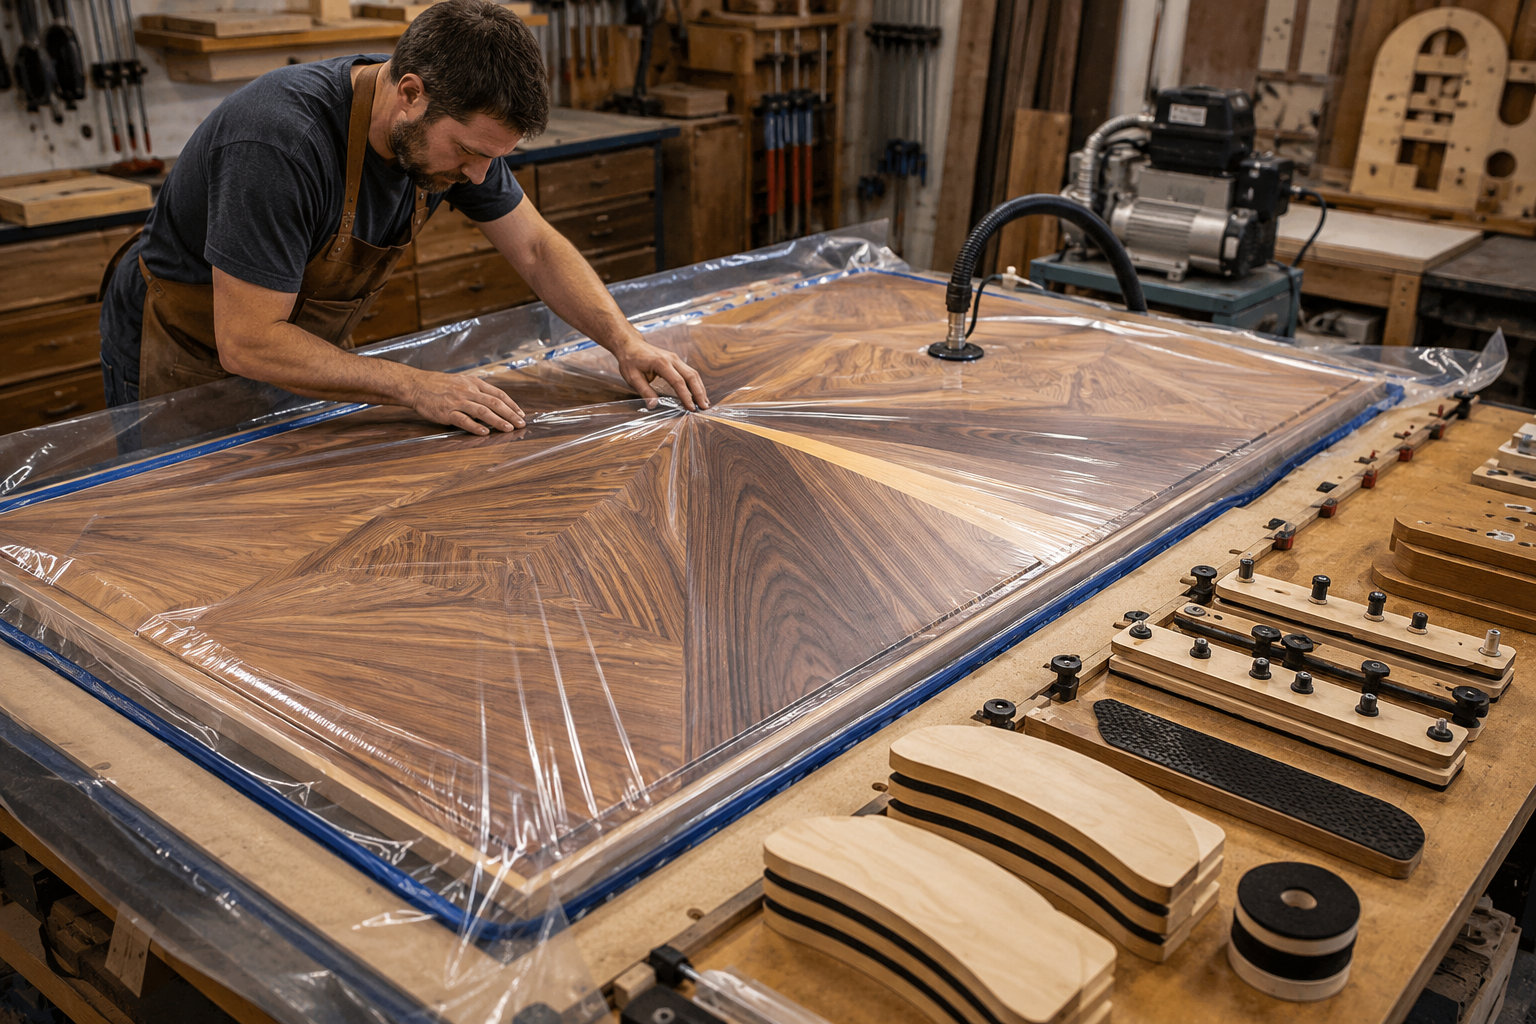
- Vacuum Press:
- Mechanism: A vacuum pump removes air from a sealed bag, creating atmospheric pressure (up to 14.7 psi) evenly across the entire surface.
- Advantages: Ideal for large panels, curved surfaces, and intricate forms. Provides consistent, even pressure.
- Usage: Place the veneered panel into a vacuum bag, seal it, and turn on the pump. Maintain vacuum for the glue’s recommended cure time.
- Cauls and Clamps:
- Mechanism: Flat, rigid boards (cauls) are placed on top of the veneered surface and clamped down using C-clamps, bar clamps, or specialized veneer clamps.
- Advantages: Suitable for smaller, flat panels or areas. Cost-effective.
- Usage: Apply glue, position veneer, place cauls (waxed paper or plastic sheeting between cauls and veneer prevents sticking), and clamp evenly across the entire surface. Ensure cauls are perfectly flat.
- Pinch Rollers/Roll Presses: More common in industrial settings, these machines apply high, even pressure by passing panels through rollers.
Ensure adequate curing time before unclamping. Premature removal can lead to delamination or bubbles. For complex shapes, consider exploring specialized methods, such as those used in advanced wood carving techniques for decorative furniture accents where veneers might conform to carved surfaces.
Handling Common Veneering Challenges
- Bubbles/Blisters: Often caused by insufficient glue, uneven pressure, or trapped air. Can sometimes be repaired by slitting the bubble, injecting glue, and clamping.
- Cracks/Tears: Repair with matching veneer patches or by carefully filling with wood putty and blending.
- Glue Bleed-Through: Use appropriate glue, avoid excessive application, and ensure adequate clamping pressure. Sand carefully to remove dried glue.
Crafting Exotic Patterns: Marquetry, Parquetry, and Inlay
Beyond simply covering a substrate, Mastering Veneering for Furniture Makers: Adding Exotic Woods and Patterns to Your Projects truly shines in the creation of intricate designs. Marquetry, parquetry, and inlay elevate furniture from functional items to works of art.
Marquetry
Marquetry involves cutting individual pieces of veneer (often different species, colors, and grain directions) and fitting them together like a jigsaw puzzle to form a pictorial design.

- Design Creation: Start with a detailed drawing or template.
- Cutting Techniques:
- Stack Cutting (Pad Sawing): Stack multiple veneers, secure them, and cut through all layers simultaneously with a fine-bladed scroll saw or fret saw. This produces identical pieces, speeding up complex designs.
- Knife Cutting: For simpler shapes, a sharp veneer knife or scalpel can be used against a straightedge or template.
- Laser Cutting (CNC): For extreme precision and intricate details, CNC laser cutters can be used to cut veneer pieces. This also opens up possibilities for integrating with beginner’s guide to CNC routers for small woodshops.
- Assembly: Once cut, the pieces are carefully assembled, often taped together on one side (the “face” side) to hold the pattern. The assembled pattern is then glued to the substrate.
- Pressing: Use a vacuum press or cauls to ensure even pressure during gluing.
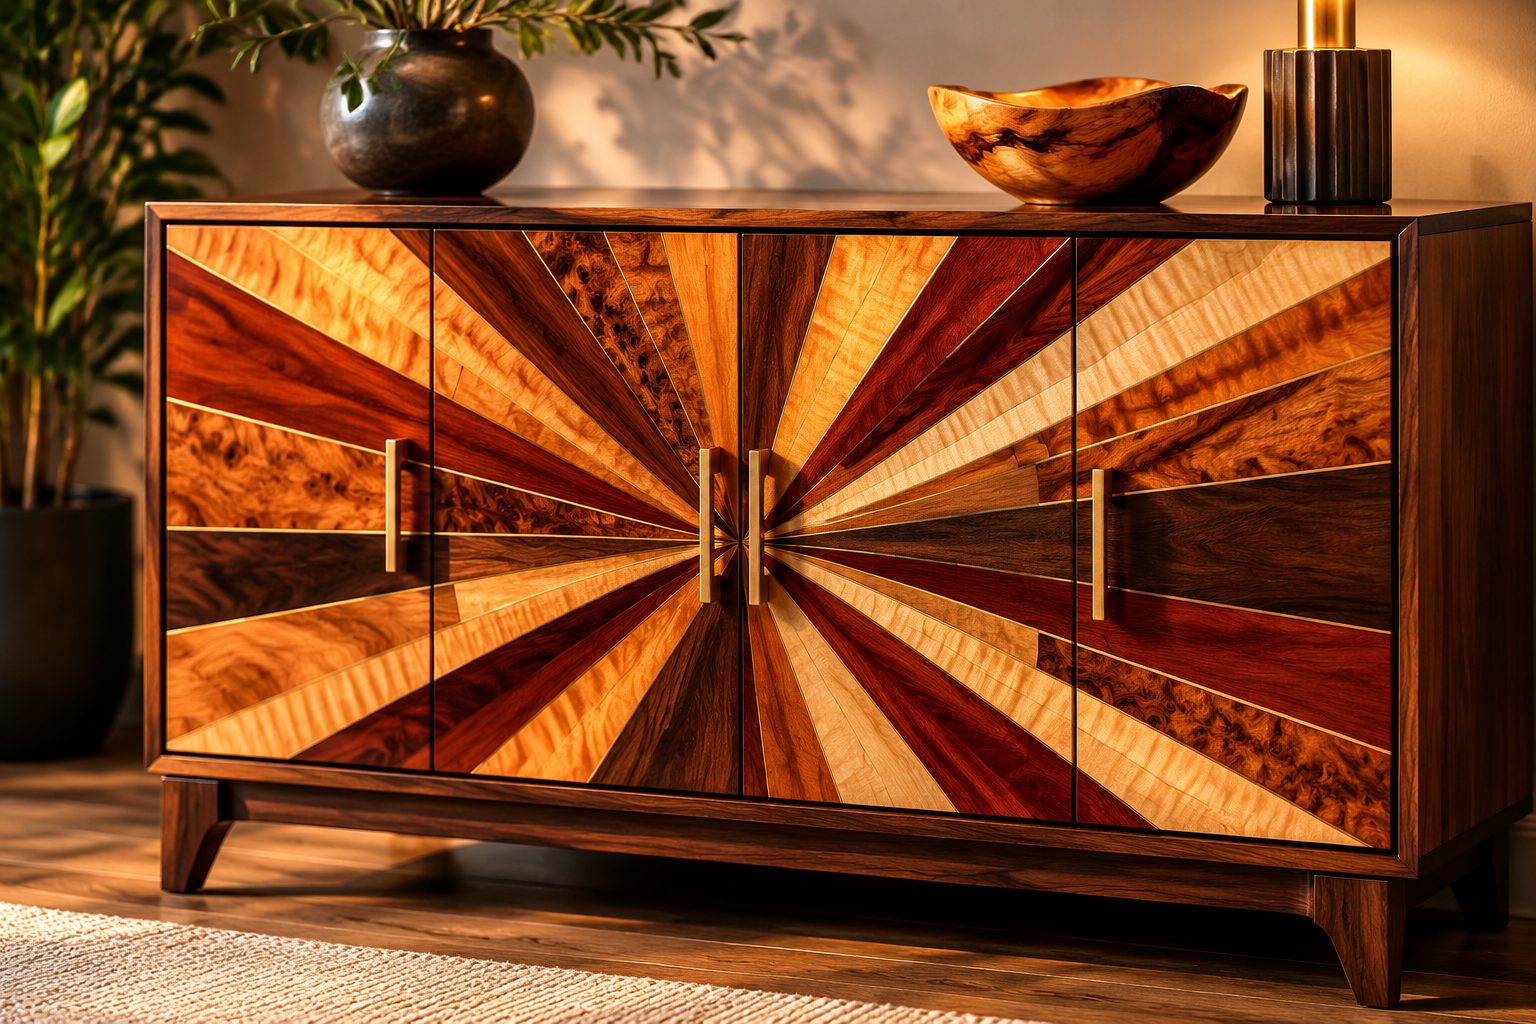
Parquetry
Parquetry creates geometric patterns using individual veneer pieces, often arranged in repeating modules. Common patterns include chevron, herringbone, basketweave, and cube designs.
- Cutting: Precise, repeatable cuts are crucial. A miter saw with a stop block, a veneer saw, or a precision jig on a table saw can be used.
- Assembly: Assemble the pattern on a flat surface, taping pieces together, before gluing to the substrate.
- Popular Patterns:
- Herringbone: Rectangular pieces laid at a 90-degree angle to each other.
- Chevron: Pieces cut at an angle, forming a continuous zigzag pattern.
- Cube (End Grain): Uses small squares of veneer, often with contrasting grain direction, to create a three-dimensional optical illusion.
Inlay
Inlay involves cutting a recess into a solid wood surface or a base veneer and fitting a contrasting piece of veneer or other material (like mother-of-pearl or metal) into the recess.
- Routing: A router with a template guide or a specialized inlay kit is often used to create the recess.
- Fitting: The inlay piece must be precisely cut to fit snugly into the routed recess.
- Gluing: Glue the inlay piece into the recess, ensuring it’s flush with the surrounding surface.
Finishing Veneered Surfaces
After the glue has fully cured, the veneered surface requires careful finishing.
- Sanding: Start with fine-grit sandpaper (220-320 grit) and work up to a very fine grit (400-600) for a smooth finish. Be extremely cautious not to sand through the thin veneer, especially at edges or where patterns meet. Hand sanding or orbital sanders with light pressure are recommended.
- Filling: Fill any minor gaps or pinholes with wood putty that matches the veneer color.
- Finishes:
- Oil Finishes: Penetrate the wood, enhancing the natural grain and color. Offer a natural look but less protection against wear and moisture.
- Varnish/Polyurethane: Provide a durable, protective layer. Available in various sheens (matte to high gloss). Apply thin, even coats, sanding lightly between coats.
- Lacquer: Dries quickly, builds a smooth film, and is easy to repair.
The chosen finish should complement the exotic woods and the overall design. Consider the intended use of the furniture piece; a dining table will require a more durable finish than a decorative wall panel. For more insights on various finishing options, explore different unique wood finishing techniques.
Conclusion
Mastering Veneering for Furniture Makers: Adding Exotic Woods and Patterns to Your Projects is a skill that opens up a world of creative expression and economic efficiency in woodworking. By understanding veneer types, meticulously preparing materials, employing effective gluing and pressing techniques, and exploring intricate patterns like marquetry and parquetry, furniture makers can transform ordinary pieces into extraordinary works of art. The ability to incorporate rare woods and complex designs without the limitations of solid lumber not only enhances the aesthetic value of your projects but also expands your capabilities as a craftsman.
To truly master this craft, consistent practice is key. Start with simpler projects to build confidence, gradually tackling more complex designs and exotic materials. Invest in quality tools, maintain a clean workspace, and always prioritize precision. The beauty of veneering lies in its endless possibilities, allowing each piece to tell a unique story through the timeless elegance of wood.
