

The average aspiring woodworker often dismisses woodturning as an advanced craft requiring significant investment in specialized equipment and extensive training. However, the reality for many enthusiasts embarking on DIY wood lathe projects for beginners reveals a much more accessible path. With a modest setup and a commitment to fundamental techniques, turning bowls, pens, and spindles can be a highly rewarding entry point into the world of woodworking, proving that intricate, beautiful objects are well within reach with minimal setup in 2026. This guide aims to demystify the process, providing a comprehensive overview for those eager to begin their turning journey.
Key Takeaways
- Woodturning for beginners is accessible with minimal investment in tools and space.
- Safety is paramount; always wear appropriate personal protective equipment (PPE).
- Mastering basic cuts and tool control is more important than possessing numerous tools.
- Start with smaller, simpler projects like pens and spindles before moving to bowls.
- Regular practice and patience are key to developing skill and confidence on the lathe.
Essential Setup for DIY Wood Lathe Projects for Beginners
Embarking on DIY wood lathe projects for beginners requires a foundational understanding of the necessary equipment and a strong emphasis on safety. While the thought of a full-scale workshop might be daunting, many rewarding projects can be completed with a compact, affordable setup.

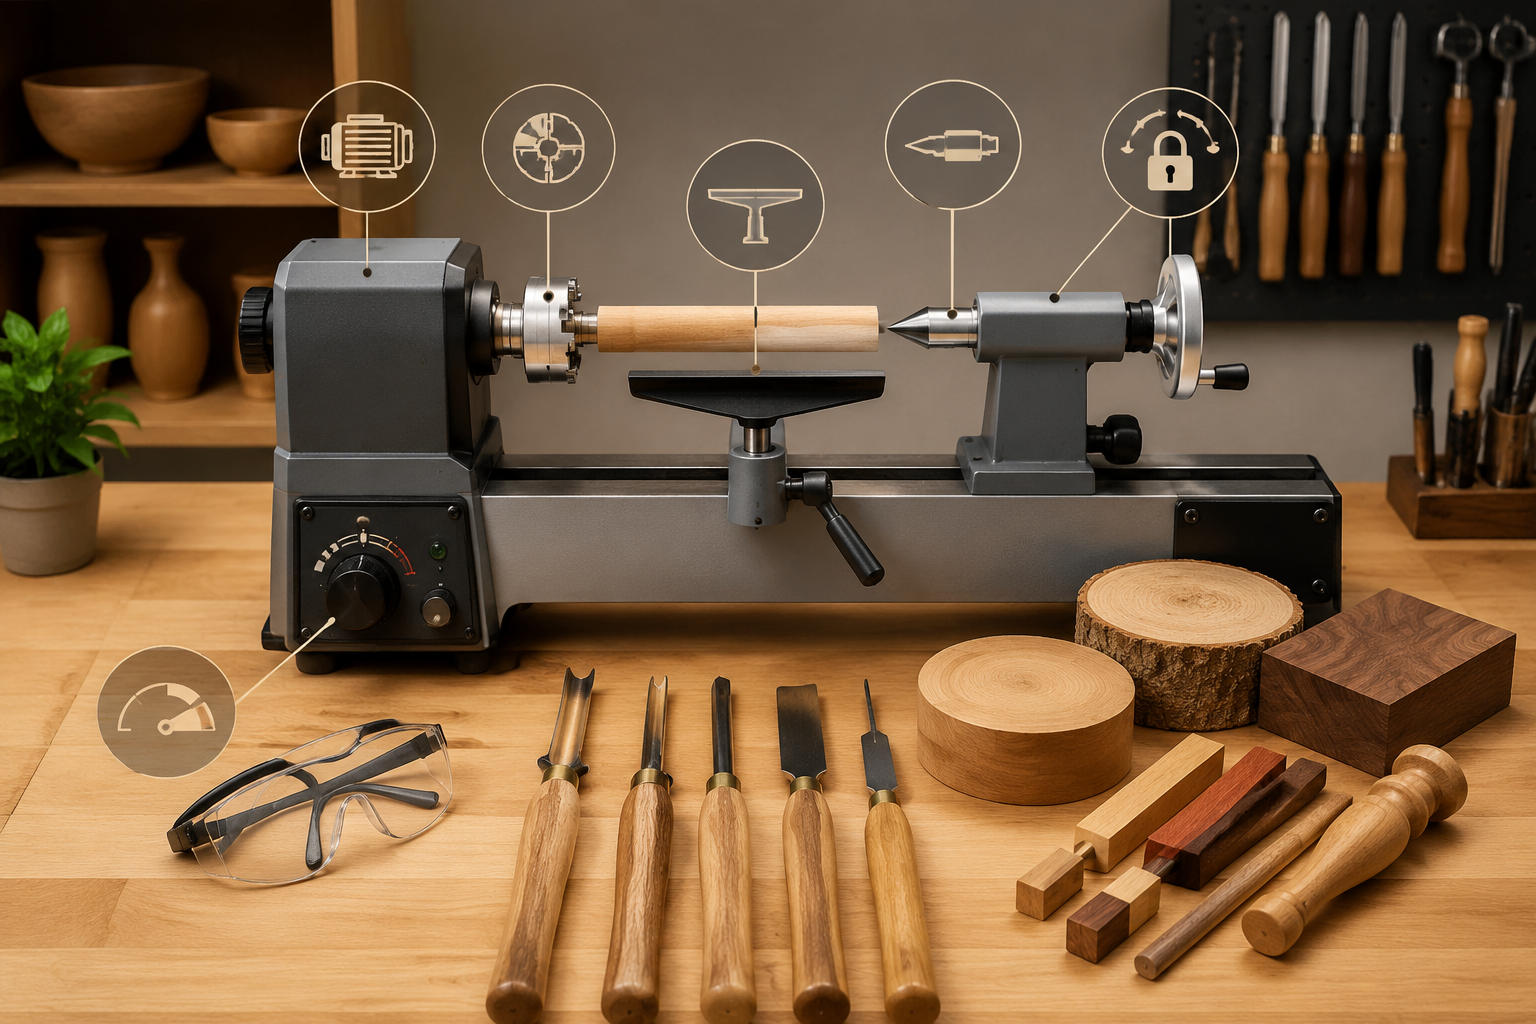
The Lathe: Your Turning Foundation
For beginners, a mini-lathe or a benchtop midi-lathe is an excellent starting point. These machines are relatively inexpensive, require less space, and are perfectly capable of handling smaller projects like pens, bottle stoppers, and small bowls up to 8-10 inches in diameter.
Key Lathe Components to Understand:
- Headstock: Contains the motor, spindle, and drive mechanism.
- Tailstock: Supports the other end of the workpiece, often housing a live center.
- Bed: The main frame connecting the headstock and tailstock, providing rigidity.
- Tool Rest: Adjustable support for your turning tools.
- Speed Control: Allows adjustment of rotational speed, crucial for safety and effective cutting.
When selecting a lathe, consider variable speed options, as different woods and project stages benefit from varying RPMs. Look for sturdy construction to minimize vibration, which can affect cut quality and safety. For more general guidance on starting your woodworking journey, consider our Introduction to Wood Turning for Beginners: Mastering Basic Lathe guide.
Essential Turning Tools
You don’t need a vast collection of tools to start. A basic set of turning chisels will cover most beginner projects.
Table 1: Essential Woodturning Tools for Beginners
| Tool Type | Primary Function | Beginner Project Use Cases |
|---|---|---|
| Spindle Gouge | Shaping curves and coves on spindle work | Pens, candle holders, decorative spindles |
| Roughing Gouge | Quickly reducing square stock to round | Initial shaping of bowl and spindle blanks |
| Skew Chisel | Creating V-cuts, beads, and shearing cuts for smooth finishes | Pens, spindles, tenons and shoulders |
| Parting Tool | Cutting off workpieces, creating grooves, sizing tenons | Sizing pen blanks, creating bowl foot tenons |
| Bowl Gouge | Shaping and hollowing bowls and other faceplate work | Small bowls, platters, cups |
Beyond these, a faceplate (for mounting bowl blanks) and a spur drive (for spindle work) are crucial accessories.
Personal Protective Equipment (PPE)
Safety is non-negotiable. Always wear:
- Eye Protection: A full face shield is highly recommended over just safety glasses, as flying chips and potential tool catches can be dangerous.
- Dust Mask/Respirator: Wood dust can be a severe respiratory irritant.
- No Loose Clothing or Jewelry: These can get caught in the spinning workpiece.
- Hearing Protection: Lathes can be noisy, especially with larger pieces.
“Woodturning is a dance between precision and raw power. Respect the machine, understand your wood, and prioritize safety above all else.”
Proper setup also involves securing your lathe to a stable workbench to prevent movement during operation.
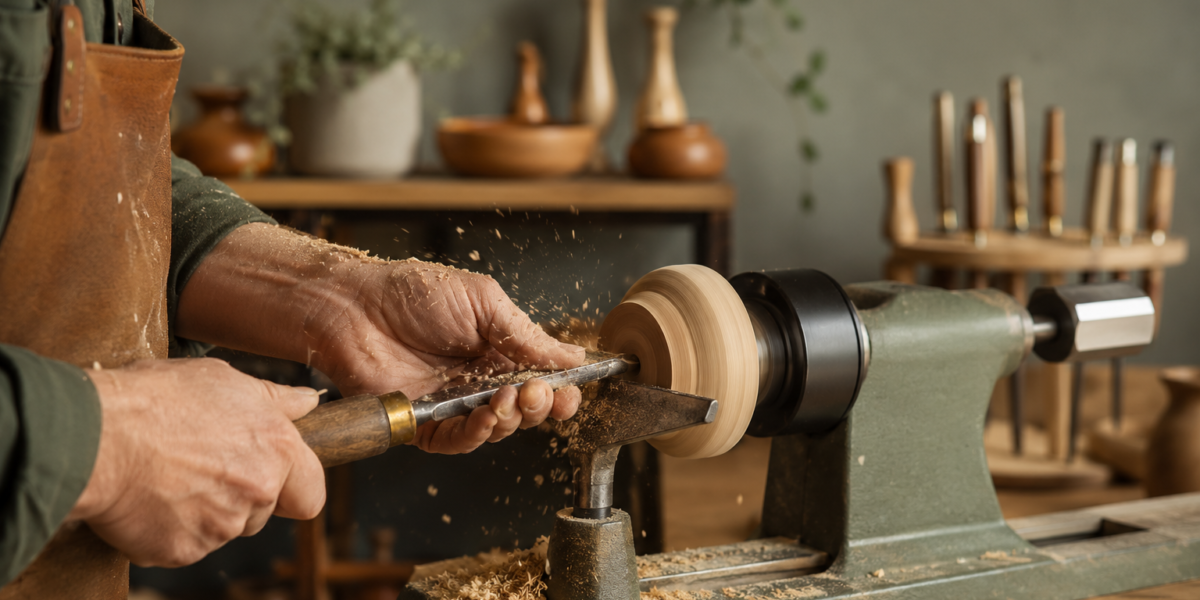
Mastering Basic Turning Techniques and First Projects
With your minimal setup ready, the next step is to understand fundamental turning techniques. The key to successful DIY wood lathe projects for beginners is patience and practicing controlled, smooth cuts.
Mounting the Workpiece
- Spindle Turning: For pens and spindles, the wood blank is mounted between the headstock’s spur drive and the tailstock’s live center. Ensure the blank is centered and the tailstock is securely locked.
- Faceplate Turning: For bowls, the wood blank is screwed directly to a faceplate, which then mounts onto the headstock spindle. Ensure screws are appropriate length and do not protrude through the turning surface.
The Stance and Tool Presentation
Your body position is crucial for control. Stand comfortably, with your feet shoulder-width apart, and the tool rest at a height that allows your tool to meet the wood slightly above center. Always brace the turning tool against the tool rest firmly and present it to the wood at the appropriate angle.
Basic Cuts: Roughing, Shaping, and Finishing
- Roughing: Using a roughing gouge or bowl gouge, begin to reduce your square or irregular blank to a cylinder or general rounded shape. Start at a slow speed and take light cuts.
- Shaping: Once rounded, switch to a spindle gouge for curves or a bowl gouge for interior/exterior bowl shaping. Focus on smooth, continuous cuts, letting the tool glide through the wood.
- Shearing/Finishing Cuts: For the smoothest surface, use a skew chisel (for spindle work) or a finely sharpened bowl gouge (for bowls) with a light shearing cut. This minimizes sanding.
For an even deeper dive into foundational techniques, our article “Introduction to Wood Turning for Beginners: Mastering Basic Lathe Operations and Simple Bowl Projects” offers excellent insights into mastering these initial steps.
Project 1: Turning a Simple Pen
Pens are ideal for beginners due to their small size, quick completion time, and the immediate gratification they offer.
Steps:

- Prepare the Blank: Cut a pen blank to length and drill a hole through its center for the pen tube. Glue the pen tube into the blank.
- Mount: Mount the blank on a pen mandrel or between centers for spindle turning.
- Rough to Round: Using a roughing gouge, turn the square blank into a cylinder, slightly larger than the pen components.
- Shape: Use a spindle gouge or skew chisel to shape the pen barrel, creating a comfortable grip and decorative profile.
- Sand and Finish: Sand through progressively finer grits (e.g., 150, 220, 320, 400, 600 grit) to achieve a smooth surface. Apply a finish like cyanoacrylate (CA) glue, friction polish, or a Danish oil.
- Assemble: Press the pen components onto the finished wood sections.
Project 2: Crafting Decorative Spindles
Spindles, like small finials or candle holders, teach various cuts and how to create repeating patterns.
Steps:
- Prepare and Mount: Select a small, straight-grained wood blank and mount it between centers.
- Rough to Round: Turn the blank to a consistent cylinder.
- Mark Divisions: Use a pencil and ruler to mark divisions for beads, coves, or other features along the length.
- Shape Features: Use a spindle gouge for coves and beads, and a skew chisel for V-cuts or crisp details. Practice smooth transitions.
- Sand and Finish: Sand the spindle with progressively finer grits and apply a desired finish.
- Part Off: Use a parting tool to cut the finished spindle from the waste stock.
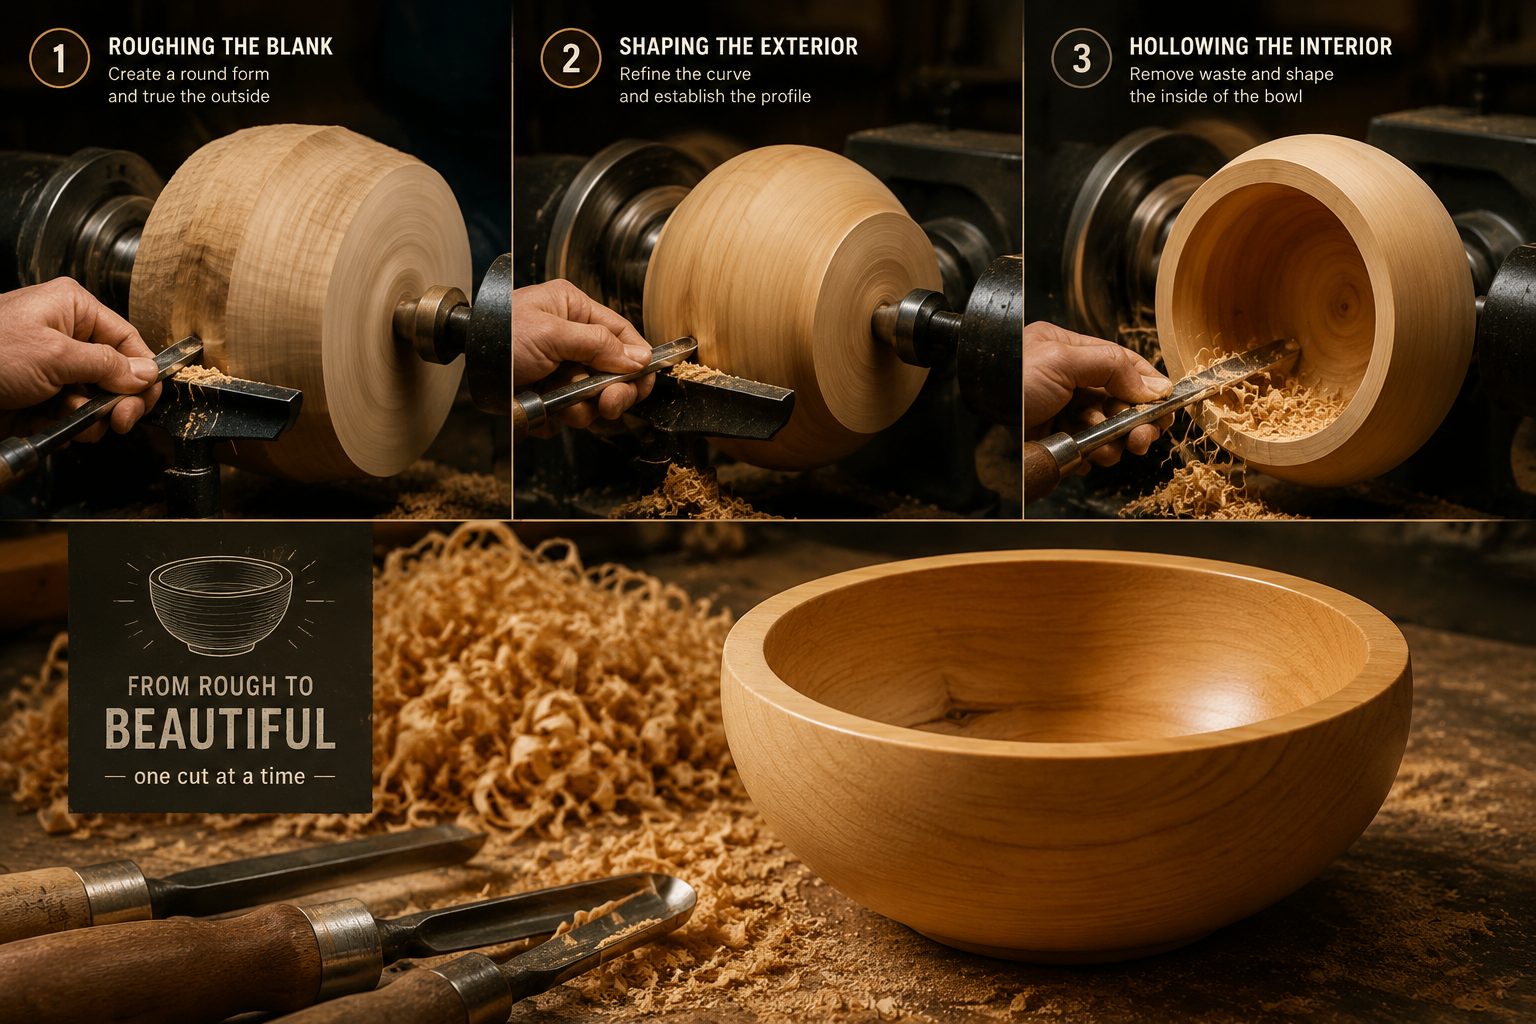
Project 3: Turning a Small Wooden Bowl
Turning a small bowl introduces faceplate turning and hollowing techniques, a significant step up from spindle work.
Steps:
- Prepare and Mount: Select a bowl blank (often a square or round piece of wood) and attach it to a faceplate. Mount the faceplate on the headstock.
- Shape Exterior: At a moderate speed, use a bowl gouge to rough shape the outside of the bowl, establishing the curve and the base. Create a tenon or recess on the base for future chucking.
- Reverse and Remount: Once the exterior is shaped and sanded, remove the faceplate, reverse the bowl, and mount it onto a chuck (using the tenon/recess) or a vacuum chuck.
- Hollow Interior: Carefully hollow out the inside of the bowl using a bowl gouge. Start from the rim and work towards the center, taking light, controlled cuts to achieve an even wall thickness.
- Sand and Finish: Sand the interior and exterior to a smooth finish. Apply a food-safe finish if intended for use with food, such as a mineral oil or specific bowl finishes. Learn more about crafting bowls in our guide on Wooden Fruit Bowls: Lathe-Turned and Segmented Builds for Ki.
Finishing Touches and Continued Growth in Woodturning
Once you’ve successfully completed a few DIY wood lathe projects for beginners, the focus shifts to refining your work and exploring new avenues. Proper finishing can transform a good turning project into a great one, and consistent practice is key to developing mastery.
Sanding and Polishing for a Flawless Finish
Even the cleanest cuts often require sanding. This process removes tool marks and prepares the wood for a protective and enhancing finish.
Sanding Best Practices:
- Start Coarse, Go Fine: Begin with a grit that effectively removes tool marks (often 150-220 grit) and work your way up to at least 400-600 grit. For a mirror-smooth finish, go even higher.
- Vary Direction: To minimize visible scratch patterns, sand across the grain (while the lathe is off or spinning slowly) and with the grain. If using power sanding, oscillate the pad.
- Shear Out Dust: Between grits, wipe the piece clean with a cloth or use compressed air to remove dust particles that can cause deeper scratches with the next grit.
- Reverse Lathe Direction: Sanding in reverse can help reveal and remove scratches that are oriented in one direction.
Applying Finishes
The type of finish depends on the project’s intended use and the desired aesthetic.
- Oils (e.g., Danish Oil, Tung Oil, Mineral Oil): These penetrate the wood, enhancing its natural color and grain. They offer a natural feel and are easy to reapply. Mineral oil is excellent for food-safe items.
- Friction Polishes: Applied while the lathe is spinning, these quick-drying finishes build a thin, glossy layer, offering a durable, attractive surface, particularly for pens.
- Waxes (e.g., Carnauba, Beeswax): Often used over an oil finish, waxes provide a soft luster and some protection.
- Lacquers/Polyurethanes: These create a hard, protective film on the surface, offering excellent durability but can sometimes obscure the natural feel of the wood.
Always apply finishes in a well-ventilated area and follow the manufacturer’s instructions for curing times and safety.
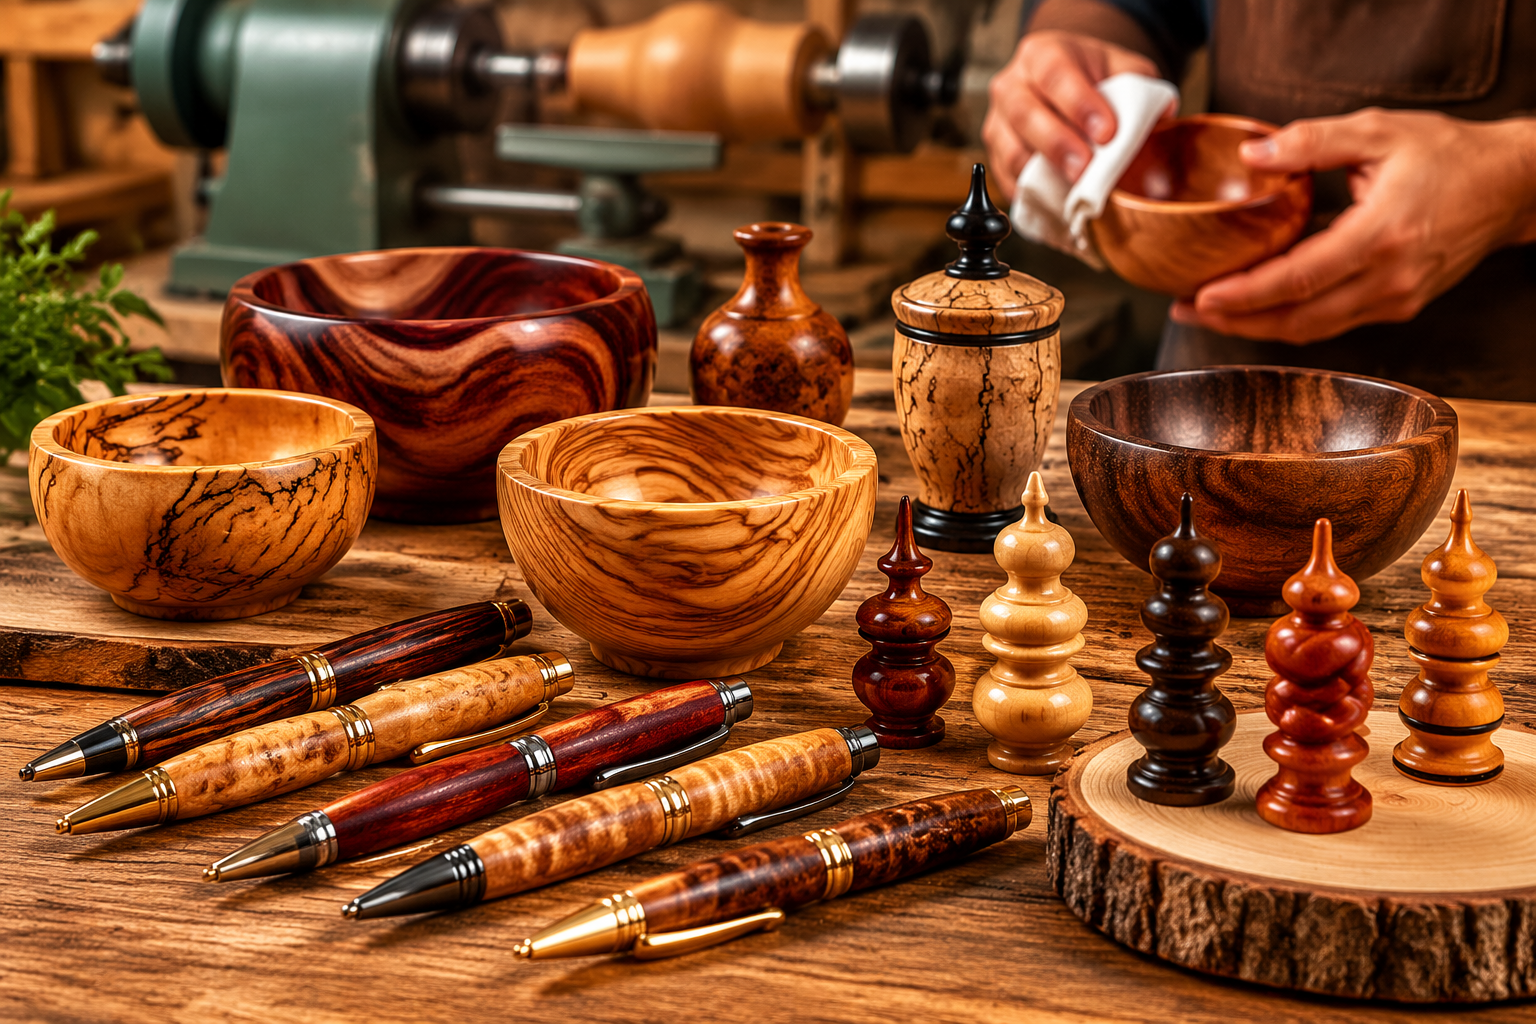
Moving Beyond Beginner Projects
Once comfortable with bowls, pens, and spindles, consider exploring more complex shapes and applications.
- Segmented Turning: Assembling multiple pieces of wood to create intricate patterns before turning. This requires precision in cutting and gluing.
- Hollow Forms: Turning vessels with small openings and deep interiors, challenging tool control and measurement.
- Vases and Lidded Boxes: Combining spindle and faceplate techniques with joinery elements.
- Custom Furniture Components: Legs, finials, and decorative elements for tables and chairs. This ties into broader woodworking skills, such as those discussed in building a Custom Wood Workbench.
Expanding Your Knowledge and Skills
- Join a Local Turning Club: These clubs offer invaluable mentorship, access to advanced equipment, and a supportive community.
- Watch Demonstrations: Online videos and in-person workshops from experienced turners can accelerate your learning.
- Experiment with Wood Species: Different woods have unique turning characteristics. Start with softer woods like maple, cherry, or poplar, then explore hardwoods or exotics.
- Tool Sharpening: A sharp tool is a safe and effective tool. Invest in a good sharpening system and learn to maintain your edges. This is a fundamental skill across all woodworking, as covered in The Ultimate Guide to Sharpening Woodworking Chisels and Planes.
Continuously challenging yourself with new techniques and projects will keep the craft exciting and your skills constantly improving. The joy of transforming a raw piece of wood into a functional or artistic object with your own hands is truly unparalleled.
Conclusion
The journey into woodturning, particularly focusing on DIY wood lathe projects for beginners, is remarkably accessible and rewarding. With a minimal investment in a benchtop lathe and a few essential tools, aspiring craftspeople can quickly begin turning beautiful and functional items like pens, decorative spindles, and small bowls. Emphasizing safety, understanding the basic components of your lathe, and patiently practicing fundamental cutting techniques are the cornerstones of success. As skills grow, the possibilities expand from simple projects to more complex, artistic endeavors, allowing for continuous growth and creative expression in 2026. This guide aims to equip you with the knowledge and confidence to take those first satisfying steps into the captivating world of woodturning.

Actionable Next Steps
- Invest in Basic Equipment: Secure a mini or midi-lathe and a core set of turning chisels.
- Prioritize Safety Gear: Purchase a full face shield, dust mask, and hearing protection before your first cut.
- Start Small: Begin with less expensive wood blanks and focus on pen or spindle turning to build confidence.
- Practice Tool Control: Spend time practicing basic cuts on scrap wood to understand how your tools interact with the material.
- Join a Community: Seek out local turning clubs or online forums for advice, inspiration, and camaraderie.
[[SEO_META]] Meta Title: DIY Wood Lathe Projects for Beginners: Turn Bowls, Pens & Spindles Meta Description: Start DIY wood lathe projects for beginners in 2026. Learn to turn bowls, pens, and spindles with minimal setup, essential tools, and basic techniques.
