
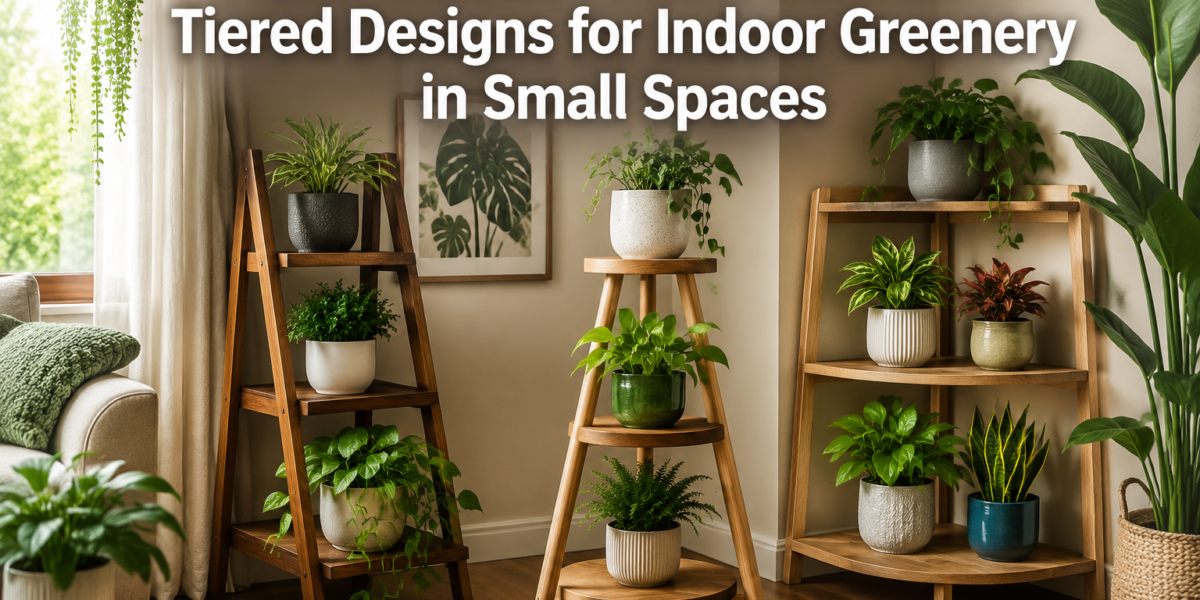

A startling 80% of urban dwellers live in apartments or small homes, often grappling with limited floor space yet yearning for the tranquility and beauty of indoor greenery. This widespread challenge presents a compelling case for smart, vertical solutions. One of the most effective and rewarding approaches is to craft your own DIY Wooden Plant Stands: Tiered Designs for Indoor Greenery in Small Spaces. By constructing tripod, ladder, and corner stands with robust dowel joinery and adjustable heights, you can select stable woods that securely hold heavy pots without tipping, transforming cramped corners into lush botanical displays.
Key Takeaways

- Space Optimization: Tiered wooden plant stands efficiently utilize vertical space, making them ideal for small living areas.
- Design Versatility: Learn to build tripod, ladder, and corner stand designs, each offering unique aesthetic and functional benefits.
- Dowel Joinery Strength: Master dowel joinery for strong, stable connections capable of supporting heavy potted plants securely.
- Wood Selection for Stability: Choose appropriate wood types that ensure the structural integrity and longevity of your DIY stands.
- Customization & Aesthetics: Tailor stand dimensions, finishes, and features to perfectly match your indoor plants and home decor in 2026.
Planning Your DIY Wooden Plant Stands: Tiered Designs for Indoor Greenery in Small Spaces
Successful woodworking projects begin with meticulous planning, and building DIY Wooden Plant Stands: Tiered Designs for Indoor Greenery in Small Spaces is no exception. This foundational stage involves selecting the right wood, designing for stability, and gathering the necessary tools.
Selecting the Right Wood for Stability and Aesthetics
The type of wood you choose significantly impacts the stand’s durability, stability, and overall appearance. For indoor plant stands, particularly those designed to hold heavy pots, selecting a dense, stable wood is crucial.
- Hardwoods:
- Oak: Known for its strength and attractive grain, oak is an excellent choice for robust stands. It’s heavy, providing inherent stability.
- Maple: Offers a fine, uniform grain and exceptional hardness, making it resistant to dents and scratches.
- Walnut: A premium choice, walnut is strong, stable, and boasts a rich, dark color that looks sophisticated with greenery.
- Softwoods (with considerations):
- Pine: More affordable and easier to work with, pine can be suitable for lighter plants or stands that don’t need to bear extreme weight. However, it’s softer and more prone to denting. Ensure adequate thickness and joinery for stability.
- Cedar: Naturally resistant to moisture and decay, cedar is often used outdoors, but its aromatic quality and beautiful grain make it a viable, albeit softer, indoor option.
Consider the ambient humidity in your home. Some woods are more prone to movement with changes in moisture. For more insights on this, refer to “Understanding Wood Movement: How to Design and Build Furniture That Lasts Through Seasonal Changes” at https://woodcraftwiz.com/understanding-wood-movement-how-to-design-and-build-furniture-that-lasts-through-seasonal-changes/.
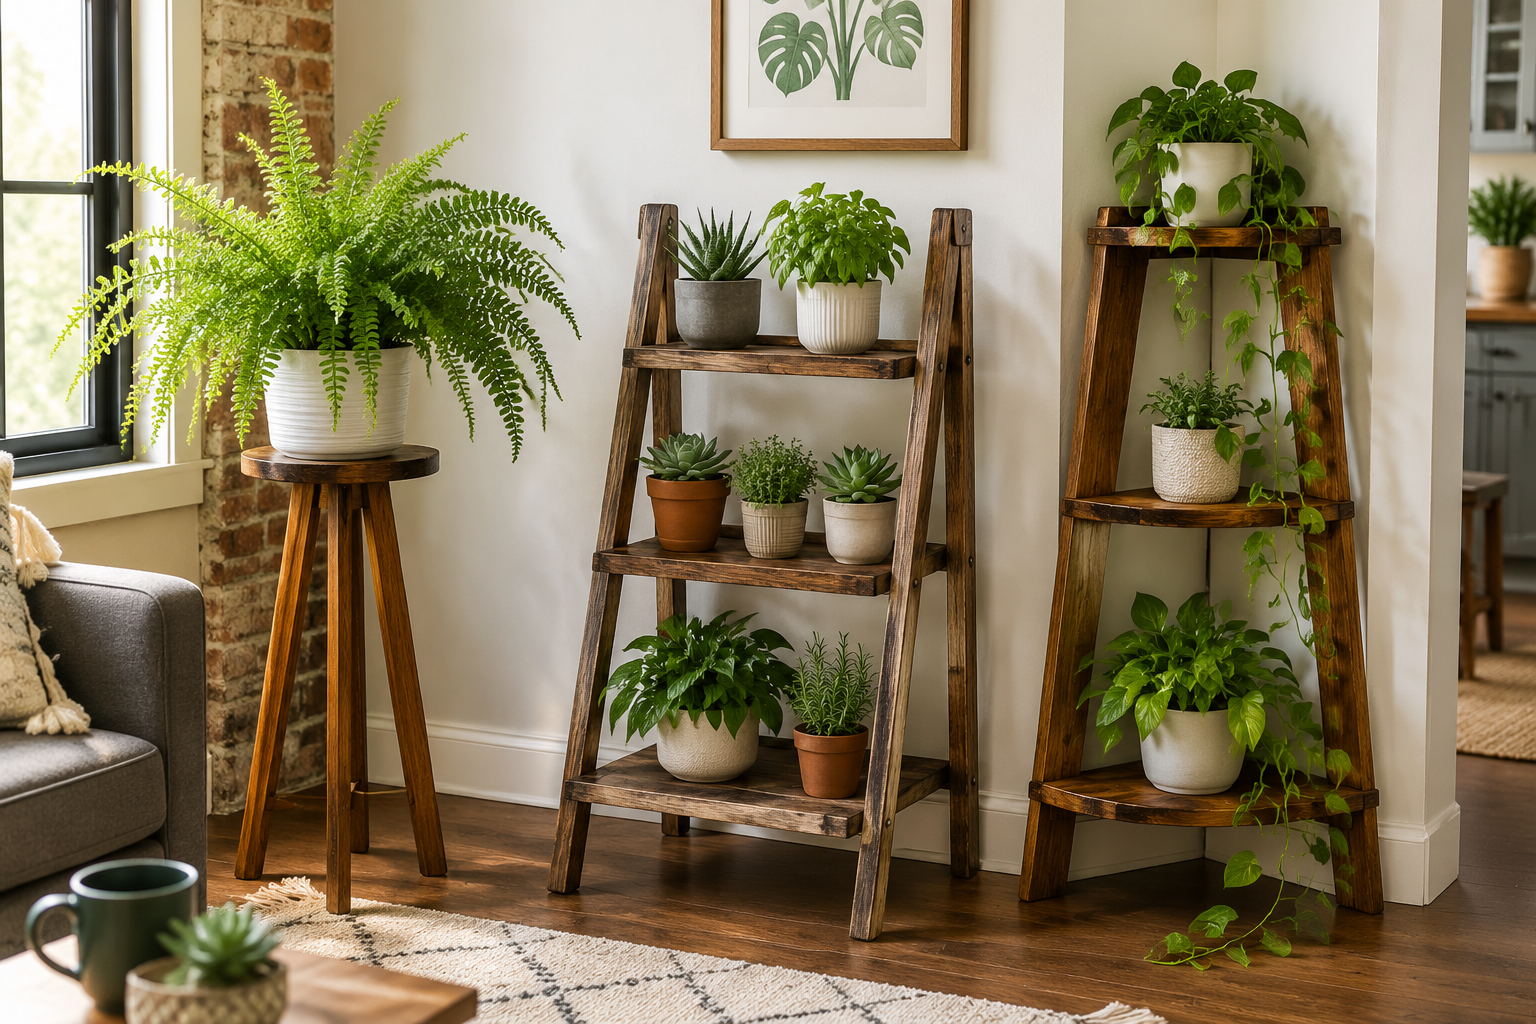
Designing for Tiered Functionality: Tripod, Ladder, and Corner Styles
Tiered designs are key to maximizing space. Each style offers unique advantages:
- Tripod Stands:
- Stability: Three legs naturally form a stable base, especially when angled correctly.
- Aesthetics: Often sleek and modern, great for showcasing a single star plant or a small cluster at varying heights.
- Adjustable Heights: Can incorporate adjustable shelves or fixed shelves at different levels for visual interest.
- Ideal for: Medium to large plants, focal points.
- Ladder Stands:
- Space Efficiency: Leans against a wall, making it excellent for narrow spaces.
- Multiple Tiers: Provides several shelves or rungs for numerous smaller plants.
- Versatility: Can be designed with fixed shelves or hanging baskets from rungs.
- Ideal for: Herb gardens, succulent collections, diverse plant displays.
- Corner Stands:
- Ultimate Space Saver: Designed to fit snugly into a corner, utilizing often-wasted space.
- Maximized Display: Offers multiple triangular or quadrant-shaped shelves.
- Structural Support: Benefits from the inherent support of two walls.
- Ideal for: Filling empty corners, displaying a collection of smaller to medium plants.
When designing, always consider the weight of your heaviest pots. The stand must be engineered to distribute this weight effectively without tipping.
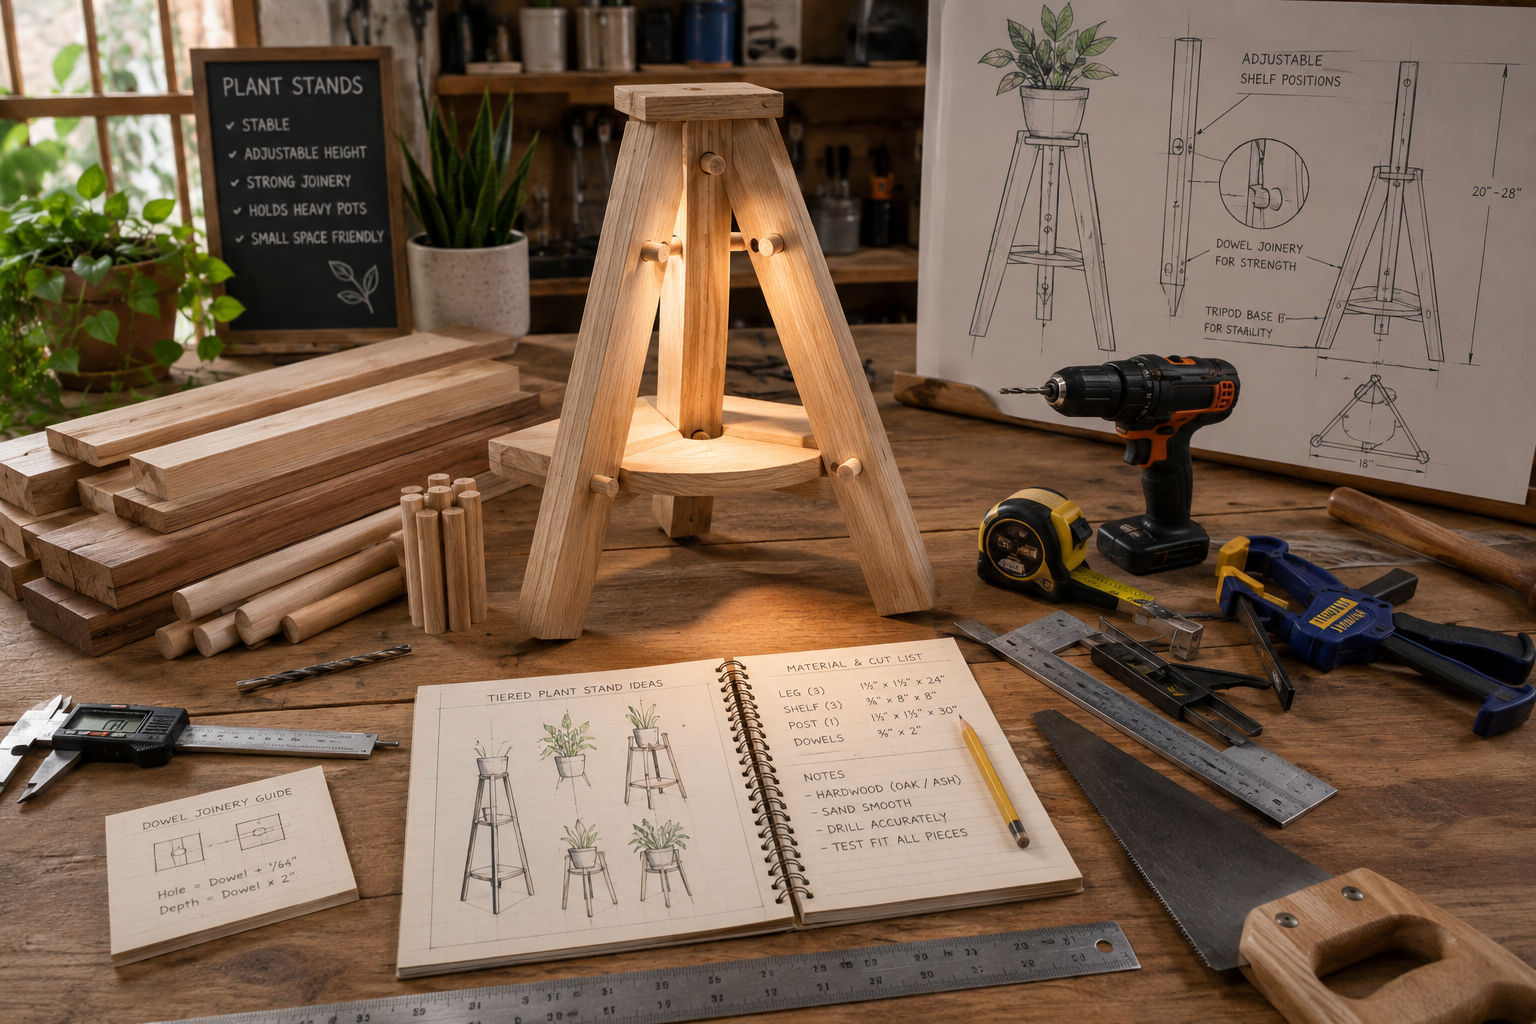
Essential Tools and Materials for Your Project
Before cutting wood, ensure you have the right arsenal of tools.
Required Tools:
- Measuring & Marking: Tape measure, ruler, combination square, pencil.
- Cutting: Hand saw (backsaw, Japanese pull saw), miter saw, or circular saw for precise cuts. A jigsaw might be useful for curves in shelf designs.
- Drilling: Electric drill (corded or cordless) with various drill bits, especially those for dowel holes. A drill press enhances precision for dowel joinery.
- Joinery: Doweling jig (crucial for precise dowel placement), wood clamps (bar clamps, C-clamps).
- Shaping & Sanding: Wood files, sandpaper (various grits: 80, 120, 180, 220), orbital sander (optional, but a time-saver).
- Safety Gear: Safety glasses, ear protection, dust mask.
Materials Checklist:
- Selected wood (dimensional lumber or project panels)
- Wooden dowels (matching drill bit size)
- Wood glue (PVA glue)
- Wood filler (if needed for minor imperfections)
- Wood finish (stain, polyurethane, oil – see below for more)
- Screws or nails (for reinforcing, if desired, though dowel joinery aims for hidden fasteners)
A doweling jig is particularly important for ensuring accurate and strong dowel joints. For more details on various woodworking tools and techniques, explore our guide on “Mastering the Router Table: Essential Jigs, Safety, and Advanced Techniques for Precision Joinery and Edges” at https://woodcraftwiz.com/mastering-the-router-table-essential-jigs-safety-and-advanced-techniques-for-precision-joinery-and-edges/.
Building Stable DIY Wooden Plant Stands: Dowel Joinery and Assembly
Constructing sturdy DIY Wooden Plant Stands: Tiered Designs for Indoor Greenery in Small Spaces hinges on precise cuts, strong joinery, and careful assembly. Dowel joinery is an excellent choice for these projects, offering robust, hidden connections that look clean and professional.
Step-by-Step Construction: Tripod, Ladder, and Corner Designs
The basic principles of cutting, drilling, and joining apply to all designs, but each stand has unique assembly considerations.
Tripod Stand Construction
- Cut Legs: Cut three identical pieces of wood for the legs. Tapering them slightly towards the top can add an elegant touch. The angle at which they meet the ground and the top shelf is critical for stability.
- Cut Shelves: Determine the number and size of your circular or triangular shelves. Cut them precisely. For adjustable heights, consider creating a system where shelves can be secured at different points, perhaps with pins or small cleat systems.
- Prepare for Joinery: Mark the precise locations for dowel holes on the legs and the underside of each shelf. A doweling jig is indispensable here to ensure perfect alignment.
- Drill Dowel Holes: Drill corresponding holes for dowels. Ensure the depth is sufficient to accommodate the dowels without drilling through the surface.
- Assemble with Dowels: Apply wood glue sparingly into the dowel holes and onto the dowels. Insert dowels into one piece, then align and press the corresponding piece onto the dowels.
- Clamp and Dry: Clamp the assembled sections firmly until the glue dries completely. Ensure the stand remains square and level during clamping.
Ladder Stand Construction
- Cut Sides: Cut two long pieces of wood for the vertical sides of the ladder.
- Cut Rungs/Shelves: Determine the width and depth of your shelves or rungs. Cut them to size. Remember that ladder stands typically lean, so shelves might need to be cut at an angle or have a lip to keep pots from sliding off.
- Dowel Joinery: Mark and drill dowel holes for the shelves into the side pieces. For a ladder, the shelves act as rungs, often recessed or dadoed into the sides for added strength, with dowels reinforcing the joint.
- Assembly: Glue and dowel the shelves into the side pieces. Work from bottom to top, clamping each section as you go.
- Bracing (Optional): Add a cross-brace at the back near the bottom for extra stability, especially if the stand will hold heavier plants.
Corner Stand Construction
- Cut Vertical Supports: Cut several vertical pieces that will form the frame of the corner stand. These can be full-height or shorter segments between shelves.
- Cut Corner Shelves: Cut triangular or quarter-circle shelves. The dimensions will depend on the corner angle (typically 90 degrees) and desired shelf size.
- Dowel Joinery: Use dowel joinery to attach the shelves to the vertical supports. For a robust corner stand, consider connecting multiple vertical supports with the shelves, forming a strong, multi-point connection.
- Assembly: Assemble the frame first, then attach the shelves, or integrate shelves as you build up the vertical structure. Clamping is essential to maintain squareness.
- Reinforcement: Due to the shape, reinforcing the back edges that meet the wall can add significant stability. Small L-brackets or cleats can be discreetly added.
For all designs, ensure all mating surfaces are perfectly flat and smooth before applying glue. For more detailed insights into joinery techniques, including advanced options for building robust furniture, consult “Beyond the Basic Box: Advanced Joinery for Unique Wooden Gift Boxes” at https://woodcraftwiz.com/beyond-the-basic-box-advanced-joinery-for-unique-wooden-gift-boxes-and-keepsakes/.
Ensuring Stability: Weight Distribution and Anti-Tipping Measures
A plant stand that tips over is not only frustrating but also potentially damaging to your plants and flooring.

- Wide Base: For tripod and freestanding ladder designs, ensure the base is wide enough to counteract the weight of plants placed on higher tiers. The center of gravity should always fall within the base perimeter.
- Even Weight Distribution: Encourage placing heavier pots on lower shelves to keep the center of gravity low.
- Secure Dowel Joints: Properly executed dowel joints, combined with quality wood glue, create very strong connections. Use enough dowels for the load each joint will bear.
- Adjustable Feet: Adding adjustable leveling feet can compensate for uneven floors, preventing wobbling.
- Wall Anchoring (for Ladder/Corner): For ladder stands and taller corner stands, securing the top to the wall with small L-brackets or anti-tip straps is a simple yet effective safety measure, especially in homes with children or pets.
- Wood Thickness: Do not skimp on wood thickness, especially for shelves bearing significant weight. Thicker wood is inherently more stable and resistant to bowing.
Customizing for Small Spaces: Adjustable Features and Compact Designs
The “small spaces” aspect of your DIY project means thinking creatively about functionality.
- Modular Shelving: Design shelves that can be easily removed or repositioned. This allows you to adapt the stand to different plant sizes or rearrange your display as your plant collection evolves. Small metal pins or a routed dado system can achieve this.
- Foldable Ladder Stands: A ladder stand could be designed with hinges to fold flat for storage, a significant advantage in tiny apartments.
- Integrated Storage: Some designs could include a small drawer or cubby at the bottom for gardening tools, watering cans, or plant food, further maximizing utility.
- Minimal Footprint: For tripod stands, ensure the leg spread is just wide enough for stability without taking up unnecessary floor space. For corner stands, measure your corner precisely to ensure a snug fit without gaps.
- Verticality: Always prioritize height over width when possible. A tall, narrow stand with multiple small tiers is often more suitable for small spaces than a wide, short one.
Building modular storage systems is a related skill that can be applied here. Our article on “Building Modular Wood Storage Systems for Small Workshops: Maximizing Space and Organization” at https://woodcraftwiz.com/building-modular-wood-storage-systems-for-small-workshops-maximizing-space-and-organization/ offers valuable insights into maximizing space through modular design.
Finishing and Maintaining Your DIY Wooden Plant Stands
The final steps for your DIY Wooden Plant Stands: Tiered Designs for Indoor Greenery in Small Spaces involve careful finishing and ongoing maintenance. A proper finish not only enhances the stand’s aesthetic appeal but also protects the wood from moisture and wear, crucial for items that will interact with water and soil.
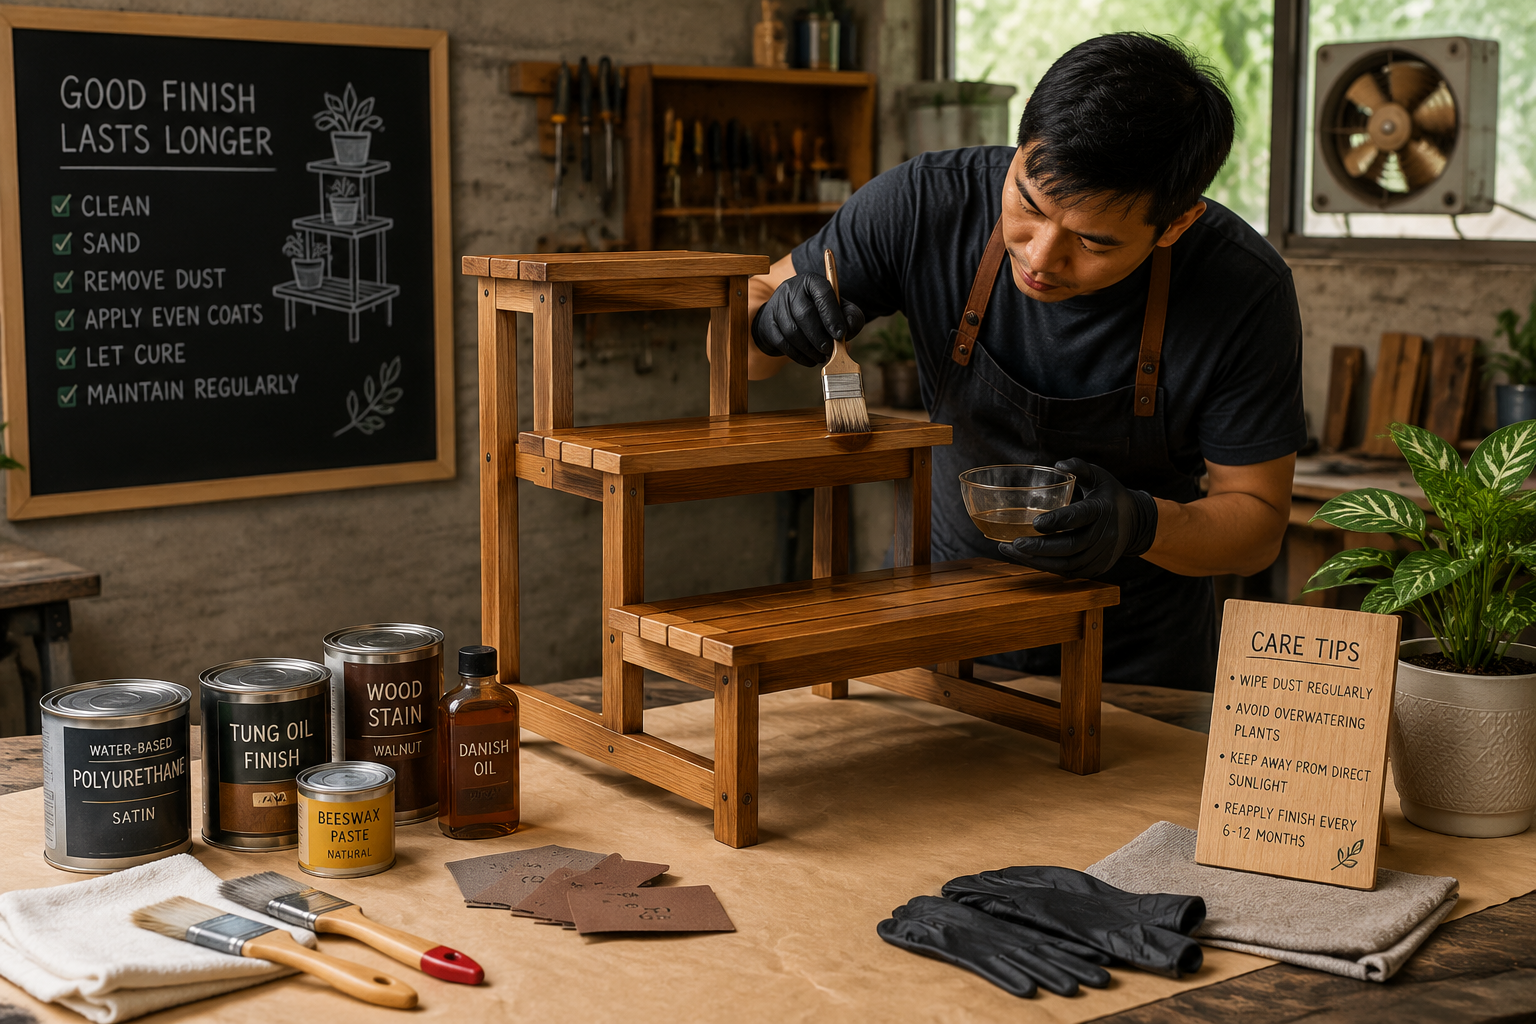
Applying Durable Finishes for Longevity
The choice of finish depends on the wood type, desired look, and the level of protection needed. For plant stands, moisture resistance is paramount.
- Sanding: Begin by sanding all surfaces thoroughly. Start with a coarser grit (80-120) to remove imperfections, then move to finer grits (180-220) for a smooth finish. Ensure all dust is removed before finishing.
- Stain (Optional): If you want to change the wood’s color, apply a wood stain. Test on a scrap piece first. Apply evenly and wipe off excess according to manufacturer instructions. Allow adequate drying time.
- Sealants & Topcoats:
- Polyurethane: A highly durable and water-resistant option, available in oil-based (more durable, amber tint) and water-based (dries faster, clearer finish) formulas. Apply multiple thin coats, sanding lightly between coats for optimal adhesion and smoothness.
- Spar Urethane: Specifically designed for outdoor use and marine environments, spar urethane offers superior moisture and UV resistance. While potentially overkill for indoor use, it provides exceptional protection against water spills and high humidity. It’s a good choice if you anticipate heavy watering or high humidity.
- Oil Finishes (e.g., Danish Oil, Tung Oil): These penetrate the wood, enhancing its natural grain and offering a more natural look and feel. They provide good water resistance but might require more frequent reapplication than polyurethane. They are also easier to repair if scratched.
- Wax: Often applied over oil finishes for an extra layer of protection and a subtle sheen.
Ensure adequate ventilation when applying finishes, and always follow the product’s safety guidelines and drying times. For a deeper dive into wood finishing techniques, refer to our comprehensive guide on “Danish Oil vs. Linseed: The Ultimate Wood Finishing Guide” at https://woodcraftwiz.com/danish-oil-vs-linseed-the-ultimate-wood-finishing-guide/.
Protecting Against Moisture and Potential Damage
Plants require water, and where there’s water, there’s a risk of spills and humidity, which can damage wood over time.
- Waterproof Liners/Trays: Always place potted plants on waterproof saucers or trays. Consider using decorative ceramic or plastic trays that fit the aesthetic of your stand.
- Elevated Pot Bases: Even with saucers, elevating the pot slightly within the saucer can prevent water from sitting directly against the wood if the saucer overflows. Small rubber feet or pebbles in the saucer can achieve this.
- Regular Wiping: Promptly wipe up any water spills from the wood surface.
- Ventilation: Ensure good air circulation around your plants and stand to prevent moisture from lingering and causing mold or wood degradation.
- Gaskets/Pads: For shelves that might frequently hold wet pots, consider adding small rubber or felt pads beneath the saucers to provide a barrier and prevent scratches.
Placement and Styling Your Indoor Greenery
Once your stands are built and finished, it’s time to populate them with your beloved plants. Strategic placement and styling can elevate your entire living space in 2026.
- Consider Light Needs: Place plants requiring bright light on upper tiers or near windows. Shade-loving plants can reside on lower shelves or in less brightly lit corners.
- Vary Heights and Textures: Arrange plants of different sizes, leaf shapes, and colors to create visual interest. Tall, upright plants can anchor a tier, while vining plants can cascade down, adding softness.
- Groupings: Create small “plant communities” on each tier, grouping plants with similar care needs. This also enhances humidity for plants that prefer it.
- Aesthetic Balance: Balance the visual weight of your plants and pots. Don’t overcrowd a single tier, allowing each plant room to breathe and be appreciated.
- Complementary Decor: Use your plant stands as an opportunity to integrate other small decorative items like small sculptures, books, or candles, enhancing the overall decor of your small space.
By thoughtfully selecting plants and arranging them on your custom-built DIY Wooden Plant Stands: Tiered Designs for Indoor Greenery in Small Spaces, you transform functional items into stunning decorative features that bring life and freshness into your home.
Conclusion
Creating DIY Wooden Plant Stands: Tiered Designs for Indoor Greenery in Small Spaces is a rewarding project that combines practical utility with aesthetic enhancement. By carefully planning your design, selecting stable woods, and mastering dowel joinery, you can construct durable and beautiful stands that perfectly fit your home’s unique dimensions and your plant collection’s needs. Whether you opt for the elegant stability of a tripod, the space-saving efficiency of a ladder, or the corner-maximizing prowess of a corner stand, the principles of precision, strength, and thoughtful finishing remain constant. These custom-built pieces not only elevate your plants but also transform often-overlooked nooks into vibrant, living displays.
For your next steps, gather your tools and materials, start with a simple design, and gradually challenge yourself with more complex tiered structures. Remember to prioritize safety, take accurate measurements, and apply a suitable finish to protect your craftsmanship. Your custom wooden plant stands will serve as a testament to your skills and a lush oasis for your indoor greenery for years to come.
seo_meta_title: DIY Wooden Tiered Plant Stands for Small Spaces – Build Guide seo_meta_description: Learn to build DIY wooden plant stands with tiered designs for indoor greenery in small spaces. Master tripod, ladder, & corner stands for stability.
