
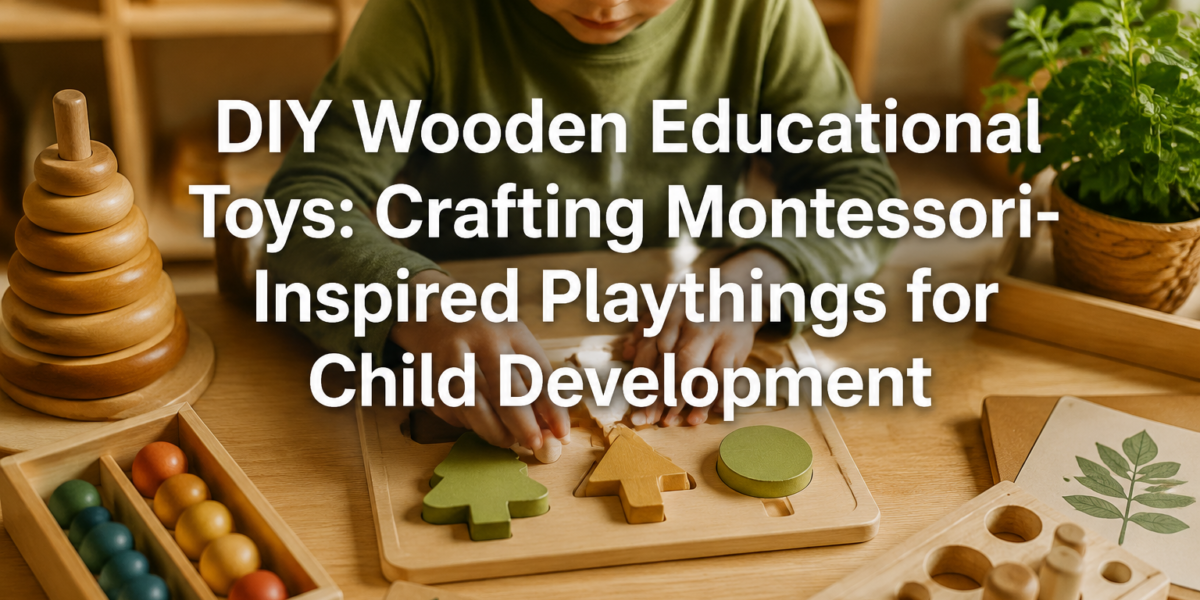

The average child, between birth and age five, will spend thousands of hours in play. Imagine if a significant portion of that time was spent not just with plastic novelties, but with thoughtfully designed, durable wooden objects crafted to stimulate specific developmental skills. This is the core philosophy behind Montessori education, and it’s a philosophy that empowers parents and crafters alike to engage in DIY Wooden Educational Toys: Crafting Montessori-Inspired Playthings for Child Development. By harnessing the tactile beauty and inherent safety of wood, we can create heirloom-quality toys that transcend fleeting trends, offering genuine educational value and fostering a child’s natural curiosity and independence.
Key Takeaways
- Montessori education emphasizes hands-on, self-directed learning, and wooden toys are ideal for this approach due to their natural properties.
- Crafting your own DIY wooden educational toys allows for customization, ensures safety with non-toxic materials, and provides a rewarding creative outlet.
- Simple designs often yield the most effective educational outcomes, focusing on a single skill or concept per toy.
- Essential tools for beginners include basic hand tools and power tools like a jigsaw or drill, with safety being paramount.
- Finishing techniques should prioritize child safety, utilizing non-toxic waxes, oils, or paints to protect both the wood and the child.
Understanding Montessori Principles and Their Application to Wooden Toys

At its heart, the Montessori method, developed by Dr. Maria Montessori, champions a child’s innate desire to learn and explore. It advocates for an “prepared environment” where children can freely choose activities that pique their interest, thereby developing concentration, independence, and a deep understanding of concepts through hands-on engagement. When we consider DIY Wooden Educational Toys: Crafting Montessori-Inspired Playthings for Child Development, we are essentially creating these “prepared environment” elements that encourage self-correction and logical thinking.

Unlike many mass-produced plastic toys that often overstimulate with lights, sounds, and prescribed play patterns, Montessori-inspired wooden toys are typically:
- Simple and Purposeful: Each toy usually focuses on teaching one specific skill or concept. For example, a shape sorter teaches geometric recognition and problem-solving, while nesting dolls develop size discrimination and order.
- Made from Natural Materials: Wood offers a sensory richness that plastic cannot replicate. Its weight, texture, and natural scent engage a child’s senses, providing a deeper, more grounded learning experience.
- Aesthetically Pleasing: The natural beauty of wood, often left unstained or finished with clear, non-toxic sealants, appeals to a child’s sense of order and beauty.
- Self-Correcting: Many Montessori toys are designed so that a child can immediately tell if they have completed an activity correctly or incorrectly, fostering independent problem-solving without adult intervention.
- Durable: Wooden toys are built to last, often becoming cherished family heirlooms that can withstand years of enthusiastic play.
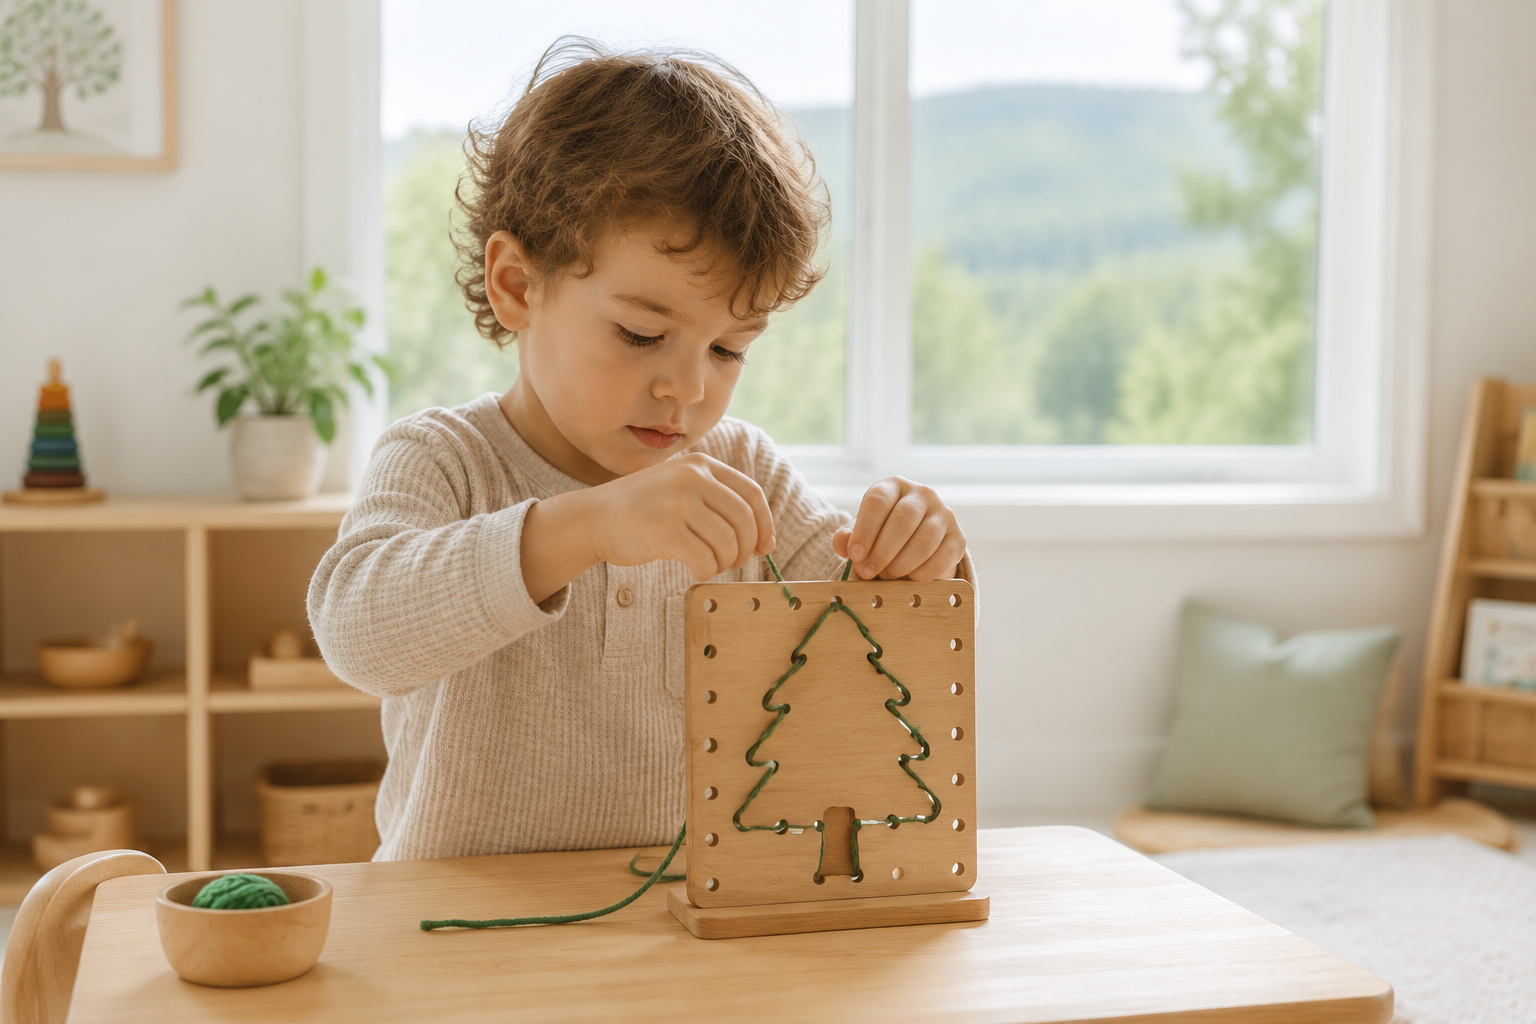
Consider the classic wooden block set. It’s not just for stacking; it can be used for building towers, creating patterns, learning about balance, understanding spatial relationships, and even rudimentary counting. The open-ended nature of such a toy is profoundly Montessori.
Why Wood is the Ideal Medium
The choice of wood for educational toys is far from arbitrary. Its inherent qualities align perfectly with Montessori’s pedagogical goals:
- Tactile Feedback: The natural texture and weight of wood provide excellent sensory input, helping children develop a stronger connection to the physical world.
- Durability and Longevity: Well-crafted wooden toys can endure rough play, making them a sustainable choice that reduces waste.
- Safety (with proper finishing): When unfinished or treated with natural, non-toxic sealants, wood is a safe material for children who are prone to putting objects in their mouths.
- Aesthetic Value: The warmth and natural patterns of wood are inherently beautiful, contributing to a calming and inviting play environment.
- Sustainability: Sourcing wood from responsibly managed forests makes these toys an environmentally conscious choice.
Essential Tools and Materials for Crafting DIY Wooden Educational Toys
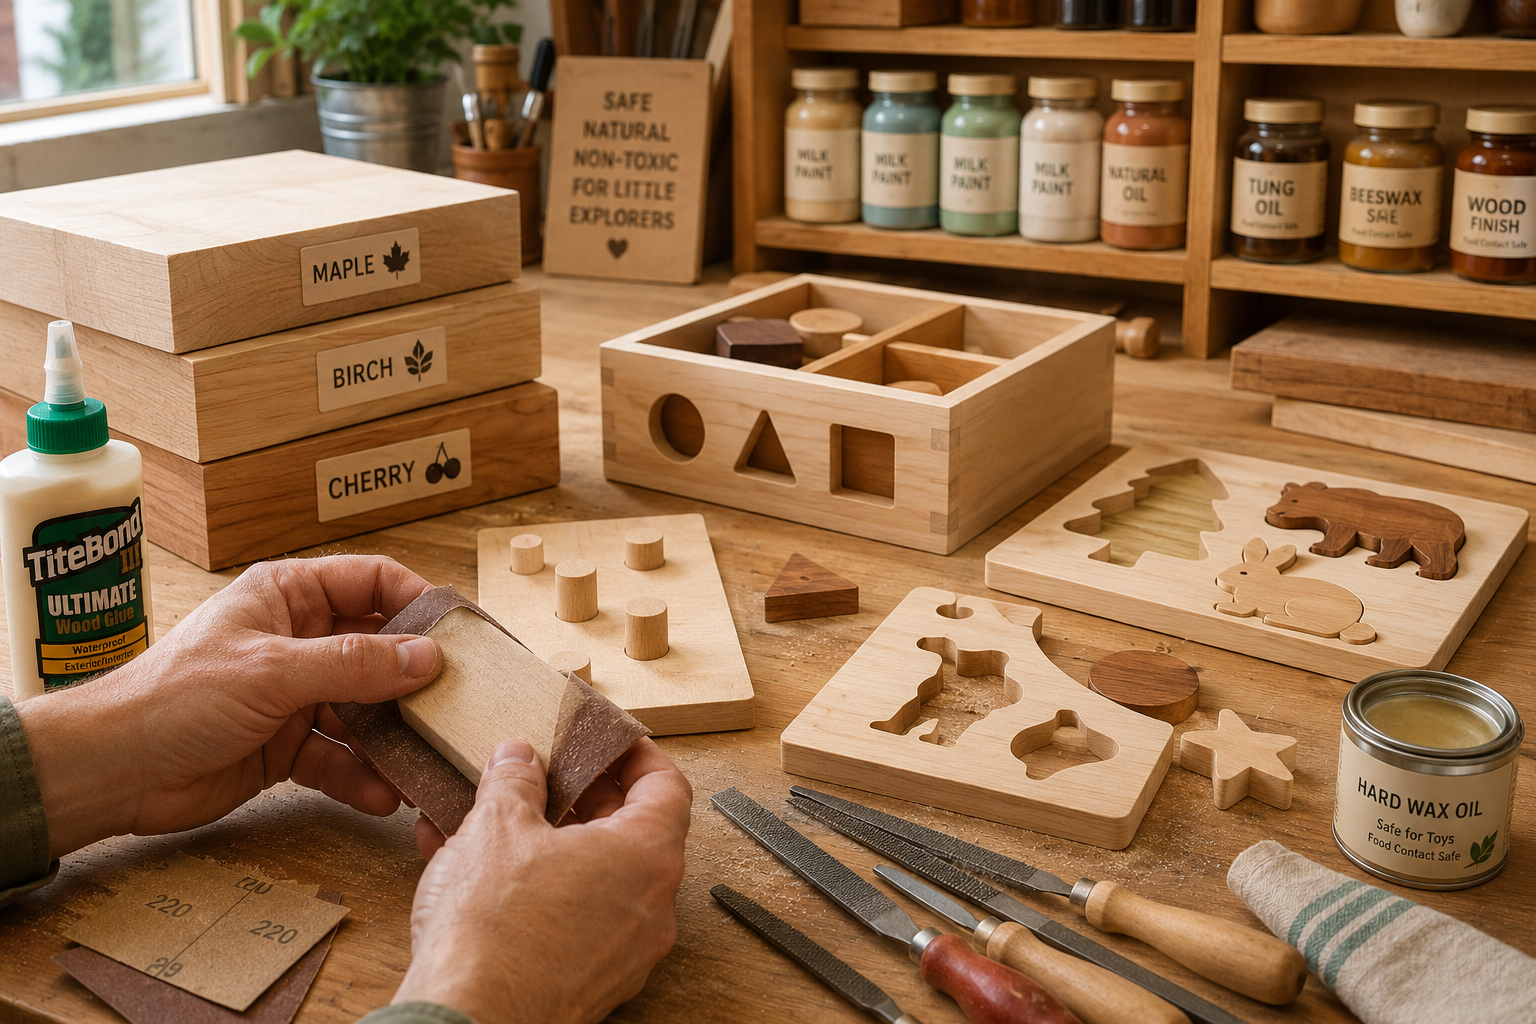
Embarking on the journey of DIY Wooden Educational Toys: Crafting Montessori-Inspired Playthings for Child Development requires a basic understanding of woodworking tools and materials. You don’t need a professional workshop; many beautiful and functional toys can be made with minimal equipment.
Wood Selection for Child Safety
The most crucial material is, of course, the wood itself. Safety is paramount, especially since young children often explore objects with their mouths.
Recommended Wood Types:
- Maple: Hard, dense, fine-grained, and naturally light-colored. It’s excellent for toys that need to be very durable and resists splintering.
- Birch: Similar to maple, with a smooth texture and light color, ideal for carving and turning.
- Cherry: Slightly softer than maple but still durable, with a beautiful reddish-brown hue that deepens with age.
- Poplar: A more affordable option, relatively soft but uniform, good for painting or simple shapes.
- Beech: Hard, strong, and highly resistant to impact, making it ideal for robust toys.
Woods to Avoid:
- Treated Lumber: Contains chemicals that are toxic to children.
- Reclaimed Pallet Wood (without certainty of origin): Pallets can be treated with chemicals or harbor contaminants. While upcycling old pallets is great for other projects, it’s best avoided for children’s toys unless you can verify its history.
- Wood with strong odors or known allergens: Some woods like cedar can have strong scents, and exotic woods can sometimes cause allergic reactions.
- Softwoods prone to splintering: Pines and firs can splinter more easily than hardwoods, posing a hazard.
Basic Tools for the Beginner Woodworker
For those just starting, a few key tools will allow you to create a wide range of toys. For more complex projects or if you wish to expand your skills, consider visiting our Introduction to Wood Turning for Beginners guide.
| Tool Type | Purpose |
|---|---|
| Measuring | Rule, tape measure, square, compass for marking precise dimensions. |
| Marking | Pencil, awl for clear layout lines. |
| Cutting | Hand Saw: For basic cuts. Jigsaw: Excellent for curves and intricate shapes. Coping Saw: For fine detail work. A table saw can be useful for repetitive, precise straight cuts, but isn’t strictly necessary for beginners. |
| Shaping | Wood Files & Rasps: For rough shaping. Sandpaper: Various grits (80-220+) for smoothing and finishing. Block Plane: For shaving off thin layers of wood. |
| Drilling | Cordless Drill: With various drill bits (e.g., Forstner bits for flat-bottomed holes, twist bits for through-holes). |
| Clamping | Wood Clamps: Essential for holding pieces securely during gluing or assembly. |
| Safety Gear | Safety glasses, hearing protection, dust mask. Always prioritize safety! |
Adhesives and Finishes for Child-Safe Toys
- Wood Glue: Use PVA wood glue (like Titebond III) which is non-toxic when dry and provides strong bonds.
- Non-Toxic Finishes:
- Mineral Oil or Beeswax Finish: A simple, food-safe option that brings out the natural beauty of the wood and provides a smooth, soft feel. Reapplication may be needed over time.
- Water-Based Polyurethane: Look for low-VOC, child-safe formulations. It creates a durable, wipeable surface. Our guide on sprayable water-based polyurethane might be helpful for application techniques.
- Non-Toxic Paints: If coloring is desired, opt for milk paint, chalk paint, or specific acrylic paints labeled as child-safe and non-toxic.
Remember, the goal is to create beautiful and safe objects. Always research specific product labels to ensure they are suitable for children’s toys.
Designing and Crafting Montessori-Inspired Playthings for Child Development
The beauty of DIY Wooden Educational Toys: Crafting Montessori-Inspired Playthings for Child Development lies in the creative freedom it offers, coupled with the intentional design choices that foster development.
Design Principles for Effective Educational Toys
When designing your toys, keep these Montessori-aligned principles in mind:
- Simplicity: Avoid clutter and overly complex features. Each toy should ideally focus on one concept or skill.
- Repetition: Design toys that allow for repetitive actions, which are crucial for skill mastery and concentration in young children.
- Realism: While abstract toys have their place, aim for designs that relate to the real world where possible, fostering a connection to their environment.
- Size Appropriateness: Ensure the toy parts are large enough to be safe for the child’s age group (no choking hazards) and comfortable for small hands to manipulate.
- Durability: Toys should be robust enough to withstand vigorous play and last for years.
Project Ideas and Construction Tips
Here are a few popular Montessori-inspired wooden toy ideas, ranging from simple to slightly more complex:
- Wooden Stacking Rings/Blocks:
- Concept: Size discrimination, order, fine motor skills.
- Construction: Cut various-sized rings or blocks from dowels or square stock. Drill a central hole through each. Create a base with a sturdy dowel post. Sand all pieces thoroughly and apply a child-safe finish.
- Geometric Shape Sorter:
- Concept: Shape recognition, problem-solving, spatial reasoning.
- Construction: Build a simple box with a lid. Cut corresponding geometric shapes (circle, square, triangle, rectangle) into the lid. Craft matching wooden shapes that fit precisely through the holes. Pay attention to precision in your cuts for a perfect fit, perhaps using hand tool joinery for the box.
- Bead Maze/Wire Maze (using wooden beads and base):
- Concept: Fine motor skills, hand-eye coordination, spatial awareness.
- Construction: Create a sturdy wooden base. Drill holes for thick, bent metal wires (ensure wire ends are securely anchored or capped). Craft or source large wooden beads that slide along the wires.
- Counting Sticks/Number Blocks:
- Concept: Number recognition, one-to-one correspondence, basic arithmetic.
- Construction: Cut uniform wooden blocks or sticks. Use wood burning, non-toxic paint, or engraving to add numbers (1-10) and corresponding dots or symbols.
- Wooden Puzzle:
- Concept: Problem-solving, spatial reasoning, shape recognition.
- Construction: Choose a simple image or shape. Cut it into 2-5 large, interlocking pieces from a single board. Sand edges smooth. You can also craft custom wooden gifts that incorporate puzzle elements.
General Construction Tips:

- Precise Measurements: “Measure twice, cut once” is crucial for well-fitting parts.
- Smooth Everything: Sanding is critical for safety and a pleasant tactile experience. Start with coarser grits (e.g., 80-120) and progress to finer ones (180-220 or even 320 for a very smooth finish). Pay special attention to edges and corners, rounding them slightly.
- Secure Joins: Use strong wood glue and clamps for secure joints. Allow adequate drying time.
- Test for Safety: Before handing a toy to a child, inspect it thoroughly for any loose parts, sharp edges, or potential hazards. If a part is small enough to fit into a child’s mouth, it’s a choking hazard for infants and toddlers.
By embracing the hands-on process of crafting these toys, you not only provide enriching playthings but also engage in a fulfilling creative endeavor. The satisfaction of seeing a child learn and grow with something you made yourself is truly unparalleled.
Conclusion
DIY Wooden Educational Toys: Crafting Montessori-Inspired Playthings for Child Development offers a profound opportunity to merge the art of woodworking with the science of early childhood education. By carefully selecting materials, employing basic woodworking techniques, and adhering to Montessori principles of simplicity and purpose, you can create durable, beautiful, and profoundly effective learning tools. These handcrafted treasures encourage a child’s natural inclination towards exploration, fostering independence, fine motor skills, and cognitive development in a gentle, engaging manner.
Beyond the immediate benefits for the child, the act of crafting these toys provides immense satisfaction and a valuable skill set for the maker. It’s an investment in sustainable play, thoughtful design, and meaningful engagement with a child’s formative years. So, gather your tools, choose your wood, and begin crafting a legacy of learning through play.
SEO Meta Title: DIY Wooden Educational Toys: Crafting Montessori Playthings SEO Meta Description: Learn to craft DIY wooden educational toys inspired by Montessori principles. Design safe, durable playthings for child development and hands-on learning.
