
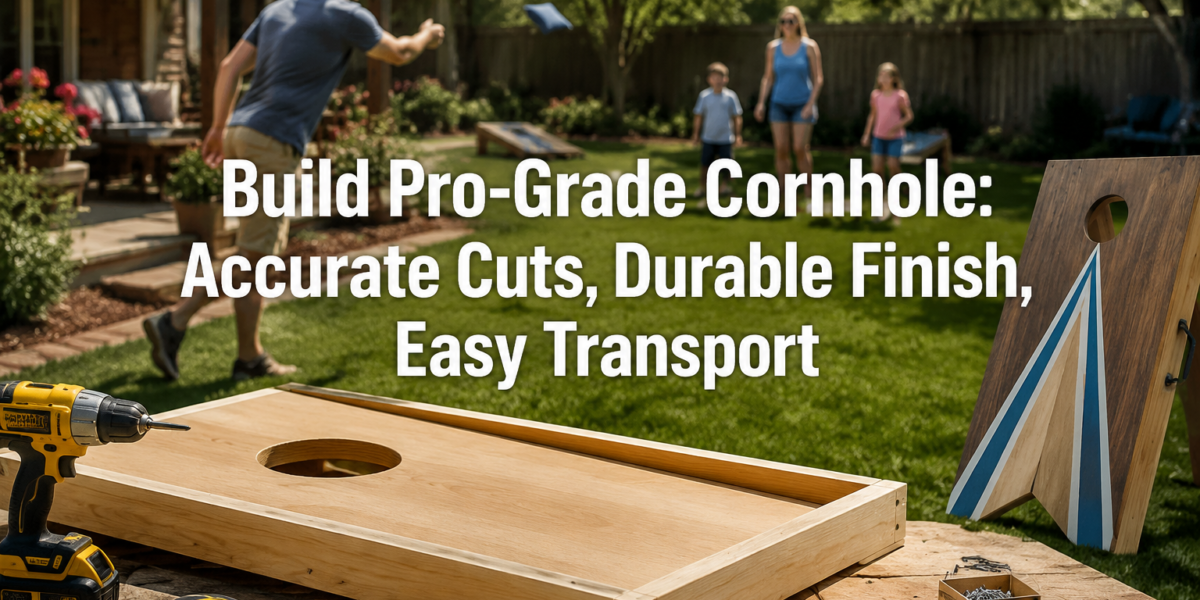

The average lifespan of a commercially purchased cornhole board set often falls short of enthusiast expectations, frequently succumbing to warping, chipping, or fading after just a few seasons. This often leads to frustrating gameplay and repeated purchases. However, with careful planning and execution, beginner woodworkers can craft a high-quality, regulation-size cornhole board set in 2026 that not only lasts for years but also features rounded edges, folding legs for convenience, and a truly weather-resistant finish. This guide focuses on Building a Backyard Cornhole Board Set: Accurate Cutting, Durable Finishes, and Easy Transport, ensuring your DIY project surpasses store-bought alternatives in both durability and playability.
Key Takeaways
- Accurate Cuts are Paramount: Precision in measuring and cutting ensures regulation dimensions and a professional finish, directly impacting gameplay.
- Quality Materials Matter: Selecting marine-grade plywood and durable hardwoods for legs guarantees longevity against outdoor elements.
- Durable Finishes Protect: Proper sealing with polyurethane or exterior paint is crucial for weather resistance and extending the life of your boards.
- Thoughtful Design Enhances Experience: Incorporating rounded edges, folding legs, and comfortable carrying solutions makes your cornhole set user-friendly and portable.
- Safety First: Always follow woodworking safety guidelines, especially when operating power tools, to prevent accidents.
Planning Your Regulation Cornhole Board Set: Materials and Dimensions
Before making your first cut, a detailed plan is essential for Building a Backyard Cornhole Board Set: Accurate Cutting, Durable Finishes, and Easy Transport. Regulation cornhole boards are 48 inches long by 24 inches wide, with a 6-inch diameter hole centered 9 inches from the top and 12 inches from each side. The front edge sits 2.5 to 4 inches off the ground, while the back edge stands 12 inches high. Adhering to these specifications is critical for authentic gameplay.

Material Selection for Durability
Choosing the right materials is the foundation of a long-lasting cornhole set.
- Plywood for the Top Surface: For the board tops, 1/2-inch thick (12mm) Baltic birch plywood or marine-grade plywood is highly recommended. These options offer excellent rigidity, resist warping, and provide a smooth playing surface. Standard ACX plywood can work but may be more prone to delamination or warping if not properly sealed.
- Frame Lumber: Use 1×4 (nominal size, actual size roughly 3/4″ x 3 1/2″) clear pine, cedar, or pressure-treated lumber for the frame. Cedar is naturally rot-resistant, while pressure-treated lumber offers superior outdoor durability. Ensure the lumber is straight and free of knots.
- Legs: 1×4 lumber or 2×2 (actual size 1 1/2″ x 1 1/2″) stock is suitable for the legs. Hardwoods like oak or maple provide extra strength and resistance to wear, which is beneficial for folding legs that endure repeated setup and takedown.
- Fasteners and Hardware:
- Wood Screws: Use 1 1/4-inch and 2-inch exterior-grade wood screws (e.g., galvanized or stainless steel) to assemble the frame and attach the legs.
- Carriage Bolts: Two 1/2-inch x 4 1/2-inch carriage bolts with washers and wing nuts for each set of folding legs.
- Wood Glue: Exterior-grade wood glue for all frame joints.
- Sandpaper: Various grits (80, 120, 220) for sanding.
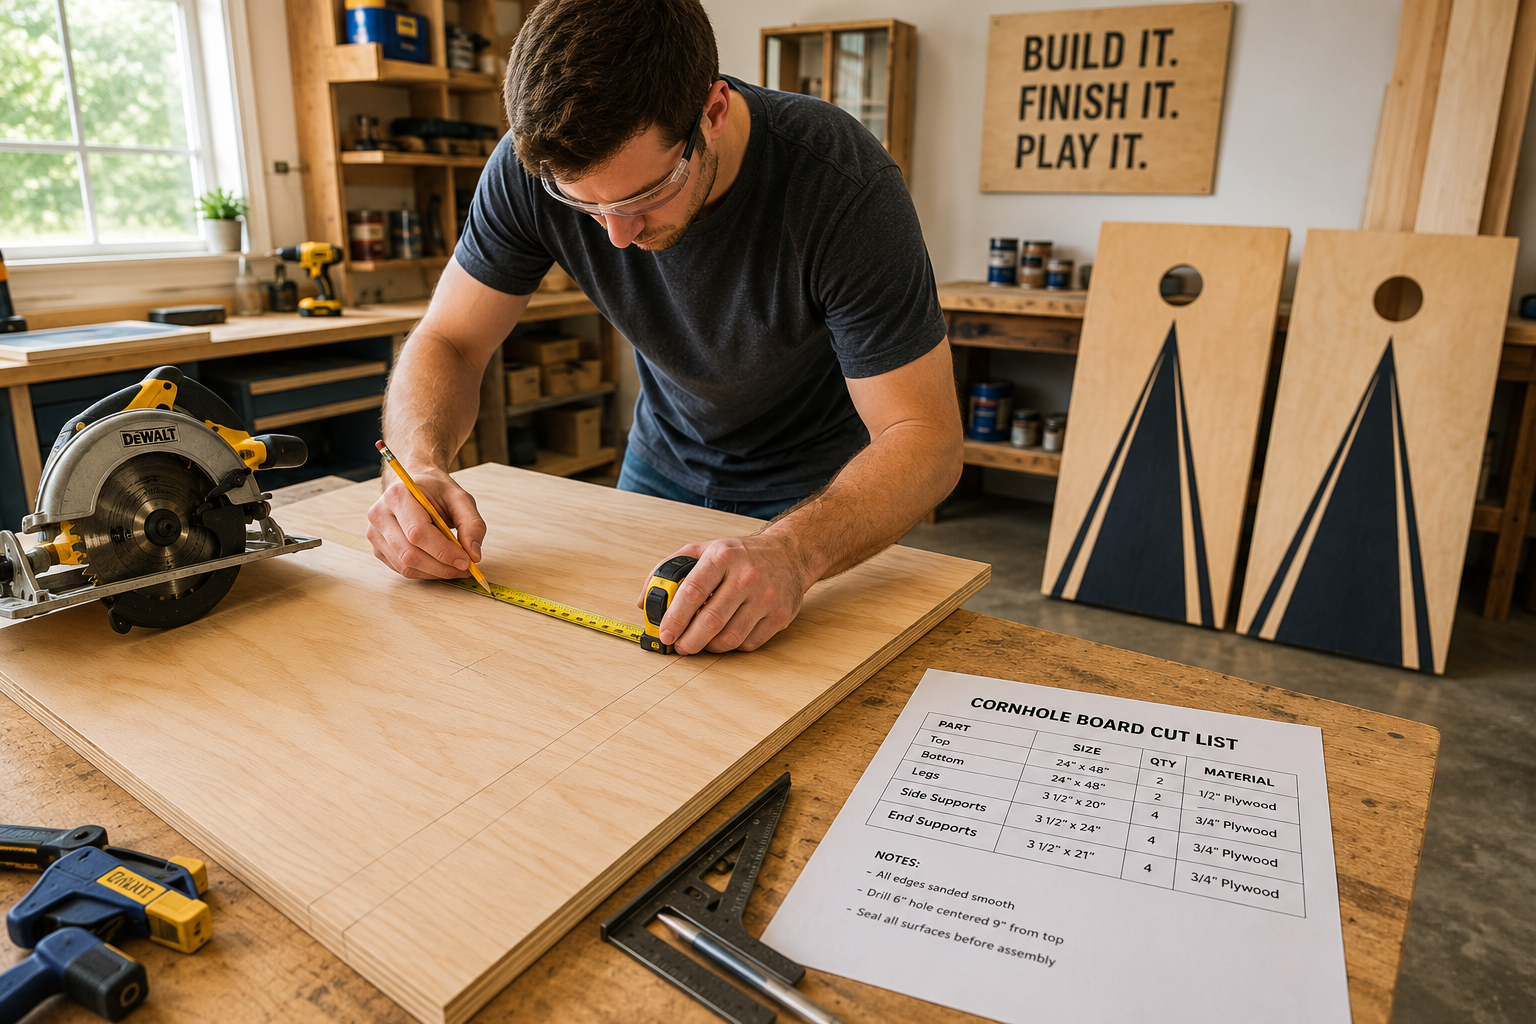
Detailed Cut List
A precise cut list minimizes waste and ensures all components fit together perfectly.
| Component | Material Type | Quantity | Dimensions (L x W) | Notes |
|---|---|---|---|---|
| Top Board | 1/2″ Plywood | 2 | 48″ x 24″ | Smooth playing surface |
| Side Rails | 1×4 Lumber | 4 | 48″ x 3 1/2″ (actual) | For the long sides of the frame |
| End Rails | 1×4 Lumber | 4 | 22 1/2″ x 3 1/2″ (actual) | For the short ends of the frame (24″ – 2x 3/4″) |
| Front Legs | 1×4 or 2×2 Lumber | 4 | 12″ x 3 1/2″ (actual for 1×4) | For the front support of the board (cut angle) |
| Back Support | 1×4 or 2×2 Lumber | 2 | 21″ x 3 1/2″ (actual for 1×4) | Cross-brace for rear legs (optional) |
(Note: Dimensions for 1×4 lumber are nominal; actual dimensions are approximately 3/4″ x 3 1/2″).
For optimal results, consider building a custom wood workbench to ensure a stable and accurate cutting surface. Also, investing in a quality saw blade is essential; our guide on 40-tooth vs 60-tooth saw blades can help you choose the right one for plywood and dimensional lumber.
Accurate Cutting and Assembly: Ensuring Regulation Specifications
Precision is key in Building a Backyard Cornhole Board Set: Accurate Cutting, Durable Finishes, and Easy Transport. Minor inaccuracies can lead to an uneven playing surface or non-regulation height, impacting gameplay.
Step-by-Step Cutting Process
- Cut Plywood Tops: Using a circular saw with a straightedge guide or a table saw, cut the two 1/2-inch plywood pieces to 48 inches by 24 inches. Take your time to ensure perfectly square cuts.
- Cut Frame Components: Cut the 1×4 lumber for the side rails (48 inches) and end rails (22 1/2 inches).
- Cut the 6-inch Hole:
- Measure 9 inches down from one 24-inch end and 12 inches in from each 48-inch side to find the center point for the hole.
- Use a large compass or a string-and-pencil method to draw a perfect 6-inch diameter circle.
- Drill a pilot hole inside the circle, then use a jigsaw or a router with a circle-cutting jig to cut out the hole. A smooth, clean cut here is crucial. For tips on jig use, refer to our beginner’s guide to essential woodworking jigs.
- Sand the edges of the hole thoroughly to remove any splinters.
- Cut and Shape Legs:
- Cut the four leg pieces to 12 inches in length.
- Measure 1 3/4 inches from the top of each leg on one edge, and draw a line diagonally to the opposite corner. This creates a rounded top edge that allows the legs to swing freely without binding against the frame.
- Use a band saw or jigsaw to cut along this line, creating the rounded top.
- At the bottom of each leg, cut a slight angle (approximately 15 degrees) to ensure the leg sits flush with the ground when the board is at its 12-inch back height.
Assembly Instructions
- Assemble the Frame:
- Apply exterior-grade wood glue to the ends of the 22 1/2-inch end rails.
- Attach the end rails between the 48-inch side rails, forming a rectangular box.
- Pre-drill pilot holes to prevent splitting, then secure the joints with 1 1/4-inch wood screws, driving two screws per corner. Ensure the frame is square.
- Attach the Plywood Top:
- Place the plywood top onto the assembled frame, ensuring it is flush on all sides.
- Apply a bead of wood glue along the top edges of the frame.
- Secure the plywood to the frame with 1 1/4-inch screws, spaced every 6-8 inches around the perimeter and along the center supports if added. Ensure the screws are countersunk slightly below the surface.
- Install Folding Legs:
- Position the top of each leg inside the frame, 1 3/4 inches from the top corner of the frame, ensuring the rounded edge allows free rotation.
- Drill a 1/2-inch hole through the side rail and the leg at this pivot point.
- Insert a 1/2-inch x 4 1/2-inch carriage bolt through the holes, securing it with a washer and a wing nut on the inside. This allows the legs to fold inward for easy transport.
- Repeat for all four legs.
- Attach Back Support (Optional but Recommended):
- Cut two pieces of 1×4 lumber to 21 inches.
- Attach these between the rear legs, just below the pivot point, to provide additional stability and prevent the legs from splaying out during play. Use 1 1/4-inch screws and wood glue.
Durable Finishes and Easy Transport Features
Once your cornhole boards are assembled, the final steps focus on protecting them from the elements and making them easy to move. This is where Building a Backyard Cornhole Board Set: Accurate Cutting, Durable Finishes, and Easy Transport truly shines.
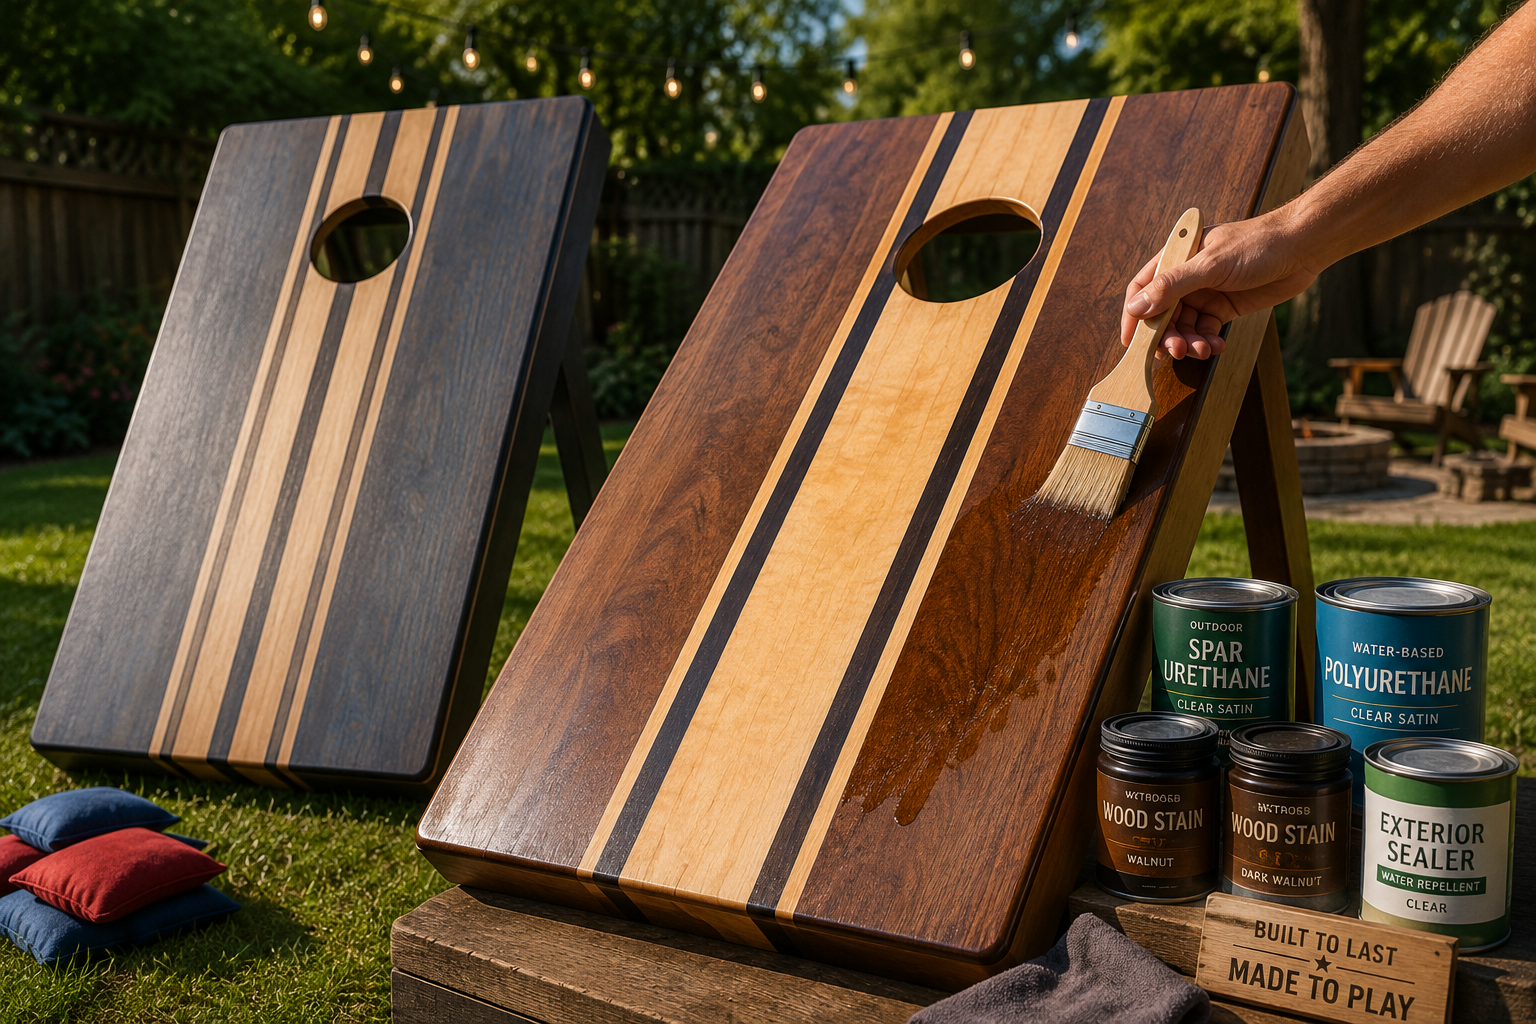
Achieving a Durable, Weather-Resistant Finish
Proper finishing not only enhances the appearance of your boards but also provides crucial protection against moisture, UV rays, and general wear and tear.
- Sanding: Thorough sanding is critical for a smooth surface and optimal finish adhesion.
- Start with 80-grit sandpaper to remove any major imperfections or glue squeeze-out.
- Progress to 120-grit, then 220-grit for a silky-smooth playing surface. Pay extra attention to the hole and all edges.
- Cleaning: After sanding, use a tack cloth or compressed air to remove all dust particles. Any dust left behind will compromise the finish.
- Priming (Optional but Recommended): If you plan to paint your boards, apply one or two coats of high-quality exterior-grade primer. This provides a uniform base, improves paint adhesion, and offers an extra layer of moisture protection. Sand lightly with 220-grit sandpaper between coats.
- Painting/Staining:
- Paint: Use exterior-grade acrylic or latex paint. Apply at least two to three thin coats, allowing adequate drying time between each. Lightly sand with 220-grit sandpaper between coats for a smoother finish.
- Stain: If you prefer a natural wood look, choose an exterior-grade wood stain. Apply according to manufacturer instructions. Stains alone offer limited protection; always follow with a clear coat.
- Clear Protective Coat: This is the most critical step for durability.
- Exterior Polyurethane: Apply at least 3-5 coats of exterior-grade clear polyurethane. This creates a hard, durable, and water-resistant surface. Water-based polyurethanes dry faster and clean up easier, but oil-based versions often provide more robust protection.
- Marine Varnish: For ultimate weather resistance, especially if boards will be left outdoors, consider marine varnish. It offers superior UV and moisture protection.
- Apply thin, even coats with a high-quality brush or sprayer, sanding lightly with 320-grit or finer sandpaper between coats to ensure good adhesion and a smooth finish. Follow manufacturer instructions for drying times. Our guide on aerosol polyurethane offers insights into application.
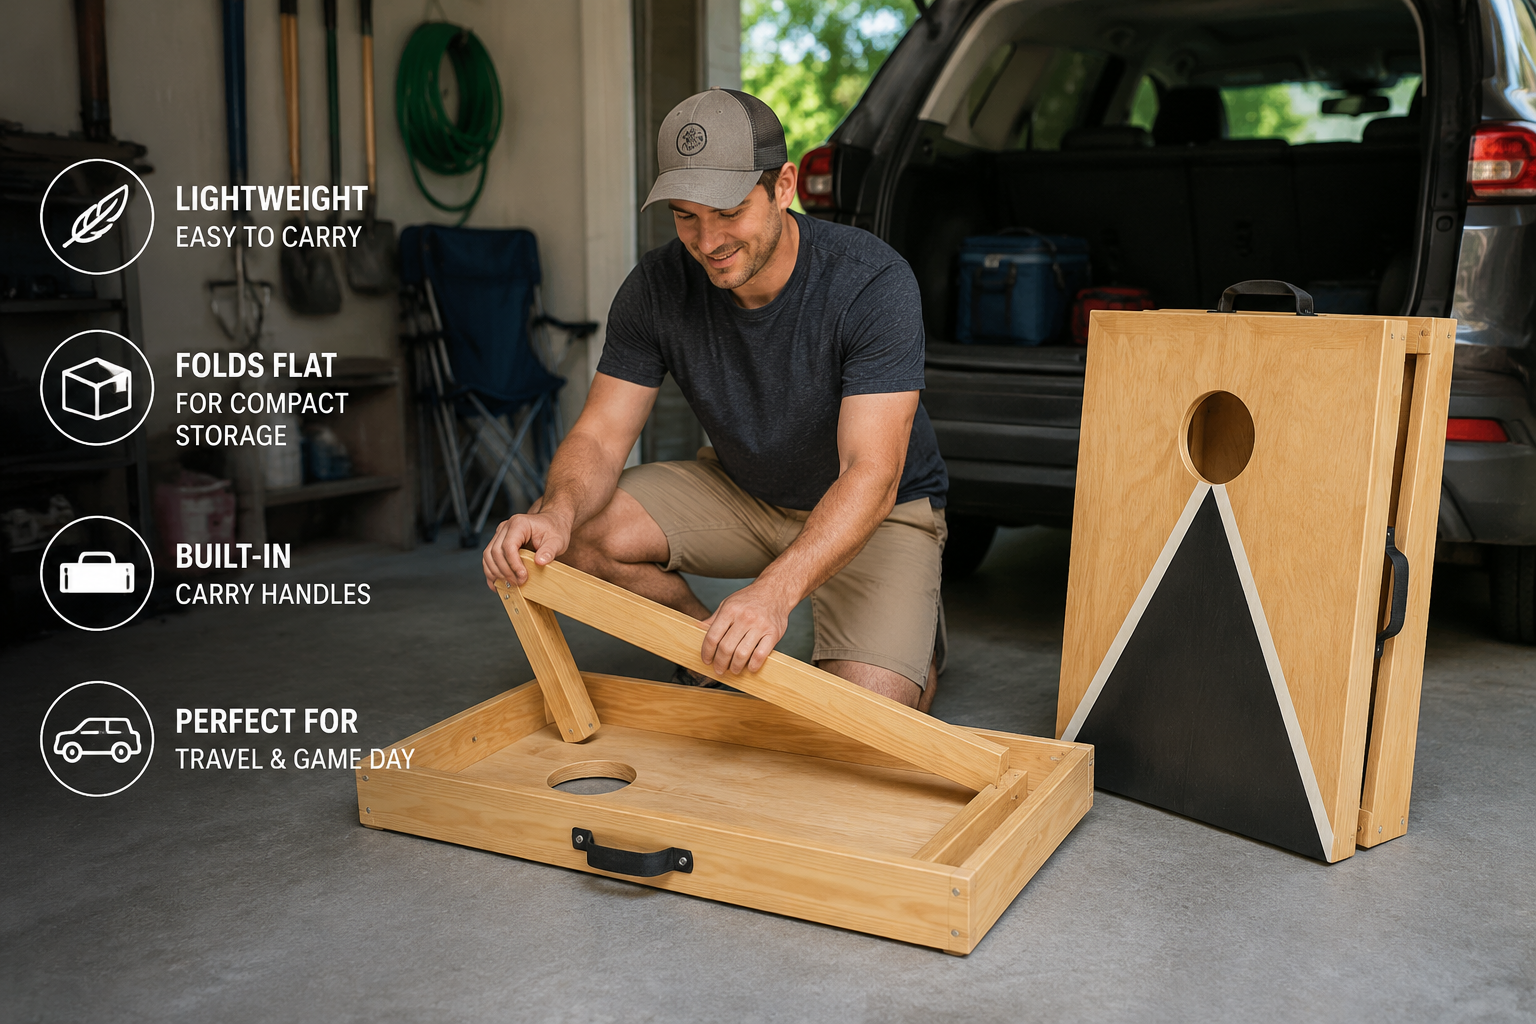
Incorporating Easy Transport Features
The folding legs are a significant step towards portability, but additional features can further enhance ease of transport.
- Handles: Attach robust handles to the side rails of each board. Heavy-duty strap handles or recessed metal handles work well. Position them to balance the board for comfortable carrying.
- Storage Straps/Clips: Consider adding simple straps or clips to hold the folded legs securely in place during transport, preventing them from swinging open.
- Carrying Case (DIY Option): For the ultimate protection and transport, you could construct a simple carrying case from thin plywood or canvas. This could include compartments for cornhole bags.
- Rounded Edges: Beyond aesthetics, rounding all sharp edges of the board (especially the top perimeter and the hole) with a router and a round-over bit (e.g., 1/4-inch or 3/8-inch radius) significantly improves durability by reducing chipping and splintering. It also makes handling the boards more comfortable and safer.
By following these finishing and design steps, your DIY cornhole boards will not only look professional but will also withstand countless games and seasonal changes, making them a lasting addition to your backyard entertainment. For more advanced finishing techniques, explore our articles on wood finishing techniques and high-gloss wood finishing techniques.
Maintenance and Care for Longevity in 2026
Even with the most durable finishes, proper maintenance is crucial to ensure your cornhole board set lasts for many years.
- Regular Cleaning: After each use, wipe down your boards with a damp cloth to remove dirt, dust, and debris. For tougher stains, use a mild soap solution, then rinse and dry thoroughly.
- Proper Storage: Always store your cornhole boards in a dry, covered area when not in use. While the finish is weather-resistant, prolonged exposure to direct sunlight, rain, and snow will eventually degrade even the best protection. A garage, shed, or even a tarp-covered spot is ideal. Storing them flat or stacked helps prevent warping. Consider building modular wood storage systems for dedicated workshop or garage storage.
- Periodic Inspection: Annually inspect your boards for any signs of wear, such as chips, cracks, or fading finish.
- Reapplication of Finish: Depending on usage and exposure, you may need to reapply a clear protective coat every 2-3 years. Lightly sand the entire surface with 220-grit sandpaper, clean thoroughly, and then apply 2-3 new coats of exterior polyurethane or marine varnish.
- Hardware Check: Ensure all screws and bolts are tight. Lubricate the leg pivot points with a silicone spray if they become stiff.
By adhering to these maintenance tips, your custom-built cornhole board set will continue to provide entertainment for seasons to come, proving the value of quality craftsmanship in Building a Backyard Cornhole Board Set: Accurate Cutting, Durable Finishes, and Easy Transport.
Conclusion
Building a Backyard Cornhole Board Set: Accurate Cutting, Durable Finishes, and Easy Transport is a rewarding woodworking project that yields a high-quality, long-lasting game set for years of backyard enjoyment. By focusing on accurate measurements, selecting appropriate materials, applying robust finishes, and incorporating user-friendly features like folding legs and rounded edges, even a beginner woodworker can create a professional-grade product. This DIY approach not only saves money compared to high-end commercial sets but also offers the satisfaction of craftsmanship and a truly custom piece built to endure.
Take the plunge and begin planning your cornhole board build today. Gather your materials, prepare your workspace, and enjoy the process of creating a durable, regulation-size cornhole set that will be the centerpiece of countless outdoor gatherings in 2026 and beyond.

References
- American Cornhole Association. (n.d.). Official Rules and Regulations. Retrieved from https://americancornhole.com/aca-regulations/
- Fine Woodworking Magazine. (n.d.). Woodworking Basics. The Taunton Press.
- Wood Magazine. (n.d.). Outdoor Projects. Dotdash Meredith.
