
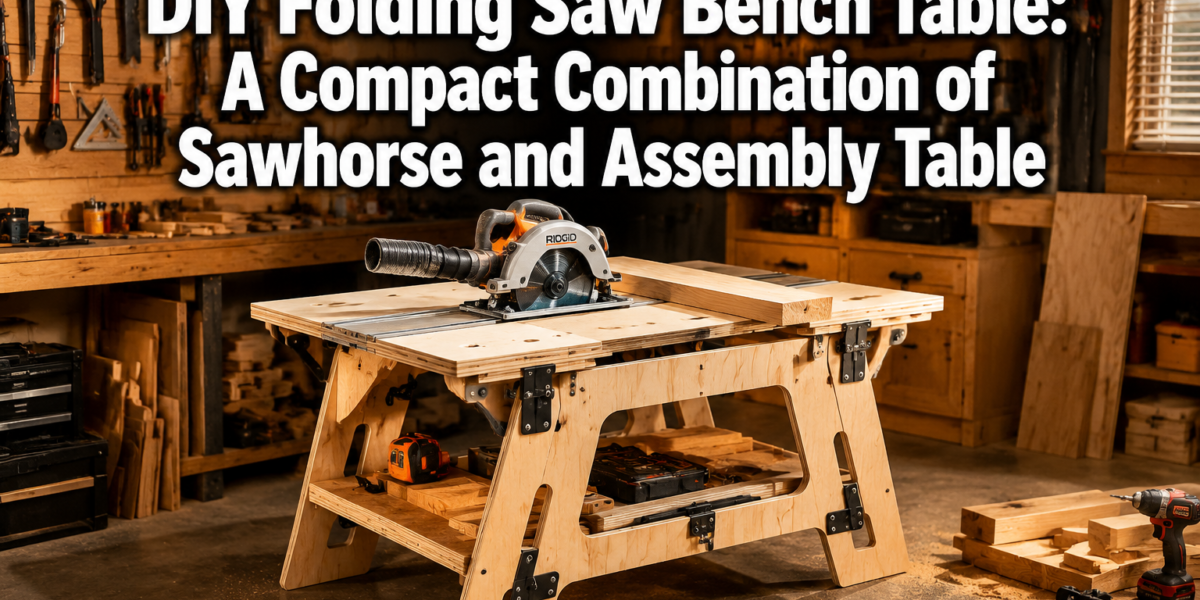

The average home workshop is often a masterclass in space optimization, where every square foot counts. For many woodworkers, the challenge isn’t just acquiring tools, but having a stable, versatile surface to use them on without sacrificing precious floor space. This is where the ingenuity of a DIY Folding Saw Bench Table: A Compact Combination of Sawhorse and Assembly Table proves invaluable. This hybrid solution addresses the need for a robust cutting platform and a stable assembly surface, all while collapsing into a footprint small enough to store against a wall or under a workbench, making it an essential addition for small shops and mobile woodworkers in 2026.
Key Takeaways
- A DIY Folding Saw Bench Table combines the utility of a sawhorse and an assembly table into one compact, portable unit.
- Building one yourself allows for customization to specific workshop needs and tool setups.
- Its folding design maximizes space efficiency, ideal for small shops or temporary setups.
- Essential features include a sturdy work surface, dog holes for clamping, and reliable folding mechanisms.
- This versatile bench enhances safety and precision for circular saw cuts and various woodworking tasks.
The Versatility of a DIY Folding Saw Bench Table: A Compact Combination of Sawhorse and Assembly Table
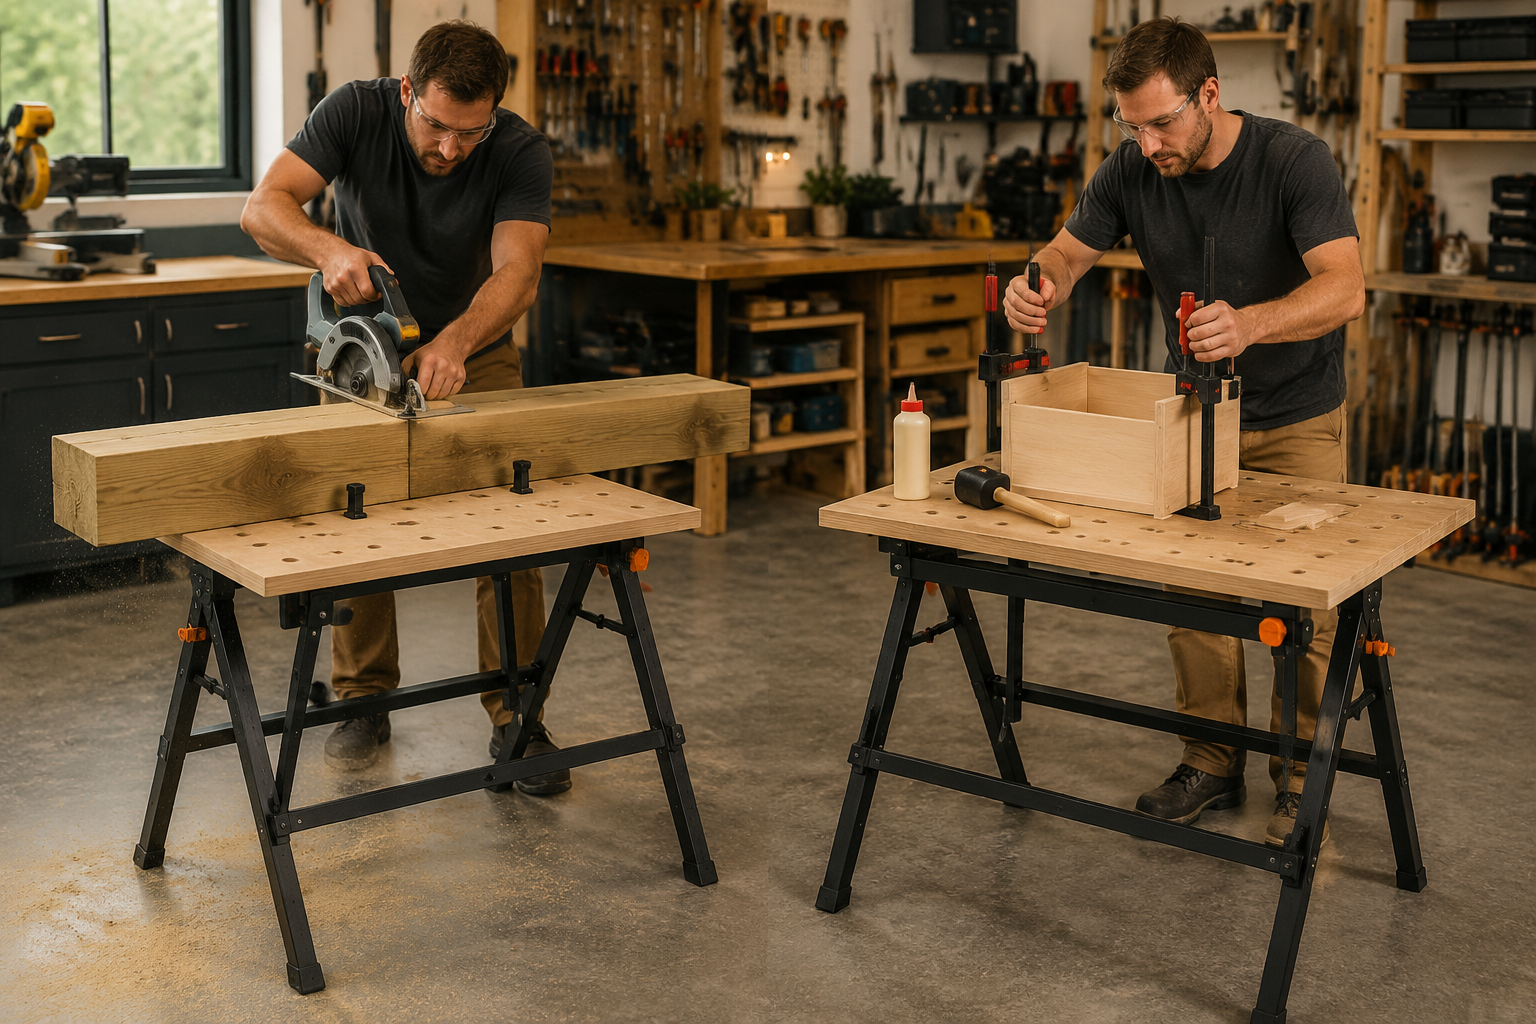
In woodworking, having a stable work surface is paramount for both safety and precision. Traditional sawhorses are excellent for supporting long stock during cutting, but often lack the flat, expansive surface needed for assembly or detailed hand tool work. Conversely, a dedicated assembly table can be bulky and consume valuable shop real estate. The DIY Folding Saw Bench Table: A Compact Combination of Sawhorse and Assembly Table bridges this gap, offering a dual-purpose solution that adapts to the demands of diverse projects without permanent commitment of space.

This innovative design typically features a sturdy top surface, often made from plywood or MDF, supported by a robust folding leg system. The top can be outfitted with dog holes, T-tracks, or sacrificial fences, transforming it from a simple cutting platform into a highly functional assembly table or even a temporary routing station (for which a dedicated router table is still recommended for maximum precision). The beauty of the folding mechanism lies in its ability to quickly convert from an active workstation to a compact, storable unit, making it perfect for those with limited space or for taking on location.
Why Build Your Own?
While commercial versions of folding workbenches exist, building a DIY version offers several distinct advantages:
- Customization: You can tailor the height, width, and specific features (like dog hole patterns, tool storage, or integrated clamps) to perfectly suit your body mechanics and the tools you use most often.
- Cost-Effectiveness: Often, a DIY build is significantly cheaper than purchasing a pre-made equivalent, especially when using readily available materials like plywood and dimensional lumber.
- Skill Development: Undertaking such a project helps hone woodworking skills, from accurate cutting and joinery to understanding structural integrity.
- Personal Satisfaction: There’s a unique satisfaction in using a piece of equipment you’ve crafted yourself, knowing it’s designed exactly for your needs.
When planning your build, consider the primary tools you’ll use. If circular saw cuts are frequent, ensuring adequate clearance for the blade and a sacrificial top is crucial. For hand tool work, a solid, flat surface that resists vibration is key. The goal is to create a versatile platform that enhances both safety and efficiency in your woodworking endeavors. For general mobile solutions, exploring various portable workbench designs can also provide inspiration.
Designing and Building Your DIY Folding Saw Bench Table
The success of your DIY Folding Saw Bench Table: A Compact Combination of Sawhorse and Assembly Table hinges on thoughtful design and meticulous execution. Before cutting any material, a clear plan is essential. Consider the dimensions, materials, and the folding mechanism that best suits your needs.
Key Design Considerations
- Height: Aim for a comfortable working height. Many prefer a height similar to their main workbench or table saw, typically between 34 and 38 inches (86-96 cm).
- Tabletop Size: A common size is 24×48 inches (60×120 cm), providing enough surface area for most projects without being overly cumbersome. However, you can adjust this based on the size of materials you typically work with.
- Material Selection:
- Plywood (3/4 inch / 19mm): Excellent for the tabletop due to its stability, flatness, and resistance to warping. Birch or Baltic birch plywood offers superior strength and a smoother finish.
- Dimensional Lumber (2x4s or 2x6s): Ideal for the legs and frame due to their strength and affordability.
- Hardware: Heavy-duty hinges, latches, screws, and perhaps casters if you want mobility when unfolded.
- Folding Mechanism: This is critical. Common approaches include:
- Gate Leg Style: Legs pivot inward and are secured with latches.
- Collapsible Sawhorse Style: Legs fold flat against the tabletop’s underside.
- Detachable Legs: Less convenient for quick setup but very compact for storage.
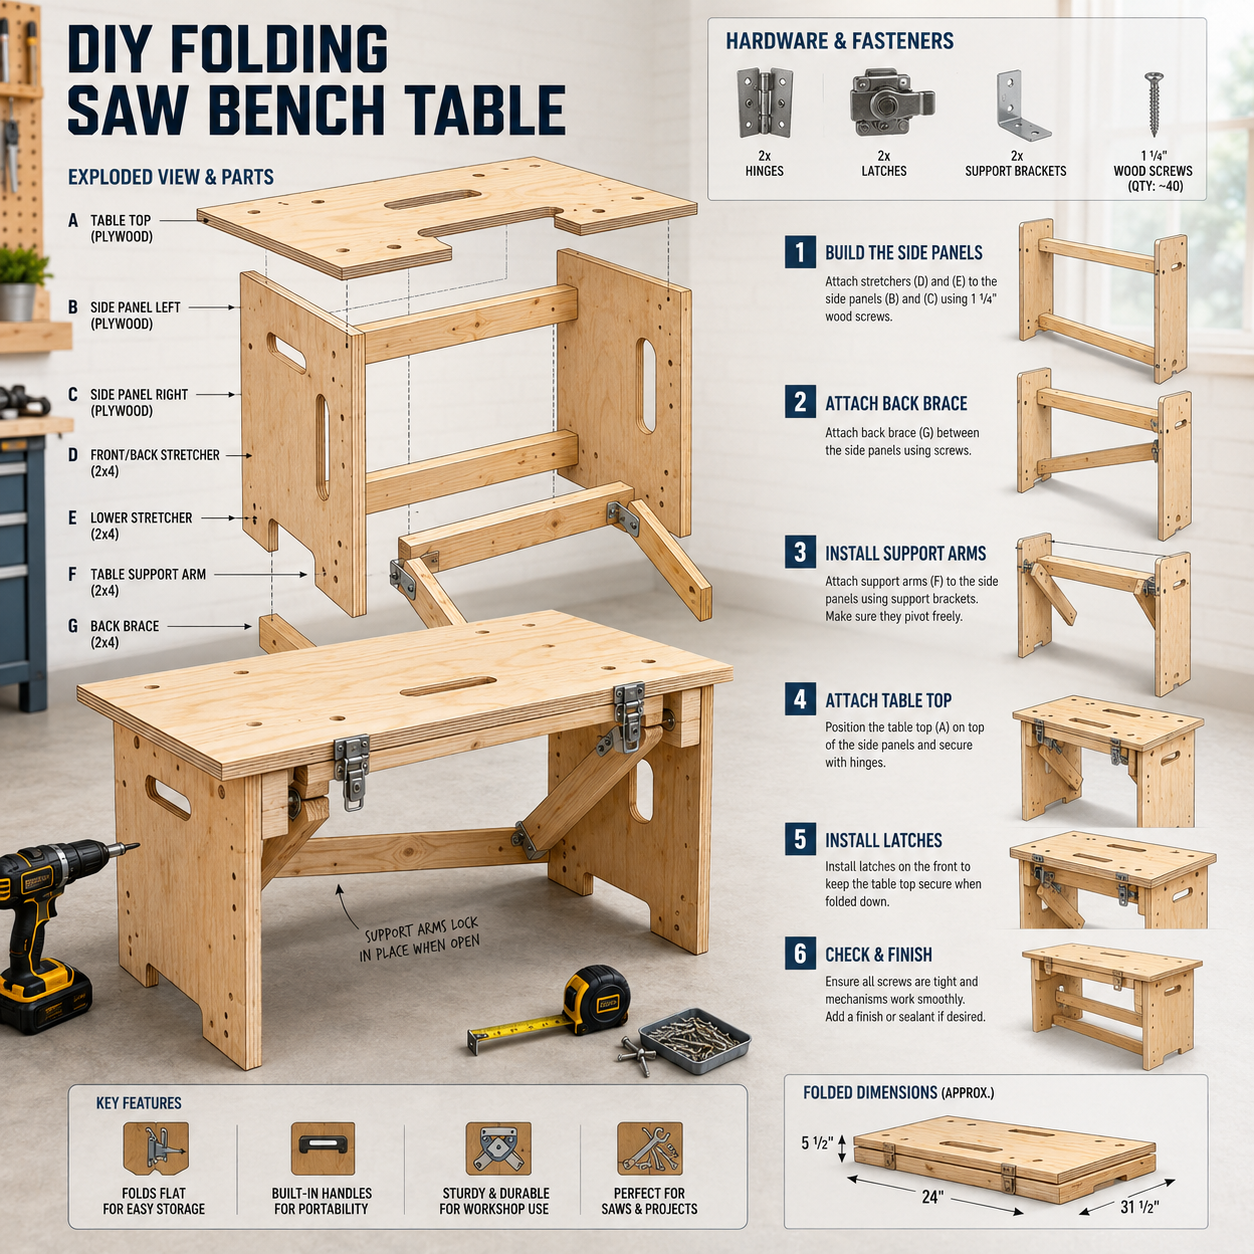
Step-by-Step Construction Guide (General Overview)
While detailed plans vary, a typical construction process for a DIY Folding Saw Bench Table: A Compact Combination of Sawhorse and Assembly Table might follow these steps:
- Cut Plywood Top: Cut your chosen plywood to the desired tabletop dimensions.
- Build Frame (Optional but Recommended): Construct a rigid frame from dimensional lumber to support the plywood top. This enhances stability and provides attachment points for legs and accessories.
- Cut Leg Components: Precisely cut the dimensional lumber for the legs. Depending on your folding design, you might have fixed leg pairs or individual pivoting legs.
- Assemble Leg Sub-assemblies: Join leg pieces using screws, bolts, or robust joinery. Ensure all angles are square and lengths are identical for stability.
- Attach Legs to Tabletop/Frame: Secure the leg assemblies to the underside of the tabletop or frame using heavy-duty hinges. Position them strategically to provide maximum stability when unfolded and allow for compact folding.
- Install Bracing and Latches: Add diagonal braces or cross-supports to prevent wobbling when the bench is open. Install reliable latches or locking mechanisms to hold the legs securely in both the open and folded positions.
- Add Accessories (Optional):
- Dog Holes: Drill regularly spaced holes (3/4 inch or 20mm) for bench dogs and clamping accessories.
- Sacrificial Top: Attach a thin sheet of MDF or hardboard to the main tabletop. This protects the primary surface from saw cuts and can be easily replaced.
- Edge Banding: Apply wood or PVC edge banding to protect the plywood edges and give a finished look.
- Handles: Install handles for easier carrying when folded.
Tool Recommendations
- Circular Saw or Table Saw: For precise cuts on plywood and dimensional lumber. A Craftsman 113.299 table saw could handle this easily.
- Drill/Driver: For pilot holes and driving screws.
- Router (Optional): For rounding over edges or creating dadoes for a frame.
- Measuring Tape, Square, Pencil: For accurate marking and measurement.
- Clamps: Essential for holding pieces during assembly.
- Safety Gear: Eye protection, hearing protection, and dust mask.
Remember, precision in cutting and assembly is key to a stable and functional folding bench. Take your time, measure twice, and cut once.
Maximizing Utility and Storage for Your DIY Folding Saw Bench Table
Once your DIY Folding Saw Bench Table: A Compact Combination of Sawhorse and Assembly Table is built, understanding how to integrate it effectively into your workflow and maximize its storage potential becomes the next priority. This bench isn’t just about saving space; it’s about enhancing your productivity and versatility in the workshop.
Enhancing Functionality
The design of your folding saw bench table offers numerous opportunities for customization and feature integration to improve its utility.
- Clamping Solutions: Incorporating dog holes is a fundamental upgrade. These holes, typically 3/4 inch or 20mm in diameter, allow for the use of bench dogs, holdfasts, and specialized clamps that securely hold workpieces for cutting, sanding, or assembly. For small projects, this stability is crucial.
- Sacrificial Top: As mentioned, adding a replaceable top layer (e.g., 1/4 inch MDF) protects your primary tabletop from saw blade kerfs, glue squeeze-out, and impact. This extends the life of your main workbench surface.
- Integrated Storage: Consider adding small shelves or hooks to the underside of the tabletop or leg braces to store frequently used tools like pencils, measuring tapes, or safety glasses when the bench is unfolded. For more robust storage solutions, explore DIY modular desk organizers as inspiration.
- Leveling Feet: If your workshop floor is uneven, adjustable leveling feet can be installed on the legs to ensure a perfectly stable and flat work surface.
- Miter Saw Station Integration: While this bench primarily targets circular saw use, it can also serve as an outfeed support for a miter saw or even a small Craftsman 12 inch table saw for shorter stock, if designed with appropriate height alignment.
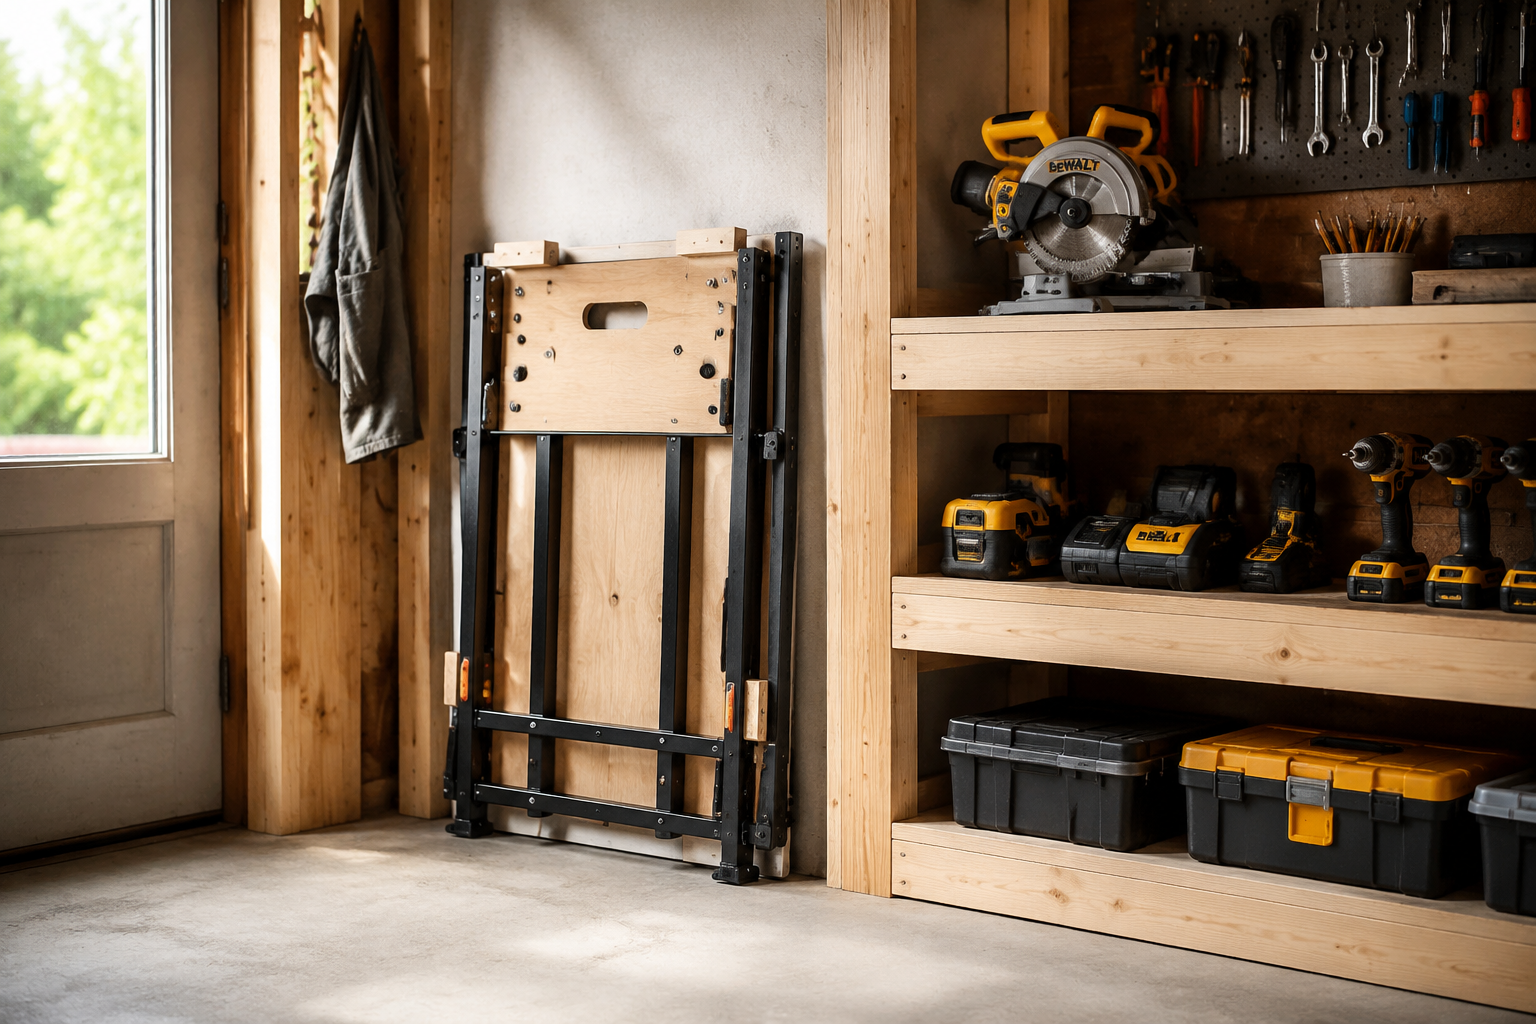
Storage and Portability
The primary benefit of a folding design is its ability to minimize its footprint when not in use.
- Wall Storage: The most common storage method is to fold the bench flat and lean it against a workshop wall. You might even install simple hooks or cleats on the wall to securely hold it upright, preventing it from tipping over.
- Under a Workbench: If you have an existing workbench, the folded saw bench can often slide underneath, completely out of the way.
- Vehicle Transport: For those who do woodworking on location or in various settings, the compact folded size makes it easy to transport in a truck bed or van. Adding sturdy carrying handles will make this process much simpler.
Safety Practices
Even with a well-designed folding bench, adhering to safety best practices is paramount.
- Secure Latches: Always ensure all locking mechanisms and latches are fully engaged before beginning work. A wobbly bench is a dangerous bench.
- Stable Footing: Place the bench on a flat, stable surface. If using leveling feet, ensure they are adjusted correctly.
- Clamping Workpieces: Always clamp your workpiece securely to the bench before cutting, drilling, or routing. This prevents movement and reduces kickback risk.
- Appropriate Tools: Use the correct tools for the task. While a folding bench is versatile, it’s not a replacement for specialized equipment like a full-size table saw for ripping large sheets.
- Personal Protective Equipment (PPE): Always wear eye protection, hearing protection, and a dust mask when operating power tools.
By thoughtfully designing, building, and integrating your DIY Folding Saw Bench Table: A Compact Combination of Sawhorse and Assembly Table, you create a powerhouse tool that enhances your woodworking capabilities while respecting the constraints of your workspace. It’s an investment in efficiency, safety, and the joy of crafting with your own hands.
Conclusion
The DIY Folding Saw Bench Table: A Compact Combination of Sawhorse and Assembly Table represents an intelligent solution for woodworkers operating within limited space or those requiring portable work surfaces. It transforms the common challenge of constrained workshop environments into an opportunity for ingenious design, offering a stable platform for cutting with circular saws and a reliable surface for detailed assembly work. The ability to fold and store this hybrid bench flat against a wall or beneath a larger workbench ensures that valuable floor space remains clear for other operations, a critical advantage in any bustling 2026 workshop.
Building your own allows for unparalleled customization, from selecting durable materials like high-quality plywood and dimensional lumber to incorporating specific features such as dog holes, sacrificial tops, and integrated clamping solutions. This tailored approach not only often proves more cost-effective but also empowers the builder with a deeper understanding of woodworking principles and the satisfaction of using a tool crafted precisely for their needs. As woodworking continues to evolve, smart, space-saving designs like this folding saw bench table remain at the forefront of practical innovation, enabling makers to achieve professional results regardless of their spatial limitations. Embrace the versatility, enhance your workshop’s efficiency, and elevate your craft with this essential piece of DIY furniture.

Actionable Next Steps:
- Assess Your Needs: Determine the ideal dimensions, height, and specific features required for your most common woodworking tasks.
- Gather Materials: Source high-quality plywood (minimum 3/4 inch), sturdy dimensional lumber, and robust hinges and latches.
- Draw Up Plans: Create detailed drawings or find existing plans that align with your requirements.
- Prioritize Safety: Always wear appropriate PPE and ensure all cuts and joints are precise for maximum stability.
- Build and Customize: Follow your plans carefully, taking pride in the construction process, and add personalized touches that enhance functionality.
SEO Meta Title: DIY Folding Saw Bench Table: Sawhorse & Assembly Combo SEO Meta Description: Build a DIY Folding Saw Bench Table in 2026—a compact combination of sawhorse and assembly table. Save space with this versatile, portable workshop essential.
