
The average city in the United States loses tens of thousands of trees annually due to disease, storm damage, or urban development. Instead of these majestic giants ending up as mulch or landfill waste, a growing movement of woodworkers is transforming them into stunning, durable furniture. This Beginner’s Guide to Building Furniture with Urban Salvaged Lumber: From Street Trees to Finished Pieces provides an essential roadmap for aspiring makers to tap into this sustainable resource, showing how to legally source city trees, meticulously assess them for metal contamination, and prepare the salvaged boards for stable, beautiful furniture builds.
Key Takeaways
- Urban salvaged lumber offers a sustainable and unique material source for furniture making.
- Legal sourcing involves contacting municipal arborists and understanding local regulations.
- Thorough inspection for metal contaminants is crucial to protect tools and ensure wood integrity.
- Proper drying and stabilization techniques are essential for preventing warping and cracking.
- Embracing the unique character of salvaged wood enhances the final furniture piece.
Sourcing and Initial Assessment of Urban Salvaged Lumber
The first step in building furniture with urban salvaged lumber is understanding how to acquire it. Unlike purchasing wood from a traditional lumberyard, sourcing urban timber involves a more hands-on, often community-driven approach.
Identifying Sources for Street Trees
Urban trees are typically removed by municipal forestry departments, utility companies, or private arborists. Establishing contact with these entities is paramount for legal and ethical sourcing. Many cities have programs or designated drop-off points for salvaged wood.
- Municipal Forestry Departments: Reach out to your city’s public works or parks department. They often have lists of trees slated for removal or processed logs available. Inquire about their policies for public access or purchase of wood.
- Arborists and Tree Removal Companies: Professional arborists frequently remove large trees and may be willing to sell logs or even grant access to their wood piles. Building relationships with local companies can provide a consistent source.
- Community Forums and Social Media: Local woodworking groups, community forums, or online marketplaces (like Facebook Marketplace or Craigslist) can be excellent places to find individuals offering logs from their property. Always confirm the tree’s origin and reason for removal.
- Universities and Arboreta: Institutions with extensive tree collections sometimes remove trees for management purposes and may offer logs to the public or research programs.
When approaching these sources, always be clear about your intentions to use the wood for furniture and your understanding of the effort involved in processing it.
Assessing Metal Contamination and Damage
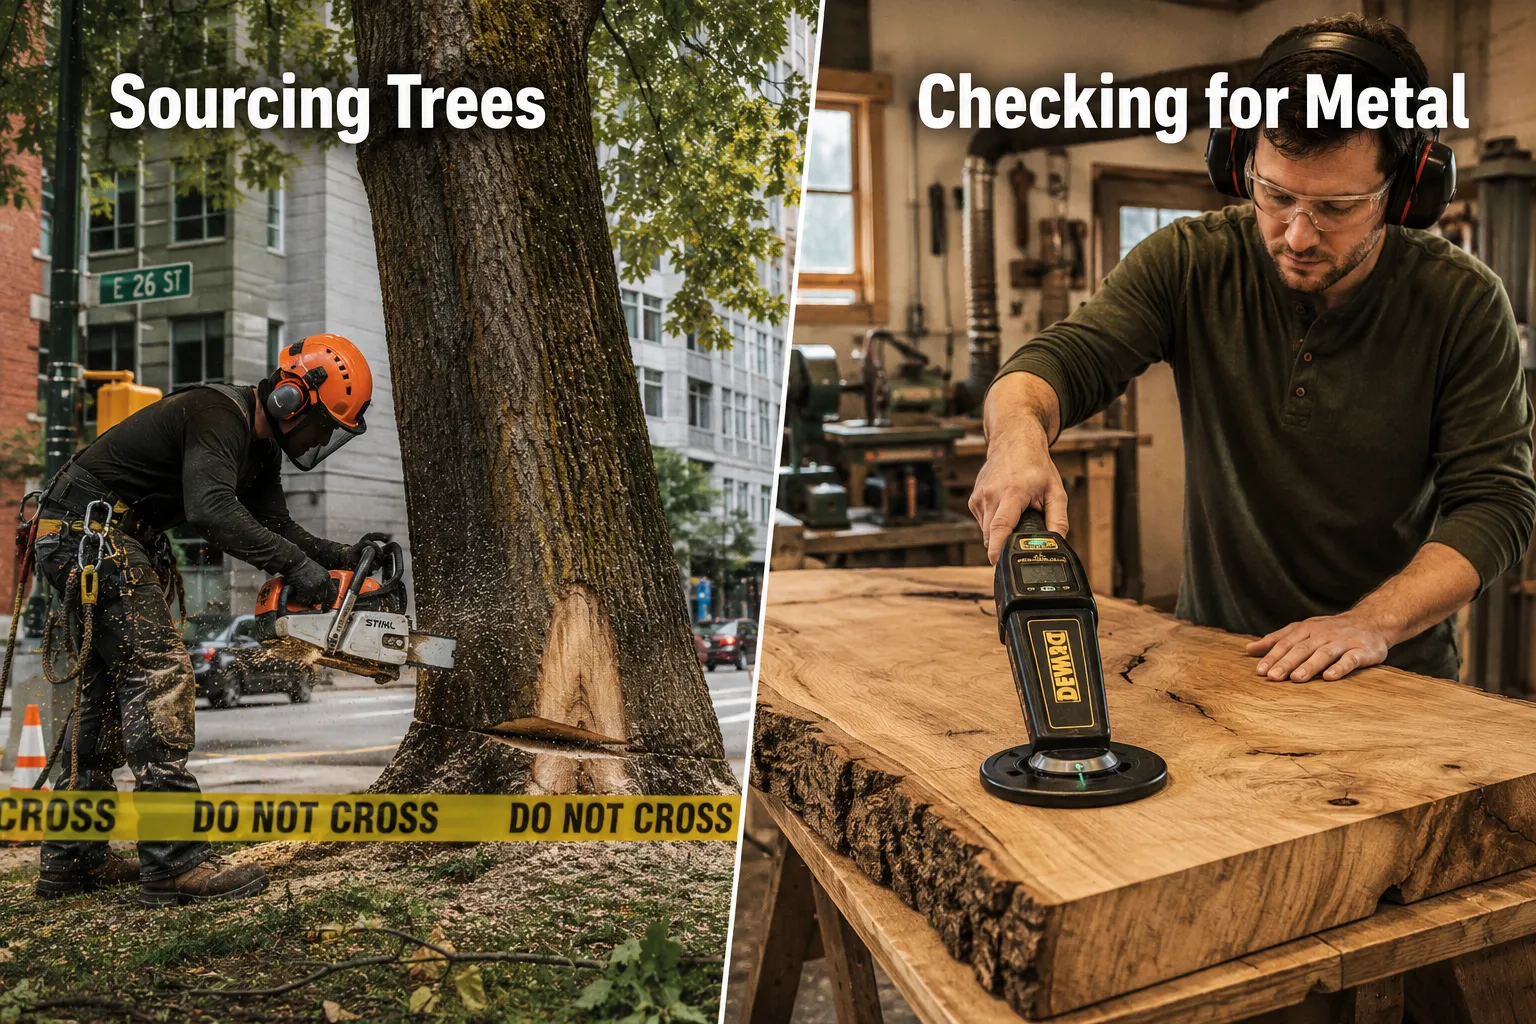 Urban trees live in a world of fences, signs, nails, and even bullets. These hidden metal objects pose significant hazards to woodworking tools and can compromise the integrity of the lumber. A thorough assessment for metal contamination is critical.
- Visual Inspection: Before any cuts, visually scan the log for obvious signs of metal, such as old nails, staples, or embedded hardware. Look for discolored streaks or bumps in the bark, which can indicate internal metal.
- Metal Detectors: A high-quality metal detector is an indispensable tool for urban salvaging. Pass the detector slowly over the entire log, marking any detected anomalies. Industrial-grade stud finders can also work for smaller pieces or surface checks.
- End Grain Examination: Once a log is cut into shorter sections, inspect the end grain for unusual discoloration or patterns that might suggest embedded foreign objects.
- Sawmill Precautions: If taking logs to a professional sawyer, inform them explicitly that the wood is urban salvaged. They will often use a specialized metal detector or charge an “urban log” fee to cover potential blade damage.
Beyond metal, inspect for signs of rot, insect infestation, or severe cracks. While some character (like spalting) is desirable, extensive decay can render wood unusable for furniture. For a deeper understanding of wood characteristics, consult a Beginner’s Guide to Wood Species: Hardwoods vs. Softwoods.
Preparing Salvaged Boards: Drying, De-Nailing, and Surface Prep
Once you’ve sourced and initially screened your urban logs, the real work of transforming them into usable lumber begins. This phase is crucial for ensuring the stability and longevity of your future furniture pieces.
Milling and Initial Air Drying
Logs must be milled into planks or slabs relatively quickly after felling to prevent rot and excessive cracking. This can be done with a chainsaw mill (for DIYers with significant experience), a portable sawmill service, or by taking the logs to a commercial sawmill.
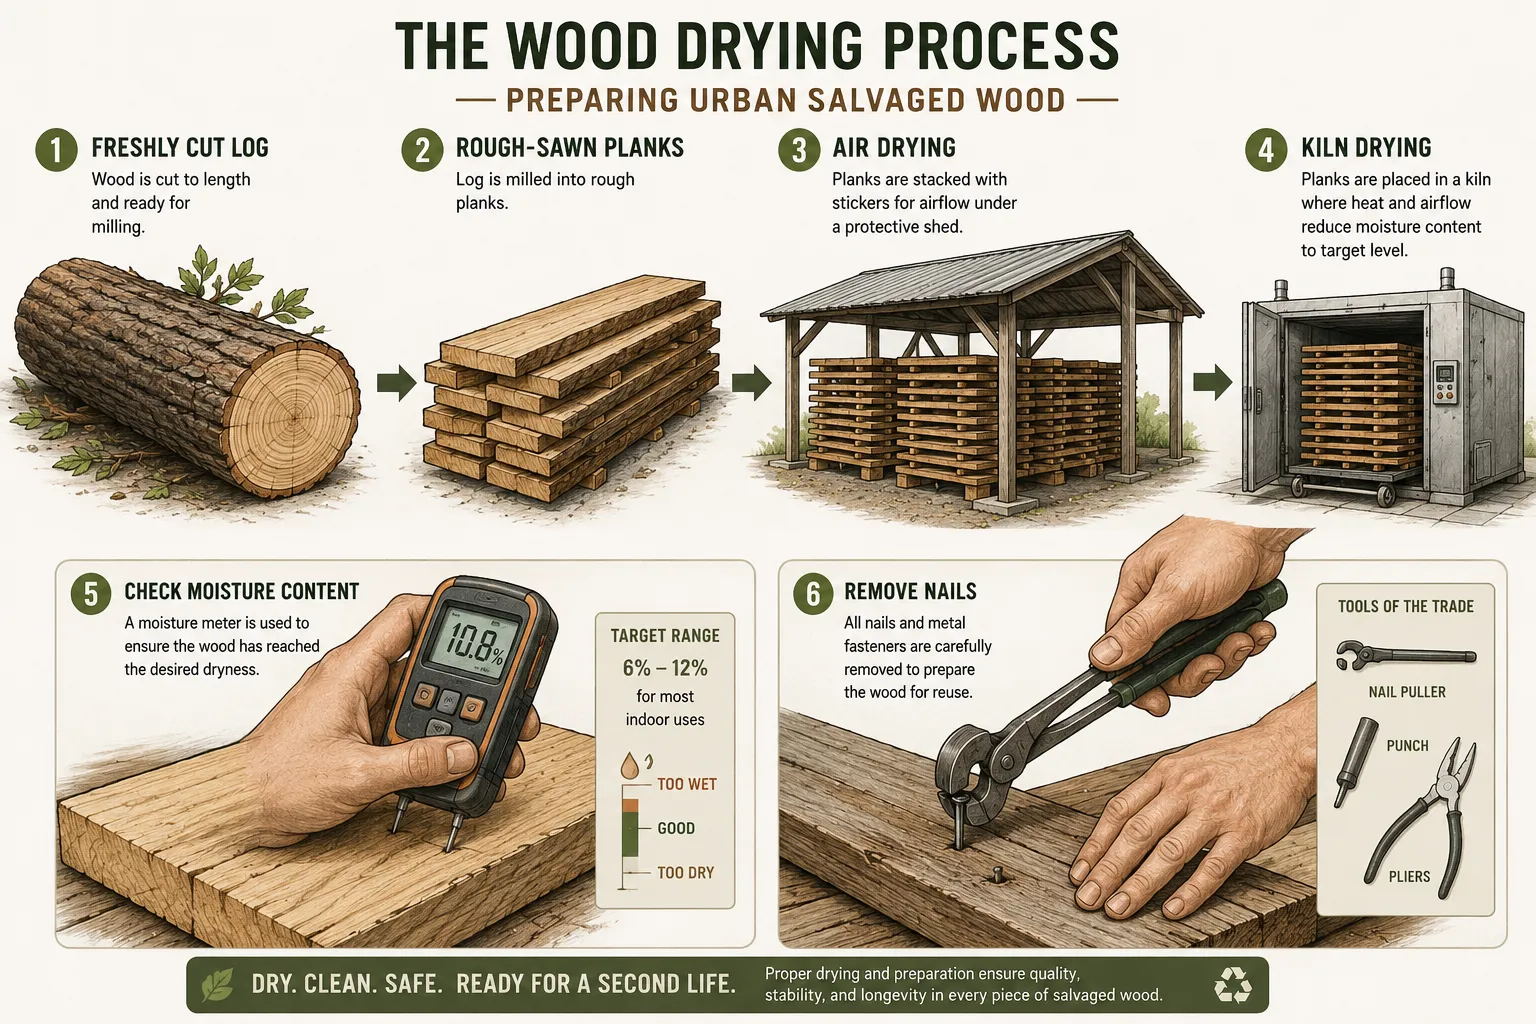
After milling, the wood needs to be dried. Freshly cut wood (green wood) contains a large amount of moisture, which, if not removed slowly and evenly, will cause significant warping, checking, and cracking.
- Stacking for Air Drying: Arrange the sawn lumber into stacks, using “stickers” (small, evenly spaced strips of dry wood) between each layer to allow air to circulate. This is vital for uniform drying.
- Proper Environment: Store stacks in a sheltered, well-ventilated area away from direct sunlight and rain. A shed or covered lean-to is ideal. The drying process can take several months to several years, depending on the wood species, thickness, and climate.
- Moisture Content: Aim for a moisture content of 6-8% for indoor furniture, which typically requires kiln drying after initial air drying. For outdoor pieces, 10-12% might be acceptable. A moisture meter is an essential tool to track progress.
De-Nailing and Initial Flattening
 Even after careful metal detection, some objects might be missed or are too small for initial detection. Before sending wood through power tools, a thorough de-nailing process is non-negotiable.
- Final Metal Scan: Prior to any planing or jointing, run a metal detector over every surface of each board. Mark any hits clearly.
- Removing Metal: Use nail punches, pliers, or specialized tools to remove any detected metal. If a piece of metal is deeply embedded and cannot be removed, consider cutting out that section of the board or re-routing your design to avoid it. Damaging a planer or jointer blade on a piece of metal is an expensive and dangerous mistake.
- Initial Flattening: Urban salvaged wood often comes with uneven surfaces. Use a jointer to create one flat face and one square edge, followed by a planer to bring the boards to a uniform thickness. For large slabs or boards that won’t fit through a traditional planer, consider using a router sled for initial flattening.
This preparatory work is labor-intensive but critical for creating stable, safe-to-work-with lumber. For guidance on creating strong joints, consider reading about Mastering Wood Joinery Techniques: Essential Methods for Strong and Beautiful Furniture.
Designing and Building with Salvaged Wood: From Concept to Finish
With prepared lumber in hand, the creative process begins. Building furniture with urban salvaged wood is not just about construction; it’s about embracing the unique narrative and characteristics of each piece.
Designing for Unique Character
Urban salvaged wood often features unique grain patterns, color variations, and even evidence of its past life, such as old nail holes or bark inclusions. These aren’t flaws; they are features that tell a story.
- Embrace Imperfections: Design your furniture to highlight these unique elements rather than concealing them. A live edge slab, for instance, makes a stunning coffee table or desk. For ideas on coffee table designs, explore a Beginner’s Guide to Coffee Table Design: Sizes, Styles, and Wood.
- Simple Joinery: Often, simpler joinery techniques allow the wood to be the star. Consider robust, visible joinery that complements the rustic or natural aesthetic of salvaged lumber.
- Functionality and Form: Think about how the wood’s inherent strengths and weaknesses (e.g., potential for knots or small checks) might influence the furniture’s structure and durability.
Essential Tools and Techniques
Building with salvaged lumber often requires the same tools as traditional woodworking, but some considerations apply.
- Power Tools: A table saw, miter saw, jointer, and planer are essential for efficient processing. Brands like Dewalt offer a range of reliable options. Learn more about Dewalt Power Tools for Woodworkers: A Comprehensive Guide to.
- Hand Tools: Planes, chisels, and hand saws can be invaluable for refining joints and surfaces, especially when working with irregular pieces.
- Joinery: Strong joinery is critical. Whether using mortise and tenon, dovetails, or simpler butt joints reinforced with screws and glue, ensure your joints are sound. For advanced techniques, see the Beginner’s Guide to Hand-Cut Mortise and Tenon Joints: Mastering the Fundamentals for Strong Furniture.
- Finishing: The finish protects the wood and enhances its natural beauty. Given the unique character of salvaged wood, choose finishes that highlight grain and texture. Natural oils or clear varnishes are popular choices. Discover more about Warm Matte Finishes for Dining Room Tables: From Sanding to Final Coat.
Assembly and Finishing Touches
 Once all components are cut and prepared, careful assembly ensures a sturdy and aesthetically pleasing final piece.
- Dry Fit: Always dry-fit your project before applying any glue or permanent fasteners. This allows you to check for fit, alignment, and make any necessary adjustments.
- Gluing and Clamping: Use appropriate wood glue and ample clamps to secure joints. Ensure even pressure and allow sufficient drying time.
- Sanding: Begin with coarser grits and progressively move to finer grits to achieve a smooth, ready-for-finish surface. The amount of sanding depends on the desired final look, some prefer a slightly more rustic feel, while others aim for glass-smooth.
- Applying Finish: Apply your chosen finish according to the manufacturer’s instructions. Several thin coats are generally better than one thick coat. Between coats, a light sanding with fine-grit sandpaper can create a smoother surface.
Building furniture from urban salvaged lumber is a rewarding process that connects you to the natural world and your community. Each piece tells a story, making it more than just furniture, it’s a narrative preserved in wood.
Conclusion
Embarking on the journey of building furniture with urban salvaged lumber is a profoundly rewarding endeavor. It’s an act of sustainability, craftsmanship, and storytelling. From the careful process of legally sourcing a fallen street tree and meticulously preparing its raw timber, to designing and crafting a unique furniture piece, every step imbues the final product with character and a sense of history that mass-produced items simply cannot replicate.
By following this Beginner’s Guide to Building Furniture with Urban Salvaged Lumber: From Street Trees to Finished Pieces, you gain the foundational knowledge to transform discarded urban wood into functional art. Remember the critical steps: establish relationships with local tree care professionals, invest in a reliable metal detector to protect your tools, commit to proper drying techniques to ensure stability, and embrace the natural imperfections that make each piece of salvaged wood truly one-of-a-kind. Your first project will not only be a testament to your newfound skills but also a sustainable contribution to your home and community. Start small, be patient, and enjoy the unique beauty of bringing a city tree back to life.
References
- Hoadley, R. B. (2000). Identifying Wood: Accurate Results with Simple Tools. The Taunton Press.
- Forest Products Laboratory. (2010). Wood Handbook: Wood as an Engineering Material. U.S. Department of Agriculture.
SEO Meta Title: Beginner’s Guide: Building Furniture from Urban Salvaged Wood SEO Meta Description: Learn to build furniture from urban salvaged wood in 2026. This guide covers sourcing street trees, detecting metal, drying lumber, and crafting unique pieces.