
The average woodworker will inevitably face the challenge of repair or restoration, a task that often demands more finesse and understanding than initial construction. Far from simply reversing the assembly process, truly mastering the wrencher involves a nuanced approach to delicate disassembly and precise repair in woodworking projects. It’s about recognizing the intricate dance between wood, joinery, and fasteners, and employing advanced techniques to take things apart without causing further damage, then meticulously restoring them to their former glory, or even improving upon them. In 2026, the pursuit of longevity and sustainability in woodworking means that these skills are more vital than ever, transforming what might seem like a destructive act into an art form of preservation.
Key Takeaways
- Strategic Disassembly: Proper planning and understanding of joinery are crucial to minimize damage during the initial breakdown of a woodworking piece.
- Specialized Tool Application: Utilizing specific tools, beyond basic wrenches and screwdrivers, for different fastener types and joint releases ensures precise and safe component separation.
- Material-Specific Repair: Employing targeted repair techniques for various types of wood damage, from minor chips to structural failures, extends the life and integrity of the project.
- Controlled Reassembly: The reassembly phase requires meticulous attention to detail, correct adhesive application, and proper clamping to ensure structural soundness and aesthetic coherence.
- Preventative Maintenance Mindset: Learning from disassembly and repair provides insights into design weaknesses, fostering a preventative approach in future woodworking projects.
Advanced Disassembly Techniques: The Foundation of Repair
Effective repair in woodworking begins not with gluing or patching, but with strategic disassembly. This critical first step, often overlooked, dictates the success of the entire restoration process. Simply forcing components apart can lead to irreparable damage, making the repair far more challenging or even impossible. Mastering the wrencher in this context means understanding how a piece was originally constructed and anticipating potential points of failure or resistance during its deconstruction.
Pre-Disassembly Assessment and Documentation
Before any tool touches the wood, a thorough assessment is mandatory. This involves:
- Visual Inspection: Look for visible fasteners, glue lines, joinery types (dovetails, mortise and tenon, dowels, biscuits), and areas of stress or damage.
- Structural Analysis: Understand how the piece bears weight and where its strongest and weakest points lie. This helps predict how it will respond to disassembly forces.
- Documentation: Take copious photographs and detailed notes. Mark components with non-damaging labels (e.g., painter’s tape with numbers) to ensure correct reassembly. This is particularly vital for complex furniture pieces with many similar components. Sketching diagrams can also be immensely helpful.
Specialized Tools for Non-Destructive Disassembly
Beyond the common screwdriver or claw hammer, advanced disassembly requires a specialized toolkit designed to minimize wood damage.
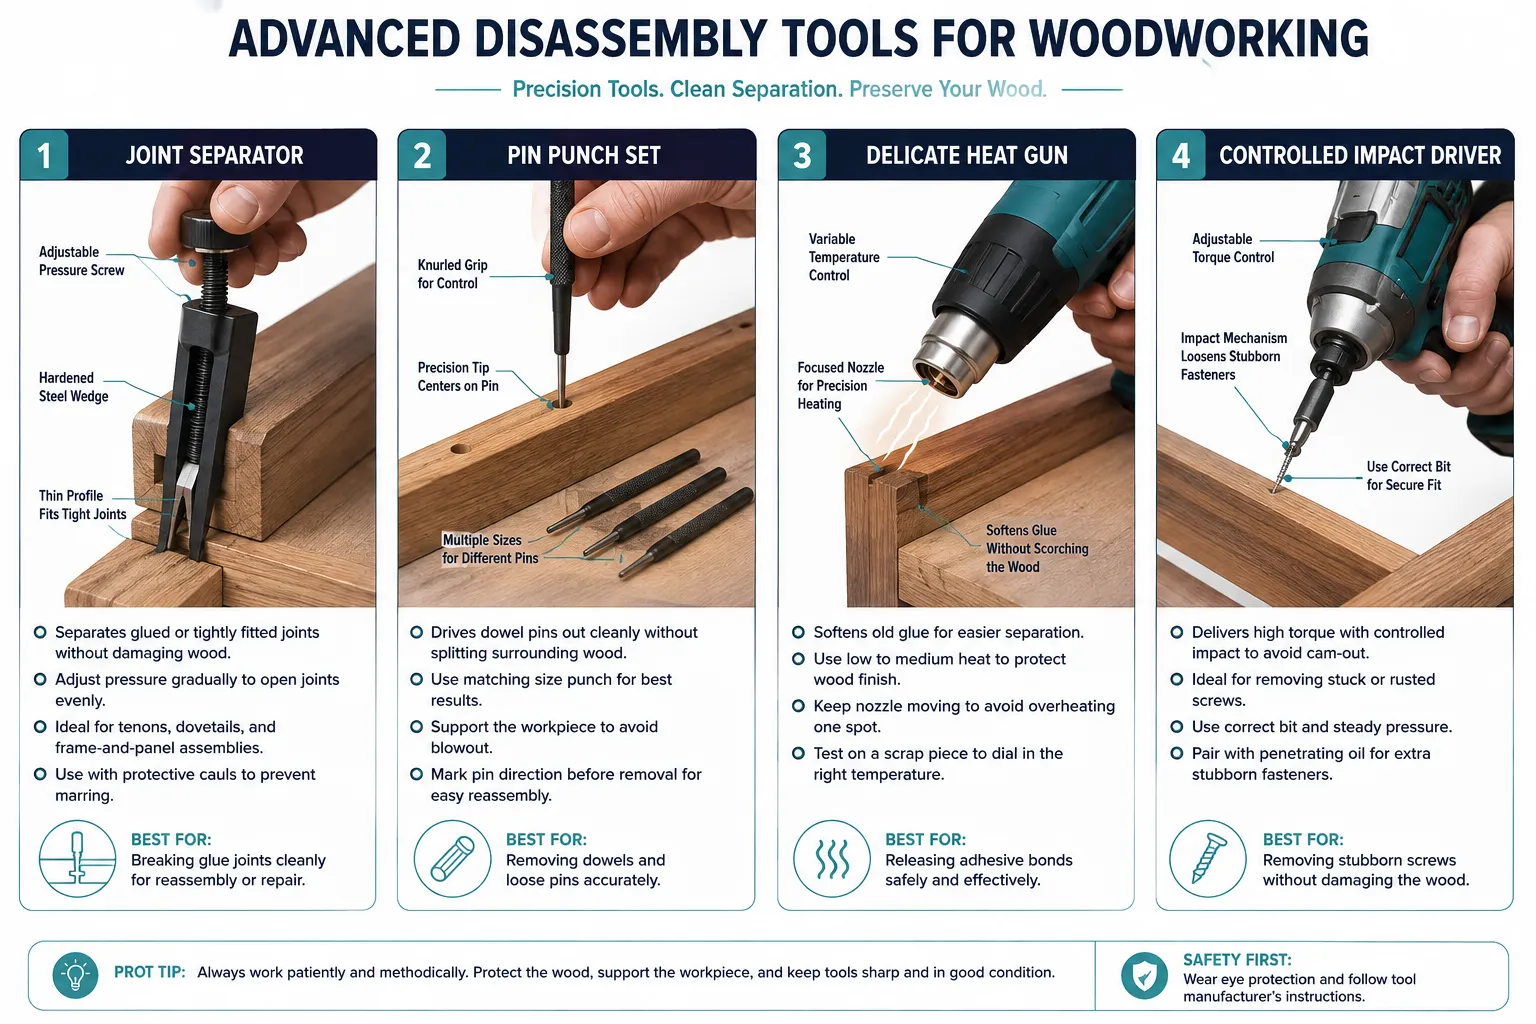
- Pry Bars and Wedges: Not all pry bars are created equal. Opt for thin, flat pry bars with a wide, polished surface to distribute pressure and reduce localized marring. Hardwood wedges (oak, maple) can be driven into joints to apply controlled, gradual separating force. Plastic shims are also excellent for delicate prying.
- Pin Punches and Dowel Extractors: For dowel joints or concealed pins, a set of varied diameter pin punches allows for careful extraction without damaging surrounding wood.
- Heat Guns and Chemical Solvents: Old glues, especially hide glue, respond well to heat or moisture for release. Modern glues may require specific solvents or controlled heat application (use with extreme caution to avoid scorching wood or releasing toxic fumes). Always test on an inconspicuous area first.
- Specialized Wrench Sets and Drivers: Precision nut drivers, hex key sets, and torx bits are essential for removing modern fasteners without stripping their heads. Impact drivers, used gently and with appropriate bits, can help loosen stubborn screws without damaging the wood fibers around them.
- Joint Separators: For tight, glued joints, dedicated joint separators, often resembling large calipers or vises, can apply even, outward pressure to slowly release the bond.
“The true craftsman approaches disassembly with the mindset of a surgeon, not a demolition expert. Every movement is deliberate, every tool chosen for its precision, ensuring that the piece can live to serve another generation.”
Strategic Joint Separation
- Grain Direction: Always consider the wood grain. Prying against the grain can easily cause splintering. Aim to separate components along the grain lines where possible.
- Even Pressure: Apply force evenly across the joint. Using cauls or wide blocks with clamps can distribute pressure effectively.
- Tapping and Vibration: Gentle tapping with a rubber mallet can sometimes break a stubborn glue bond. For extremely delicate work, an orbital sander (without sandpaper) held against a component can induce micro-vibrations that loosen joints.
- Moisture Application: For traditional hide glue, a damp cloth or sponge can soften the glue. Apply heat simultaneously to speed up the process. Be mindful of swelling or warping, especially with veneer.
Once components are separated, clean off old glue and debris thoroughly. This prepares the surfaces for the next stage: repair. Learning about the ultimate guide to wood glue can help you choose the right adhesive for repair and reassembly.
Advanced Repair Techniques: Restoring Integrity and Aesthetics
With the piece carefully disassembled, the focus shifts to restoring damaged components. This phase requires a blend of traditional craftsmanship and modern material science, going beyond simple patching to truly restore the integrity and aesthetics of the woodworking project. Mastering the wrencher means not just fixing what’s broken, but understanding why it broke and ensuring the repair is robust.
Addressing Wood Damage: Beyond the Basic Fill
Wood damage can range from superficial scratches to deep structural failures. Advanced repair techniques offer solutions for even the most challenging issues.
- Splinter and Chip Repair: For small splinters and chips, re-gluing the original piece (if available) with a strong wood glue and clamping precisely is ideal. For missing chips, color-matched wood filler is a common solution, but for high-stress areas, consider creating a custom dutchman patch or inlay from a matching wood species. This provides superior strength and aesthetic integration.
- Crack and Split Repair:
- Fine Cracks: Thin CA glue (cyanoacrylate) can wick into fine cracks, providing a strong, invisible bond. Clamp tightly.
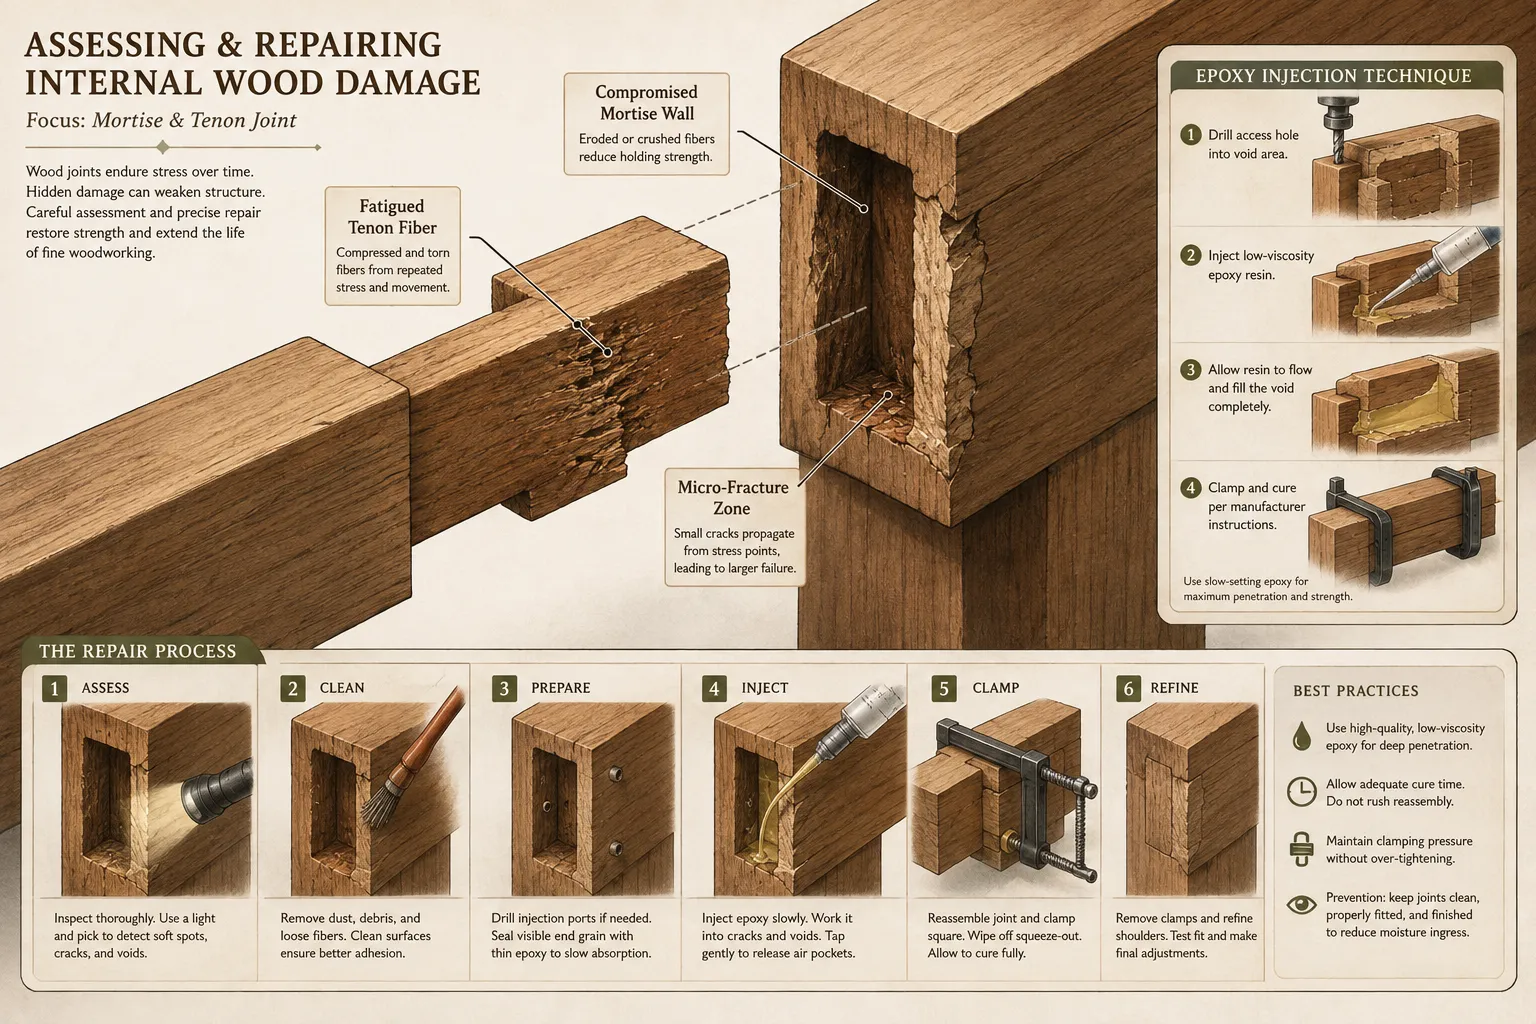
- Larger Cracks: For wider cracks, clean out debris and inject epoxy resin. Epoxy offers excellent gap-filling and structural strength. Tint the epoxy with pigments to match the wood.
- Through Splits: Consider splining or butterfly keys for added reinforcement, especially in tabletops or structural elements. These techniques mechanically strengthen the joint while adding a decorative element.
- Dowel Hole and Fastener Hole Repair: Enlarged or stripped fastener holes can be repaired by filling with epoxy putty, or by drilling out the hole slightly oversized, gluing in a hardwood dowel, then drilling a new pilot hole. This creates fresh, strong wood for the fastener.
- Burn and Dent Repair: Minor dents can sometimes be raised by applying moisture and heat (using a damp cloth and a clothes iron) to swell the compressed wood fibers. Burns may require careful scraping, sanding, or in severe cases, a patch or inlay.
Joint Repair and Reinforcement
Weakened or broken joints are common culprits in woodworking failures.
- Loose Mortise and Tenon Joints: If a tenon has shrunk or the mortise has widened, veneer shims can be glued to the tenon cheeks to create a tighter fit. Alternatively, a thin piece of contrasting wood can be glued into the mortise face and then re-cut to size for a fresh, tight joint.
- Dowel Joint Repair: Replace broken dowels with new ones of the same diameter and length. If dowel holes are enlarged, consider drilling slightly larger holes and using oversized dowels or switch to a different joinery method like floating tenons for added strength.
- Bridle and Half-Lap Repair: These joints often fail due to shear stress. Reinforce them with through-dowels, concealed screws, or by adding small support blocks or gussets on unseen surfaces.
- Advanced Gluing Techniques: When re-gluing, ensure mating surfaces are perfectly clean and flat. Apply glue evenly and clamp with adequate, but not excessive, pressure. Using specific clamps designed for complex angles or delicate work is crucial. Consider using the ultimate guide to wood glue for proper adhesive selection.
Reassembly and Finishing: The Art of Putting It Back Together
The culmination of mastering the wrencher lies in the meticulous reassembly and finishing. This stage isn’t just about putting pieces back in order; it’s about ensuring structural integrity, aesthetic harmony, and often, an improved outcome over the original construction. Precision at this point is paramount, as mistakes here can undo all the careful work of disassembly and repair.
Controlled Reassembly Techniques
- Dry Fit First: Always perform a dry fit of all components before applying any glue. This allows you to identify any fit issues, ensure correct orientation, and practice the assembly sequence. It’s much easier to adjust a dry joint than a glued one.
- Sequential Assembly: Plan your assembly sequence. Often, it’s best to assemble sub-components first (e.g., a chair leg assembly) before joining them to the main structure. Work from the inside out or base up, depending on the project.
- Glue Application: Apply glue evenly to both mating surfaces, but avoid excessive squeeze-out, especially in areas difficult to clean. Open and closed times for glue are critical, work within these windows.
- Clamping Strategy:
- Even Pressure: Use sufficient clamps to apply even pressure across all joints. Cauls (sacrificial wood blocks) protect the workpiece from clamp marks and help distribute pressure.
- Squareness and Flatness: Continuously check for squareness, plumb, and flatness during clamping. Use winding sticks, straightedges, and reliable squares.
- Drying Time: Allow adequate drying time for glues as specified by the manufacturer. Rushing this step can lead to weak joints.
- Fastener Reinstallation: When reinserting screws or other mechanical fasteners, ensure pilot holes are correctly sized. For stripped holes, repair as described in the previous section. Use a screwdriver (manual or powered with clutch control) to avoid overtightening and stripping.
Advanced Finishing Touches
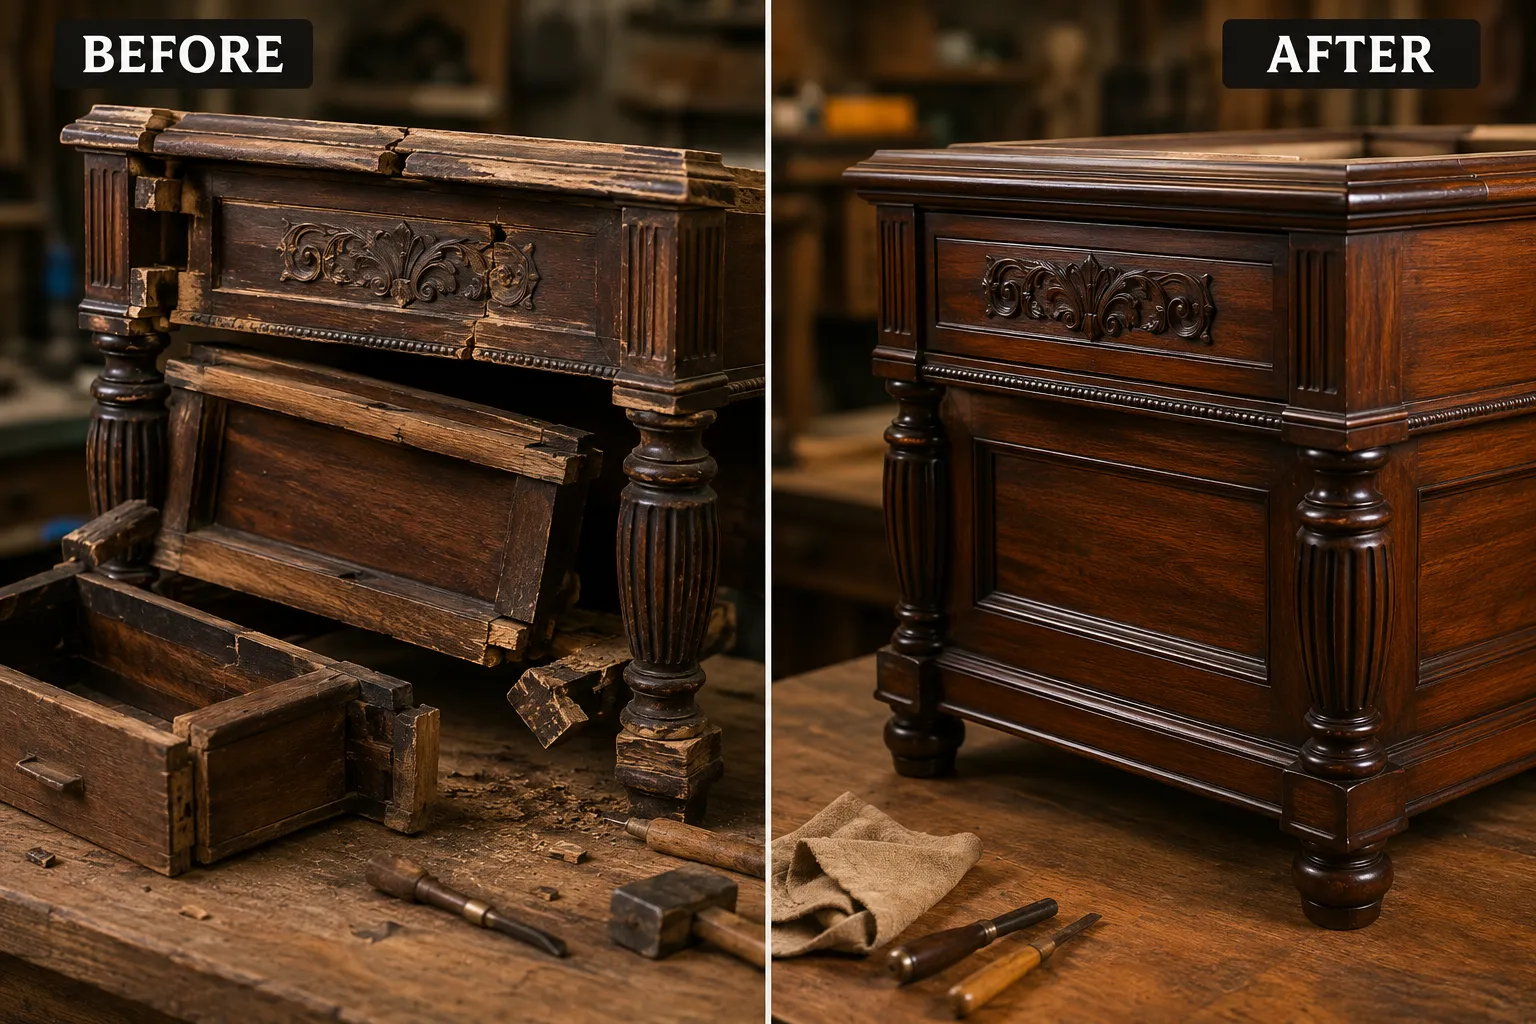
After reassembly, the repaired areas often need blending with the existing finish.
- Sanding and Surface Preparation: Carefully sand repaired areas, starting with a coarser grit and progressing to finer grits (e.g., 120, 180, 220, 320) to achieve a smooth, uniform surface. Feather the sanding into the surrounding original finish. For larger surfaces, a mastering the router sled can help achieve perfectly flat panels.
- Color Matching: This is perhaps the most challenging aspect. Test stains, dyes, or repair waxes on scrap wood or an inconspicuous area. Building up color gradually is easier than removing it. Consider using artists’ oils or acrylics applied with a fine brush for subtle tinting.
- Finish Application: Apply a new finish to the repaired areas, trying to match the existing sheen (matte, satin, gloss). This might involve shellac, lacquer, varnish, or oil. For a seamless blend, a light, even coat over the entire piece might be necessary. Explore rustic wood finishing techniques for specific aesthetic matches.
- Buffing and Polishing: For a high-gloss finish, buffing and polishing with fine compounds can remove minor imperfections and bring out a deep luster.
Long-Term Care and Maintenance
Educate yourself or the client on proper care to prevent future issues. This includes advice on humidity control, avoiding direct sunlight, and gentle cleaning practices. By mastering these advanced techniques, woodworkers can not only extend the life of cherished pieces but also develop a deeper understanding of wood and joinery, enhancing future creations.
Conclusion
Mastering the wrencher in woodworking is a highly rewarding skill that elevates a craftsman from a builder to a restorer. It involves a profound appreciation for the materials, a meticulous approach to delicate processes, and the strategic application of both traditional wisdom and modern innovation. By thoroughly understanding advanced techniques for disassembly, precise repair, and careful reassembly, woodworkers in 2026 can confidently tackle even the most daunting restoration projects, breathing new life into damaged pieces. This comprehensive approach not only saves valuable furniture and heirloom items but also deepens one’s overall woodworking proficiency, fostering a sustainable mindset that champions repair and longevity over replacement. Embrace the challenge, and your ability to preserve and perfect will undoubtedly grow.