
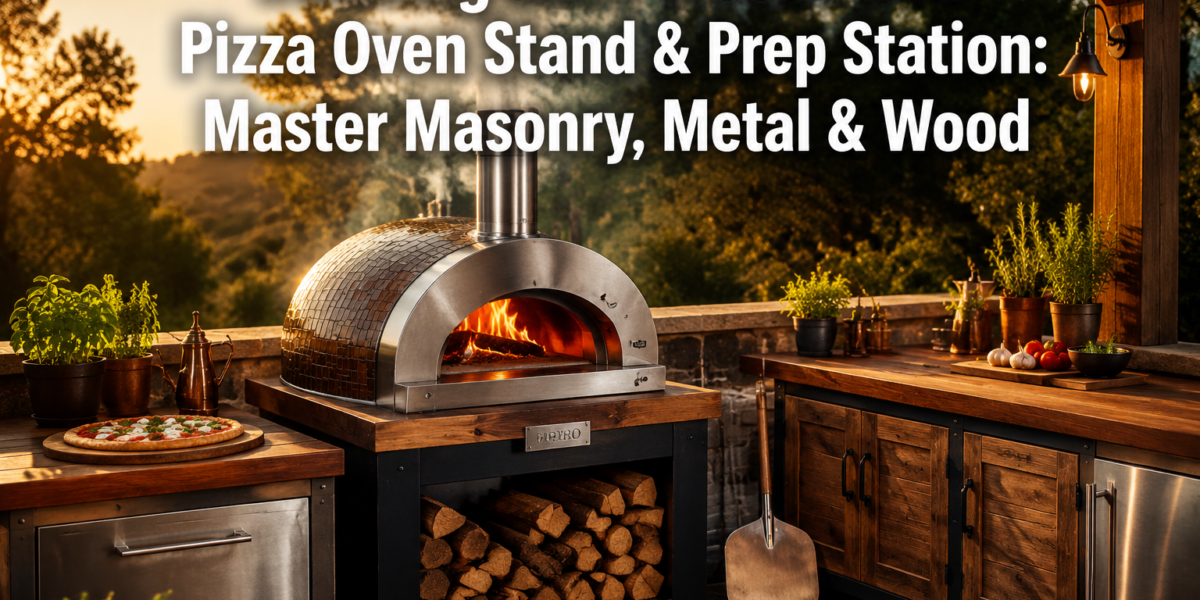

The average household invests upwards of $15,000 in outdoor living spaces, yet many lack a truly integrated, custom cooking solution that serves as both a focal point and a highly functional area. Elevate your outdoor cooking experience in 2026 by building a custom wood stand and prep station for your wood-fired pizza oven. This ambitious yet rewarding project blends the enduring strength of masonry, the structural integrity of metalwork, and the aesthetic warmth of woodworking, creating a functional and beautiful outdoor kitchen centerpiece that will be the envy of your neighborhood.
Key Takeaways

- Integrated Design is Crucial: Plan your wood-fired pizza oven stand and prep station comprehensively, considering material synergy and workflow.
- Multi-Disciplinary Skills: This project requires a blend of masonry for stability, metalwork for support, and woodworking for aesthetics and functionality.
- Safety First: Prioritize safety in every phase, from structural planning to fire-resistant material selection.
- Customization is Key: Tailor the design to your specific needs, incorporating storage, counter space, and tool access.
- Durability and Aesthetics: Choose materials and finishes that withstand outdoor elements while enhancing your outdoor living area.
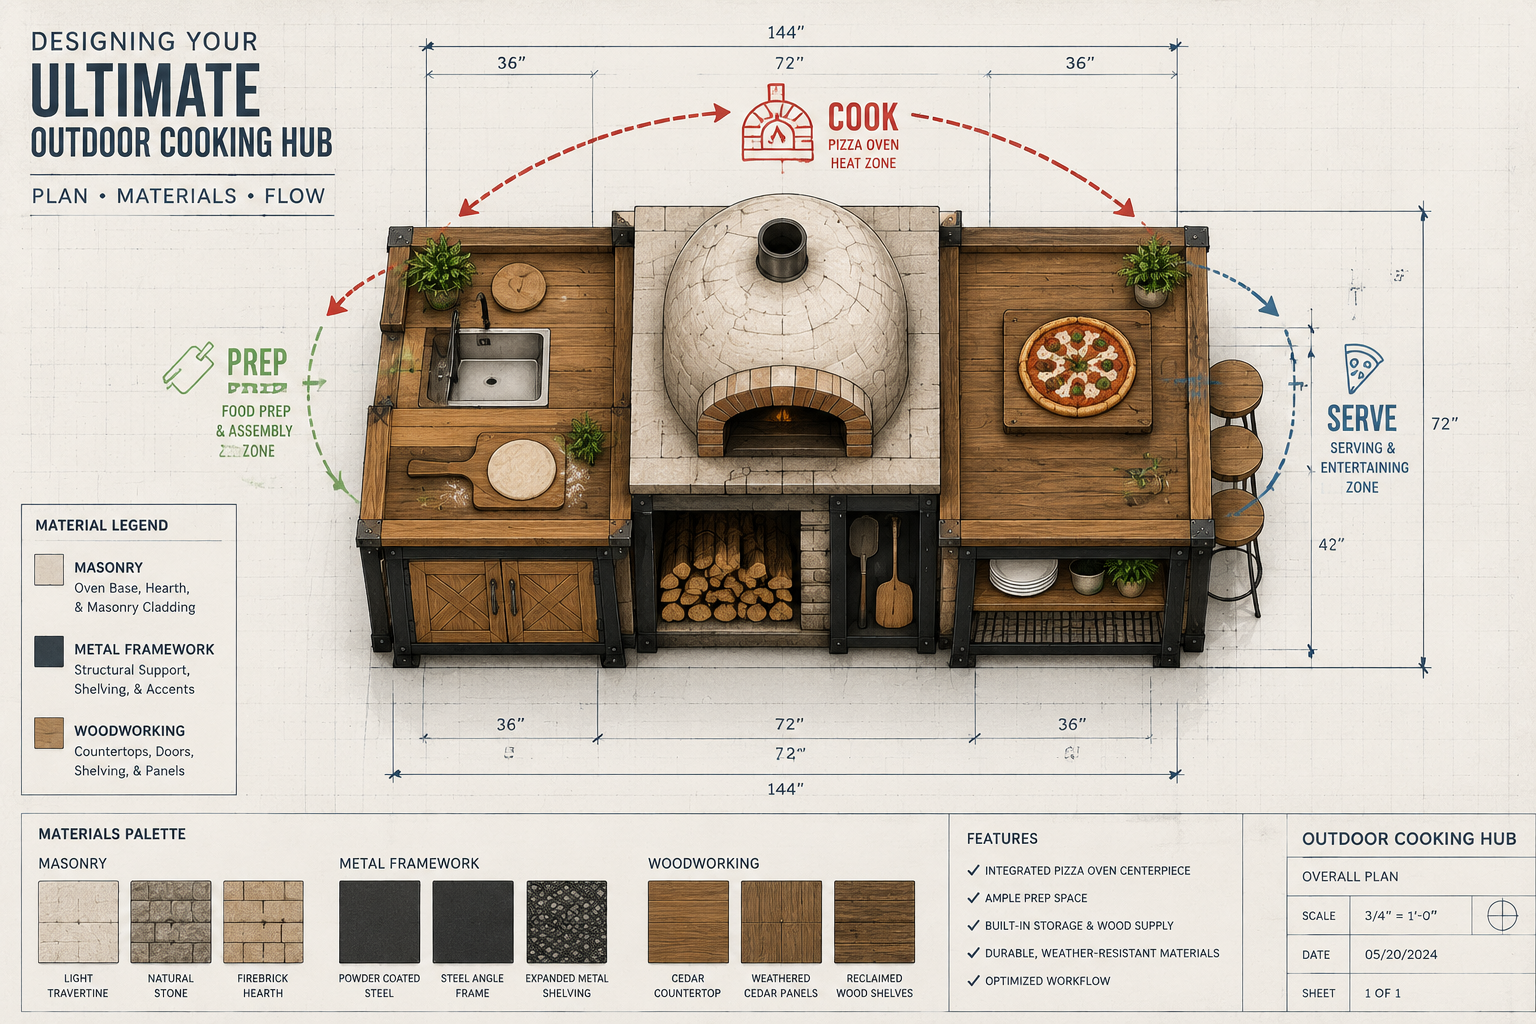
Designing Your Ultimate Outdoor Cooking Hub for 2026
Building a DIY wood-fired pizza oven stand and prep station: combining masonry, metalwork, and woodworking for outdoor cooking begins with meticulous planning. A well-designed stand and prep station transforms a simple oven into a complete outdoor kitchen, enhancing both functionality and aesthetic appeal. Before lifting a single brick or cutting a piece of wood, consider the big picture.
Site Selection and Layout Considerations
Choosing the right location is paramount. The area should be level, easily accessible from your main house, and positioned to avoid smoke becoming a nuisance to neighbors or prevailing winds. Essential considerations include:
- Proximity to Utilities: While a wood-fired oven doesn’t require gas or electricity, easy access to water for cleanup and general use is highly beneficial.
- Foundation Requirements: The combined weight of a masonry pizza oven and a robust stand is substantial. A solid concrete slab foundation, properly reinforced, is critical for stability and longevity. Consult local building codes for specific requirements.
- Sun and Shade: Position the station to offer some shade during peak cooking hours, making the experience more comfortable.
- Clearances: Ensure adequate clearance from combustible materials like fences, trees, or your home structure, adhering to fire safety regulations.
Conceptualizing the Multi-Material Design
The beauty of this project lies in integrating different materials, each chosen for its specific strengths:
- Masonry (Base & Oven Enclosure): Provides unparalleled heat resistance, structural stability, and a classic aesthetic. Bricks, concrete blocks, or natural stone are excellent choices. This forms the core, supporting the heavy oven and insulating it.
- Metalwork (Framework & Accents): Steel, aluminum, or wrought iron can offer robust support for countertops, shelving, and can even be incorporated as decorative elements like hooks for utensils or towel bars. Metal framing can provide sleek, modern lines or rustic charm depending on the finish. For inspiration on organizing your tools for such projects, explore Building Modular Wood Storage Systems for Small Workshops: Maximizing.
- Woodworking (Countertops & Storage): Adds warmth, natural beauty, and practical surfaces. Hardwoods like teak, ipe, cedar, or treated lumber are ideal for outdoor use due to their durability and resistance to rot and insects. This is where ergonomic design truly shines.
Design Elements to Include:
- Oven Landing: A generous heat-resistant counter space directly in front of the oven door for handling pizzas.
- Prep Area: Ample counter space for preparing ingredients, stretching dough, and garnishing.
- Storage: Shelving or cabinets for wood logs, cooking tools, dough ingredients, and cleaning supplies. Consider using Custom Wooden Planters for growing fresh herbs adjacent to your prep station, adding both utility and beauty.
- Sink (Optional): A small outdoor sink with a hose connection can dramatically improve convenience.
- Tool Hooks/Bars: Metal or sturdy wooden hooks for hanging peels, brushes, and other pizza tools.
A detailed sketch, even a simple one, outlining dimensions, material choices, and desired features, will serve as your roadmap.
Masonry, Metal, and Wood: A Step-by-Step Construction Guide for Your Outdoor Oven
With a solid design in hand, the construction phase begins. This section breaks down the process into its core components, emphasizing the interplay of masonry, metalwork, and woodworking.
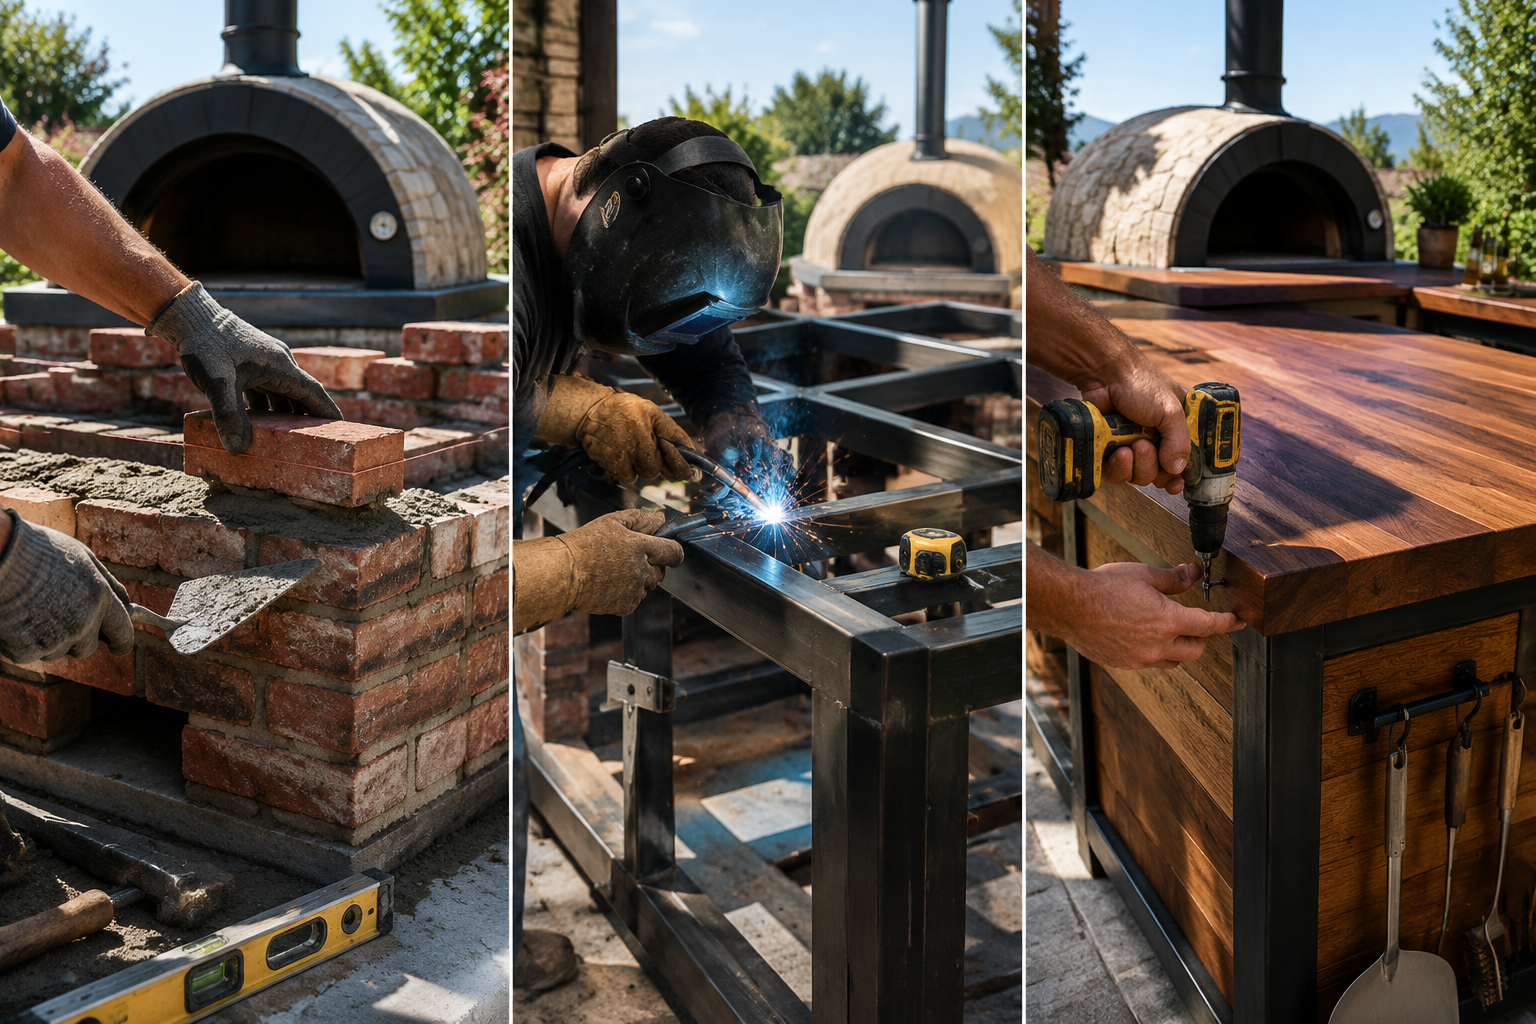
1. The Masonry Foundation and Oven Base
The masonry work forms the backbone of your stand. It must be robust enough to support the significant weight of the pizza oven and withstand high temperatures.
- Prepare the Site: Excavate the area for your concrete slab foundation (if not already present). Ensure proper drainage and compact the sub-base.
- Pour the Concrete Slab: Install rebar for reinforcement. A 4-6 inch thick slab is typically sufficient for most residential pizza ovens. Allow adequate curing time (usually 7-28 days).
- Build the Masonry Base: Using concrete blocks, bricks, or stone, construct the lower support structure for your oven. This forms a sturdy plinth. Ensure it is perfectly level and square.
- Install the Hearth Slab: On top of your masonry base, lay a reinforced concrete slab or pre-cast hearth slab that will serve as the floor of your pizza oven. This needs to be extremely strong and level.
- Construct the Oven Housing: Depending on your pizza oven type (pre-built dome, kit, or scratch-built), you’ll now build the surrounding masonry enclosure. This acts as insulation and provides a finished look. Use high-heat refractory mortar for any parts directly contacting the oven’s exterior, as regular mortar can degrade under extreme temperatures.
2. Integrating Metalwork for Structure and Utility
Metal elements provide structural integrity and opportunities for customization.
- Design the Metal Frame: Plan for a metal framework that will support your wooden countertops and potentially shelving beneath. Square steel tubing (e.g., 1.5″ x 1.5″ or 2″ x 2″) is an excellent choice for its strength and ease of welding or bolting.
- Fabrication: Cut and weld (or bolt together using specialized connectors) the metal frame. Ensure all joints are strong and angles are precise. Consider adding diagonal bracing for extra rigidity. If welding, ensure proper safety gear and ventilation.
- Corrosion Protection: For outdoor use, the metal frame must be protected from rust. This can involve galvanizing, powder coating, or applying a rust-inhibiting primer followed by several coats of outdoor-grade paint.
- Mounting: Securely attach the metal frame to the masonry base using anchor bolts or concrete screws. This ensures the entire structure is unified and stable. Incorporate metal hangers or brackets for specialized tools like pizza peels.
3. Woodworking for Functional Surfaces and Aesthetics
The woodworking phase adds the essential prep surfaces, storage, and visual warmth. Precision in joinery is vital for durability and appearance; learning Beginner’s Guide to Essential Woodworking Joints will be highly beneficial.
- Select Wood: Choose weather-resistant hardwoods or treated lumber. For stunning countertops, consider large live-edge slabs, detailed in Live Edge Slab Selection and Preparation.
- Cut and Shape Countertops: Accurately measure and cut your wooden slabs for the prep and landing areas. Allow for overhangs if desired. Use a router to create appealing edge profiles.
- Finishing Wood: Proper outdoor finishing is crucial. Sand surfaces smooth, then apply multiple coats of a marine-grade varnish, penetrating oil (like teak oil), or an exterior-grade polyurethane. These finishes protect against UV, moisture, and temperature fluctuations. Re-apply annually for best results.
- Construct Storage: Build cabinets, shelves, or drawers beneath the countertops. Mortise and tenon or dado joints offer superior strength for outdoor furniture. For detailed joinery techniques, consult Mastering Dovetail Joints with Hand Tools.
- Attach Wood Elements: Securely fasten the wooden countertops and storage units to the metal frame and/or masonry using stainless steel screws or bolts. Countersink screw heads for a clean finish. Ensure all fasteners are suitable for outdoor use to prevent rust streaks.
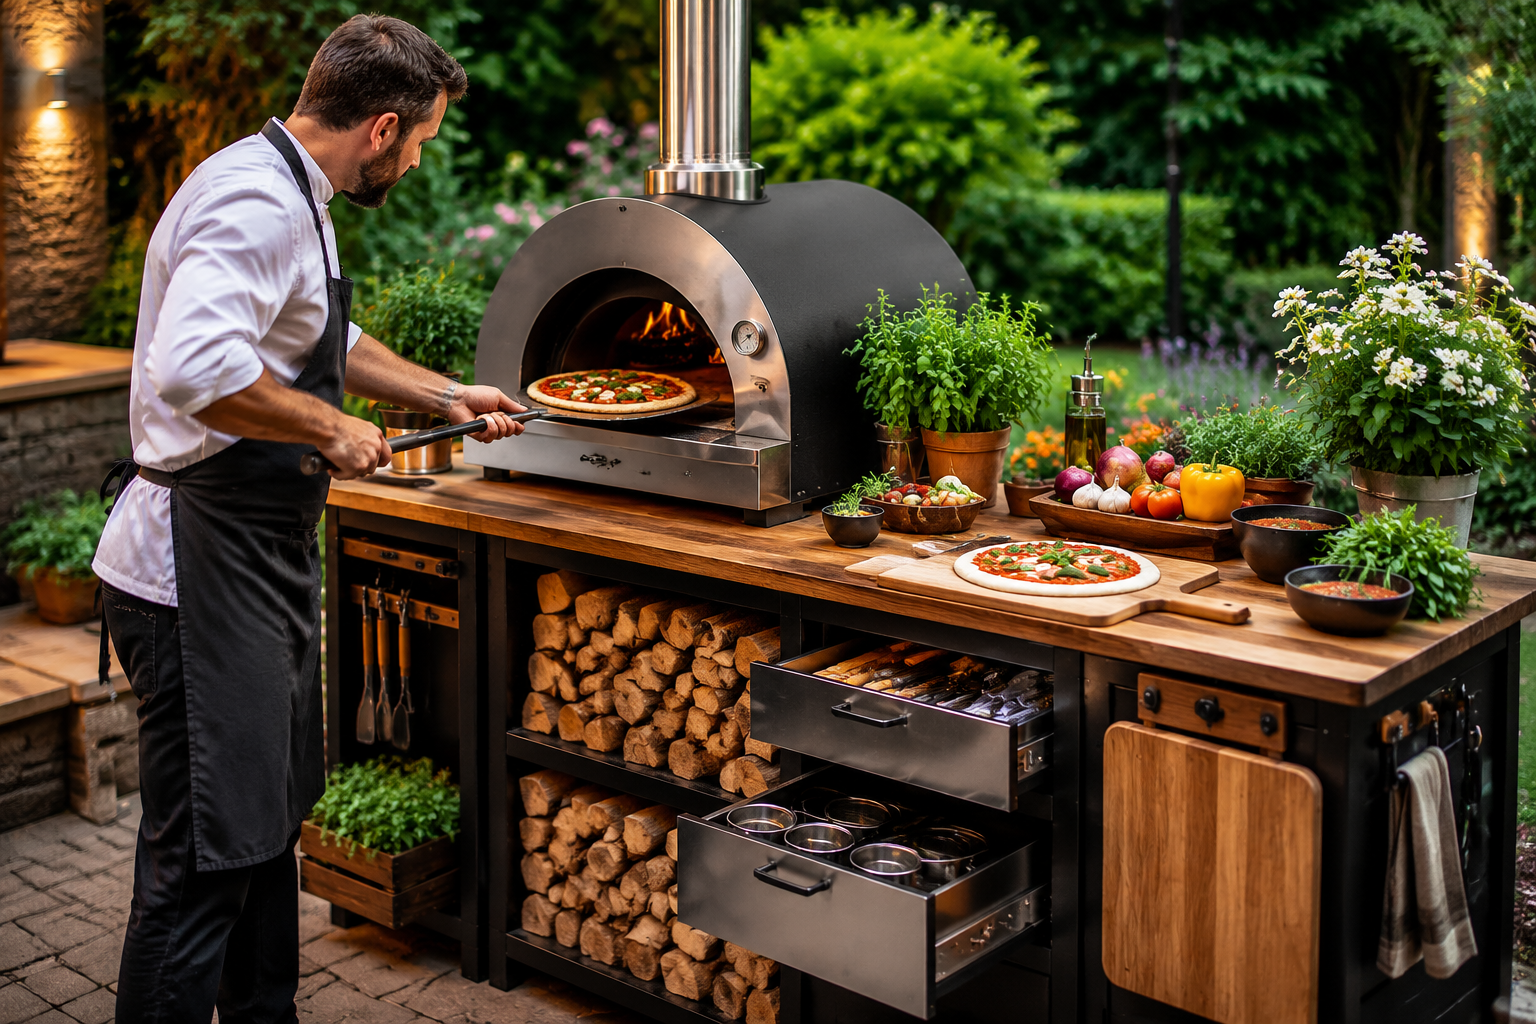
Finishing Touches and Maximizing Functionality of Your Pizza Oven Stand
Once the core structure of your DIY wood-fired pizza oven stand and prep station is complete, the final touches transform it into a truly exceptional outdoor kitchen. These elements not only enhance its appearance but also significantly improve its usability.
Enhancing Durability and Aesthetics
- Sealing Masonry: Apply a penetrating masonry sealer to bricks or stone to protect against moisture, staining, and efflorescence. This also makes cleaning easier.
- Weatherproofing Wood: Beyond the initial finish, regular maintenance is key. Re-apply wood finishes as needed, typically annually, to combat the effects of sun and rain. Pay close attention to end grain, which is most susceptible to moisture absorption.
- Decorative Elements: Consider adding tile accents to the masonry, incorporating LED strip lighting under the countertops for evening cooking, or even installing a small, stylish outdoor fan for comfort. For those interested in advanced woodworking for decorative accents, explore Advanced Wood Carving Techniques for Decorative Furniture Accents.
- Firewood Storage: Design an easily accessible, well-ventilated area for firewood. This can be an open shelf beneath the oven or a more enclosed log store.
Incorporating Smart Functionality
Maximizing the utility of your outdoor cooking hub means thinking about workflow and convenience.
- Integrated Cutting Boards: Create a permanent, removable, or pull-out cutting board from a dense hardwood like maple or oak.
- Tool Organization: Beyond simple hooks, consider custom-built inserts for drawers to keep smaller tools, like pizza cutters, thermometers, and dough scrapers, organized.
- Waste Management: Integrate a discreet bin or a pull-out drawer for a trash receptacle, making cleanup effortless.
- Shelving for Ingredients: Open shelving can keep frequently used spices, oils, and sauces within easy reach. For enclosed storage, ensure it is weather-tight.
- Mobility (Partial): While the oven itself is fixed, consider if any parts of the prep station could be made semi-mobile, perhaps with heavy-duty casters, for flexibility.
- Safety Features: Install a fire extinguisher nearby and ensure easy access to a water source. The masonry construction inherently provides excellent fire resistance, but proper planning around the cooking area is vital.
By thoughtfully integrating these finishing touches, your DIY wood-fired pizza oven stand and prep station will become more than just a place to cook; it will be a fully realized outdoor culinary destination, a testament to combining masonry, metalwork, and woodworking for an unparalleled outdoor cooking experience in 2026.
Conclusion
Building a DIY wood-fired pizza oven stand and prep station is a rewarding endeavor that significantly elevates any outdoor living space. It’s a project that challenges and refines a diverse skill set, blending the foundational strength of masonry, the robust utility of metalwork, and the refined beauty of woodworking. From the initial conceptual design to the final aesthetic and functional enhancements, each phase contributes to creating a durable, efficient, and visually stunning outdoor cooking hub. In 2026, such custom integrations are not just luxuries but reflections of a lifestyle that values craftsmanship, outdoor living, and gourmet experiences.
The satisfaction of pulling a perfectly cooked pizza from an oven you’ve meticulously built a home for, on a prep station designed for seamless workflow, is truly unmatched. This project stands as a testament to the power of combining different trades to achieve a cohesive, high-performance result.

Actionable Next Steps:
- Refine Your Design: Sketch out your dream pizza oven stand, incorporating all desired features and considering material interaction.
- Research Local Codes: Investigate building regulations and fire safety requirements for outdoor structures in your area.
- Gather Materials & Tools: Compile a comprehensive list of masonry, metalworking, and woodworking tools and materials.
- Practice Skills: If new to any of the required crafts, consider smaller projects to build confidence, such as Crafting Custom Wooden Planters or basic welding exercises.
- Start Building: Begin with the foundation, systematically progressing through each stage of masonry, metalwork, and woodworking, checking for precision at every step.
References
- O’Connell, J. (2018). The Bread Builder’s Apprentice: Mastering the Art of Extraordinary Bread. W. W. Norton & Company.
- Frankl, P. T. (2015). Complete Masonry Step-by-Step. Taunton Press.
- Petersen, L. (2012). Welding For Dummies. For Dummies.
- Krieder, S. (2017). The Woodworker’s Handbook: The Essential, Illustrated Reference. Chartwell Books.
