
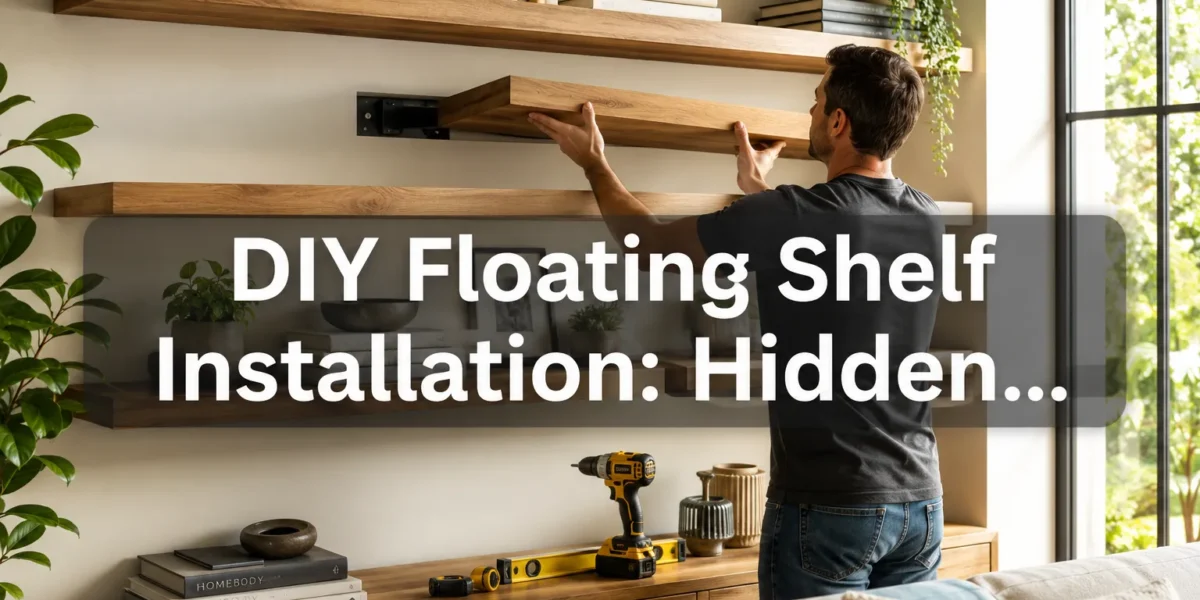
The average homeowner might install a few traditional shelves in their lifetime, but the demand for sleek, minimalist storage solutions has made DIY floating shelf installation a highly sought-after skill. The true artistry, however, lies not just in the aesthetic, but in mastering hidden bracket joinery and load-bearing techniques. Achieving a strong, invisible support system is paramount for both beauty and utility, ensuring your shelves can gracefully hold everything from decorative accents to heavy book collections without a visible trace of support. This guide demystifies the process, empowering you to build and install sturdy floating shelves with confidence, learning various joinery techniques to ensure strong, load-bearing installations for a clean, modern look in your home in 2026.
Key Takeaways
- Proper planning and wall assessment are critical for a successful DIY floating shelf installation.
- Selecting the right hidden bracket system and understanding its load-bearing capacity is essential for safety and stability.
- Accurate measurement, precise drilling, and secure fastening to wall studs are non-negotiable steps.
- Various joinery techniques, such as mortise and tenon or specialized floating shelf hardware, contribute to structural integrity.
- Finishing touches and regular maintenance ensure the longevity and aesthetic appeal of your floating shelves.
Understanding the Fundamentals of DIY Floating Shelf Installation
The allure of floating shelves comes from their clean lines and the illusion that they are seamlessly integrated into the wall. However, this minimalist appearance belies a crucial engineering challenge: how to support weight without visible brackets. The answer lies in robust hidden bracket joinery and load-bearing techniques. Before embarking on your DIY floating shelf installation, it’s vital to grasp the foundational elements that ensure both stability and safety.
First and foremost, assessing your wall is paramount. Not all walls are created equal when it comes to supporting weight. Drywall, for instance, offers minimal support on its own. For any substantial load, you must locate and secure your brackets directly into wall studs. A reliable stud finder is an indispensable tool for this task. Once studs are identified, mark their centers precisely. If installing a long shelf, you may need to hit multiple studs or consider alternative anchoring solutions for non-stud locations, although securing to studs is always preferred for maximum load-bearing capacity.
Next, consider the type of wood for your shelves. Solid wood, particularly hardwoods like oak or maple, offers superior strength and durability compared to particleboard or MDF, which may sag over time, especially with heavy loads. The thickness of your shelf also plays a significant role; thicker shelves are inherently stronger and less prone to warping or deflection.
Critical Considerations for Wall Preparation:
- Stud Location: Use a stud finder to mark the center of vertical studs. This is where your hidden brackets will be anchored.
- Leveling: Use a long level to draw a perfectly horizontal line where the bottom of your shelf will sit. This ensures a straight installation.
- Obstructions: Check for electrical wires or plumbing within the wall before drilling, especially if you’re working with older homes.
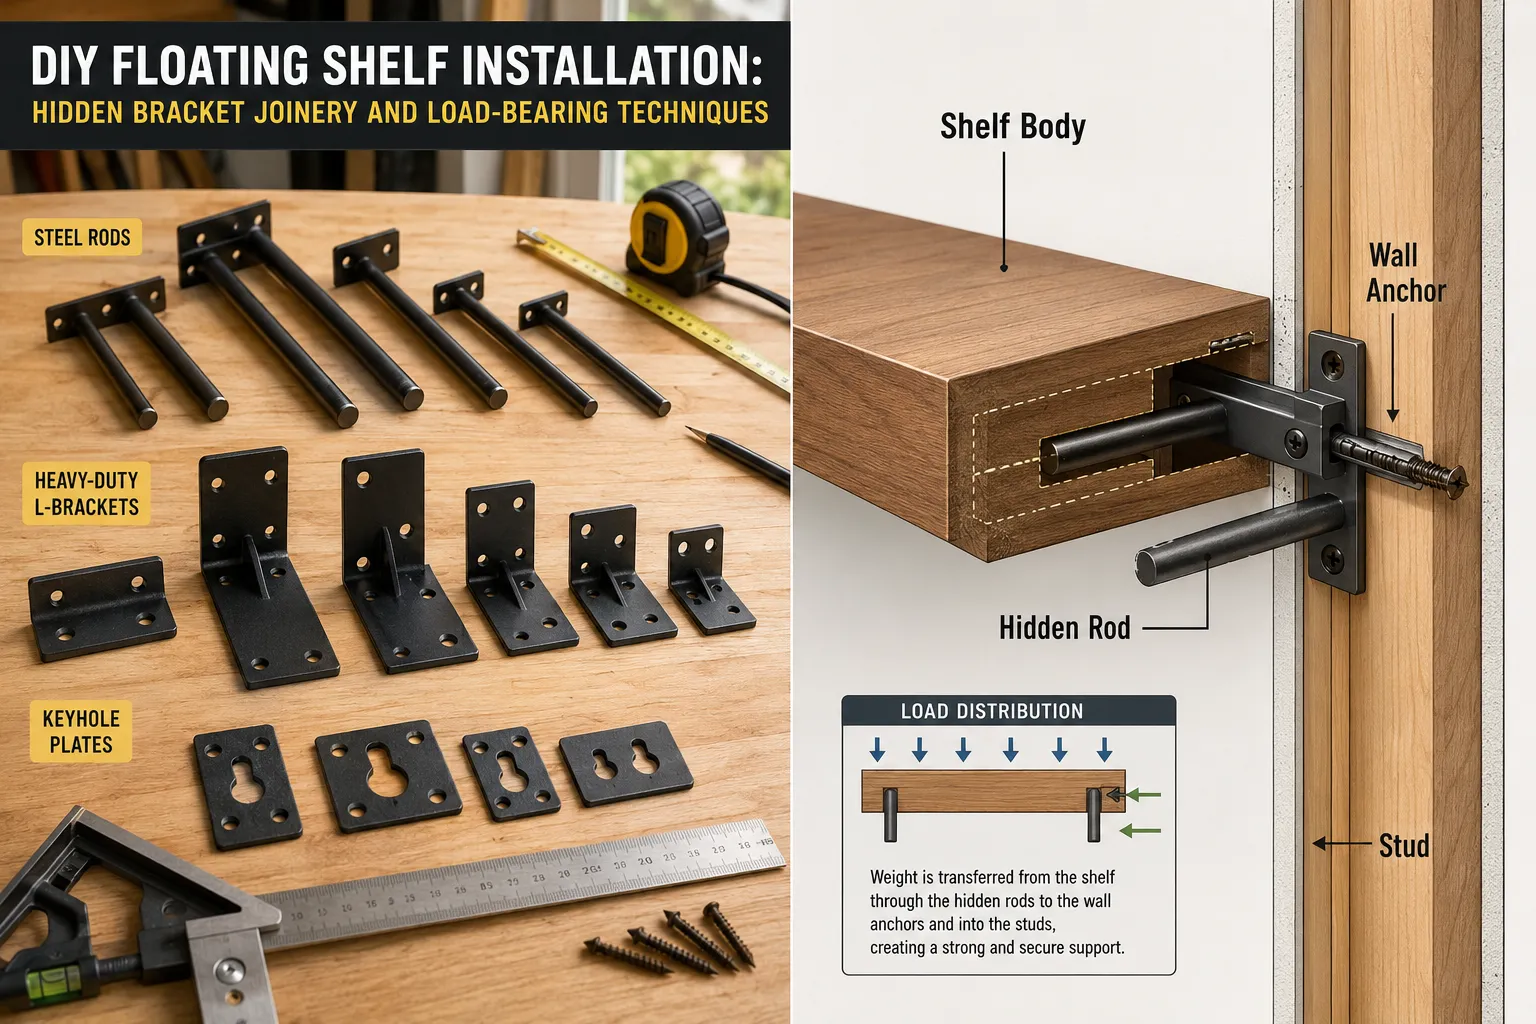
When choosing your hidden bracket system, you will encounter various types, each with specific installation requirements and load capacities. Some common types include steel rod brackets that insert directly into pre-drilled holes in the shelf, and heavy-duty L-brackets that fasten to the wall and slide into a routed channel on the back of the shelf. The choice often depends on the weight the shelf needs to bear and the thickness of the shelf itself. For more insights on different bracket types, explore our guide to unlock the secrets of brackets woodworking.
<code><div style="background-color: #f0f8ff; border-left: 5px solid #4682b4; padding: 15px; margin-bottom: 20px;">
    <h3 style="color: #2c3e50; margin-top: 0;">Tip for Heavy Loads:</h3>
    <p style="color: #34495e;">For shelves intended to hold significant weight (e.g., extensive book collections, heavy kitchenware), consider using a ledger board. This involves securely attaching a sturdy piece of wood (like a 2x4 or 2x6) horizontally to multiple studs, then attaching your hidden brackets to this ledger. The shelf then slides over both the brackets and the ledger, distributing weight more effectively across the wall structure. This method greatly enhances the load-bearing capacity and is a hallmark of professional DIY floating shelf installation.</p>
</div>
</code>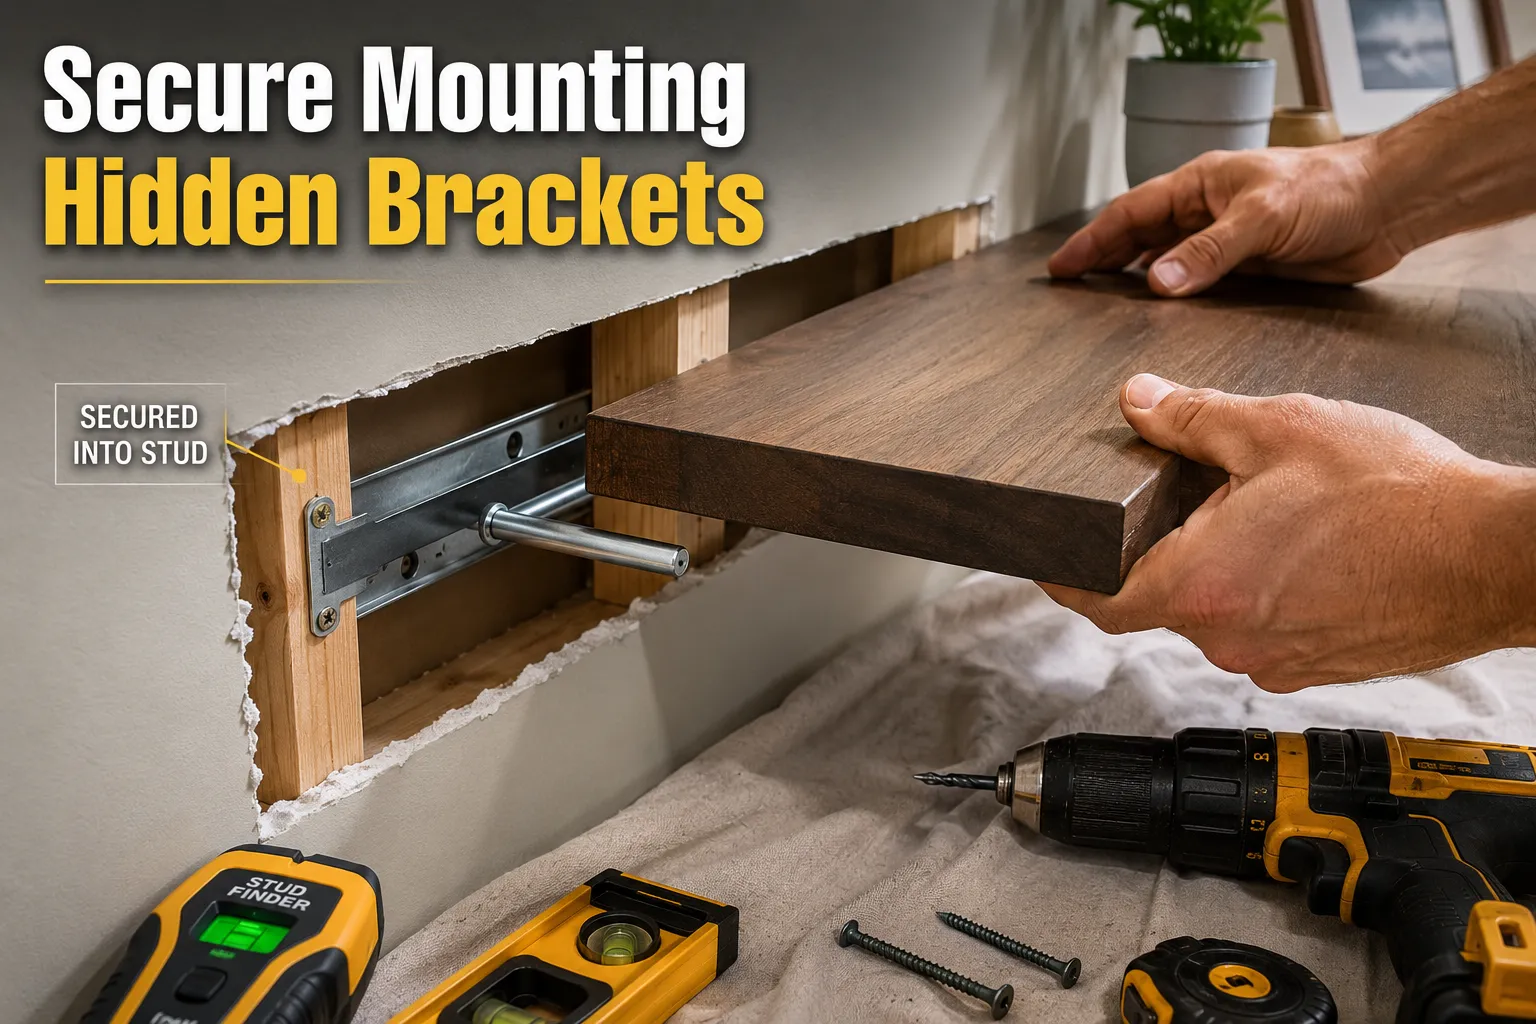
Choosing and Installing Hidden Brackets for Optimal Load Bearing
The success of your DIY floating shelf installation hinges on the appropriate selection and precise installation of hidden brackets. These specialized brackets are designed to disappear once the shelf is mounted, creating that coveted floating effect while providing robust support. Understanding the different types and their ideal applications is crucial for ensuring both aesthetics and structural integrity.
Types of Hidden Brackets
Steel Rod Brackets: These consist of solid steel rods, typically 1/2 inch or 5/8 inch in diameter, attached to a base plate that screws into wall studs. The rods extend horizontally, and the shelf is designed with corresponding holes drilled into its back edge, allowing it to slide snugly onto the rods.
- Pros: Very strong, truly invisible, ideal for thicker shelves (1.5 inches or more).
- Cons: Requires precise drilling into the shelf, less forgiving if holes are misaligned.
Heavy-Duty Floating Shelf Hardware (e.g., Keyhole Brackets or Dovetail Brackets): These systems often involve a metal bar or plate that screws into the wall studs. The shelf then has a corresponding routed channel or keyhole slots that interlock with the wall-mounted hardware.
- Pros: Distributes weight along a longer section of the wall, suitable for thinner shelves (though still recommend solid wood).
- Cons: Can be more complex to route the shelf correctly, may not be as strong as multiple steel rods for extreme weights.
Concealed L-Brackets/Wedge Brackets: Some systems use a robust L-shaped bracket that mounts to the wall, with the horizontal arm being thin enough to be routed into the back of the shelf, making it less visible. Wedge brackets work similarly, using an interlocking profile.
- Pros: Good for moderate loads, can be easier to install than full rod systems for some DIYers.
- Cons: May require precise routing to hide completely, can sometimes be slightly visible from below if not perfectly integrated.
For exceptional strength, especially when aiming for robust floating shelves, steel rod brackets are often the preferred choice. The key is to embed them deeply and securely into solid wall studs.
Installation Steps for Hidden Bracket Joinery
- Marking and Drilling Pilot Holes: Once your stud locations and level line are marked, hold the bracket base plate against the wall, ensuring it’s perfectly centered on the stud and aligned with your level line. Mark the screw holes. Use a drill to create pilot holes.
- Mounting the Brackets: Securely fasten the bracket base plate to the wall studs using appropriate length screws (typically 2.5-3 inches). Use a socket wrench or impact driver for best results, ensuring the brackets are firmly seated against the wall.
- Preparing the Shelf (for Steel Rod Brackets):
- Measure Rod Spacing: Carefully measure the exact distance between the center of each steel rod on the mounted bracket. Transfer these measurements precisely to the back edge of your shelf.
- Drill Holes: Using a drill press (highly recommended for accuracy) or a hand drill with a drilling guide, bore holes into the back of the shelf that match the diameter of the steel rods. These holes must be perfectly straight and deep enough to fully accommodate the rods, typically 6-8 inches deep for adequate support. This step is critical for successful DIY floating shelf installation. Misaligned or crooked holes will prevent the shelf from seating flush against the wall.
- Test Fit: Gently slide the shelf onto the rods to test the fit. It should slide on smoothly and seat flush against the wall. If it’s too tight, slightly enlarge the holes; if too loose, you might need shims or a friction-fit adhesive later.
- Preparing the Shelf (for Channel/Keyhole Brackets):
- Route the Channel: Use a router with a straight bit to create a channel on the back edge of the shelf that perfectly matches the profile of your wall-mounted hardware. This requires precision to ensure a snug, invisible fit. For advanced joinery techniques like this, consider mastering skills such as dovetail joinery for drawers, as the precision involved is similar.
- Test Fit: As with rod brackets, test fit the shelf onto the wall hardware to ensure it slides on smoothly and sits flush.
When attaching the shelf, apply a strong construction adhesive or wood glue into the holes or channel before sliding the shelf into place. This adds an extra layer of security, especially for heavier loads. For larger shelves, you might also consider additional mechanical fasteners through the top of the shelf into the bracket (if the design allows and they can be hidden).
Advanced Joinery and Load-Bearing Reinforcement
While standard hidden brackets provide a solid foundation for DIY floating shelf installation, incorporating advanced joinery and reinforcement techniques can significantly boost their load-bearing capacity and longevity. These methods move beyond simple bracket installation, integrating structural elements directly into the shelf design for superior strength.
Integrated Ledger Systems
One of the most effective ways to enhance load-bearing is to create an integrated ledger system. Instead of just relying on the individual bracket base plates, a continuous piece of sturdy lumber (e.g., 2×4 or 2×6) is securely fastened horizontally to multiple wall studs. This ledger acts as a robust anchor point, distributing the shelf’s weight across a wider section of the wall.
- Install the Ledger: Cut a 2×4 or 2×6 to the length of your shelf. Using a level, mark its position and secure it to every accessible wall stud with long structural screws (e.g., 3-inch construction screws). Ensure it’s perfectly level and flush with the wall.
- Attach Brackets to Ledger: Mount your hidden brackets (e.g., steel rods) to this ledger board. The ledger itself provides immense support, and the brackets then act to transfer the load from the shelf to the ledger, which is anchored to multiple studs.
- Create the Shelf Body: For this system, the “shelf” is often constructed as a hollow box. The inside dimension of this box should precisely fit over the ledger and the mounted brackets. The top, bottom, and front face of the shelf box are joined using strong joinery like biscuits, dominos, or even small dowels, providing a clean appearance. For advice on precision tools like doweling jigs, refer to our comprehensive guide.
- Install the Box Shelf: Slide the hollow shelf box over the ledger and brackets, securing it with glue and potentially a few small finishing nails from the top, driven into the top edge of the ledger.
Mortise and Tenon Integration
For the most ambitious DIYers seeking heirloom-quality strength, a mortise and tenon joint can be integrated directly into the floating shelf design. This technique is typically used when building the shelf from scratch.
- Create the Wall-Mounted Tenons: Instead of conventional metal brackets, strong hardwood tenons (protruding pieces of wood) are precisely cut from a piece of lumber that is then securely fastened into the wall studs. These tenons are typically wider and flatter than steel rods, offering a larger gluing surface.
- Cut Mortises in the Shelf: Corresponding mortises (rectangular holes) are carefully routed or chiseled into the back edge of the actual shelf.
- Assemble and Glue: The shelf is then slid onto the tenons, and the joint is secured with a strong wood glue. This creates an incredibly strong, monolithic structure. While more complex, the result is a shelf with unparalleled load-bearing capacity and a truly seamless look. This is a testament to the power of advanced joinery, similar to the techniques explored in mastering dovetail drawers for cabinets.
Internal Reinforcement and Material Selection
Even with excellent external support, the shelf material itself needs to withstand downward forces.
- Plywood Core: For thicker shelves, using a high-quality plywood core (e.g., Baltic birch) laminated with a solid wood veneer provides immense strength and stability, resisting sag better than solid wood alone, especially over longer spans.
- Torsion Box Construction: For very long or extremely heavy-duty shelves, consider a torsion box design. This involves creating a hollow box with internal webbing (like a miniature bridge truss) that significantly increases rigidity without adding excessive weight.
- Solid Wood Choice: If opting for solid wood, select hardwoods like oak, maple, or walnut, which have high bending strength. Avoid softwoods like pine for heavily loaded floating shelves.
By combining these advanced joinery and load-bearing techniques, your DIY floating shelf installation will not only achieve a stunning, minimalist aesthetic but will also offer uncompromising strength and durability, serving your home beautifully for years to come.

Conclusion
Mastering DIY floating shelf installation with hidden bracket joinery and load-bearing techniques transforms your living space with functional elegance. The key to a successful project lies in meticulous planning, from accurately locating wall studs to selecting the right bracket system and shelf material. By understanding the nuances of various hidden bracket types and applying precise installation methods, you can ensure your shelves are not only visually striking but also robust enough to support significant weight.
For those seeking to elevate their woodworking skills, exploring advanced joinery techniques like integrated ledger systems or even mortise and tenon connections can turn a simple floating shelf into a true custom masterpiece. Remember that the strength of your installation is directly proportional to the care and precision you apply at each step.
Begin your project by carefully measuring and assessing your wall, then choose a hidden bracket system that matches your shelf’s anticipated load and aesthetic goals. Take the time to drill pilot holes accurately and secure your brackets firmly into wall studs. If in doubt about a heavy load, always err on the side of over-engineering with additional reinforcement. With these techniques in hand, you are well-equipped to create beautiful, strong, and seemingly effortless floating shelves that enhance your home in 2026.
Actionable Next Steps:
- Assess Your Wall: Use a stud finder and level to map out your installation area.
- Select Your Brackets: Based on anticipated load and shelf thickness, choose the appropriate hidden bracket system.
- Gather Materials: Acquire your chosen wood, brackets, drill, level, and mounting hardware.
- Practice Precision: If new to advanced joinery, consider practicing cuts or drilling on scrap wood first.
- Install with Confidence: Follow the steps outlined, focusing on accuracy and secure fastening for a professional finish.
SEO Meta Title: DIY Floating Shelf Installation: Hidden Brackets & Load-Bearing Tech
SEO Meta Description: Learn DIY floating shelf installation using hidden bracket joinery and load-bearing techniques. Install sturdy shelves with a clean, modern look in 2026.