
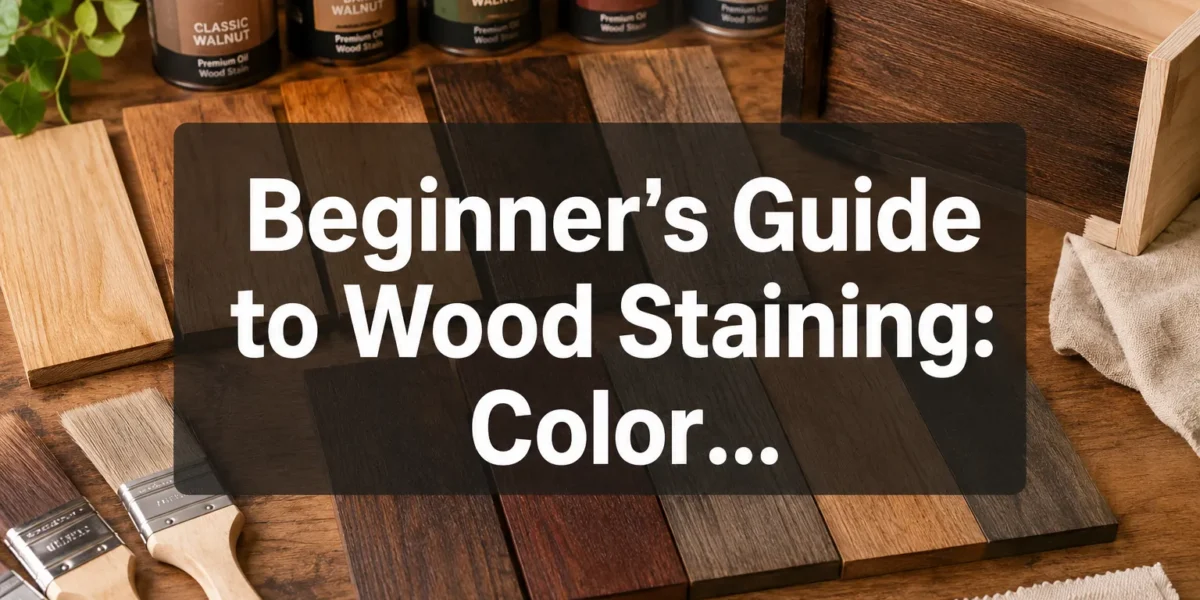
The average homeowner or aspiring woodworker often underestimates the transformative power of wood stain, viewing it as a simple coat of color rather than an integral part of enhancing wood’s natural beauty and durability. Yet, mastering the nuances of wood staining can elevate a project from ordinary to extraordinary, revealing hidden grain patterns and adding depth that paint simply cannot achieve. This Beginner’s Guide to Wood Staining: Color Selection, Application, and Troubleshooting Common Issues provides a comprehensive foundation for anyone looking to achieve professional-quality results on their woodworking projects in 2026.
Key Takeaways
- Preparation is Paramount: Proper sanding, cleaning, and conditioning are essential for an even, beautiful stain finish.
- Test, Test, Test: Always test your chosen stain color on scrap wood of the same type as your project to ensure satisfaction.
- Apply Thin, Even Coats: Over-application or uneven application is a leading cause of blotching and inconsistent color.
- Wipe Off Excess Promptly: Allowing stain to dry on the surface leads to sticky, opaque finishes.
- Troubleshooting Common Issues: Understand how to address problems like blotching, uneven color, and raised grain to salvage your project.
Beginner’s Guide to Wood Staining: Color Selection
Choosing the right wood stain color and type is perhaps the most critical step, as it dictates the final aesthetic of your project. This decision involves understanding wood species, stain types, and how they interact.
Understanding Wood Species and Grain Patterns
Different wood species absorb stain differently due to their unique cellular structure and porosity. For instance, softwoods like pine and maple are known for being blotchy because they absorb stain unevenly. Hardwoods like oak and walnut, with their open grain, tend to accept stain more uniformly, highlighting their natural patterns beautifully.
- Open-grain woods (e.g., Oak, Ash, Walnut): These woods have large pores that readily accept stain, often resulting in rich, deep colors. They are generally easier to stain evenly.
- Closed-grain woods (e.g., Maple, Cherry, Birch): With smaller, tighter pores, these woods can be prone to blotching as stain soaks in unevenly. Pre-conditioners are often necessary.
- Softwoods (e.g., Pine, Fir, Spruce): Highly prone to blotching due to variations in density. Always use a wood conditioner on these woods.
Consider the natural color of your wood as well. A light stain on a naturally dark wood will have a very different appearance than the same stain on a light-colored wood. Always work with, not against, the wood’s inherent characteristics.
Types of Wood Stains
The market offers several types of wood stains, each with distinct properties affecting application, drying time, and final appearance.
Oil-Based Stains:
- Pros: Penetrate deeply, offer rich color, long open time (easy to work with), durable finish.
- Cons: Slower drying times, require mineral spirits for cleanup.
- Best for: Most woodworking projects, especially where deep penetration and rich color are desired.
Water-Based Stains:
- Pros: Fast drying, low odor, easy water cleanup, eco-friendly, less prone to blotching on some woods.
- Cons: Can raise wood grain, faster drying can make application challenging for beginners (less open time).
- Best for: Projects requiring quick turnaround, or for achieving lighter, more translucent finishes.
Gel Stains:
- Pros: Thick consistency, excellent for preventing blotching on tricky woods (pine, maple), easy to control.
- Cons: Sits more on the surface (less penetration), can appear less transparent, requires more coats for deep color.
- Best for: Beginners, blotch-prone woods, or when staining over existing finishes.
Wiping Stains:
- Pros: Versatile, good for controlling color, easy application by wiping on and off.
- Cons: Can be thinner than gel stains, requiring careful application to avoid runs.
- Best for: Achieving controlled color depth and even finishes.
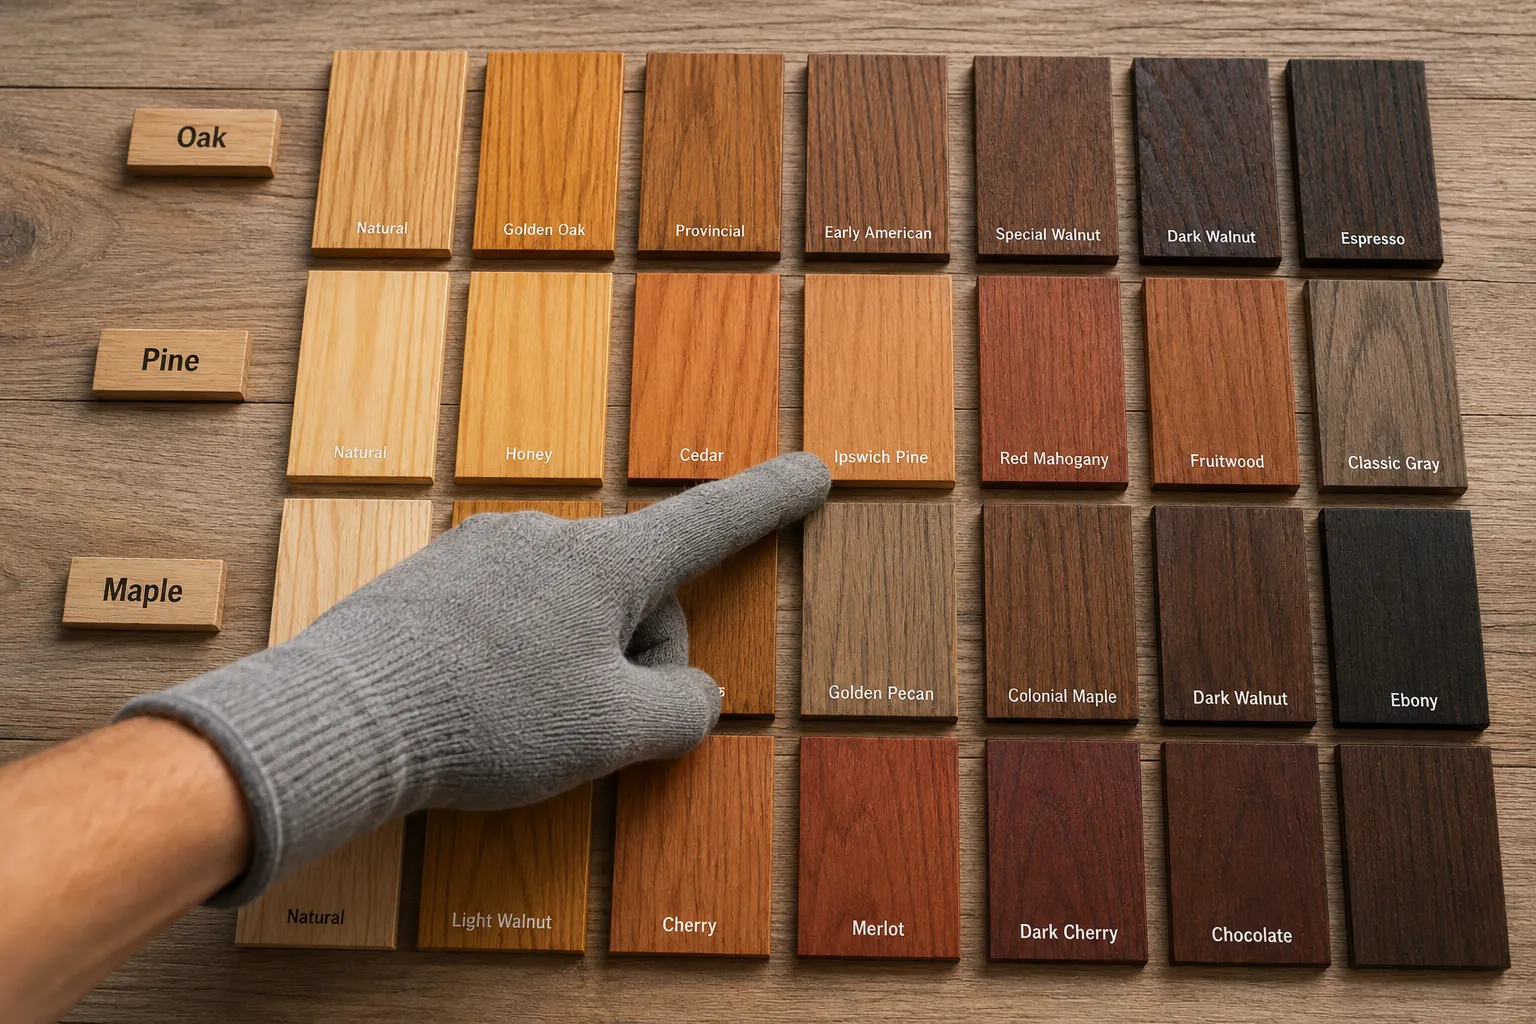
Color Theory and Matching
Choosing a color is subjective, but a few principles can guide your decision. Consider the existing decor of the space where the stained item will reside. Do you want the wood to stand out or blend in?
- Warm Tones: Reds, oranges, and yellows (e.g., cherry, mahogany, golden oak) create a cozy, inviting atmosphere.
- Cool Tones: Grays, blues, and some browns (e.g., weathered gray, espresso) offer a more modern, contemporary feel.
- Natural Tones: Clear or very light stains enhance the wood’s natural color without significantly altering it.
Crucially, always test your stain on a scrap piece of the exact same wood species you’re using for your project. The color shown on a can is only an approximation, and it will look different on various wood types. Stains also interact with the wood’s natural undertones. A gray stain on a red oak, for example, might result in a purplish hue.
Pre-Stain Wood Conditioner
For woods prone to blotching, a pre-stain wood conditioner is a game-changer. It helps to even out the wood’s porosity, allowing the stain to absorb more uniformly. Apply conditioner according to the manufacturer’s directions, typically 15-30 minutes before staining, allowing it to penetrate but not fully dry. This step is non-negotiable for softwoods and closed-grain hardwoods like pine, birch, and maple.
Beginner’s Guide to Wood Staining: Application Techniques
Proper application is key to a beautiful, lasting finish. This section breaks down the essential steps for preparing your wood and applying stain effectively.
Wood Preparation: The Foundation of a Great Finish
A flawlessly stained surface begins with meticulous preparation. This stage is non-negotiable.
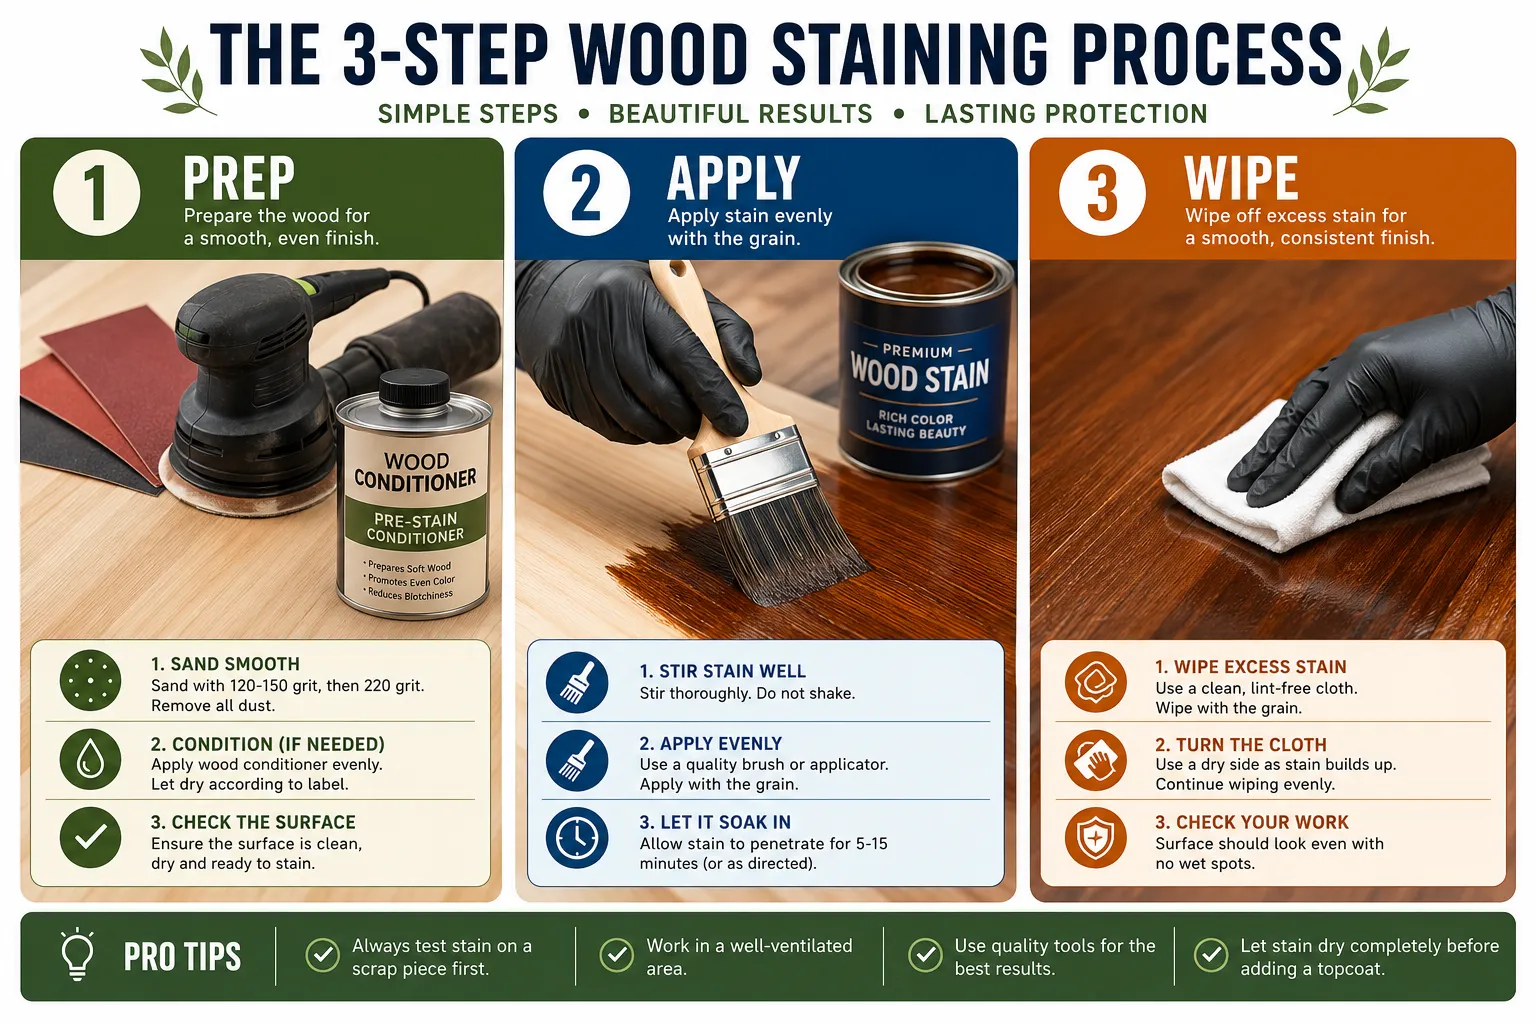
- Sanding: Start with a coarser grit sandpaper (e.g., 80-100 grit) to remove any imperfections, old finishes, or deep scratches. Gradually move to finer grits (120, 150, 180, and finally 220 grit). Each grit removes the scratches left by the previous one. Sand with the grain, never against it, to avoid visible cross-grain scratches. For intricate projects, consider exploring various essential woodworking joints and sanding techniques to ensure all surfaces are ready.
- Dust Removal: After sanding, thoroughly remove all sanding dust. Use a vacuum, then a tack cloth or a cloth dampened with mineral spirits (for oil-based stains) or water (for water-based stains). Any residual dust will mix with the stain, creating an uneven, muddy finish.
- Wood Conditioner (if needed): As discussed, apply pre-stain conditioner to blotch-prone woods. Follow the product’s instructions for application and drying time before staining.
Applying the Stain
Once the wood is prepped, it’s time to apply the stain. Work in a well-ventilated area and wear appropriate personal protective equipment (gloves, safety glasses).
Step-by-Step Application:
- Stir the Stain: Before and periodically during application, stir the stain thoroughly. Pigments can settle at the bottom, leading to inconsistent color. Do not shake, as this can introduce air bubbles.
- Apply Evenly: Use a natural bristle brush for oil-based stains, a synthetic brush for water-based stains, a foam brush, or a clean cloth. Apply stain generously but evenly, working with the grain. Avoid drips and runs. Work in small, manageable sections, especially with fast-drying stains.
- Allow Penetration: Let the stain penetrate the wood for the time recommended by the manufacturer (typically 5-15 minutes). Longer penetration times result in darker colors. For consistent results, aim for a uniform penetration time across your entire project.
- Wipe Off Excess: This is a crucial step. Use a clean, lint-free cloth to wipe off all excess stain, again working with the grain. Failure to wipe off excess stain will result in a sticky, uneven, and poorly cured finish. Use fresh areas of the cloth as it becomes saturated.
- Drying Time: Allow the first coat to dry completely. Drying times vary significantly based on stain type, humidity, and temperature (check manufacturer guidelines). Oil-based stains can take 12-24 hours; water-based stains typically dry in 1-4 hours.
- Second Coat (Optional): If you desire a darker color, apply a second coat, following the same application and wiping process. Be aware that subsequent coats will deepen the color but may obscure the grain if over-applied.
- Topcoat Application: Once the stain is completely dry and cured (which can take several days for oil-based stains), apply a protective topcoat like polyurethane, lacquer, or varnish. This protects the stained wood from moisture, scratches, and UV damage. Our article on wood finishing techniques offers more in-depth guidance on this final step.
Pro Tip: For large surfaces, consider using a paint pad applicator for more consistent and faster coverage. Always have plenty of clean rags on hand.
Troubleshooting Common Issues in Wood Staining
Even with careful planning and application, issues can arise. Knowing how to diagnose and fix them can save your project. This Beginner’s Guide to Wood Staining: Color Selection, Application, and Troubleshooting Common Issues wouldn’t be complete without addressing these potential pitfalls.
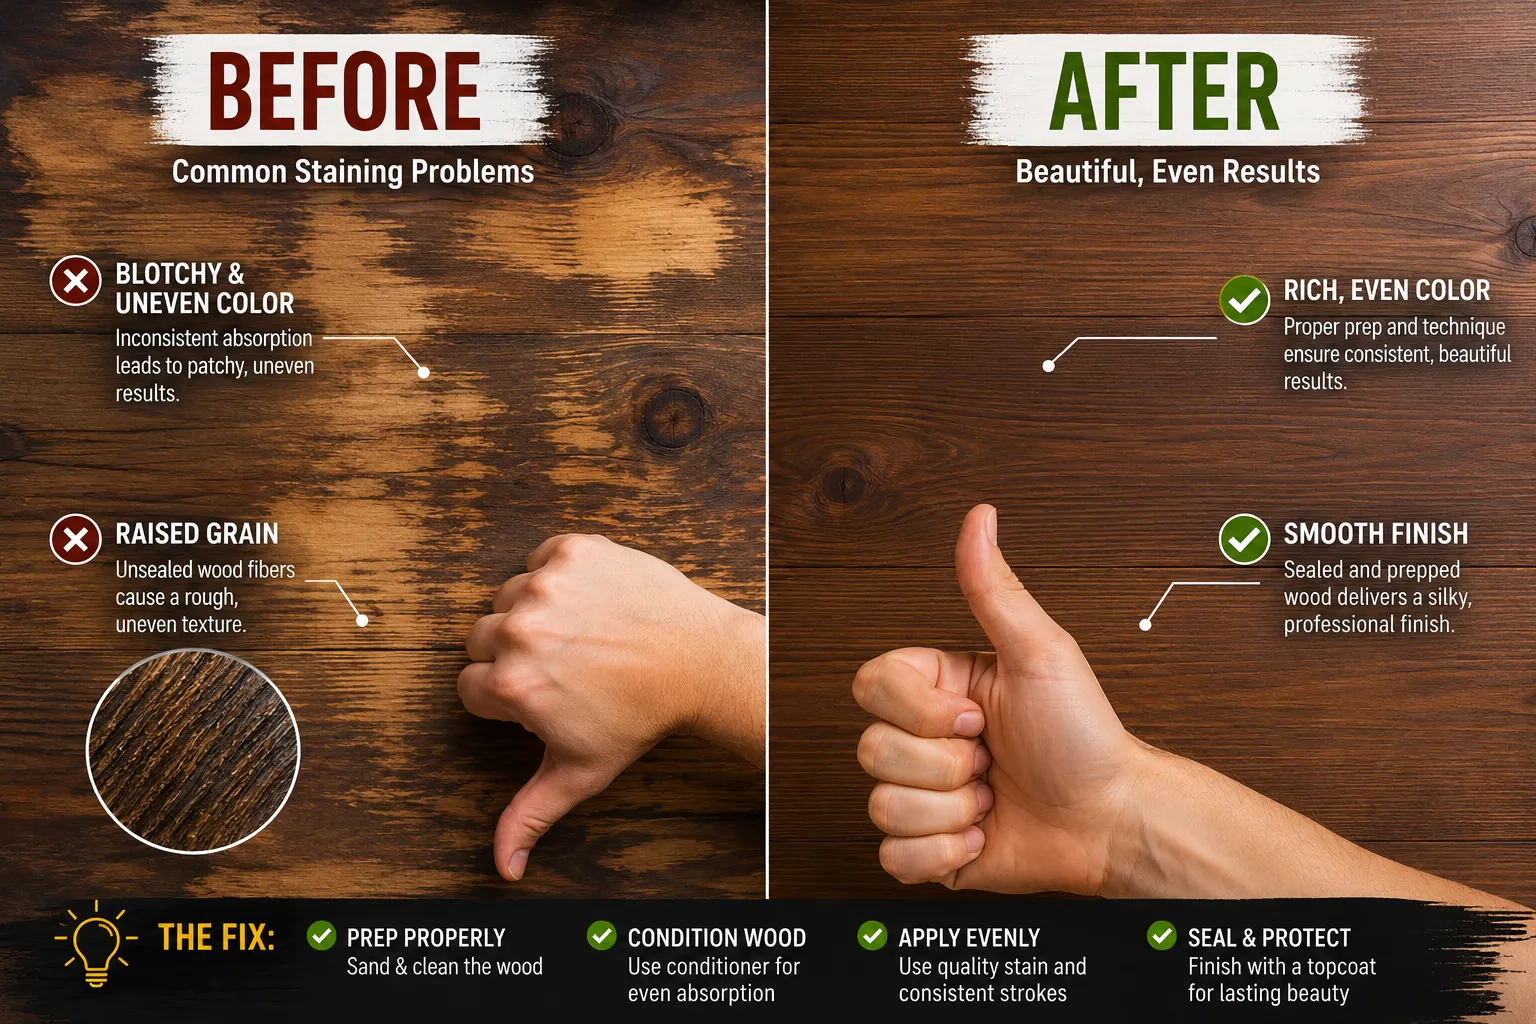
1. Blotching or Uneven Color
This is perhaps the most common staining problem, especially with softwoods like pine or closed-grain woods like maple.
- Cause: Uneven absorption of stain due to varying wood density or inadequate surface preparation.
- Solution:
- Prevention: Always use a pre-stain wood conditioner on blotch-prone woods. Ensure thorough and consistent sanding.
- Fix: If blotching occurs after staining, you may need to strip the stain entirely with a chemical stripper or by sanding it back to bare wood. Then, re-sand thoroughly, apply conditioner, and re-stain. For subtle blotches, applying a very thin layer of gel stain can sometimes even out the color without stripping. Learning about proper wood finishing techniques can help avoid this.
2. Sticky or Tacky Finish
A finish that remains sticky long after the expected drying time indicates an issue with stain application or curing.
- Cause: Too much stain was left on the surface and not wiped off, or the stain didn’t cure properly due to humidity or low temperatures.
- Solution:
- Fix: For minor tackiness, try wiping the surface gently with a cloth dampened with mineral spirits (for oil-based) or denatured alcohol (for water-based), then wiping dry immediately. For severe stickiness, you may need to strip and re-stain, ensuring all excess stain is wiped off during application. Ensure adequate ventilation and proper temperature for curing.
3. Raised Grain
Water-based stains, in particular, can cause the wood fibers to swell and stand up, resulting in a rough surface.
- Cause: Exposure to moisture in water-based stains or conditioners.
- Solution:
- Prevention: Before staining with water-based products, “water-pop” the grain. Dampen the wood surface lightly with a wet cloth, let it dry completely, then lightly sand with 220-grit sandpaper to knock down the raised fibers. This pre-raises and then removes the fibers that would otherwise lift with the stain.
- Fix: If the grain raises after staining and before a topcoat, lightly sand with 220 or 320-grit sandpaper after the stain has fully dried and cured. Be extremely careful not to sand through the stain. Reapply a very thin layer of stain if necessary, then proceed with your topcoat.
4. Lap Marks or Streaks
Visible lines or darker areas where stain applications overlapped.
- Cause: Inconsistent application, working in too large sections, or slow drying time allowing previous sections to dry before blending.
- Solution:
- Prevention: Work in smaller, manageable sections. Maintain a wet edge, meaning you apply the new stain into the still-wet edge of the previous application to ensure seamless blending.
- Fix: If lap marks are minor and the stain is still wet, try to re-wet the area and blend. Otherwise, you’ll likely need to sand back the affected area or the entire piece and re-stain.
5. Inconsistent Color Between Different Wood Pieces
When assembling a project from multiple pieces of wood, even of the same species, color variation can occur.
- Cause: Natural variations in wood porosity and color, or slight differences in sanding and preparation.
- Solution:
- Prevention: Purchase all wood for a project at the same time and from the same batch if possible. When preparing, ensure all pieces are sanded to the exact same grit and conditioned identically.
- Fix: This can be challenging. For minor differences, a tinted topcoat can sometimes help to unify the color. For significant differences, the only true fix is to strip and re-stain, attempting to adjust application time on lighter pieces to achieve a darker tone, or using different stain mixes.
Navigating these common issues with a calm, informed approach will significantly improve your confidence and results in wood staining. Always remember that practice makes perfect, and don’t be afraid to experiment on scrap pieces.
Conclusion
Wood staining is an art form that transforms raw lumber into pieces of lasting beauty. By diligently following this Beginner’s Guide to Wood Staining: Color Selection, Application, and Troubleshooting Common Issues, you are well-equipped to tackle your next woodworking project with confidence in 2026. Remember, success hinges on meticulous preparation, thoughtful color selection, precise application, and the knowledge to troubleshoot common problems. Don’t rush the process; allow each step sufficient time, and always test your methods on scrap wood. The satisfaction of a perfectly stained piece of furniture or decor is incredibly rewarding, adding warmth and character to any space. Now, go forth and bring your wooden creations to life with rich, vibrant color. For those ready to apply these skills to practical projects, consider our guide on high-demand woodworking projects for 2026.
References
- Flexner, B. (2005). Understanding Wood Finishing: How to Choose and Apply the Right Finish. Fox Chapel Publishing.
- Jewitt, J. (2014). Wood Finishing 101: The Essential Guide for All Woodworkers. Taunton Press.
- Vandette, C. (2012). Wood Finishing Book: The Step-by-Step Guide to Applying a Beautiful Finish. Sterling Publishing.
SEO Meta Title: Beginner’s Guide to Wood Staining: Colors, Application & Fixes SEO Meta Description: Master wood staining in 2026! Learn color selection, perfect application techniques, and troubleshoot common issues like blotching for stunning finishes.