


Over 60% of small workshop owners and homeowners struggle with clutter, hindering productivity and diminishing living spaces. The solution often lies not in expanding square footage, but in intelligently utilizing vertical space. This article provides a comprehensive guide to crafting [DIY Floating Wall Shelves: Space-Saving Storage for Small Workshops and Homes], focusing on precise mounting, optimal wood selection for strength, and achieving clean lines using hidden fasteners and robust pocket hole joinery. This approach is ideal for beginners eager to practice layout and finishing techniques while maximizing compact spaces with elegant, functional storage.
Key Takeaways
- Precision is Paramount: Accurate measurement and stud finding are critical for strong, level floating shelf installation.
- Material Matters: Choose solid woods like oak or maple, or high-quality plywood for durability and load-bearing capacity.
- Hidden Fasteners for Aesthetics: Specialized floating shelf brackets and pocket hole joinery ensure a clean, seamless look.
- Design for Function & Form: Plan shelf dimensions and placement to suit specific storage needs while enhancing room aesthetics.
- Safety First: Always use appropriate personal protective equipment and secure shelves properly to prevent accidents.
Understanding the Benefits of DIY Floating Wall Shelves: Space-Saving Storage for Small Workshops and Homes
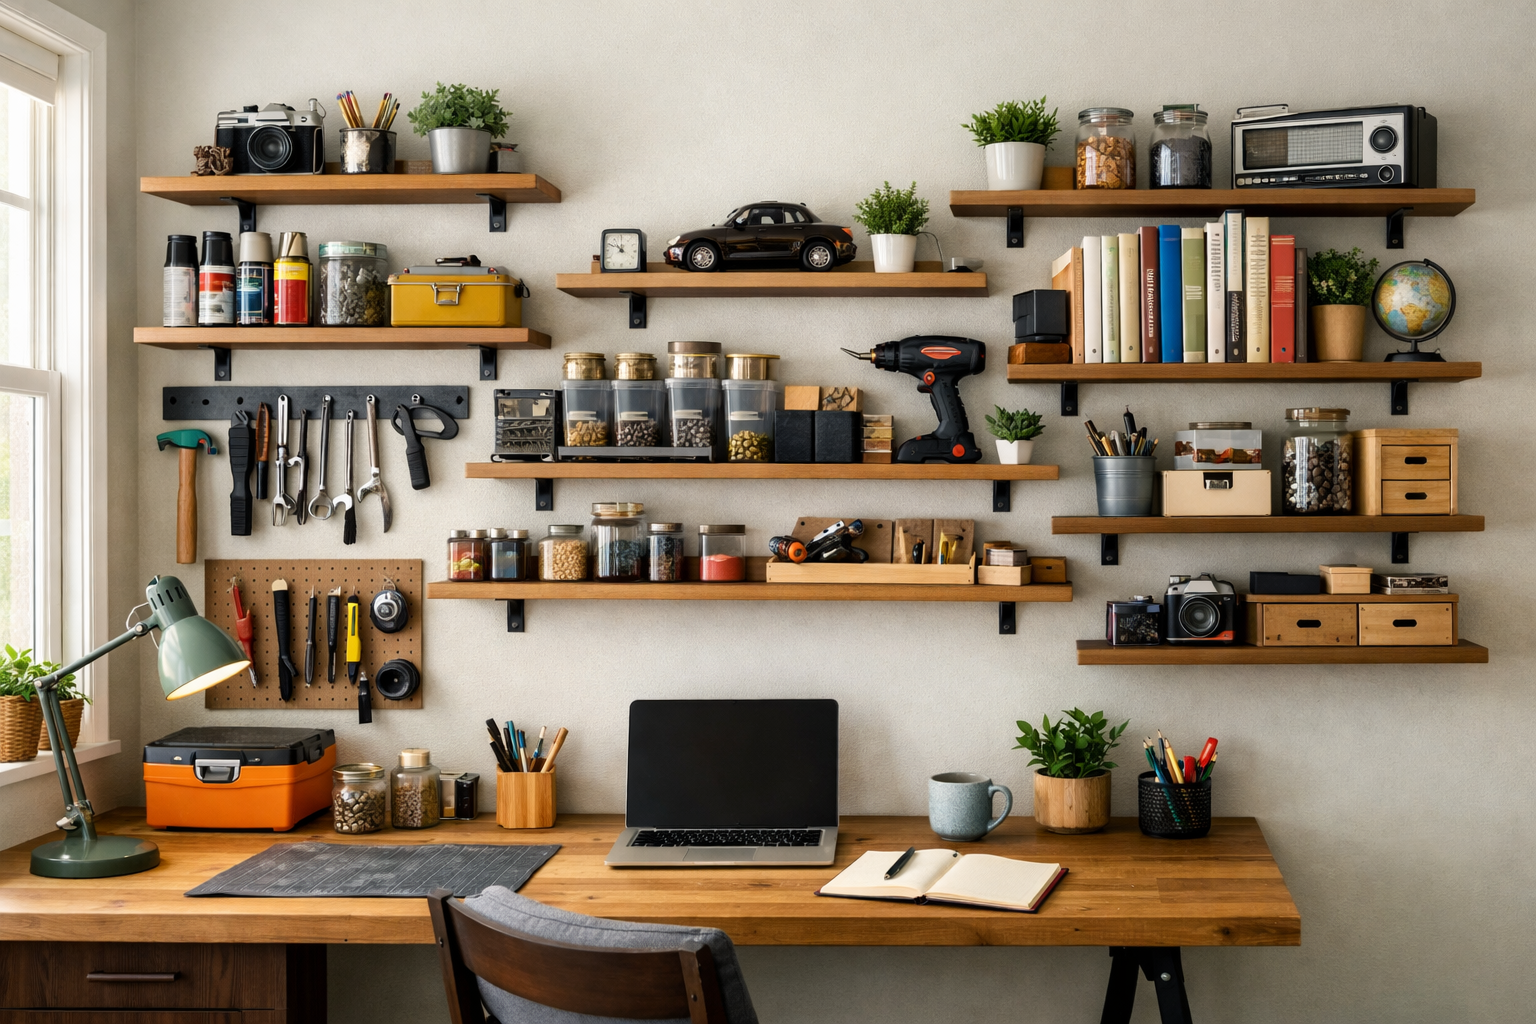
Floating wall shelves are more than just planks of wood on a wall; they are a design statement and a highly efficient storage solution, especially in settings where floor space is at a premium. For small workshops, they clear valuable workbench space, keeping tools and materials within easy reach but off the main work surface. In homes, they offer minimalist storage for books, décor, or kitchen essentials, contributing to an open, uncluttered aesthetic. The “DIY” aspect not only saves money but allows for complete customization in terms of size, material, and finish, perfectly matching the existing decor or specific functional needs.

One of the primary advantages of DIY floating wall shelves is their ability to transform unused vertical wall space into functional storage. Unlike traditional shelves with visible brackets, floating shelves create an illusion of lightness, making rooms feel larger and more open. This is particularly beneficial in smaller rooms where bulky furniture can quickly overwhelm the space. Imagine a small craft corner in a living room, or a compact kitchen – floating shelves can hold supplies, display plants, or house everyday items without visually eating into the room.
Furthermore, building your own shelves allows you to choose materials that align with your sustainability goals or design preferences. You might opt for reclaimed wood for a rustic charm or select a premium hardwood for a sleek, modern look. The process itself offers a rewarding woodworking experience, honing skills in measurement, cutting, and finishing. By mastering these techniques, you not only gain functional storage but also boost your confidence for future woodworking projects.
Essential Tools and Materials for Your Floating Shelf Project
Before diving into the build, gathering the right tools and materials is crucial for a smooth and successful project. Precision is key when working with floating shelves, so ensure your tools are in good working order.
Basic Tool List:
- Measuring Tape & Pencil: For accurate measurements and marking.
- Stud Finder: Absolutely essential for locating wall studs, which provide the secure anchor points for your shelves.
- Level (2-4 ft): To ensure your shelves are perfectly horizontal.
- Drill/Driver: For pilot holes and driving screws.
- Miter Saw or Circular Saw: For precise cuts on your lumber. A table saw can also be incredibly useful for ripping wider boards.
- Sander (orbital or block): For smoothing surfaces and edges.
- Clamps: To hold pieces securely during assembly and gluing.
- Safety Glasses & Hearing Protection: Always prioritize safety.
- Pocket Hole Jig (e.g., Kreg Jig): For strong, concealed joinery.
- Router (optional): For decorative edge profiles.
Material List:
- Wood:
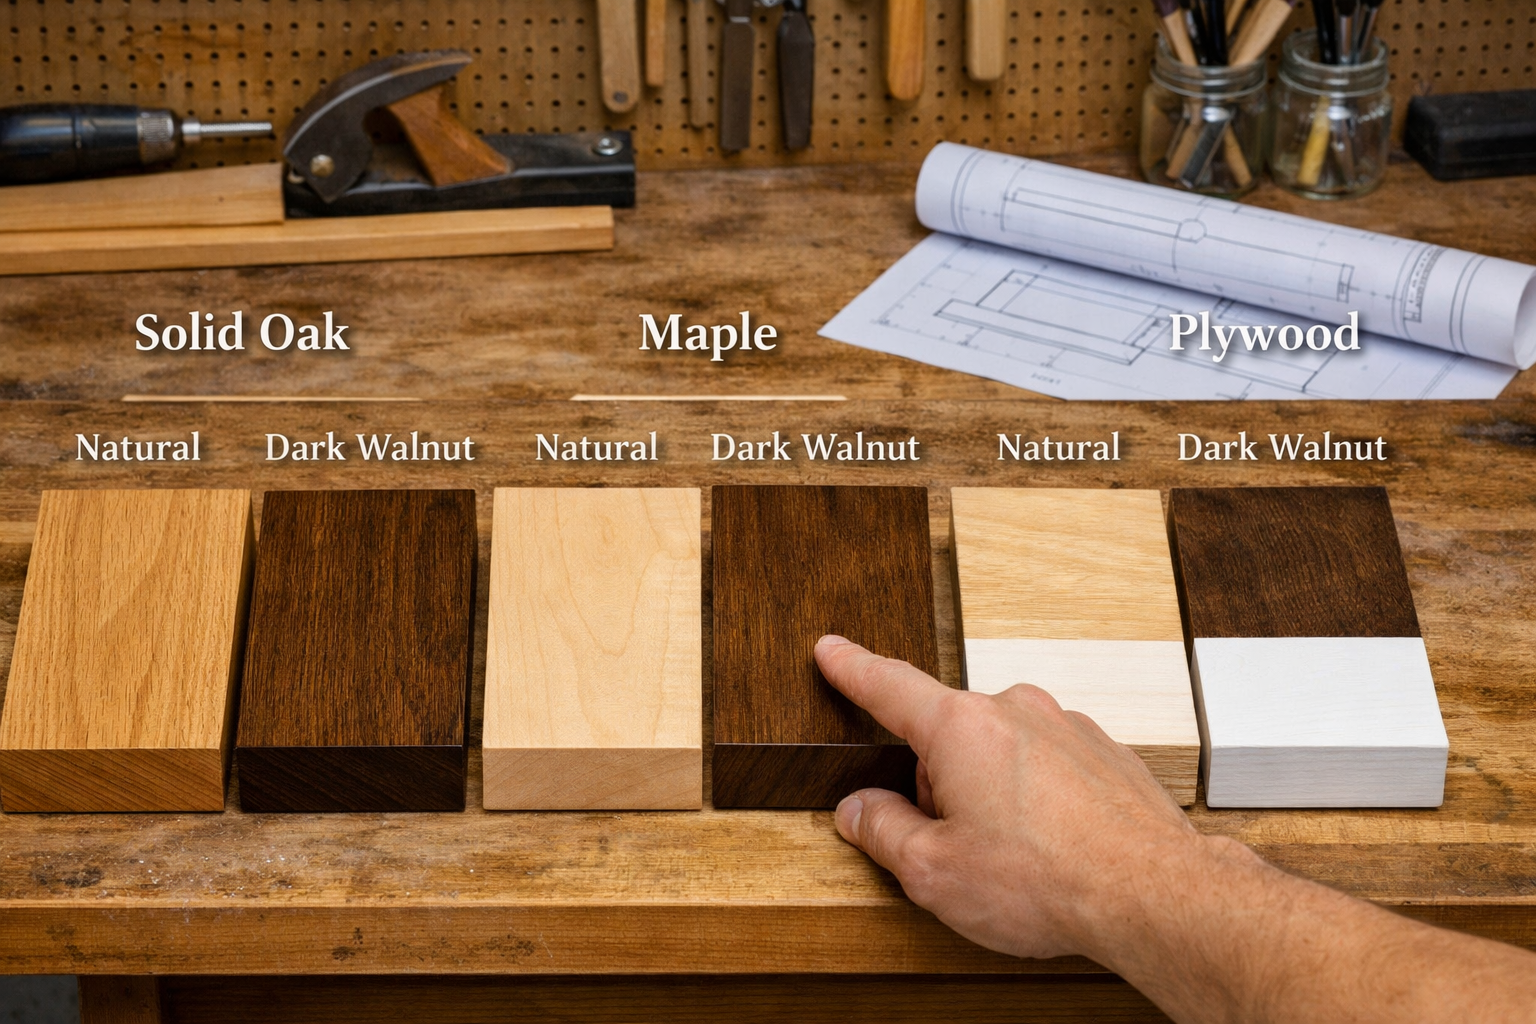
- Solid Hardwood (Oak, Maple, Walnut): Offers superior strength and durability, ideal for heavier loads.
- High-Quality Plywood (Birch, Baltic Birch): A stable and cost-effective option, especially for longer shelves or box construction. Avoid cheap MDF for floating shelves due to its weight and susceptibility to moisture.
- Floating Shelf Brackets: Choose robust metal brackets designed for significant weight. Options include hidden rod brackets or internal frame systems.
- Wood Glue: High-quality wood glue for strong joints.
- Wood Screws: Appropriate length and gauge for your brackets and wall studs.
- Sanding Paper: Various grits (e.g., 80, 120, 180, 220).
- Wood Finish: Stain, paint, polyurethane, or oil to protect and beautify your shelves.
- Drywall Anchors (if studs are not available): Use with caution and only for very light loads. Stud mounting is always preferred.
When selecting wood, consider both its aesthetic and structural properties. For example, understanding wood movement is vital for ensuring your shelves remain stable over time, especially in environments with fluctuating humidity like a workshop.

Designing and Planning Your DIY Floating Wall Shelves
The success of your DIY Floating Wall Shelves: Space-Saving Storage for Small Workshops and Homes hinges on meticulous planning and design. This stage involves determining dimensions, material choice, and the optimal placement to maximize both functionality and aesthetic appeal.
Determining Shelf Dimensions and Load Capacity
Start by assessing what you intend to store on your shelves. Will it be heavy tools, books, or light decorative items? This dictates the required length, depth, and thickness of your shelves, as well as the type of internal support system needed.
Considerations for Dimensions:
- Length: Measured to fit your wall space. Keep in mind that longer shelves require more robust support and more frequent stud mounting.
- Depth: Standard depths range from 6 to 12 inches. Too shallow, and items might fall; too deep, and they can protrude awkwardly into the room.
- Thickness: Thicker shelves generally look more substantial and can often conceal larger support brackets. A minimum of 1.5 inches for solid wood, or 2-3 inches for a hollow box construction, is common for floating shelves.
Load Capacity: The weight your shelf can hold depends on several factors:
- Wood Type: Hardwoods are stronger than softwoods.
- Shelf Thickness and Depth: Thicker, deeper shelves can support more.
- Support System: The strength of your floating shelf brackets and how securely they are anchored to wall studs.
- Spacing of Supports: More frequent support points mean greater load distribution.
Always err on the side of caution. If you plan to store heavy items, ensure your design and mounting strategy account for significant weight. For comprehensive details on advanced fastening and load-bearing design, refer to our guide on building robust floating shelves.
Choosing the Right Wood and Finish
The material you select for your DIY Floating Wall Shelves: Space-Saving Storage for Small Workshops and Homes will significantly impact their durability, appearance, and ease of construction.
| Wood Type | Pros | Cons | Best Use |
|---|---|---|---|
| Solid Oak | Extremely strong, durable, beautiful grain, good for heavy loads. | Expensive, heavy, can be challenging to work with for beginners. | Heavy-duty workshop storage, elegant home decor. |
| Solid Maple | Dense, strong, smooth grain, takes stain well, modern look. | Can be expensive, hard to cut without sharp tools. | Clean, minimalist home shelves, medium workshop loads. |
| Birch Plywood | Stable, affordable, takes paint well, good for longer shelves (box construction). | Edge banding required for clean look, not as strong as solid wood for thin shelves. | Versatile for both home and workshop, painted finishes. |
| Pine/Fir | Inexpensive, lightweight, easy to work with. | Softer, prone to dents, less weight capacity. | Light decorative shelves, beginner projects. |
Finishing Options:

- Polyurethane/Varnish: Offers excellent protection against scratches and moisture, ideal for workshop environments.
- Wood Stain: Enhances natural wood grain and allows for color customization.
- Paint: Provides a clean, modern look and can match existing decor.
- Oil Finish (e.g., Danish Oil): Penetrates the wood, offering a natural look and feel with good protection. Check out our guide on Danish Oil vs. Linseed Oil for more insights.
Consider the environment where the shelves will reside. For a workshop, durability and ease of cleaning might be prioritized. For a living space, aesthetics and a smooth finish are key.
Construction and Installation Techniques for DIY Floating Wall Shelves
Building and installing DIY Floating Wall Shelves: Space-Saving Storage for Small Workshops and Homes requires precision and attention to detail. This section covers the key steps, from preparing your wood to securing the shelves firmly to the wall.
Preparing the Wood and Assembling the Shelf Structure
For a truly “floating” look, the shelves often use a hollow box construction or thick solid timber. A popular method, especially for longer shelves, is the box construction, which uses pocket hole joinery for a strong, hidden connection.
- Cut Your Lumber:
- Cut the top, bottom, and front pieces to your desired shelf length and width.
- Cut smaller pieces for internal cleats that will run the length of the shelf. These cleats will be secured to the wall and the outer shell of the shelf will slide over them.
- For a box-style shelf, you’ll need a top, bottom, front, and two end pieces.
- Drill Pocket Holes: Using a pocket hole jig, drill pocket holes along the inside edges of the top, bottom, and end pieces where they will connect to the front piece and to each other. This creates strong, hidden joints.
- Assemble the Box (if applicable): Apply wood glue to the mating surfaces and secure the pieces together using pocket hole screws. Clamp the assembly tightly while the glue dries. Ensure all corners are square. For more on advanced joinery, consider guides on mastering dovetail drawers for cabinets, which shares similar principles of precise woodworking.
- Sand and Finish: Once assembled and the glue is dry, sand the entire shelf thoroughly, starting with a coarser grit (e.g., 80 or 120) and progressing to finer grits (e.g., 180 or 220) for a smooth finish. Apply your chosen stain, paint, or protective finish according to product instructions. Allow ample drying time.
Precise Mounting and Hidden Fasteners
This is the most critical stage for any DIY floating shelf. The goal is a level, secure shelf with no visible supports.
- Locate Wall Studs: Use a stud finder to precisely locate and mark the center of wall studs where your shelf will be installed. Aim for at least two, preferably more, studs for solid anchoring. Mark the stud centers at the desired height of your shelf.
- Pro Tip: Run your stud finder horizontally at different heights to confirm stud locations and avoid wiring or plumbing.
- Prepare the Mounting Bracket/Cleat:
- Internal Wood Cleat System: If building a box shelf, create a sturdy internal cleat (typically a 2×4 or similar strong wood) that will mount to the wall. This cleat should be slightly shorter than the shelf length and narrower than the shelf depth so it can slide inside the hollow box. Pre-drill pilot holes in the cleat at the marked stud locations.
- Metal Floating Shelf Brackets: These typically consist of metal rods or plates that extend from a wall-mounted base. Mark the drill points for these brackets precisely according to the manufacturer’s instructions, ensuring they align perfectly with your shelf’s internal channels or pre-drilled holes.
- Install the Wall Support:
- Wood Cleat: Hold the cleat against the wall, align it with your stud marks, and use a level to ensure it’s perfectly horizontal. Drill pilot holes into the wall studs through the cleat’s pre-drilled holes. Secure the cleat to the studs using long, robust wood screws (e.g., 2.5-3 inch construction screws).
- Metal Brackets: Drill pilot holes into the studs at your marked locations. Secure the metal brackets firmly to the studs using the provided hardware or appropriate heavy-duty screws. Ensure they are perfectly level and spaced correctly to engage with your shelf.
- Attach the Shelf to the Support:
- Wood Cleat System: Carefully slide your finished box shelf over the installed wood cleat. The fit should be snug. Once in place, secure the shelf to the cleat from the top and/or bottom using small finish nails or screws, angled slightly to bite into the cleat. These can be filled and touched up if needed.
- Metal Floating Shelf Brackets: Slide the shelf onto the metal rods or plates. Many systems have small set screws on the underside of the shelf that tighten onto the rods, or a system of locking pins that secures the shelf in place.
- Final Touches: Fill any visible nail/screw holes with wood filler, sand smooth, and touch up the finish. Step back and admire your new, seamless storage solution!
For workshops, integrating floating shelves with other smart workshop storage solutions can create an incredibly efficient space. Consider pairing them with modular systems for tools or a compact entryway organizer for a cohesive look throughout your home or workspace.
Conclusion
Building DIY Floating Wall Shelves: Space-Saving Storage for Small Workshops and Homes is a rewarding project that offers immense benefits in organization and aesthetics. By meticulously planning your design, selecting the appropriate materials, and employing precise construction and installation techniques—especially focusing on hidden fasteners and sturdy joinery—you can create stunning, functional storage that elevates any space. Remember, the key to success lies in careful measurement, diligent stud finding, and using robust hardware to ensure your shelves are not only beautiful but also safe and durable for years to come.
Embrace the satisfaction of crafting custom solutions that perfectly fit your needs, whether it’s decluttering a busy workshop or adding elegant display space to your home. The skills learned in this project, from precise cutting to flawless finishing, are foundational for many other woodworking endeavors.
Actionable Next Steps
- Assess Your Needs: Walk through your workshop or home. Identify areas prone to clutter and visualize where floating shelves could provide optimal storage.
- Measure and Plan: Sketch out your desired shelf dimensions and locations. Consider what items will be stored and estimate their weight.
- Gather Materials: Compile your tool and material lists, prioritizing quality wood and strong floating shelf brackets.
- Start Small: If you’re new to woodworking, begin with a shorter, less complex shelf to practice your techniques before tackling larger projects.
- Build and Install: Follow the steps outlined in this guide, emphasizing safety and precision at every stage.
By taking these steps, you’re not just building shelves; you’re creating organized, inspiring spaces that reflect your craftsmanship and ingenuity.
