
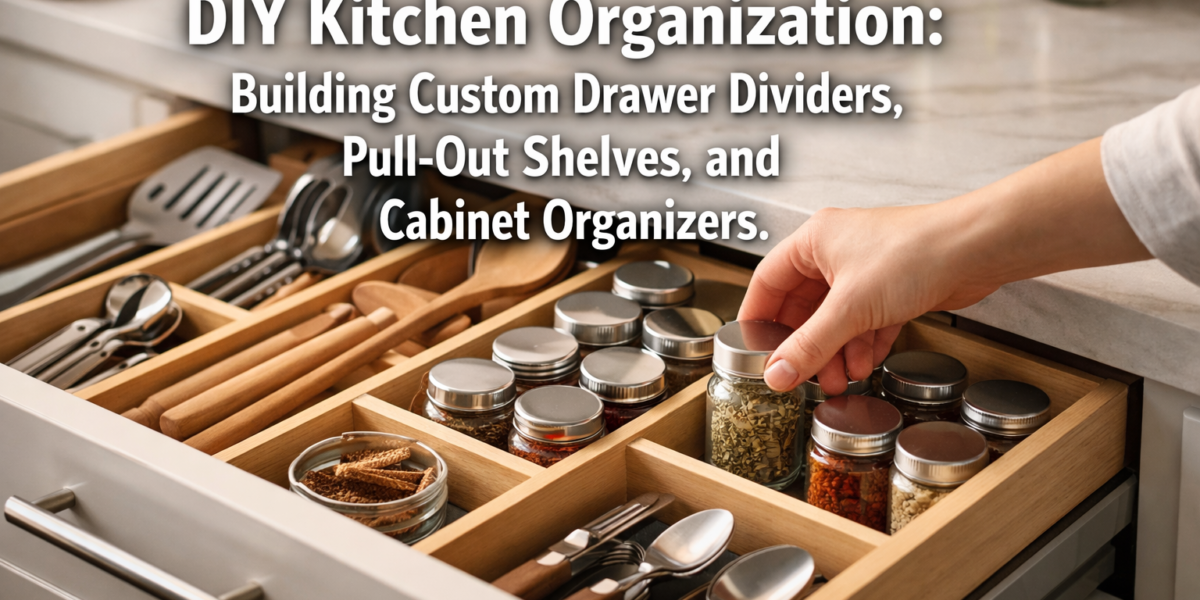

The average person spends nearly 600 hours a year in their kitchen, a space often plagued by clutter and inefficient storage (Houzz, 2024). This often leads to frustration when searching for a specific utensil or struggling with disorganized cabinets. However, a significant transformation is within reach through DIY Kitchen Organization: Building Custom Drawer Dividers, Pull-Out Shelves, and Cabinet Organizers. By taking a hands-on approach, homeowners can create tailored solutions that not only enhance functionality and accessibility but also add a touch of custom craftsmanship to their culinary hub. This article will guide you through the process of designing and constructing these essential organizational elements, empowering you to reclaim your kitchen space in 2026.
Key Takeaways
- Custom drawer dividers, pull-out shelves, and cabinet organizers offer superior functionality compared to off-the-shelf solutions.
- Careful planning and precise measurements are critical for successful DIY kitchen organization projects.
- A range of basic woodworking tools and materials can be used, making these projects accessible to various skill levels.
- These projects not only improve kitchen efficiency but also add value and aesthetic appeal to your home.
- Consider ergonomics and future needs when designing your custom organization systems.
The Foundation of Order: Custom Drawer Dividers 🍴
Drawer chaos is a universal kitchen problem. Utensils jumbled together, spices scattered, and plates stacked precariously can make cooking a chore. Custom drawer dividers, however, provide a tailored solution that fits your specific items and drawer dimensions perfectly. This section focuses on designing and building these personalized compartments for optimal DIY Kitchen Organization: Building Custom Drawer Dividers, Pull-Out Shelves, and Cabinet Organizers.

Planning and Measuring for Perfection
Before cutting any wood, meticulous planning is essential.
- Empty and Inventory: Remove everything from the drawer. Sort items by type (spoons, forks, knives, spatulas, spice jars, etc.). This helps determine the exact number and size of compartments needed.
- Measure the Drawer: Use a precise tape measure to get the internal width, depth, and height of your drawer. Always measure in several spots, as drawers can sometimes be slightly out of square. Record these measurements carefully.
- Sketch Your Layout: Draw a simple diagram of your drawer. Start arranging your inventoried items on paper, allotting space for each. Consider how frequently you use items – frequently used items should be most accessible.
- Material Selection: Plywood (1/4″ or 1/2″ thickness) or solid wood scraps are excellent choices. Hardwoods like maple or oak offer durability and a premium look, while birch or pine are more budget-friendly. Choose wood that complements your kitchen’s existing aesthetic.
| Item Type | Recommended Compartment Size (Approx.) | Material Suggestion | Notes |
|---|---|---|---|
| Utensils (large) | 3″ W x 10-12″ L x 2″ H | 1/4″ Plywood | Allows for spatulas, serving spoons |
| Utensils (small) | 2″ W x 8-10″ L x 2″ H | 1/4″ Plywood | Forks, knives, regular spoons |
| Spice Jars | 2.5″ W x 8-10″ L x 2.5″ H | 1/4″ Plywood | Angled dividers can increase visibility |
| Plates/Bowls | Custom to fit stack | 1/2″ Plywood | Vertical dividers with cleats to prevent movement |
Construction Techniques for Drawer Dividers
Building custom drawer dividers often involves simple joinery, making it a great project for beginners and experienced woodworkers alike.
- Dado and Rabbet Joints: For a professional and sturdy finish, use a router or table saw to cut dadoes (grooves) into the main divider pieces where cross-dividers will intersect. Rabbet joints can be used for the perimeter pieces to fit snugly against the drawer sides. For those looking to refine their joinery skills, mastering dovetail joinery can elevate the craftsmanship of your drawer projects.
- Simple Butt Joints: For an easier approach, simply cut all divider pieces to size and assemble them using wood glue and small brad nails or screws. Ensure all cuts are square for a tight fit. You can reinforce these with corner blocks if needed.
- Adjustable Dividers: For maximum flexibility, consider creating a grid system where dividers can be moved. This involves cutting parallel grooves into the base of the drawer (or a thin false bottom) and the top edge of the main dividers, allowing smaller cross-dividers to slide in and out.
- Finishing: Once assembled, sand all surfaces smooth (120-220 grit). Apply a food-safe finish like mineral oil, butcher block oil, or a clear polyurethane to protect the wood and make it easy to clean.
“The beauty of DIY organization lies in its ability to adapt perfectly to your unique needs, something off-the-shelf solutions rarely achieve.”
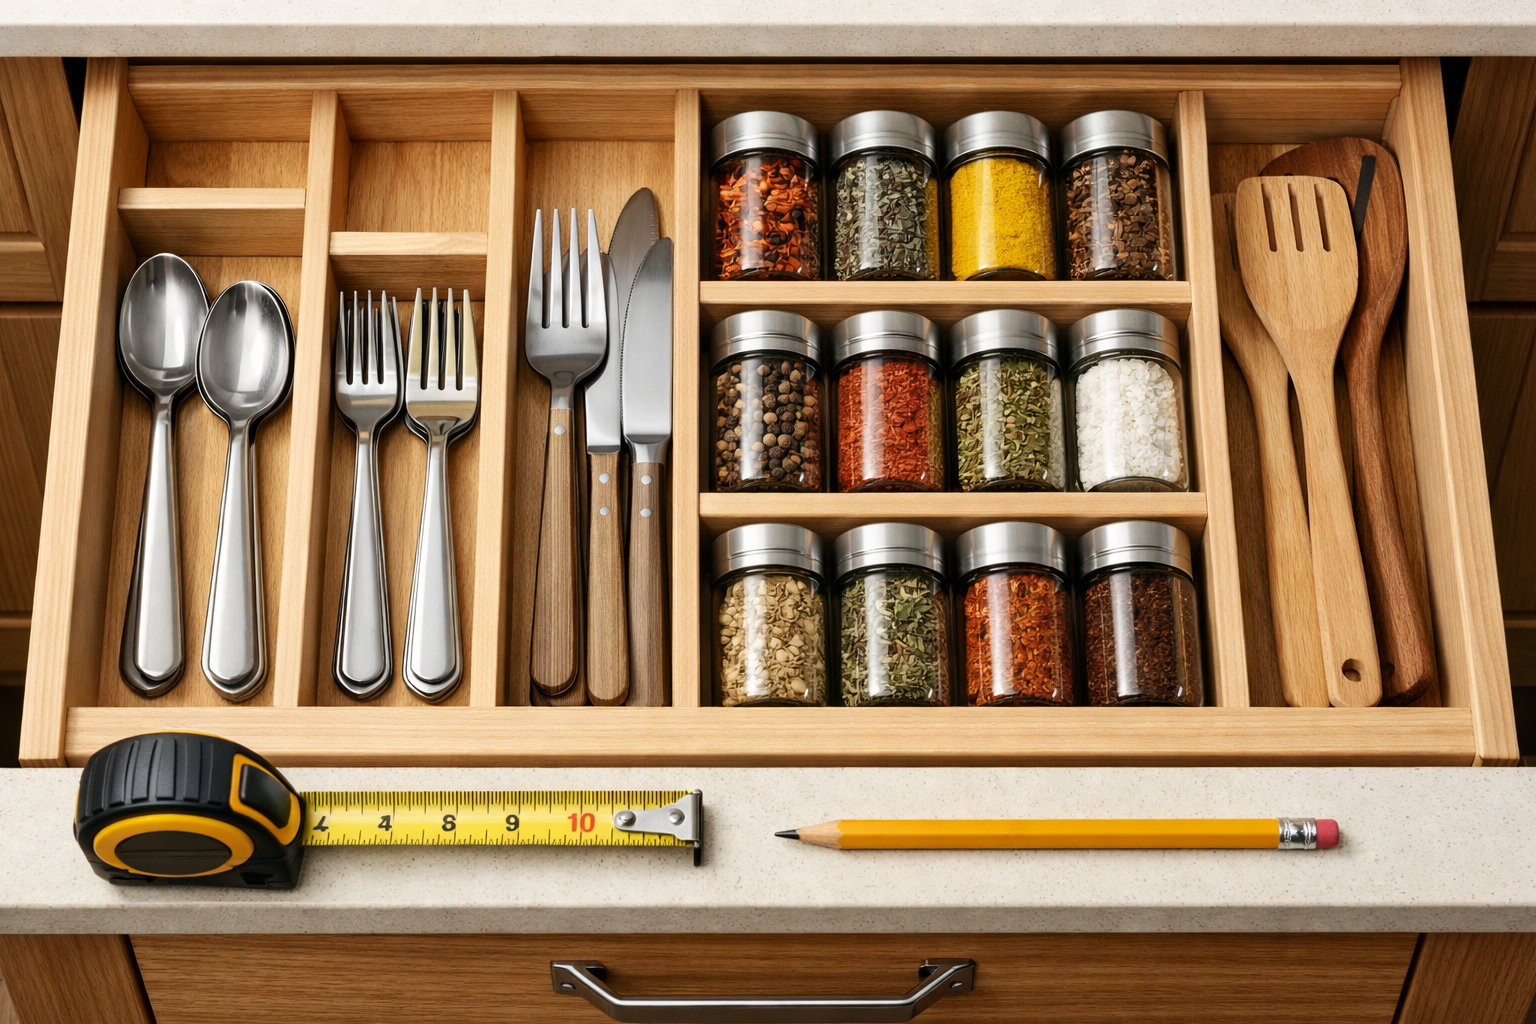
Specifics for Spices and Plates
- Spice Drawer Inserts: For spices, consider a tiered or angled design. Angled inserts allow you to lay jars on their sides, making labels visible at a glance. You can also build a dedicated spice rack as a pull-out drawer.
- Plate and Bowl Dividers: For heavy items like plates and bowls, vertical dividers are ideal. Ensure they are tall enough to support the items and consider adding a thin strip of wood (cleat) to the drawer bottom on either side of the divider to prevent it from shifting under weight. Using 1/2″ plywood for these dividers provides extra stability.
By investing a little time and effort, your drawers can go from chaotic to impeccably organized, making every cooking experience more enjoyable and efficient.
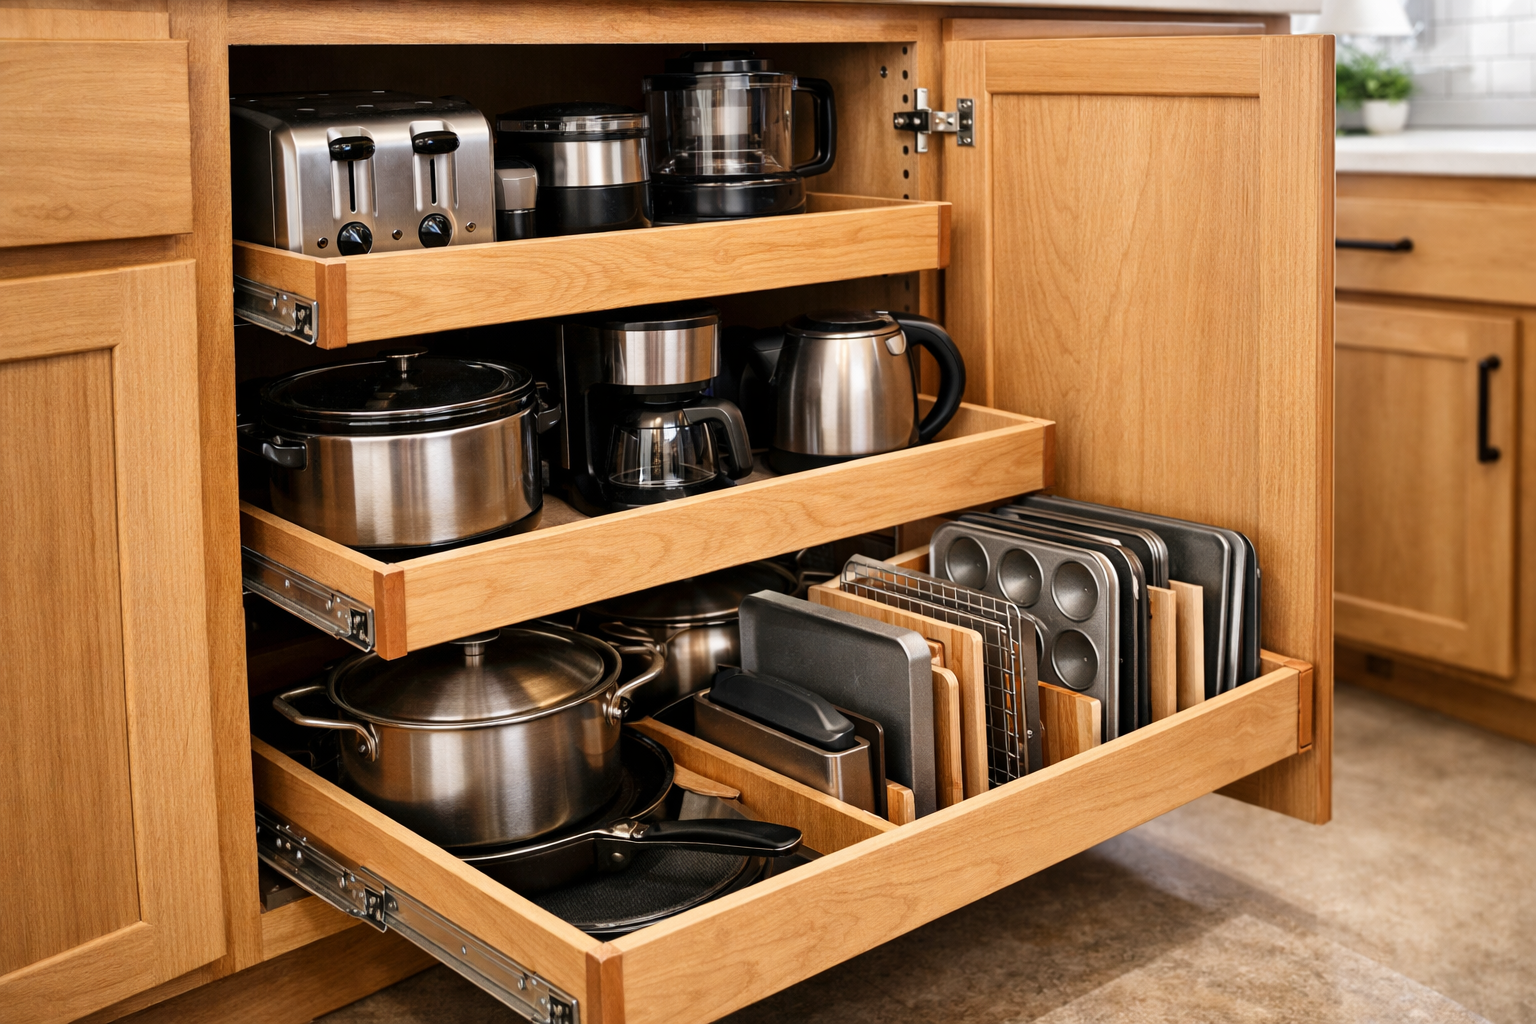
Enhancing Accessibility: Building Pull-Out Shelves and Cabinet Organizers 🏗️
Deep cabinets, especially lower ones, are notorious for becoming black holes where items get lost or forgotten. DIY Kitchen Organization: Building Custom Drawer Dividers, Pull-Out Shelves, and Cabinet Organizers truly shines when tackling these challenging spaces. Pull-out shelves and custom cabinet inserts transform hard-to-reach areas into highly accessible and functional storage.
Designing Pull-Out Shelves
Pull-out shelves (often called roll-out trays or ROTs) bring the contents of your cabinet directly to you.
- Assess Cabinet Interior: Measure the internal width, depth, and height of your cabinet opening. Account for any hinges or obstructions.
- Determine Shelf Quantity and Spacing: Decide how many shelves you need and their vertical spacing. Consider the height of items you’ll store (e.g., large pots, small appliances, cleaning supplies).
- Choose Drawer Slides:
- Side-Mount Slides: Most common, easy to install, come in various weight capacities. Require precise side clearance.
- Under-Mount Slides: Hidden beneath the shelf, offering a cleaner look. Often more expensive and require specific shelf design.
- Heavy-Duty Slides: Essential for shelves holding heavy items like stand mixers or cast iron cookware.
- Full Extension vs. 3/4 Extension: Full extension slides allow the shelf to come entirely out of the cabinet, offering maximum access.
- Material Selection: 1/2″ or 3/4″ plywood is recommended for the shelf bottom, with 1/2″ solid wood or plywood for the sides. Thicker material means greater strength.
Constructing Pull-Out Shelves
Building a pull-out shelf involves creating a sturdy box and attaching it to drawer slides.
- Cut Components: Cut the bottom and four side pieces for each shelf box.
- Assemble the Box: Use durable joinery methods like rabbet joints, dadoes, or pocket screws for strong connections. Apply wood glue to all joints before fastening. Ensure the box is perfectly square.
- Install Slides:
- Attach the inner slide members to the sides of the shelf box, ensuring they are flush with the bottom edge.
- Attach the outer slide members to cleats or blocking inside the cabinet. Use a level and spacers to ensure slides are perfectly parallel and level. For cabinet construction, exploring resources like building ergonomic workshop furniture can offer insights into robust joinery and stability.
- Test Fit: Carefully slide the shelf into place to ensure smooth operation. Adjust if necessary.
| Feature | Benefit | Tooling Consideration |
|---|---|---|
| Full Extension | Maximum access to items at the back | Requires appropriate drawer slide length |
| High Sides | Prevents items from falling off | Can impact maximum height of stored items |
| Heavy-Duty Glides | Essential for heavy loads (e.g., small appliances) | Ensure cabinet structure can support weight |
| Front Panel | Aesthetically matches existing cabinetry | Requires careful alignment with existing drawer/door fronts |
Custom Cabinet Organizers
Beyond pull-out shelves, a variety of static and dynamic cabinet organizers can be built.
- Vertical Dividers: Create slots for cutting boards, baking sheets, or platters. These can be fixed or adjustable within a cabinet.
- Tiered Shelving: For corner cabinets or taller spaces, build tiered shelves (e.g., a lazy Susan or fixed corner shelves) to make items visible and accessible.
- Door-Mounted Organizers: Utilize the inside of cabinet doors for shallow storage, perfect for foil, wraps, or small utensils.
- Under-Sink Organizers: Design custom U-shaped shelves or pull-outs to navigate around plumbing, maximizing this often-wasted space.
When building these, consider the cabinet’s existing structure and ensure any added weight is supported. Reinforce cabinet walls if necessary, especially for heavy pull-out units. These solutions significantly enhance the functionality and ergonomics of your kitchen.
Maximizing Every Inch: Advanced Cabinet Organization Strategies 📏
A truly organized kitchen extends beyond drawers and pull-out shelves. It involves a holistic approach to every cabinet, pantry, and corner. This section delves into advanced strategies for DIY Kitchen Organization: Building Custom Drawer Dividers, Pull-Out Shelves, and Cabinet Organizers, focusing on smart solutions for specific challenges and aesthetic integration.
Specialized Cabinet Inserts
Certain kitchen items demand unique storage solutions. Building these custom inserts ensures everything has its place.
- Waste and Recycling Centers: Integrate pull-out bins for trash and recycling directly into a base cabinet. This often requires heavy-duty slides and a sturdy frame to support the bins.
- Pantry Pull-Outs: For tall pantry cabinets, a full-height pull-out pantry unit on heavy-duty slides can hold numerous shelves, bringing all contents forward with a single pull. This is a complex build but offers immense storage.
- Appliance Garages: Conceal small appliances like blenders or toasters behind a retractable door or within a dedicated cabinet with a roll-up front.
- Under-Counter Knife Blocks: Build a custom knife block that slides out from under the counter or fits neatly into a drawer, protecting blades and keeping them handy. For more unique storage ideas, consider how DIY smart home integration with custom wooden enclosures could inspire hidden storage compartments.
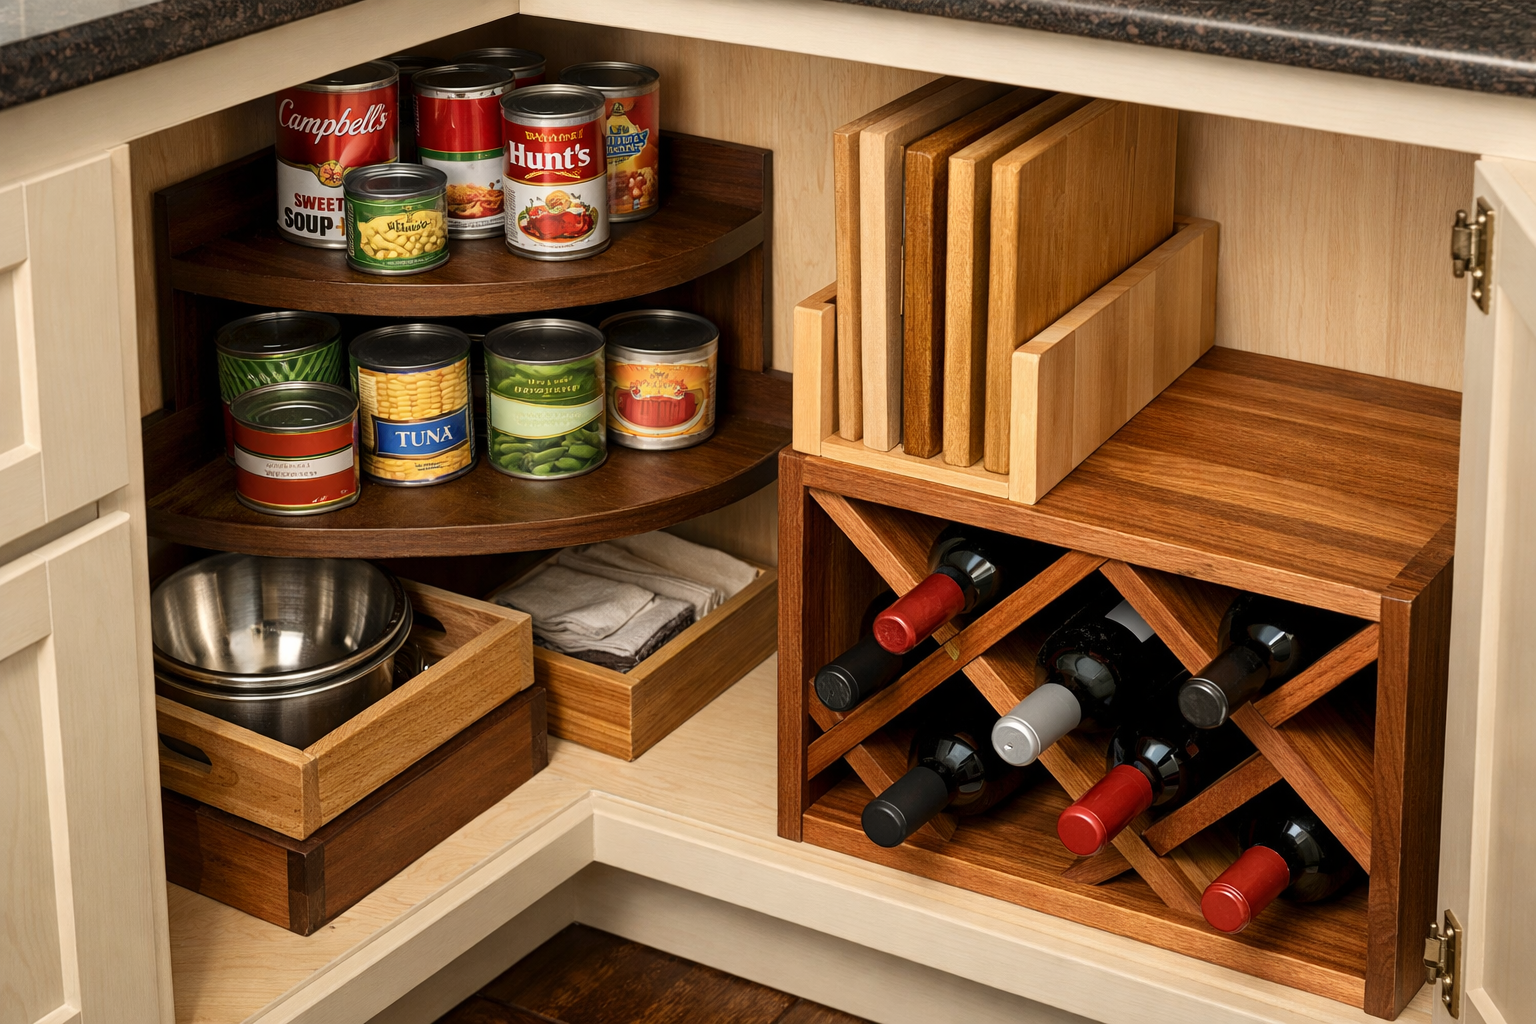
Corner Cabinet Solutions
Corner cabinets are notorious for being difficult to organize.
- Lazy Susans: Building custom lazy Susans (rotating shelves) is a classic and effective solution. They can be full-round or pie-cut, single or multi-tiered, and offer excellent access to items.
- Blind Corner Pull-Outs: For blind corner cabinets, specialized hardware allows shelves to pull out and then pivot, bringing the contents from the deepest part of the cabinet into the open. While the hardware can be expensive, building the custom wooden shelves to fit it is a rewarding DIY project.
Integrating Aesthetics and Functionality
Custom organization shouldn’t just be functional; it should also enhance your kitchen’s look.
- Matching Materials: Use wood types and finishes that match or complement your existing cabinetry for a seamless, built-in appearance.
- Hidden Joinery: For advanced woodworkers, utilizing hidden joinery methods like mortise and tenon or specialized biscuit joints can create clean, professional-looking pieces. More on joinery can be found in our guide on hand tool joinery for visible wood joints.
- Custom Floating Shelves: Beyond cabinet interiors, consider custom floating shelves for open storage of decorative items or frequently used essentials.
- Labeling Systems: Once everything is organized, a consistent labeling system (e.g., chalkboard labels, printed labels) ensures everyone knows where items belong, maintaining order in the long run.
The goal is to create a system where every item has a designated, easily accessible home. This not only speeds up cooking and cleaning but also reduces visual clutter, creating a more serene and enjoyable kitchen environment.

Tools and Materials for Your DIY Projects
Embarking on DIY Kitchen Organization: Building Custom Drawer Dividers, Pull-Out Shelves, and Cabinet Organizers requires a selection of tools and materials. Here’s a comprehensive list:
Essential Tools
- Measuring Tools: Tape measure, ruler, square, pencil. Precision is paramount.
- Cutting Tools:
- Circular Saw or Table Saw: For making straight, accurate cuts on plywood and solid stock. A table saw is ideal for repeatability.
- Miter Saw: Excellent for precise cross-cuts.
- Jigsaw: For cutting curves or intricate shapes (less common for these projects but useful).
- Drilling/Fastening Tools:
- Cordless Drill/Driver: For drilling pilot holes and driving screws.
- Brad Nailer (Optional but Recommended): For quickly assembling dividers and shelves with brad nails.
- Clamps: Essential for holding pieces together while glue dries.
- Sanding Tools: Orbital sander, sanding blocks, sandpaper (various grits).
- Router (Optional): For cutting dadoes, rabbets, and decorative edges.
- Safety Gear: Safety glasses, hearing protection, dust mask/respirator.
Recommended Materials
- Wood:
- Plywood (1/4″, 1/2″, 3/4″): Versatile and stable for drawer bottoms, dividers, and shelf boxes. Birch or maple plywood are good choices.
- Solid Wood (1/2″, 3/4″): For drawer sides, fronts of pull-out shelves, or exposed dividers where aesthetics are important.
- Wood Glue: High-quality wood glue for strong, lasting joints. For selecting the right adhesive, consult the ultimate guide to wood glue.
- Hardware:
- Drawer Slides: Full extension, side-mount or under-mount, with appropriate weight capacity.
- Screws: Various sizes for securing slides and assembling components.
- Brad Nails (if using brad nailer): For quick assembly.
- Shelf Pins/Supports: If making adjustable shelves within a cabinet.
- Finishing Supplies:
- Wood Filler: To fill any small gaps or imperfections.
- Sandpaper: Various grits (e.g., 120, 180, 220).
- Stain or Paint (Optional): To match existing cabinetry.
- Polyurethane or Food-Safe Oil: For protection and durability.
By having these tools and materials on hand, you’ll be well-equipped to tackle your kitchen organization projects efficiently and effectively in 2026.
Conclusion
Transforming your kitchen into an organized, highly functional space is an incredibly rewarding endeavor. Through DIY Kitchen Organization: Building Custom Drawer Dividers, Pull-Out Shelves, and Cabinet Organizers, you gain not just storage, but a personalized system designed precisely for your needs. From meticulously divided drawers that bring peace to utensil chaos, to accessible pull-out shelves that eliminate deep-cabinet dilemmas, each custom-built solution enhances your daily culinary experience.
As you embark on these projects in 2026, remember that precision in planning and measurement is your best ally. Start with smaller projects like drawer dividers to hone your skills, then advance to pull-out shelves and more complex cabinet inserts. The result will be a kitchen that not only looks beautifully coherent but also functions with unparalleled efficiency, reflecting your craftsmanship and attention to detail. Reclaim your kitchen, one custom-built organizer at a time.
Actionable Next Steps:
- Inventory Your Kitchen: Go through your drawers and cabinets to identify areas of greatest need and list all items to be organized.
- Measure Accurately: Take precise internal measurements of all target drawers and cabinets.
- Sketch Designs: Create simple drawings of your desired organization solutions, mapping out compartment sizes and shelf placements.
- Gather Materials and Tools: Purchase necessary wood, hardware, and ensure you have the required tools for your chosen projects.
- Start Small: Begin with a simple drawer divider project to build confidence and skills before moving to more complex pull-out shelves.
