
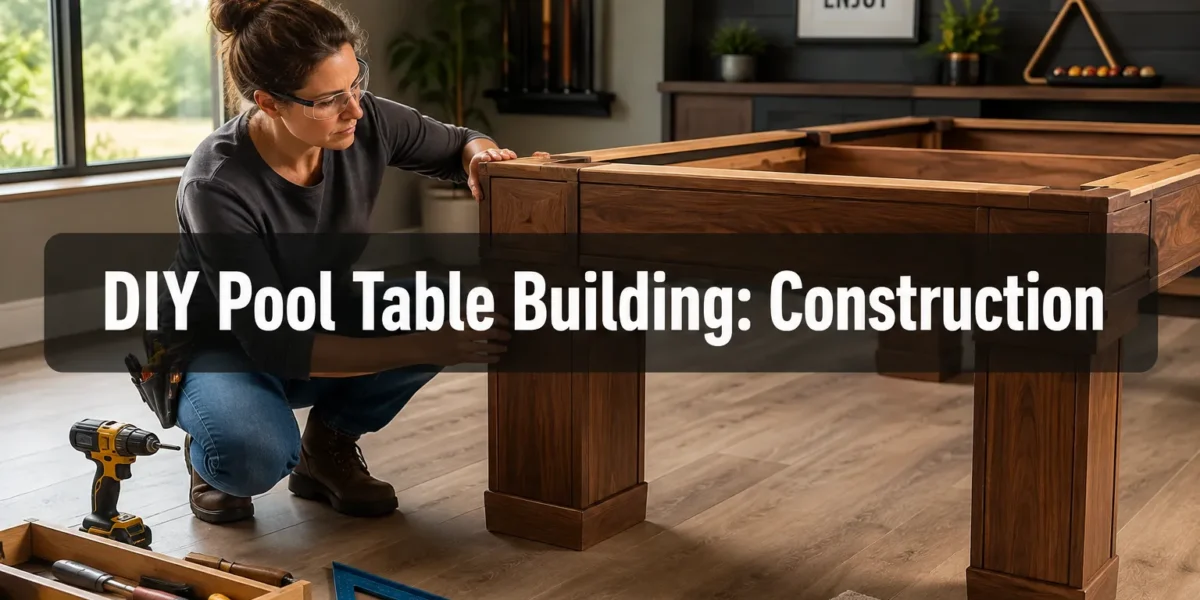
The ambition to craft a regulation-size pool table from scratch represents one of woodworking’s most rewarding, yet challenging, endeavors. This guide to DIY Pool Table Building: Construction, Leveling, and Slate Installation for Game Rooms will demystify the process, empowering skilled hobbyists to create a lasting centerpiece for their recreational spaces. Far beyond mere aesthetics, building a pool table demands precision in joinery, structural integrity, and meticulous calibration, directly impacting gameplay quality. Undertaking this project offers not only significant cost savings compared to purchasing a high-end table but also the immense satisfaction of creating a custom, high-performance piece designed to your exact specifications.
Key Takeaways
- Foundation is Critical: A robust and perfectly square frame is the cornerstone of a professional-grade pool table, dictating long-term stability and playability.
- Precision in Leveling: Achieving a perfectly level playing surface is paramount. This involves careful shimming and adjustment of legs after the table is fully assembled.
- Slate Handling and Installation: Slate is heavy and fragile; proper lifting, positioning, and seaming are essential for a smooth, consistent playing surface.
- Material Selection Matters: Choosing high-quality, stable hardwoods and durable felt will ensure your DIY pool table performs and endures for years.
- Patience and Attention to Detail: Success in this complex project hinges on meticulous execution at every stage, from initial cuts to final felt stapling.
Mastering DIY Pool Table Building: Frame Construction
The journey of DIY Pool Table Building: Construction, Leveling, and Slate Installation for Game Rooms begins with a solid, well-engineered frame. This structural skeleton supports the immense weight of the slate and provides the rigidity necessary for consistent gameplay. Without a robust and square frame, no amount of leveling or careful slate installation can compensate for underlying instability.
Designing Your Pool Table Frame
Before cutting any wood, a detailed plan is crucial. Standard pool table sizes range from 7-foot (bar size) to 9-foot (regulation size), each with specific internal dimensions for the playing surface. Your design must account for:
- Leg Assemblies: These provide primary support. Common designs include single pedestals, double pedestals, or four-leg systems. Ensure legs are sturdy enough to bear hundreds of pounds.
- Main Aprons/Side Rails: These form the perimeter of the table, connecting the legs and supporting the slate. They must be perfectly straight and dimensionally stable.
- Cross Beams/Center Supports: Crucial for preventing sag in the middle of the table, especially with multi-piece slate. These should run perpendicular to the long aprons.
- Pockets: Decide on drop pockets or ball return systems, as this affects frame design.
Material Selection: For the frame, stable hardwoods like oak, maple, ash, or even robust plywood (birch or Baltic birch) are excellent choices. Avoid softwoods like pine for primary structural components, as they are prone to warping and denting under stress. For a truly professional look, consider using premium hardwoods for visible parts, with hidden structural elements made from high-quality plywood or lesser-cost hardwoods.
| Component | Recommended Material | Key Characteristics |
|---|---|---|
| Legs | Solid Hardwood (Oak, Maple, Ash) | Strength, stability, resistance to impact |
| Main Aprons/Side Rails | Solid Hardwood or High-Grade Plywood | Straightness, rigidity, minimal warping |
| Cross Beams | Solid Hardwood or Structural Plywood | High stiffness to prevent sag |
| Slate Bed Supports | Plywood or MDF (¾” to 1″) | Flatness, ease of machining, even support for slate |
| Sub-Frame (optional) | Construction-grade Lumber (e.g., 2x4s) | Cost-effective for internal reinforcement, not visible |
Cutting and Joinery for the Frame
Precision in cutting and joinery is non-negotiable. A slight error at this stage will compound, leading to an uneven playing surface.
- Dimensioning Lumber: Use a table saw for ripping boards to width and a miter saw for precise cross-cuts. Ensure all cuts are perfectly square.
- Joinery Methods:
- Mortise and Tenon Joints: Ideal for connecting legs to aprons, providing maximum strength and rigidity. These require careful layout and precise cutting.
- Dominoes or Dowels: Excellent for reinforcing butt joints in less load-bearing areas, offering good alignment.
- Heavy-Duty Pocket Screws: While less traditional, these can be used for internal frame components if paired with robust wood glue for added strength.
- Bolting: For removable legs, consider heavy-duty through-bolts with threaded inserts for strong, disassemble-friendly connections.
- Assembly and Squaring: Assemble the frame components on a flat, level surface. Use high-quality wood glue at every joint. Clamp tightly and check for squareness frequently using a large framing square and by measuring diagonals. Any discrepancies must be corrected before the glue sets.
- Slate Bed Preparation: Once the main frame is complete, install the slate bed supports. These are usually ¾” to 1″ thick plywood or MDF sheets cut to fit precisely within the frame, providing a flat surface for the slate to rest on. Ensure these are securely fastened and perfectly level with each other.
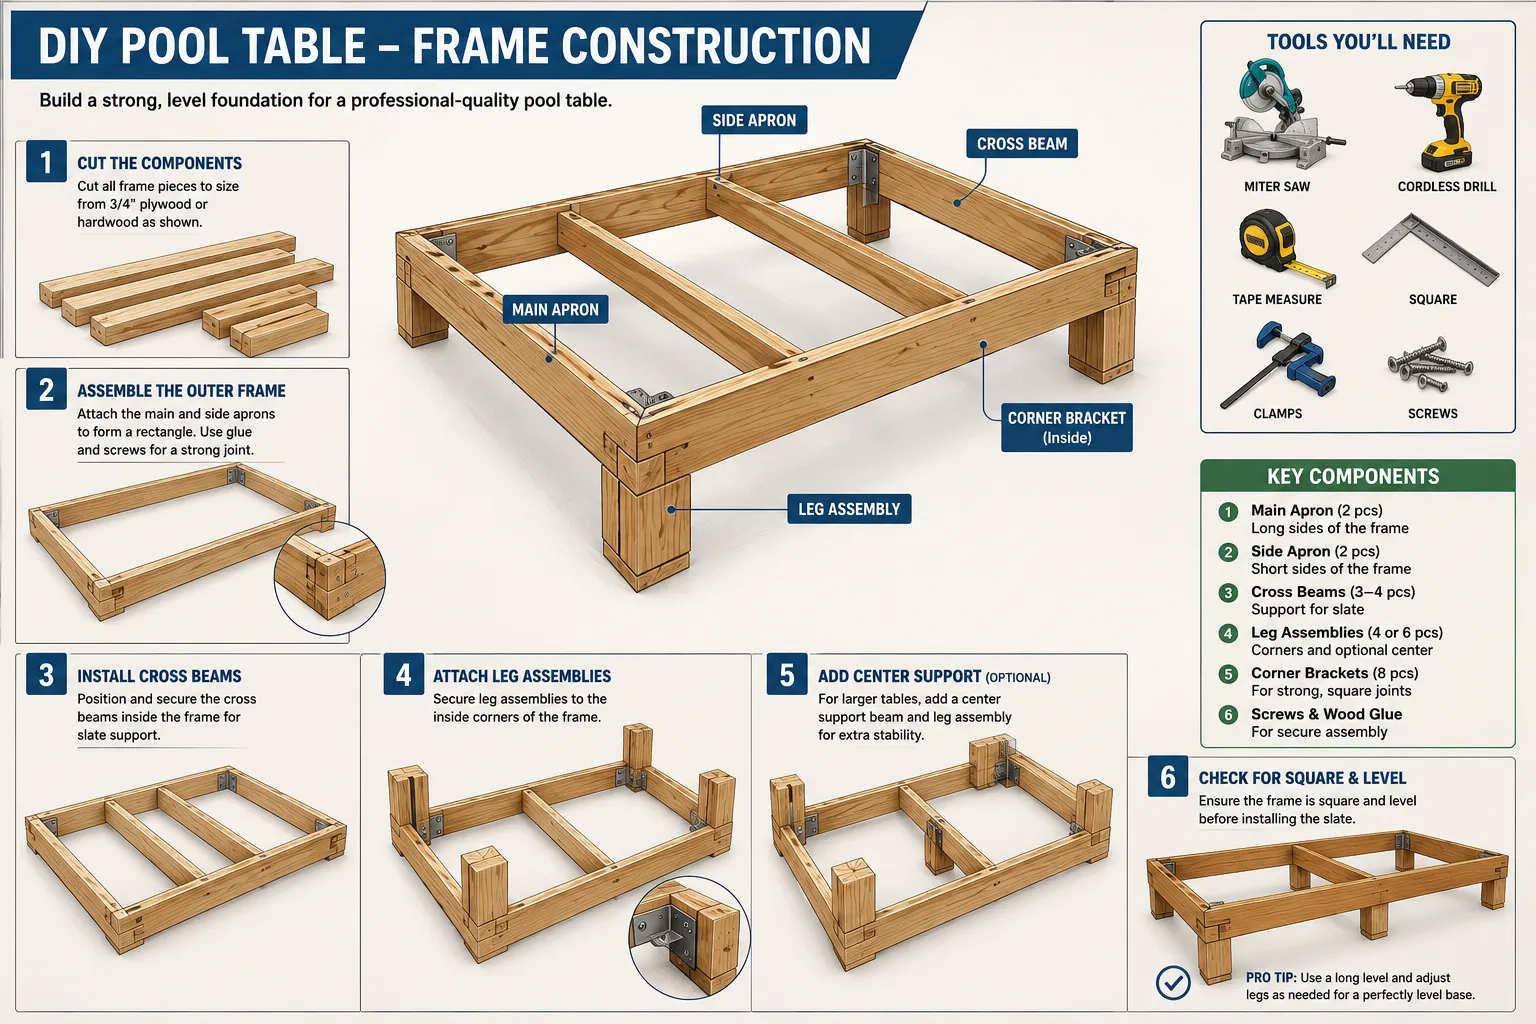
A well-constructed frame is the unseen hero of your DIY pool table. Investing time in precise cuts, strong joinery, and careful assembly will pay dividends in the table’s stability and playability. For intricate joinery work, you might find inspiration in techniques discussed in introduction to traditional Japanese wood joinery.
Achieving Perfection: Leveling and Slate Installation
With the frame meticulously constructed, the next critical phases in DIY Pool Table Building: Construction, Leveling, and Slate Installation for Game Rooms are leveling the frame and installing the heavy, precision-ground slate. These steps are where your table truly begins to take its playable form.
Precision Leveling the Frame
Before any slate is introduced, the frame itself must be perfectly level. This forms the foundation for a true playing surface.
- Placement: Position the assembled frame in its final game room location. Remember, once the slate is installed, moving the table will be extremely difficult and potentially damaging.
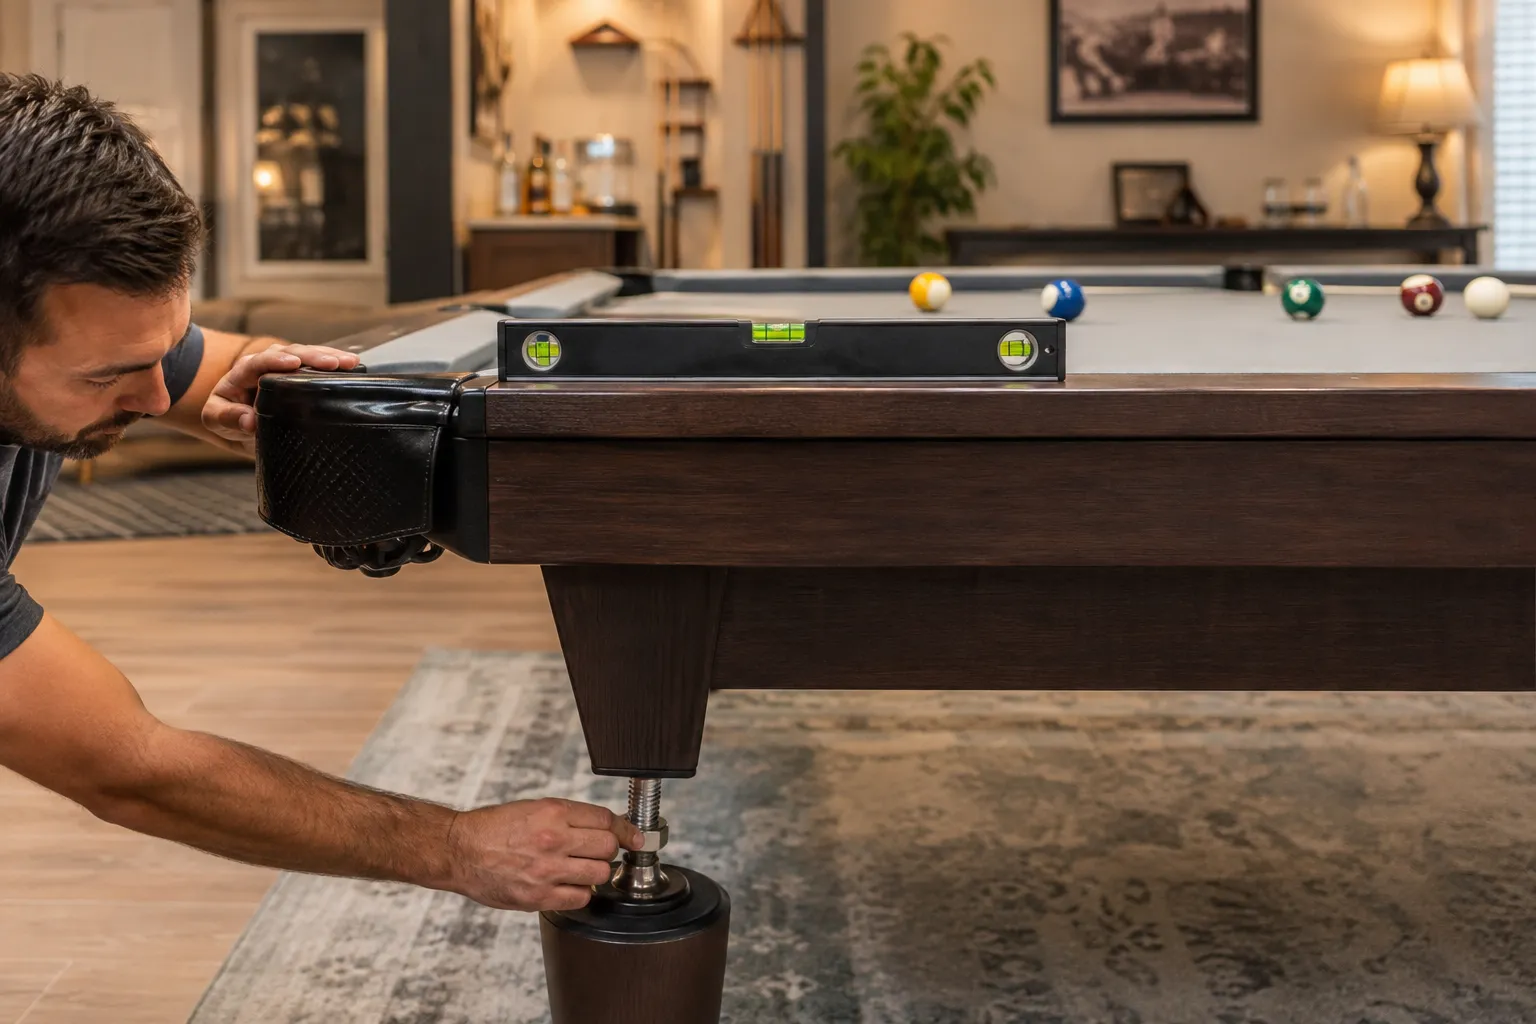
- Initial Leveling: Use a high-quality spirit level, at least 4 feet long, across the entire top surface of the frame. Check in multiple directions: lengthways, widthways, and diagonally.
- Adjustable Leg Levelers: Most custom pool tables incorporate adjustable leg levelers. These threaded feet allow for minute adjustments. Turn them incrementally to raise or lower specific corners or sides.
- Shimming (if necessary): For tables without integrated levelers, use solid hardwood shims underneath the legs. Ensure shims are securely placed and do not rock.
- Re-check Frequently: Leveling is an iterative process. Adjust one area, then re-check the entire table, as adjustments in one spot can affect others. The goal is zero bubble movement on your level across all directions.
Handling and Installing the Slate
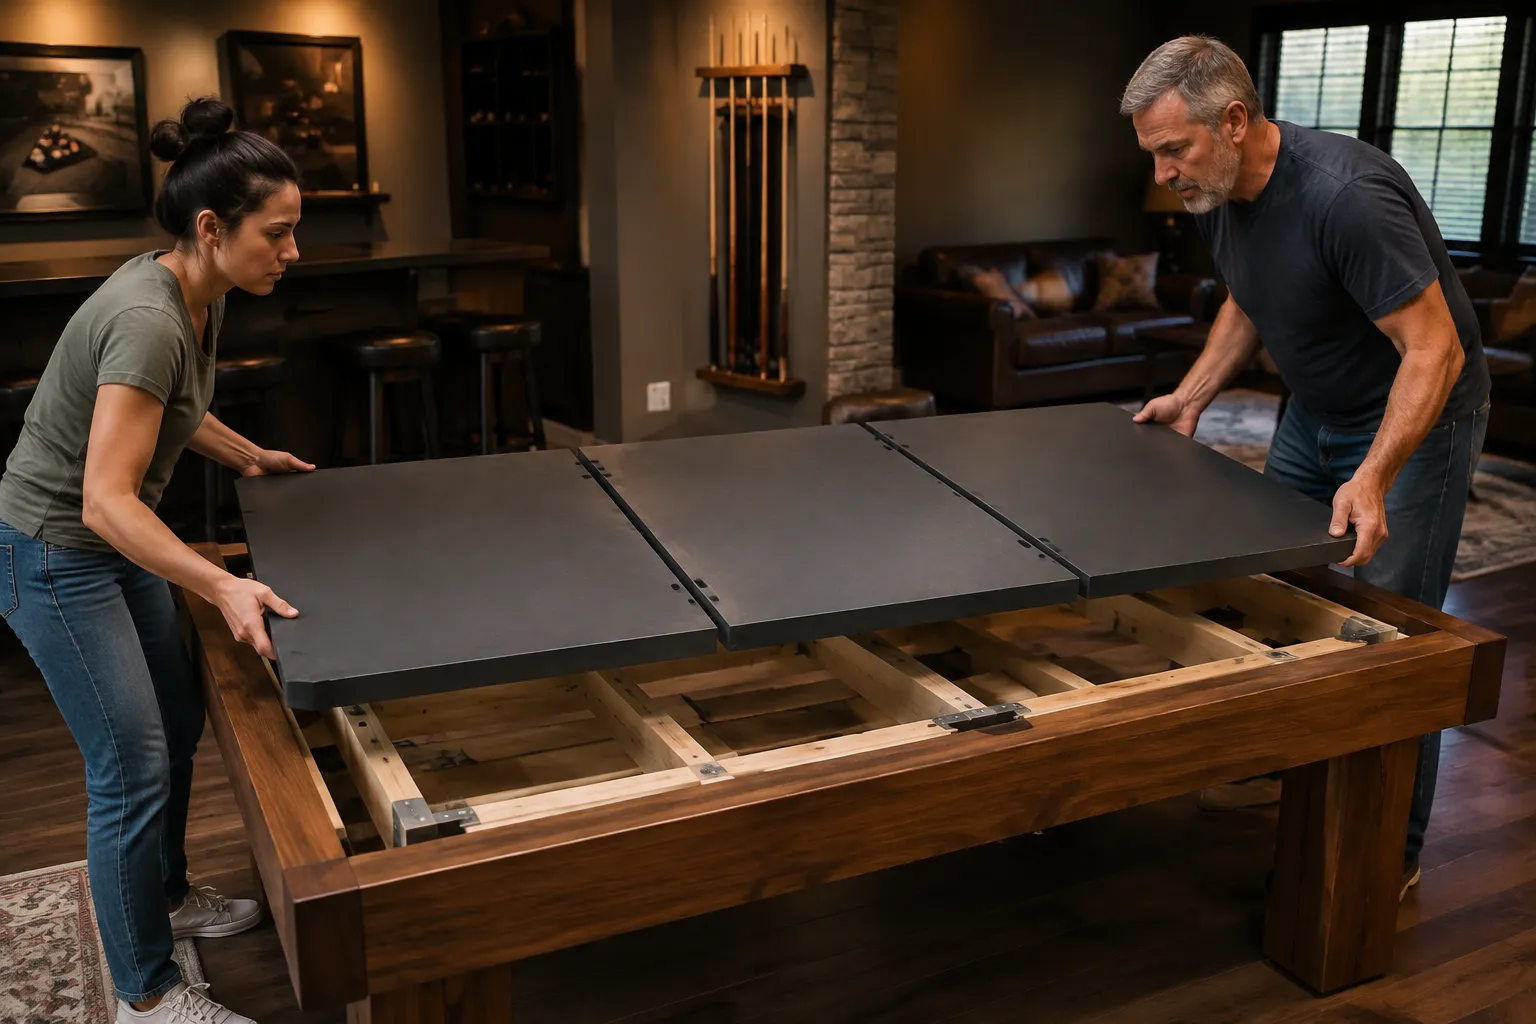
Slate, typically ¾” to 1″ thick and weighing hundreds of pounds, is the heart of a pool table’s playing surface. Most full-size tables use a three-piece slate system to manage weight and facilitate installation.
- Safety First: Slate is incredibly heavy and brittle. Always use proper lifting techniques and have ample assistance. Four people are often needed to safely maneuver each piece. Use sturdy moving straps or specialized slate movers.
- Cleanliness: Ensure the slate bed supports are absolutely clean and free of any debris. Even a tiny particle can create an uneven spot under the slate.
- Placement of Slate Pieces:
- Start with the center piece, positioning it carefully on the frame.
- Align the two end pieces, leaving a slight gap (around 1/8″ to ¼”) between them. This gap will be filled later.
- Ensure all pieces are oriented correctly, as they are often cut and ground to fit specifically.
- Securing the Slate: Once positioned, the slate pieces are typically secured to the wooden frame using screws that go through pre-drilled holes in the slate and into the frame’s cross-beams. These screws should be flush or slightly recessed. Do not overtighten, as this can crack the slate.
- Seaming the Slate: This is a crucial step for a perfectly smooth playing surface.
- Wax and Filler: Traditionally, seams are filled with a mix of beeswax and paraffin, or specialized pool table seam filler. This mixture is heated and poured into the gaps between the slate pieces.
- Leveling the Seam: While the filler is still warm, use a straightedge and a razor blade or scraper to meticulously level the seam perfectly flush with the slate surface. This requires a steady hand and attention to detail. Any raised or recessed seam will affect ball roll.
- Sanding (optional): Some professionals lightly sand the dried seams with very fine-grit sandpaper (e.g., 220-grit) for an ultra-smooth finish, ensuring all dust is thoroughly removed afterward.
- Final Leveling Check: After the slate is installed and seamed, perform a final, comprehensive leveling check using your spirit level. Minor adjustments can still be made using the leg levelers.
The precision involved in leveling and slate installation elevates your DIY Pool Table Building: Construction, Leveling, and Slate Installation for Game Rooms project from a mere carpentry task to an exacting craft. This is where patience truly becomes a virtue.
Finishing Touches: Rail System, Felt, and Pockets
The final stages of DIY Pool Table Building: Construction, Leveling, and Slate Installation for Game Rooms involve installing the rail system, applying the felt, and fitting the pockets. These steps add the aesthetic and functional elements that complete your custom pool table.
Building and Attaching the Rail System
The rails house the cushions and define the playing area. They must be precisely constructed and securely attached.
- Cushion Installation: Purchase high-quality gum rubber cushions (K-66 profile is standard). Adhere them firmly to the rail sub-assembly using specialized cushion adhesive. Ensure the cushions are perfectly straight and flush with the rail’s playing edge. Allow ample drying time.
- Rail Facings: Cover the rails with your chosen felt, stretching it taut and securing it with staples on the underside. Be meticulous around the pocket openings, cutting the felt cleanly.
- Attachment to Slate: The rails are typically bolted through the frame into the slate itself. Use specialized rail bolts that draw the rails down firmly against the slate, creating a snug, level playing edge. Check that the rail height is consistent around the table.
Applying the Pool Table Felt
Felt (more accurately, billiard cloth) is critical for ball roll. High-quality worsted cloth offers superior playability compared to standard napped cloth.
- Choosing Your Cloth:
- Worsted Cloth: Tightly woven, non-directional fibers (no nap). Faster play, greater accuracy, more durable. Recommended for serious players.
- Napped Cloth: Traditional, fuzzy surface with a nap that affects ball roll. Slower play, less expensive.
- Consider color, but prioritize quality.
- Cleaning the Slate: Ensure the slate is immaculately clean, dry, and free of any dust, filler particles, or debris. Use a vacuum cleaner and a tack cloth.
- Applying the Bed Felt:
- Carefully unroll the felt over the slate, centering it perfectly.
- Begin by stretching the felt from the center of one long side, stapling it to the underside of the slate bed supports. Work your way outwards, ensuring even tension.
- Repeat on the opposite long side, stretching firmly across the table.
- Stretch and staple the short sides last.
- Crucial: The felt must be taut and wrinkle-free, but not overstretched to the point of distorting the weave.
- Trim excess felt from around the pocket openings, leaving enough to staple securely.
- Applying Rail Felt: As mentioned, the rails are felted separately before being bolted onto the table. Ensure the felt on the rails meets the bed felt cleanly at the playing surface.
Installing Pockets and Finishing Touches
- Pockets: Attach the pocket liners and leather pocket sets or ball return components. Ensure they are secure and properly aligned to catch balls.
- Leg Levelers (Final): Re-verify the table’s level using a precision level. Make any final, minute adjustments to the leg levelers.
- Cue Rack and Accessories: Consider building custom DIY garage opener storage solutions or a DIY folding work table for other accessories.
- Cleaning and Testing: Give the entire table a final clean. Then, enjoy your first game on a custom-built, professional-grade pool table.
This comprehensive approach to DIY Pool Table Building: Construction, Leveling, and Slate Installation for Game Rooms ensures that every detail, from the underlying frame to the final felt, contributes to an exceptional playing experience. The satisfaction of playing on a table crafted by your own hands is truly unparalleled.
Conclusion
Building your own pool table is a significant undertaking, but as this guide to DIY Pool Table Building: Construction, Leveling, and Slate Installation for Game Rooms illustrates, it is entirely achievable with careful planning, precision woodworking, and meticulous attention to detail. From the robust frame construction, which demands strong joinery and perfect squareness, to the critical leveling of both the frame and the heavy slate pieces, each stage builds upon the last to create a superior playing surface. The final steps of installing the felt and rails bring your vision to life, culminating in a custom game room centerpiece that offers both exceptional performance and immense personal pride.
By following these professional guidelines, you not only save considerable costs but also gain an intimate understanding of what makes a high-quality pool table. The reward is a fully functional, beautiful, and durable piece of furniture tailored to your preferences, ready to provide countless hours of entertainment.
Actionable Next Steps:
- Develop Detailed Plans: Before buying any materials, finalize your table dimensions and create comprehensive construction drawings.
- Source Quality Materials: Invest in stable, high-grade hardwoods for the frame and the best possible slate and felt for the playing surface.
- Gather Specialized Tools: Ensure you have access to precision woodworking tools, a reliable spirit level, and appropriate slate handling equipment.
- Enlist Assistance: Due to the weight of slate, plan to have several strong assistants available during installation.
- Practice Patience: This project requires meticulous work. Do not rush any step, especially leveling and seaming the slate.
Meta Title: DIY Pool Table Building: Construction, Leveling & Slate Installation Meta Description: Build your own professional-grade pool table in 2026. Learn expert construction, leveling, and slate installation for a perfect game room centerpiece.