
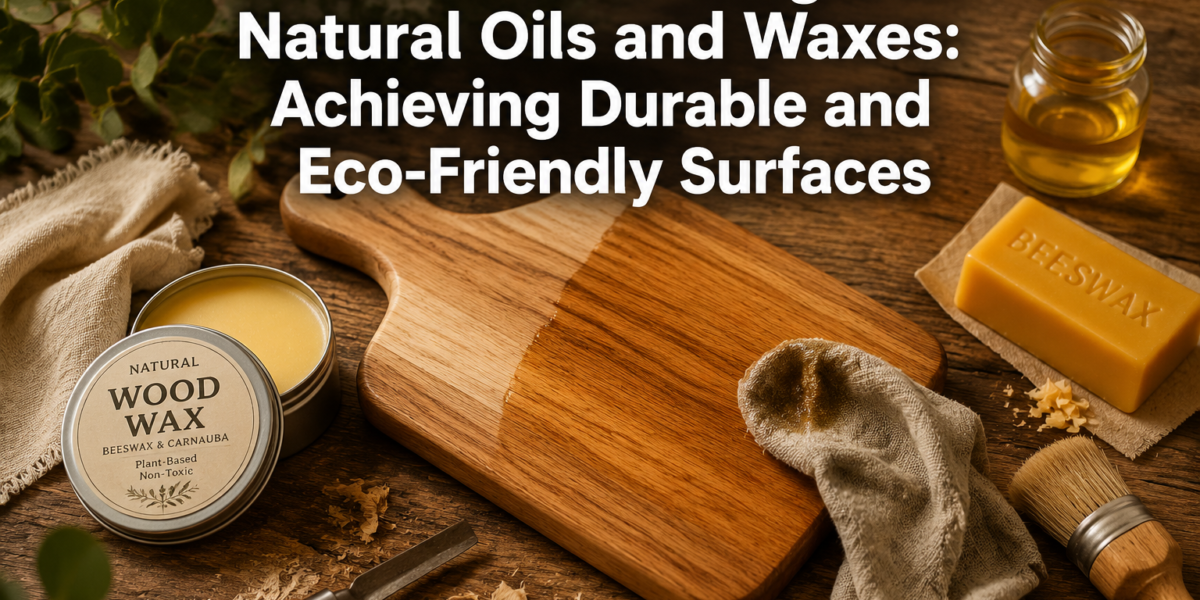

The average household in North America purchases approximately 60 pounds of wood furniture annually, much of which is coated in synthetic finishes that contribute to indoor air pollution and pose disposal challenges. This statistic underscores a compelling argument for a more sustainable approach: DIY Wood Finishing with Natural Oils and Waxes: Achieving Durable and Eco-Friendly Surfaces. This method not only bypasses the environmental and health drawbacks of conventional finishes but also enhances the natural beauty and longevity of wooden items through processes that are both rewarding and accessible. Embracing natural oils and waxes empowers woodworkers to create surfaces that are not only stunning and highly durable but also kind to both people and the planet.
Key Takeaways
- Natural oils and waxes offer a non-toxic, eco-friendly alternative to synthetic wood finishes, enhancing indoor air quality.
- Proper wood preparation, including sanding and cleaning, is crucial for successful application and a durable finish.
- Different natural oils (linseed, tung, walnut, hemp) and waxes (beeswax, carnauba) offer varied protection, appearance, and application properties.
- Achieving a durable, eco-friendly surface requires multiple thin coats and proper curing times.
- Regular maintenance with natural waxes and oils can significantly extend the life and beauty of your finished wood pieces.
The Foundation of Natural Finishing: Understanding Your Materials
Choosing to pursue DIY Wood Finishing with Natural Oils and Waxes: Achieving Durable and Eco-Friendly Surfaces begins with a deep appreciation for the materials themselves. Unlike lacquers and polyurethanes that form a plastic-like film on the surface of wood, natural oils and waxes penetrate the wood fibers, enhancing their intrinsic characteristics, providing a warm, tactile feel, and allowing the wood to breathe. This approach supports the inherent qualities of the wood rather than masking them.

Why Choose Natural Oils and Waxes?
The appeal of natural finishes extends beyond aesthetics; it’s a choice rooted in health, environmental responsibility, and the unique properties they impart.
- Eco-Friendly: Sourced from renewable resources, these finishes have a significantly lower environmental impact during production and disposal. Many are biodegradable.
- Non-Toxic & Food-Safe: Free from harsh VOCs (Volatile Organic Compounds), making them safer for application in home workshops and ideal for items like cutting boards and children’s toys.
- Breathability: Allows wood to exchange moisture with its environment, reducing the risk of cracking and warping, which is especially important for understanding wood movement.
- Repairability: Scratches and wear can often be spot-repaired by reapplying the finish, unlike film finishes that require complete stripping.
- Natural Aesthetics: They deepen the wood’s natural color, highlight grain patterns, and provide a soft, inviting luster.
Common Natural Oils and Their Properties
Each oil brings distinct characteristics to the finishing process.
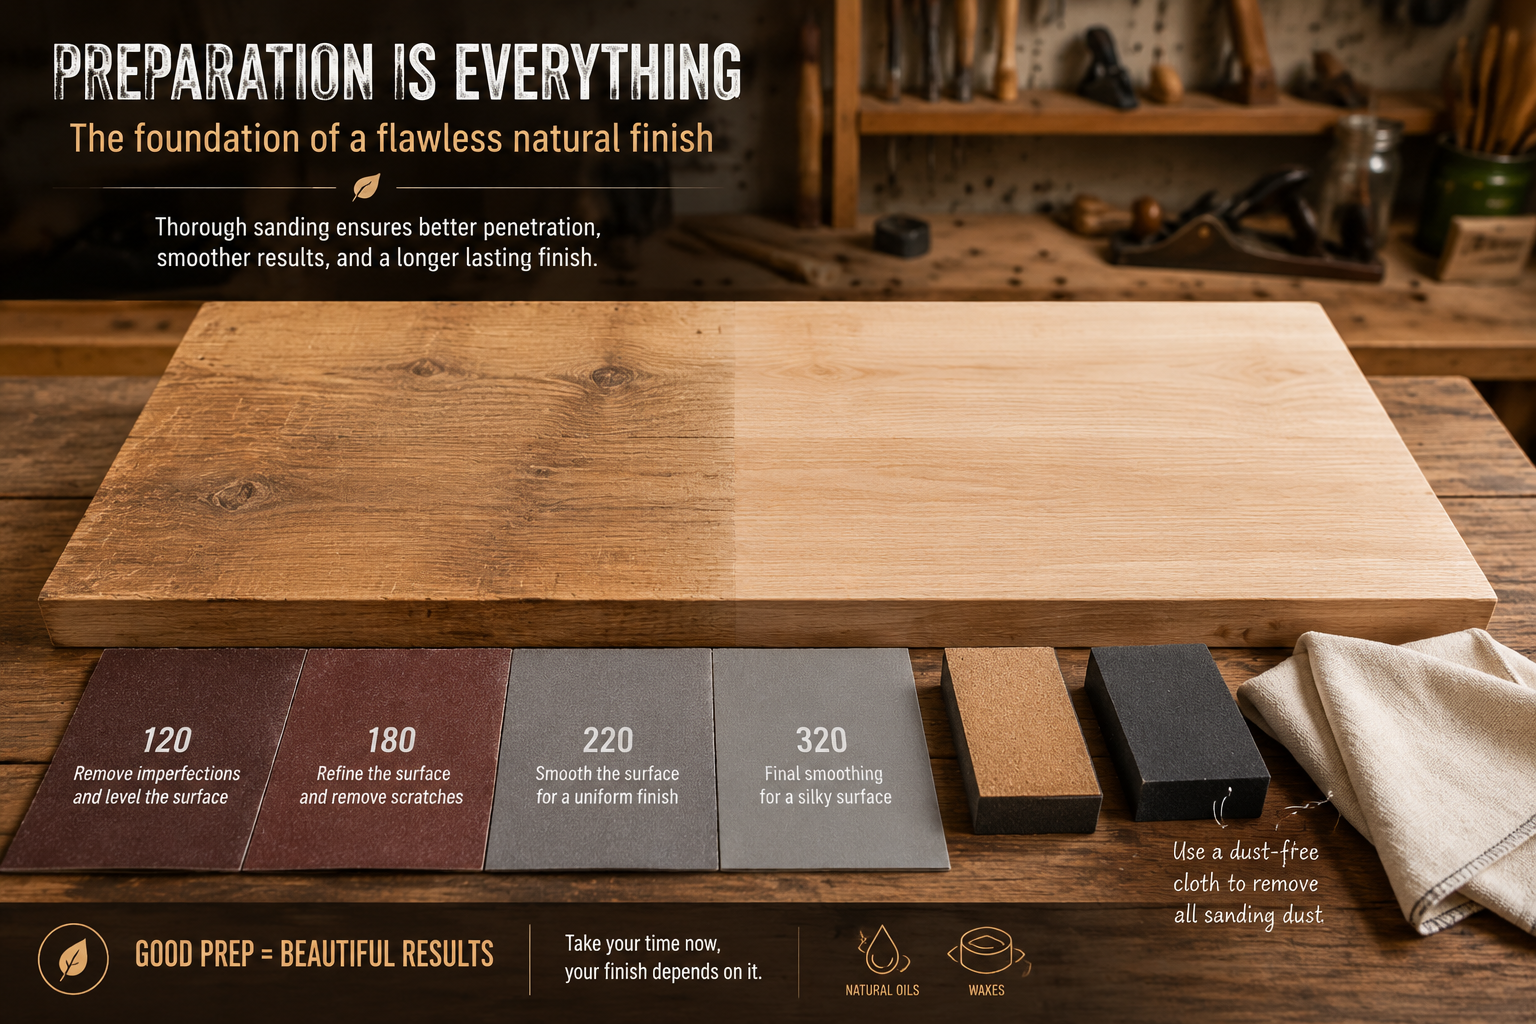 Table 1: Comparison of Popular Natural Wood Oils
| Oil Type | Key Characteristics | Drying Time | Durability | Common Uses |
|---|---|---|---|---|
| Linseed Oil | Deepens wood color, flexible, natural sheen | Slow (days to weeks) | Good | Furniture, flooring, outdoor wood |
| Tung Oil | Excellent water resistance, harder finish, less yellowing | Medium (2-7 days) | Excellent | Countertops, tabletops, marine applications |
| Walnut Oil | Food-safe, light amber color, moderate protection | Medium-Slow (days) | Moderate | Cutting boards, utensils, children’s toys |
| Hemp Seed Oil | Very low VOC, subtle sheen, easy application | Medium (1-3 days) | Good | Furniture, decorative items |
| Mineral Oil | Non-hardening, food-safe, requires frequent reapplication | N/A (non-drying) | Low | Cutting boards, butcher blocks |
When selecting an oil, consider the project’s use. For food-contact items, ensure the oil is certified food-safe. For outdoor use, tung oil offers superior water resistance, making it an excellent choice for items like crafting custom wooden planters.
Natural Waxes: The Finishing Touch
Waxes provide an additional layer of protection, enhance sheen, and offer a smooth, tactile feel. They are often applied over an oil finish to boost durability and water repellency.
- Beeswax: The most common natural wax, providing a soft, natural sheen and good water resistance. Easy to apply and buff.
- Carnauba Wax: Derived from the leaves of the Brazilian palm tree, carnauba is significantly harder and offers a higher gloss and greater scratch resistance than beeswax. Often blended with other waxes or oils.
- Blends: Many commercial “hard wax oils” combine natural oils (like linseed or tung) with waxes (beeswax, carnauba) to create a single-step finish that offers both penetration and surface protection.
The Step-by-Step Process for Natural Wood Finishing
Achieving a beautiful, durable, and eco-friendly surface with natural oils and waxes is a methodical process. Each step is crucial for the final outcome. This guide focuses on general application, but always refer to specific product instructions.
Step 1: Meticulous Wood Preparation
Proper preparation is paramount. Any imperfections left on the wood will be highlighted by penetrating finishes.
- Sanding: Start with a coarser grit (e.g., 120-150 for rough wood, 180 for previously sanded wood) and progressively move to finer grits (220, 320, or even 400 for a glass-smooth finish). Sand with the grain, ensuring all previous scratch marks are removed before moving to the next grit. For fine furniture pieces or items meant for significant handling, such as handcrafted wooden wall clocks, sanding to 320 or 400 grit will yield the best results.
- Dust Removal: After sanding, thoroughly remove all dust. Use a vacuum, then a tack cloth or a rag dampened with mineral spirits (if using oil-based finishes) or denatured alcohol (if using water-based products or for a clean surface). Ensure the wood is completely dry before applying any finish.
- Grain Raising (Optional): For an even smoother finish, especially on open-pored woods, dampen the wood surface with a cloth, allow it to dry completely, then lightly sand with your final grit (e.g., 220 or 320). This raises loose wood fibers, which are then removed, preventing them from raising after the first coat of finish.
Step 2: Applying Natural Oils
Application technique directly impacts the finish’s quality and durability.
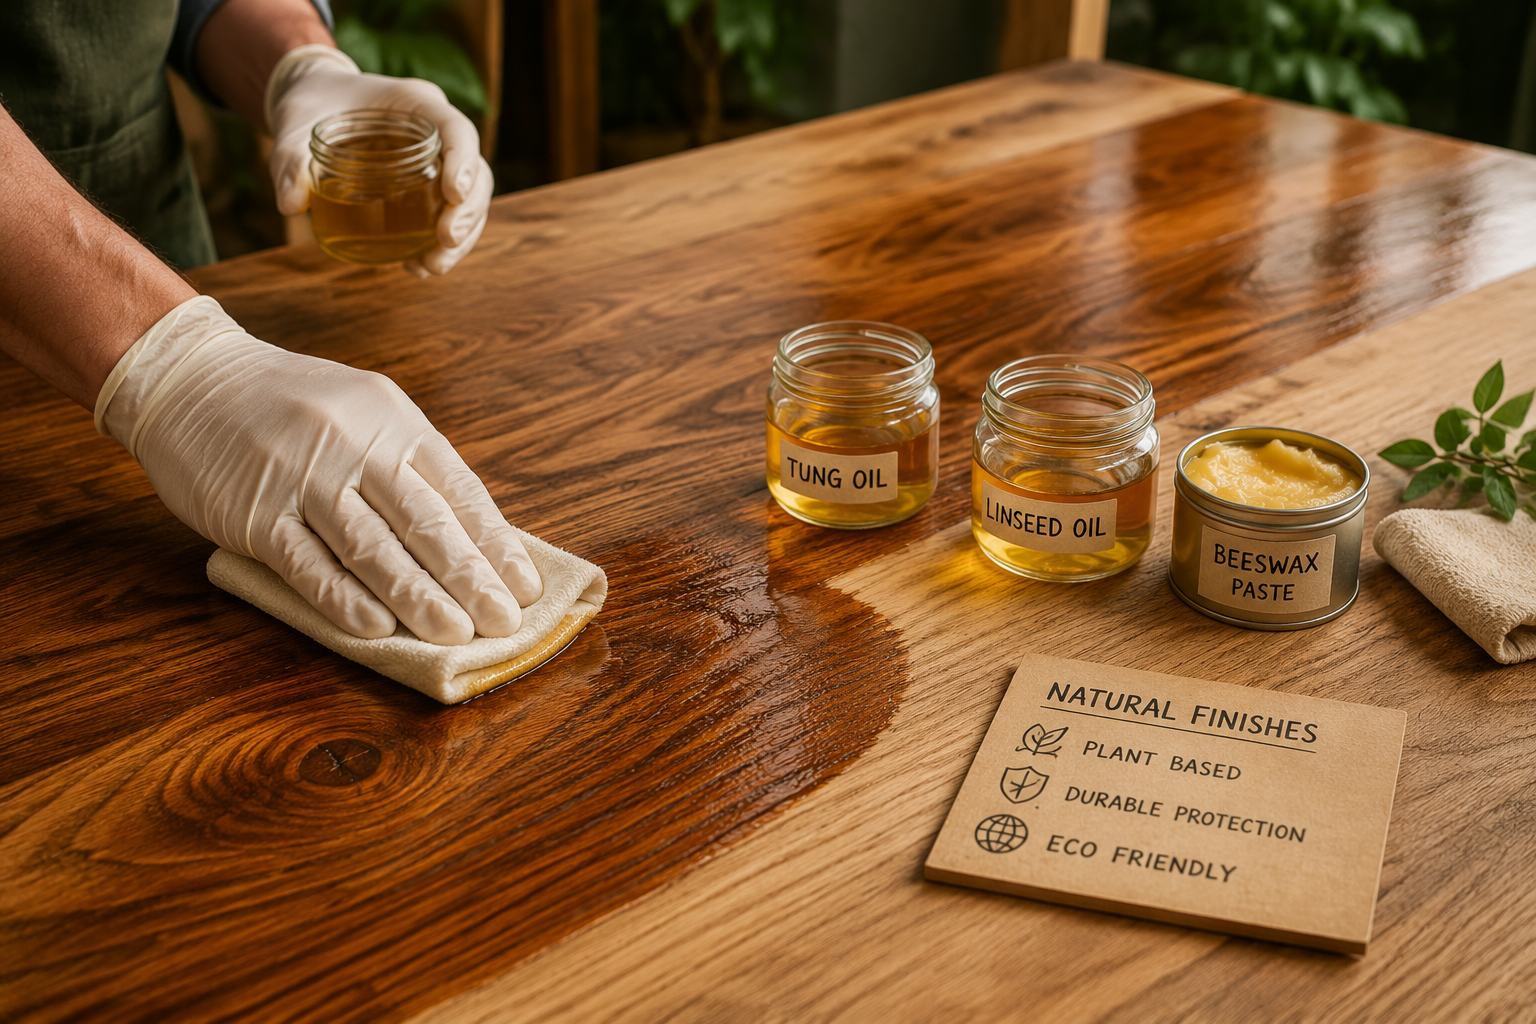
- First Coat: Apply a generous amount of your chosen oil to the wood surface using a clean, lint-free cloth or a foam brush. Ensure full coverage. Allow the oil to penetrate for 15-30 minutes (check product instructions).
“The first coat of oil is like a drink for the wood, saturating the fibers and beginning the process of protection and enhancement.”
- Wipe Off Excess: After the penetration time, thoroughly wipe off all excess oil. This is critical to prevent stickiness or a gummy surface, especially with drying oils like linseed or tung. Use clean cloths and keep turning to a fresh section. The surface should feel barely damp, not oily.
- Drying/Curing Time: Allow ample time for the first coat to cure. This can range from 24 hours to several days, depending on the oil and environmental conditions (temperature, humidity). Good ventilation is key.
- Subsequent Coats: Apply 2-5 more thin coats, allowing each coat to fully cure before applying the next. Lightly scuff the surface with 400-600 grit sandpaper or a fine abrasive pad between coats to improve adhesion and smoothness. Wipe away dust after each scuffing. For live edge slab selection and milling projects, multiple coats are essential for deep protection.
Step 3: Applying Natural Waxes (Optional, but Recommended for Durability)
Applying wax over an oil finish provides an added layer of protection and enhances the sheen.
- Ensure Oil is Fully Cured: Do not apply wax until the underlying oil finish is completely cured and hardened. This can take several days to a few weeks, depending on the oil.
- Apply Wax: Using a soft, clean cloth, apply a thin, even coat of beeswax or carnauba-based wax in a circular motion. Cover the entire surface.
- Dwell Time: Allow the wax to haze or dry for 10-20 minutes, or as per product instructions.
- Buffing: Using a separate clean, soft cloth (like a microfiber towel), buff the waxed surface vigorously in a circular motion until a desired sheen is achieved.
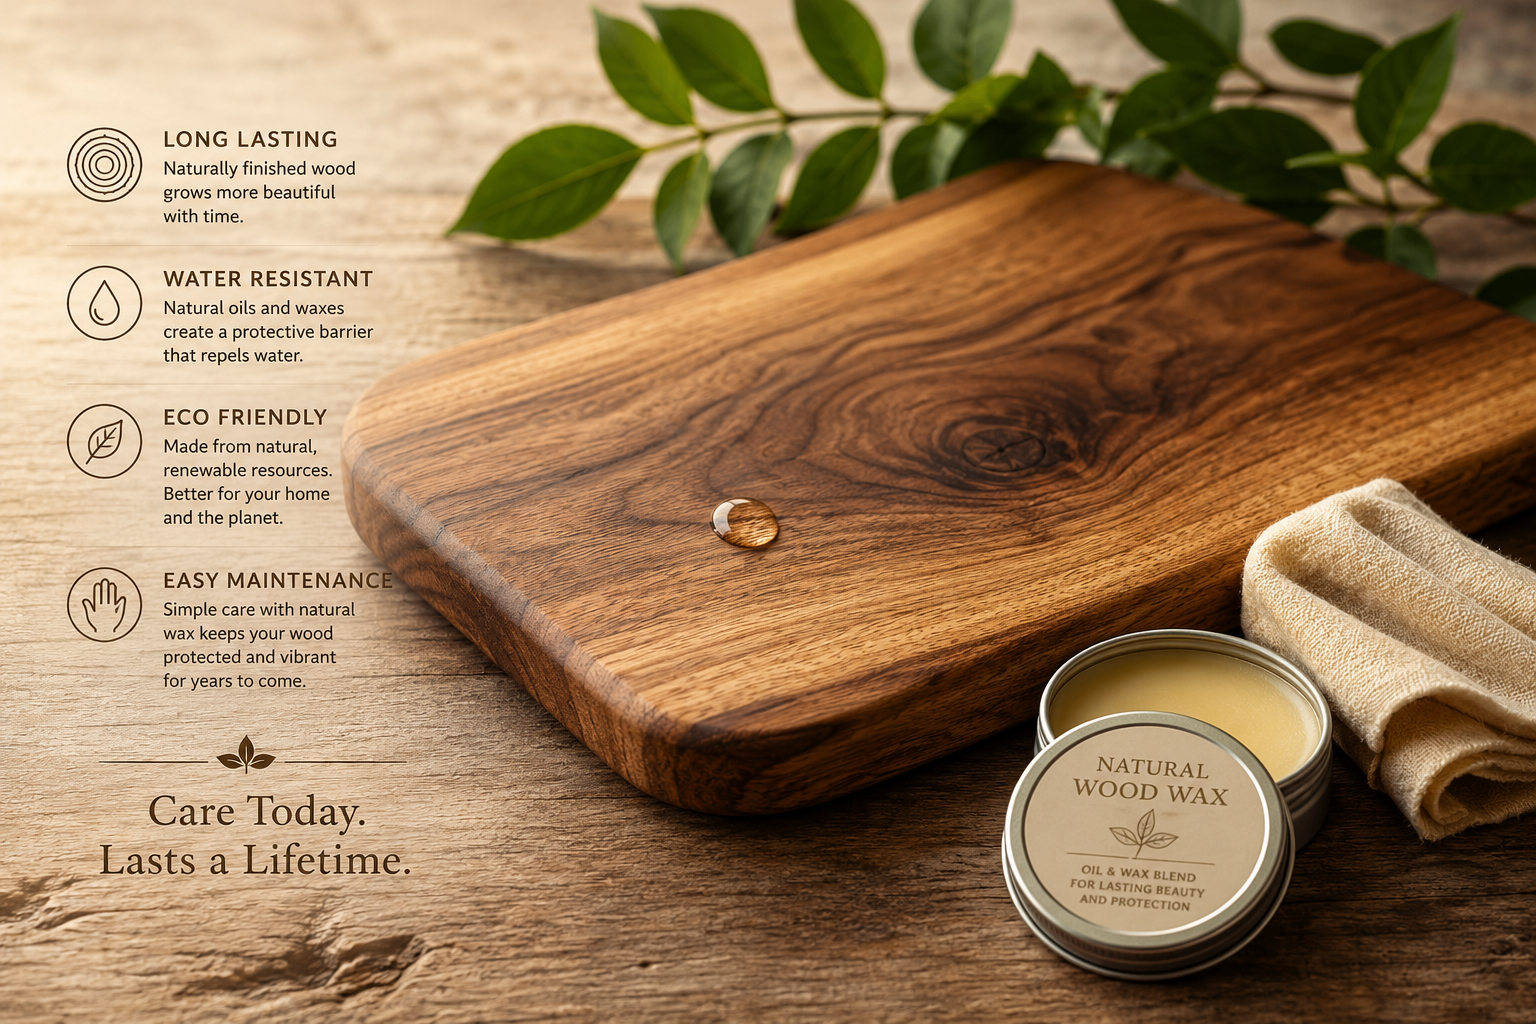
Maintenance and Repair for Naturally Finished Surfaces
One of the distinct advantages of DIY Wood Finishing with Natural Oils and Waxes: Achieving Durable and Eco-Friendly Surfaces is the ease of maintenance and repair. Unlike film finishes that chip or peel, natural finishes can often be refreshed with minimal effort.
Routine Cleaning and Maintenance
- Dusting: Regularly dust with a soft, dry cloth.
- Cleaning: For spills or dirt, wipe immediately with a damp cloth. For stubborn spots, use a very mild soap solution, then wipe dry. Avoid harsh chemical cleaners, which can strip natural finishes.
- Re-oiling/Re-waxing: Over time, natural finishes will show wear, especially in high-traffic areas. Reapply a thin coat of oil or wax every few months to a few years, depending on use. Simply clean the surface, apply a thin coat, let it penetrate, and wipe off the excess. This rejuvenates the finish and maintains its protection. For heavily used items like profitable beginner woodworking projects such as cutting boards, more frequent re-oiling is necessary.
Repairing Scratches and Dents
Minor damage can often be repaired seamlessly.
- Light Scratches: For superficial scratches, often a fresh application of oil or wax, followed by buffing, is sufficient to blend them in.
- Deeper Scratches/Dents:
- Light Sanding: Carefully sand the damaged area with a fine-grit sandpaper (e.g., 320-400 grit) to remove the scratch or smooth the dent. Feather the edges into the surrounding untouched finish.
- Clean: Wipe away all sanding dust.
- Reapply Finish: Apply a thin coat of the original oil or oil/wax blend to the repaired area. Allow it to penetrate, wipe off excess, and let it cure. Repeat for several coats until the finish matches the surrounding area.
- Buff (if applicable): Once cured, buff the area to blend the sheen.
This spot-repair capability ensures that your naturally finished pieces can retain their beauty and durability for generations, truly embodying the spirit of sustainable craftsmanship.
Conclusion
Embracing DIY Wood Finishing with Natural Oils and Waxes: Achieving Durable and Eco-Friendly Surfaces is a testament to mindful craftsmanship and environmental stewardship. This method yields not only stunning, tactile results that celebrate the wood’s inherent beauty but also provides durable, non-toxic protection that is easily maintained and repaired. From selecting the right natural oil and wax to meticulous preparation and thoughtful application, each step contributes to creating pieces that are built to last and safe for your home. By choosing these sustainable finishes, you invest in the longevity of your woodworking projects and contribute to a healthier environment, making every piece a legacy of both skill and responsibility.
Actionable Next Steps:
- Start Small: Begin with a less critical project, like a small wooden box or a set of engraved wooden coasters, to practice application techniques.
- Research Products: Explore various brands of natural oils and waxes. Read reviews and look for products specifically labeled as “food-safe” or “zero-VOC” if those attributes are important for your project.
- Invest in Quality Cloths: Use high-quality, lint-free rags for application and buffing to achieve the best finish.
- Experiment with Woods: Different wood species react differently to natural finishes. Experiment on scrap pieces to see how the oil enhances the grain and color of specific woods.
- Prioritize Ventilation: Always work in a well-ventilated area, especially when oils are curing, even with low-VOC products.
Meta Title: DIY Wood Finishing: Natural Oils & Waxes for Durable, Eco-Friendly Surfaces Meta Description: Discover DIY wood finishing with natural oils and waxes. Achieve durable, eco-friendly surfaces for woodworking projects using non-toxic methods in 2026.

