

The frustration of warped panels and uneven edges can derail even the most carefully planned woodworking project, often forcing hobbyists and small shop owners to covet expensive jointers and planers. However, precision woodworking doesn’t require a hefty investment in large machinery. By harnessing the power of a common router and a few sheets of plywood, anyone can construct DIY Wood Router Sleds and Jigs for Perfect Edge Jointing and Panel Flattening. These ingenious shop-made solutions provide a pathway to achieve perfectly flat surfaces and laser-straight edges, transforming rough lumber into project-ready stock with remarkable accuracy. This guide will walk you through the essential designs and techniques to elevate your craftsmanship in 2026, making professional-grade results accessible for every woodworker.
Key Takeaways
- Cost-Effective Precision: DIY router sleds and jigs offer a budget-friendly alternative to expensive jointers and planers, providing similar accuracy for edge jointing and panel flattening.
- Versatile Tooling: A standard router becomes a powerful precision machine with the right jig, capable of preparing stock for high-quality joinery and finishes.
- Essential Shop Projects: Building these jigs is a valuable woodworking exercise in itself, honing your skills in measurement, cutting, and assembly.
- Improved Project Quality: Achieve seamless glue-ups and perfectly flat surfaces, enhancing the overall fit, finish, and durability of your woodworking projects.
- Accessibility for Small Shops: These DIY solutions are ideal for woodworkers with limited space or budget, maximizing the utility of existing tools.
The Fundamentals of DIY Router Sleds and Jigs for Panel Flattening
One of the most common challenges in woodworking is dealing with roughsawn lumber or wide panels that aren’t perfectly flat. Cupping, bowing, and twisting are natural occurrences in wood, and trying to build with uneven stock leads to gaps, weak joints, and unsightly finished pieces. A router sled for panel flattening is an invaluable tool for any workshop, effectively transforming your router into a highly capable planer.

Understanding the Panel Flattening Sled
A router sled for flattening panels typically consists of a sturdy base, two parallel rails, and a carriage that holds your router. The workpiece is placed on the base, and the router, mounted in its carriage, slides along the rails, progressively shaving down the high spots of the wood until the entire surface is flat. This method is especially useful for large or irregular slabs that wouldn’t fit through a traditional planer, or for achieving a perfectly flat surface on glued-up panels before sanding.
Key Components of a Panel Flattening Sled:
- Base: A flat, rigid surface (often MDF or high-quality plywood) upon which the workpiece rests. It must be larger than your largest intended workpiece.
- Rails: Two precisely parallel rails, often made from straight hardwood or aluminum extrusions, that define the cutting plane of the router. They are elevated above the base to accommodate the thickness of your workpiece.
- Router Carriage (Bridge): A bridge-like structure that spans the distance between the rails and securely holds the router. It allows the router to move smoothly back and forth, and typically features a removable base plate for easy router mounting.
- Leveling Shims/Wedges: Used to stabilize and roughly level the workpiece on the base before routing, minimizing wobble and reducing the amount of material that needs to be removed.
Building Your Own Panel Flattening Sled
Constructing a DIY Wood Router Sled and Jig for Perfect Edge Jointing and Panel Flattening is a straightforward project that pays dividends in accuracy and capability. Here’s a general approach:
- Choose Your Materials: Opt for flat, stable sheet goods like MDF or Baltic birch plywood for the base and carriage components. For the rails, select straight, dimensionally stable lumber or aluminum square tubing.
- Size Considerations: Determine the maximum width and length of panels you plan to flatten. This will dictate the size of your base and the span of your rails. A common size allows for slabs up to 24-36 inches wide.
- Construct the Base: Cut a large, flat sheet of MDF or plywood for the base. Ensure it’s perfectly flat and free of twist.
- Attach the Rails: Secure two perfectly parallel rails to either side of the base, elevated by risers. The critical aspect here is ensuring the rails are precisely the same height and perfectly parallel along their entire length. This is where accuracy truly matters. Clamping and careful measurement are crucial.
- Build the Router Carriage: Create a bridge that will slide smoothly along your rails. The carriage needs a precise opening for your router to be mounted, typically with a large flat bit like a spoilboard surfacing bit. Ensure the router can be easily adjusted for depth of cut.
- Assembly and Testing: Assemble all components. Before using it on a valuable workpiece, perform test passes on scrap material to confirm flatness and smooth operation. Check for any binding or unevenness in the router’s movement.
💡 Pro Tip: Consider adding T-tracks or toggle clamps to your sled base for easily securing workpieces without damaging them. This enhances both safety and efficiency.
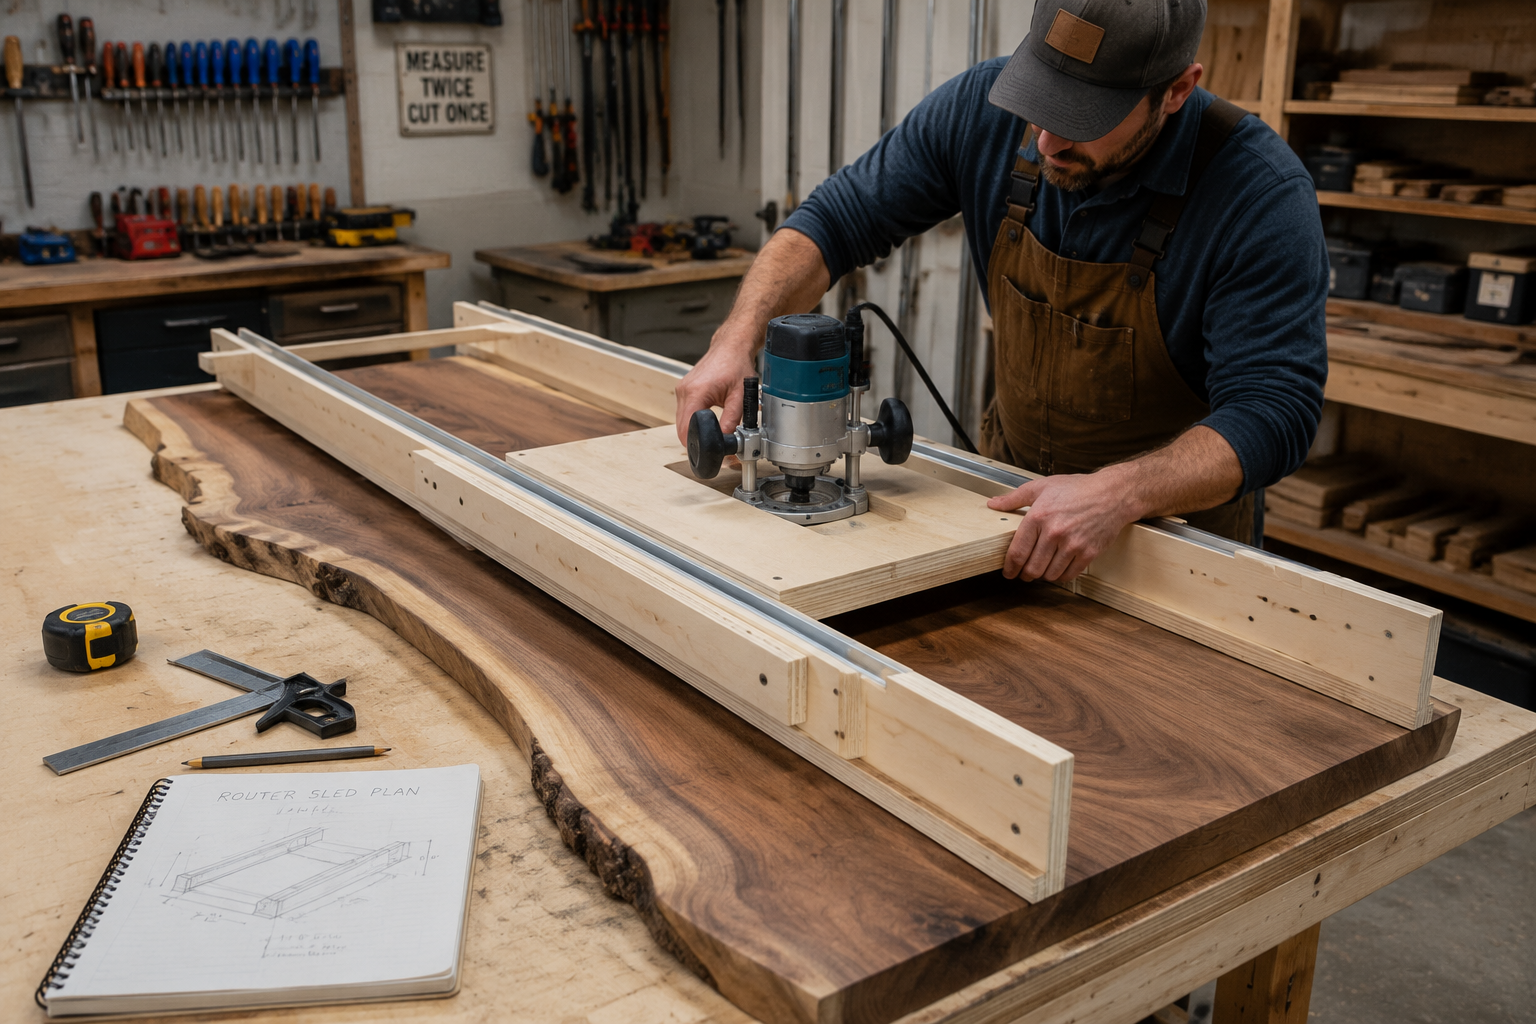 An example of a woodworker assembling a precise DIY router sled for panel flattening.
Achieving Perfect Edge Jointing with Router Jigs
Beyond flattening panels, achieving perfectly square and straight edges is fundamental for strong, gap-free glue-ups and professional-looking joinery. While a jointer excels at this, a well-designed router jig can deliver comparable results for small to medium-sized stock, making it an indispensable tool for those without a dedicated jointer.
The Router Edge Jointing Jig Explained
An edge jointing jig guides your router along the edge of a board, ensuring a perfectly straight cut. The core principle involves referencing the router off a known straight edge (the jig itself) while keeping the router bit precisely aligned with the workpiece. This allows you to remove any inconsistencies, ensuring a crisp, 90-degree edge ready for glue.
Common Types of Edge Jointing Jigs:
- Fixed Fence Jig: This simple jig consists of a long, straight fence attached to a base. The router’s base plate rides along this fence, guiding the bit to trim the workpiece edge. Some designs include a slight offset to allow the router bit to take a clean shave off the edge.
- Straight Edge Guide: A straightforward approach where a perfectly straight piece of material (e.g., aluminum extrusion, straight plywood edge) is clamped to the workpiece. The router’s base plate or a dedicated router guide bush runs along this straight edge. For more on achieving perfect edges, explore methods for edge joining plywood.
- Sliding Sled Jig: Similar in concept to a panel flattening sled, but designed for edge work. The workpiece is secured to a sled that slides past a fixed router bit or a router mounted in a dedicated router table. This provides excellent control for longer boards.
Designing and Building Edge Jointing Jigs
When creating DIY Wood Router Sleds and Jigs for Perfect Edge Jointing and Panel Flattening, precision in construction is paramount. Any deviation in your jig will be directly transferred to your workpiece.
- Select a Reference Straight Edge: The heart of any edge jointing jig is its straight edge. This could be a factory edge of a piece of plywood, a carefully jointed piece of hardwood, or an aluminum ruler. The straighter, the better.
- Basic Fixed Fence Jig:
- Cut a piece of flat plywood or MDF as your base.
- Glue and screw a long, perfectly straight fence to the base.
- Mount your router with a straight bit. The key is to ensure the router bit extends precisely the right amount to take a small, consistent cut when the router’s base plate rides against the fence.
- For greater accuracy, some jigs feature a sacrificial fence that is trimmed by the router bit itself, ensuring perfect alignment.
- Router with Guide Bush: For this method, you need a router equipped with a guide bush (also called a template guide or collar).
- Obtain a long, perfectly straight piece of material to serve as your guide rail.
- Clamp this guide rail to your workpiece, offset by the distance between the edge of your router bit and the outside edge of your guide bush.
- Run the guide bush along the clamped straight edge, and the router bit will trim the workpiece edge. This is a versatile technique also used for other routing tasks like dadoes and rabbets. For choosing the right bits, see our guide on the essential guide to router bits.
Table: Common Edge Jointing Jigs and Their Best Use Cases
| Jig Type | Description | Best Use Cases |
|---|---|---|
| Fixed Fence Jig | A base with a long, straight fence. The router’s base plate rides against the fence, ensuring a consistent, straight cut along the workpiece edge. Often includes an offset for the bit. | Jointing multiple shorter boards, creating consistent straight edges for small to medium-sized panels. Excellent for rapid, repeatable tasks. |
| Straight Edge Guide | A simple, perfectly straight piece of material (e.g., aluminum, plywood edge) clamped directly to the workpiece. The router, with its base or guide bush, rides along this guide. | Jointing longer boards, squaring up edges on larger workpieces, cutting dados, or rabbets. Highly versatile for a range of routing operations. |
| Sliding Sled Jig | A carriage or sled that holds the workpiece and slides past a stationary router (often mounted in a router table) or a fixed router guide. Provides superior control and support for long boards. | Jointing very long or wide boards where stability is critical. Ideal for production runs or ensuring perfectly parallel edges on furniture components. |
| Router Table Fence | While not a “jig” in the traditional sense, a router table’s fence, when properly set up, acts as an excellent edge jointing tool, especially when one side of the fence is offset. More information can be found in Mastering the Router Table: Beyond Basic Edges. | Jointing stock up to the capacity of the table, creating perfectly straight edges for smaller components, and for situations where precise depth of cut is needed. |
💡 Pro Tip: For ultimate precision on your fixed fence jigs, use a router bit with a bearing that rides directly on your fence. This eliminates potential discrepancies from the router’s base plate.
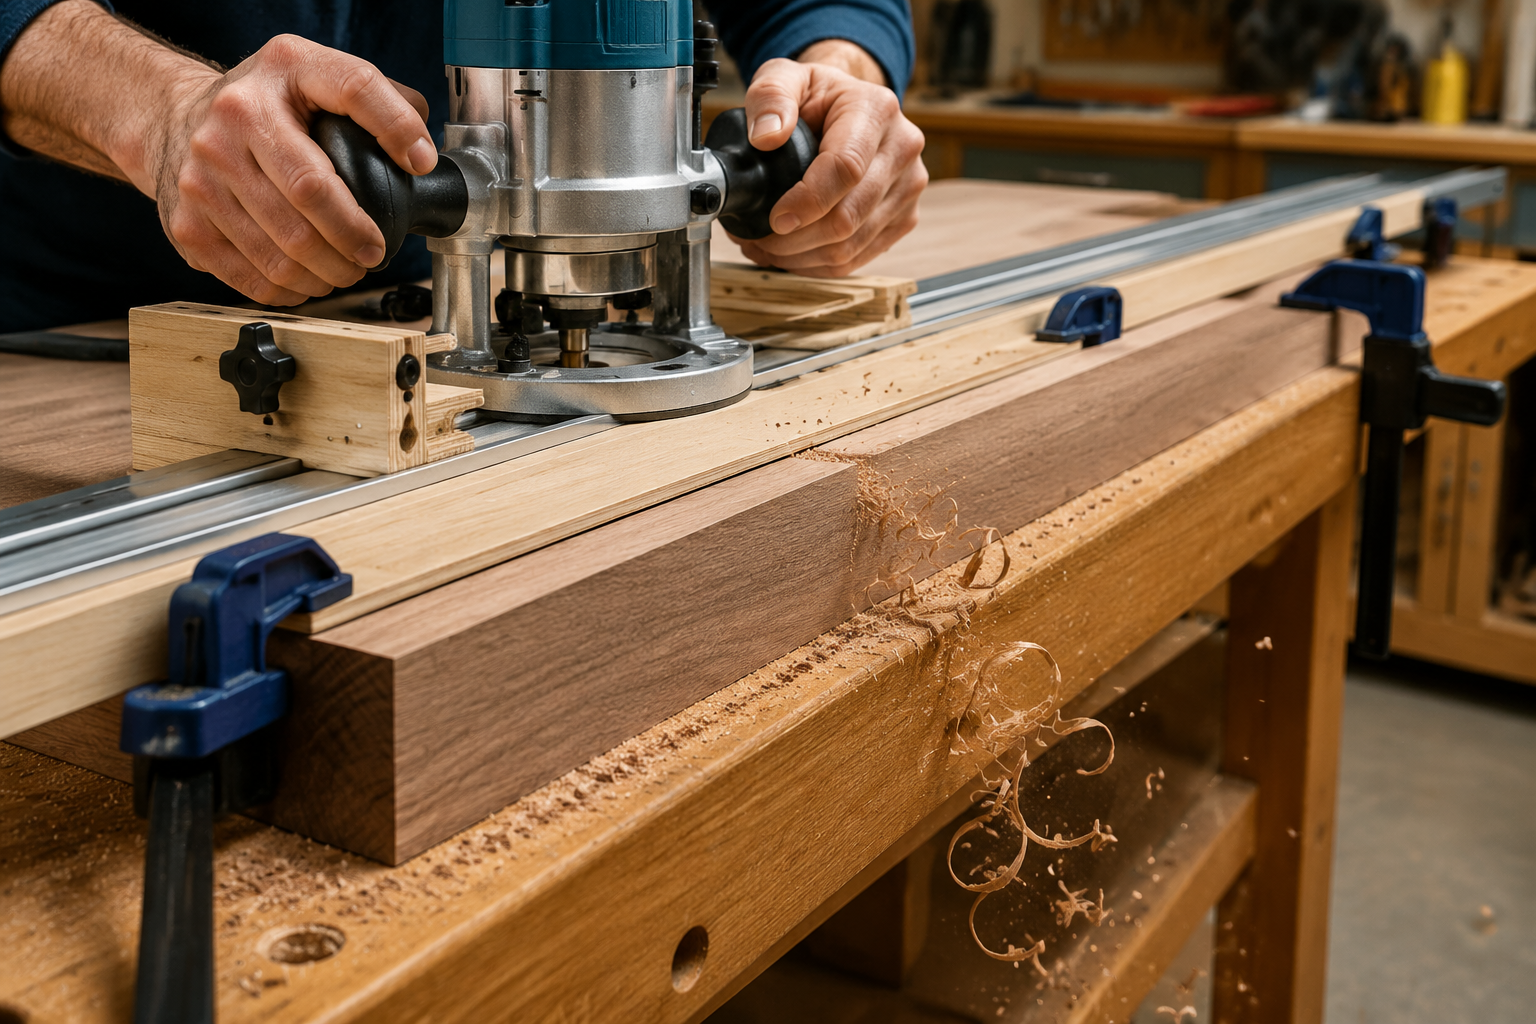 A close-up of a router edge jointing jig in use, producing a perfectly straight edge on a wooden board.
Advanced Tips and Best Practices for Using Router Sleds and Jigs
While building these DIY Wood Router Sleds and Jigs for Perfect Edge Jointing and Panel Flattening is a significant step, mastering their use requires attention to detail and adherence to best practices.

Optimizing Performance and Accuracy
- Sharp Router Bits: Always use sharp, high-quality router bits. Dull bits cause tear-out, burning, and increased strain on your router. For flattening, a large diameter spoilboard surfacing bit or a bottom-cleaning bit is ideal. For edge jointing, a straight bit is usually sufficient.
- Shallow Passes: For both flattening and jointing, take multiple shallow passes rather than one deep pass. This reduces strain on the router, minimizes tear-out, and results in a smoother finish. Aim to remove only 1/16 to 1/8 inch per pass.
- Clamping is Crucial: Secure your workpiece firmly to the sled base or workbench. Any movement can compromise the flatness or straightness of your cut. Use reliable clamps or hold-downs.
- Dust Collection: Routing generates a significant amount of dust and chips. Effective dust collection is essential for visibility, air quality, and preventing chips from interfering with the router’s movement or the cutting action. Consider building a smart workshop dust collection system.
- Direction of Cut: Always route in the correct direction (climb cut vs. conventional cut) to prevent kickback and achieve the best finish. For most routing operations, a conventional cut (feeding against the rotation of the bit) is safest.
- Listen to Your Router: Pay attention to the sound of your router. If it sounds strained, you might be taking too deep a cut or the bit is dull.
Maintenance and Longevity of Your Jigs
- Keep Jigs Flat and Square: Store your router sleds and jigs carefully to prevent warping or damage. Flat storage on a wall or shelf is best.
- Cleanliness: Regularly clean sawdust and debris from your jigs, especially the rails and sliding surfaces. This ensures smooth operation and prevents wear.
- Check for Wear: Over time, guide surfaces can wear down. Periodically check your jigs for flatness, squareness, and any signs of wear that might affect accuracy. Replace components as needed.
- Lubrication: For sliding components, a dry lubricant (like paste wax or specialized spray lubricants) can improve smoothness without attracting dust.
- Organization: Label and organize your jigs for easy access. Efficient workshop organization is key to productivity. Learn more about smart workshop storage solutions.
Troubleshooting Common Issues
- Uneven Flattening: If your panel is not perfectly flat after routing, check the flatness and parallelism of your sled’s rails. Ensure your router carriage moves smoothly without binding or rocking. Also, verify that your workpiece was adequately supported and shimmed to prevent movement during cutting.
- Tear-out on Edges: This often indicates a dull bit, too deep a cut, or routing against the grain. Take shallower passes and ensure your bit is sharp. You might also consider adding a sacrificial fence to your jointing jig to provide support to the wood fibers at the exit of the cut.
- Router Bit Burns Wood: Burning is usually a sign of a dull bit, feeding too slowly, or taking too deep a cut. Adjust your feed rate and check your bit’s sharpness.
By carefully constructing and maintaining these DIY Wood Router Sleds and Jigs for Perfect Edge Jointing and Panel Flattening, woodworkers can achieve professional-level results in their projects, expanding the capabilities of their workshop without breaking the bank.
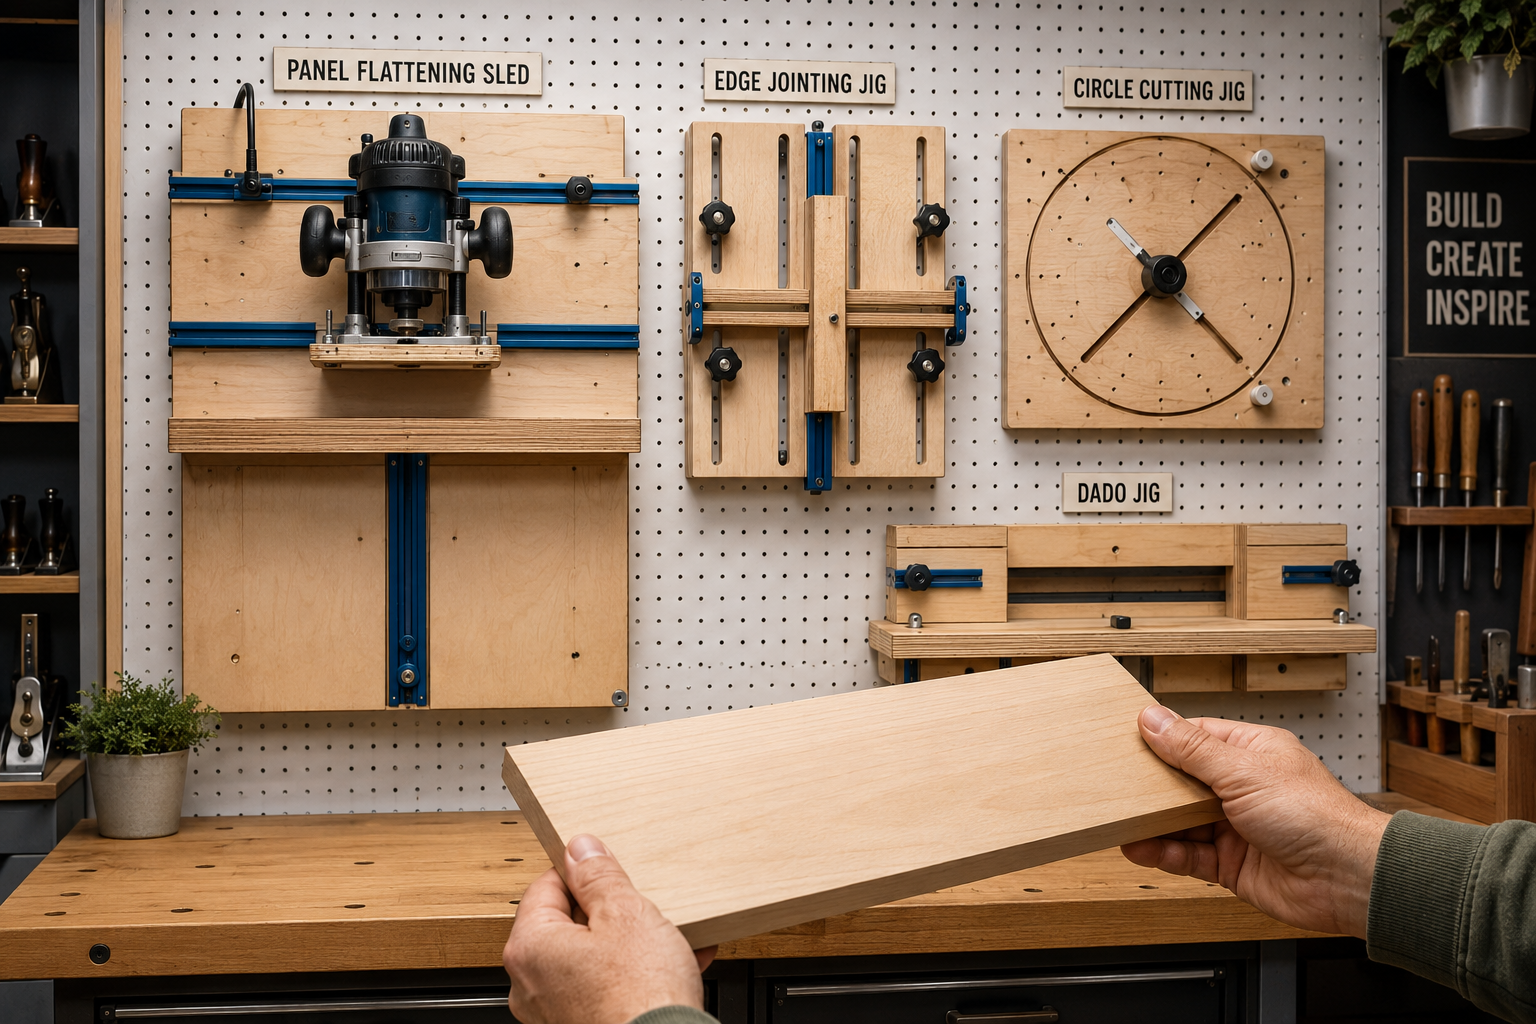 A comprehensive display of various DIY router sleds and jigs organized in a clean woodworking shop, highlighting their utility.
Conclusion
The journey to precision woodworking is often marked by the tools we acquire, but even more so by the ingenuity we apply to overcome limitations. DIY Wood Router Sleds and Jigs for Perfect Edge Jointing and Panel Flattening exemplify this spirit, transforming a versatile handheld router into a powerful solution for preparing wood stock with remarkable accuracy. In 2026, the accessibility of woodworking knowledge and materials empowers makers to craft their own high-performance tools, bypassing the need for expensive machinery.
By investing a bit of time and effort into building these essential shop aids, you unlock the ability to tackle projects that demand perfectly flat panels and laser-straight edges, from tabletop glue-ups to intricate cabinetry. Not only do these jigs save money, but they also deepen your understanding of woodworking mechanics and precision. Embrace the challenge of crafting these invaluable tools, and witness how they elevate the quality and satisfaction of every project you undertake. Start building today, and watch your woodworking capabilities soar!
