
The average game room, even one featuring a pristine pool table, often feels incomplete without thoughtful companion pieces. While the table itself is the star, the real magic of a fully realized game room comes from the surrounding elements: comfortable seating, organized storage, and a cohesive aesthetic. This article delves into creating Pool Table Benches and Cue Racks: Easy Woodworking Add‑Ons to Complete Your Game Room, focusing on woodworking projects that enhance functionality and style, offering comfortable seating, and keeping your cues neatly organized. Forget complex joinery or exotic materials; these projects are designed for accessibility, emphasizing simple construction and customizable finishes to perfectly match your existing décor.
Key Takeaways
- Custom pool table benches and cue racks elevate a game room’s aesthetics and functionality.
- Woodworking these add-ons offers significant cost savings and allows for personalized design.
- Simple joinery techniques make these projects accessible for woodworkers of all skill levels.
- Proper wood selection and finishing are crucial for durability and matching existing furniture.
- Strategic placement and design considerations ensure comfort and optimal gameplay.
Designing and Building Custom Pool Table Benches for Optimal Comfort
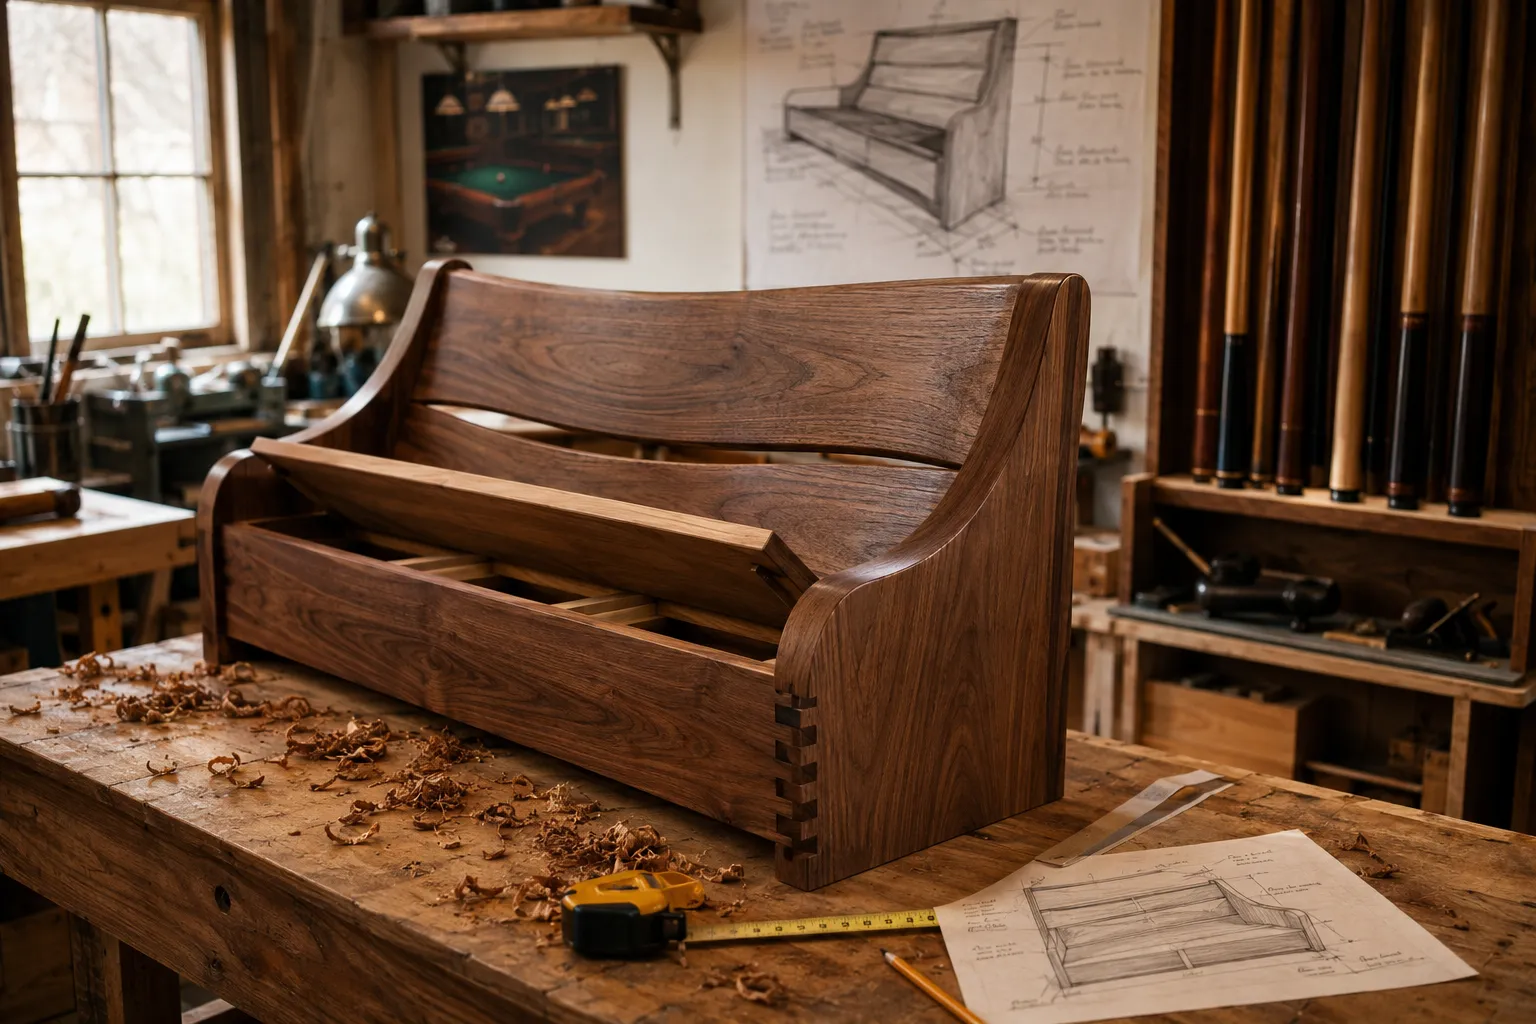
A pool table bench isn’t just a place to sit; it’s an integral part of the game room experience. It provides a comfortable waiting spot for players, a place for spectators, and can even offer hidden storage. When designing and building custom pool table benches, the key is to consider both ergonomics and aesthetics, ensuring they complement the pool table itself.
Ergonomic Considerations and Dimensions
The height of your bench is paramount. Standard dining chair height is typically around 18 inches, but for a pool table bench, you might aim slightly higher or lower depending on the height of your specific pool table and the average height of players. The goal is to allow players to rest comfortably without interfering with play or feeling too low compared to the table. A good starting point is often around 18-20 inches, including any cushion.
Consider the depth as well. A bench that is too shallow will be uncomfortable, while one that is too deep can be cumbersome. A depth of 14-18 inches usually strikes a good balance. Length should be proportionate to your pool table. For a 7-foot table, a 4-5 foot bench might suffice, while larger 8 or 9-foot tables could accommodate longer benches, or even multiple smaller ones.
Table: Recommended Bench Dimensions (Approximate)
| Feature | Standard Range (Inches) | Notes |
|---|---|---|
| Height | 18-20 | Including cushion; consider your specific pool table’s height |
| Depth | 14-18 | Balances comfort and space efficiency |
| Length | 48-72 | Proportional to pool table size; can be multiple benches |
| Leg Width | 1.5 – 3 | For stability, depending on wood species and design |
Simple Joinery Techniques for Sturdy Benches
For beginners or those looking for efficient builds, several simple yet robust joinery techniques are ideal for pool table benches.
- Pocket Hole Joinery: This is an excellent choice for speed and strength. Using a pocket hole jig, you drill angled holes that allow screws to connect two pieces of wood securely. It’s fast, strong, and the screw heads can be hidden with wood plugs or placed on less visible surfaces. This method is particularly effective for attaching legs to rails or aprons.
- Dado and Rabbet Joints: These joints involve cutting a groove (dado) or a recess (rabbet) into one piece of wood to accept another. While they require a table saw or router, they offer excellent strength and alignment, especially for connecting stretcher rails or horizontal supports.
- Lap Joints: A simple and strong joint where two pieces of wood overlap and are typically fastened with glue and screws or bolts. This can be used for connecting a stretcher to a leg.
- Mortise and Tenon (Simplified): While traditional mortise and tenon can be complex, simplified versions using a router or even careful drilling and chiseling can provide superior strength and a refined look for a bench frame.
- Through-Tenons and Wedges: For a decorative and incredibly strong connection, consider through-tenons secured with wedges, especially for the legs. This visually showcases your craftsmanship.
For added stability, especially with longer benches, consider adding a stretcher rail between the legs, closer to the floor. This significantly reduces racking and wobble. Ensuring all joints are tightly fitted and generously glued will contribute to the bench’s longevity. Remember, proper clamping is crucial for strong glue joints.
Material Selection and Finishing Options
The choice of wood greatly influences the bench’s appearance and durability.
- Hardwoods: Oak, maple, cherry, and walnut are excellent choices for their durability, beautiful grain patterns, and ability to hold up to wear and tear. They are ideal for matching existing high-quality furniture.
- Softwoods: Pine and poplar are more budget-friendly and easier to work with. They can be stained to mimic hardwoods or painted for a more casual look. Just ensure the stock is free of large knots and has good structural integrity. For certain projects, even lightweight woods like Paulownia can be a good option if properly braced and finished, though less common for benches.
When it comes to finishing, aim to match your pool table’s aesthetic.
- Stains: These enhance the wood’s natural grain and can be color-matched to your pool table or other game room furniture. Always test stains on scrap pieces of the same wood.
- Varnishes and Polyurethanes: These provide durable, protective layers against spills, scuffs, and general wear. They come in various sheens, from matte to high gloss.
- Paints: For a contemporary or specific color scheme, painting the benches can create a striking contrast or seamless integration. Use a good primer for best results.
- Oil Finishes: Penetrating oil finishes, like Danish oil or tung oil, offer a natural, hand-rubbed look and feel, enhancing the wood’s warmth while providing some protection. For more information on durable finishes, explore resources on sustainable wood finishing.
Consider adding cushions for enhanced comfort. These can be custom-made or purchased ready-made and secured with ties or non-slip backing. A well-placed Japandi Slatted Bench with Live-Edge Seat could also provide a unique design alternative to a more traditional style.
Crafting Functional and Stylish Cue Racks and Chalk Shelves
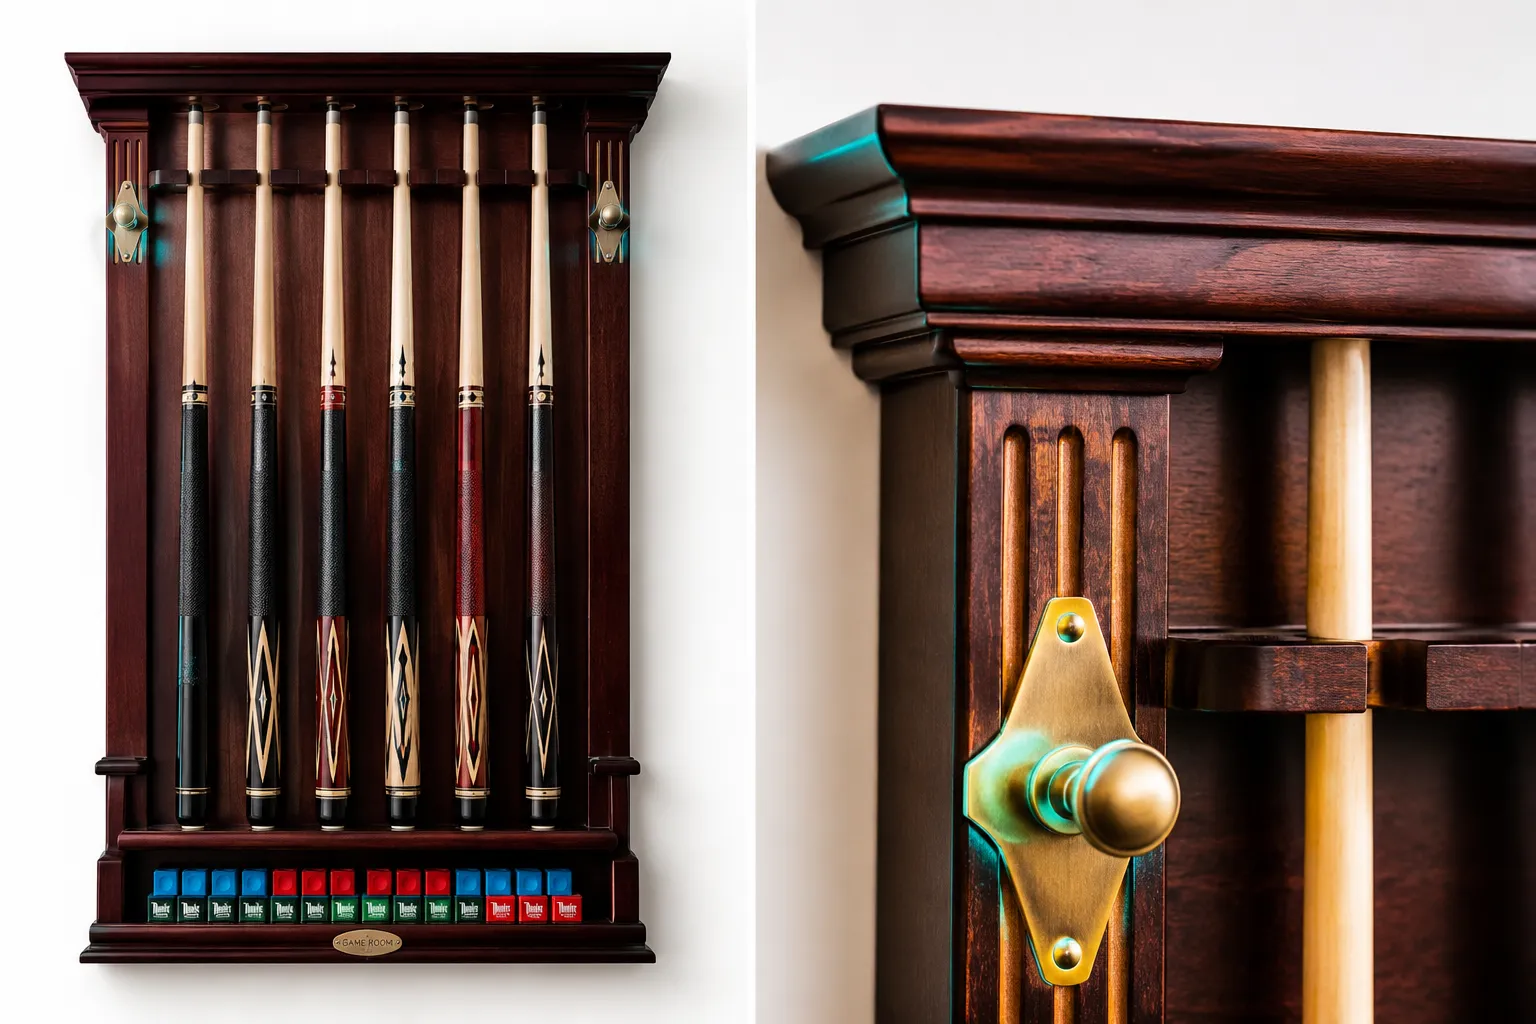
Beyond comfortable seating, organized storage for cues and accessories is essential. Custom-built cue racks and chalk shelves not only keep your equipment safe and tidy but also add a refined touch to your game room’s decor, reinforcing the theme of Pool Table Benches and Cue Racks: Easy Woodworking Add‑Ons to Complete Your Game Room.
Types of Cue Racks: Wall-Mounted vs. Floor-Standing
The choice between a wall-mounted and floor-standing cue rack depends largely on your available space, aesthetic preference, and the number of cues you need to store.
- Wall-Mounted Cue Racks: These are excellent space-savers, ideal for smaller game rooms or areas where floor space is at a premium. They typically consist of two main pieces: an upper section with clips or drilled holes to hold the cue shafts, and a lower section with corresponding indentations or holes for the cue butts.
- Advantages: Saves floor space, protects cues from being knocked over, can be integrated seamlessly into wall decor.
- Considerations: Requires secure mounting to wall studs, placement needs to be away from high-traffic areas.
- Floor-Standing Cue Racks: These offer a more traditional or substantial look. They can range from simple vertical stands to elaborate cabinets that also store balls, chalk, and other accessories.
- Advantages: Portable (though less common to move frequently), can be a design statement, often offers more storage capacity.
- Considerations: Takes up floor space, can be more prone to being bumped.
For most woodworking enthusiasts, a wall-mounted rack presents a more straightforward and impactful project, often requiring less material and simpler construction while providing significant aesthetic value.
Design Elements for Cue Racks
When designing your cue rack, consider the following elements:
- Number of Cues: Standard racks hold 6-8 cues, but you can customize this based on your needs.
- Hole/Clip Size: Ensure the drilled holes or clips are wide enough to accommodate the thickest part of your cues but snug enough to hold them securely. Typically, 1.25-1.5 inch diameter holes work well for cue butts, and smaller clips or grooves for the shafts.
- Spacing: Allow adequate space between cue slots so cues can be easily removed and replaced without hitting each other. About 4-6 inches on center is usually sufficient.
- Chalk Shelf Integration: Many wall-mounted racks incorporate a small shelf for chalk. This can be a simple ledge or a recessed cubby. Consider adding small divots or compartments to keep chalk from sliding off.
- Ball Storage: For a more comprehensive solution, design a floor-standing rack or a larger wall unit that includes shelves or trays for storing billiard balls.
- Decorative Touches: Incorporate elements that match your pool table, such as carved details, specific edge profiles (e.g., chamfers, roundovers), or contrasting wood accents. This can be a great opportunity to explore profitable small-scale woodworking skills on a smaller scale.
Construction and Mounting Tips
For construction, simple joinery like pocket holes or dado joints can work effectively, especially if you’re building a more enclosed cabinet-style rack. For a minimalist wall rack, precisely drilled holes and clean edges are key.
- Measure Twice, Cut Once: This adage is especially true when drilling holes for cues. Accuracy ensures a neat, professional look.
- Secure Mounting: For wall-mounted racks, always locate wall studs and use appropriate fasteners (e.g., lag screws or heavy-duty toggles) to ensure the rack is securely anchored. Cues, especially weighted ones, can be surprisingly heavy.
- Finishing: Apply a durable finish that protects the wood and matches your benches and pool table. This might involve staining, varnishing, or painting.
- Edge Treatment: Smooth all edges to prevent splinters and give a polished appearance. A slight chamfer or round-over can greatly improve the feel.
A well-designed and executed cue rack and chalk shelf transform a cluttered corner into an organized, attractive display, enhancing the overall appeal and functionality of your game room.
Practical Woodworking Tips for Your Game Room Add-Ons
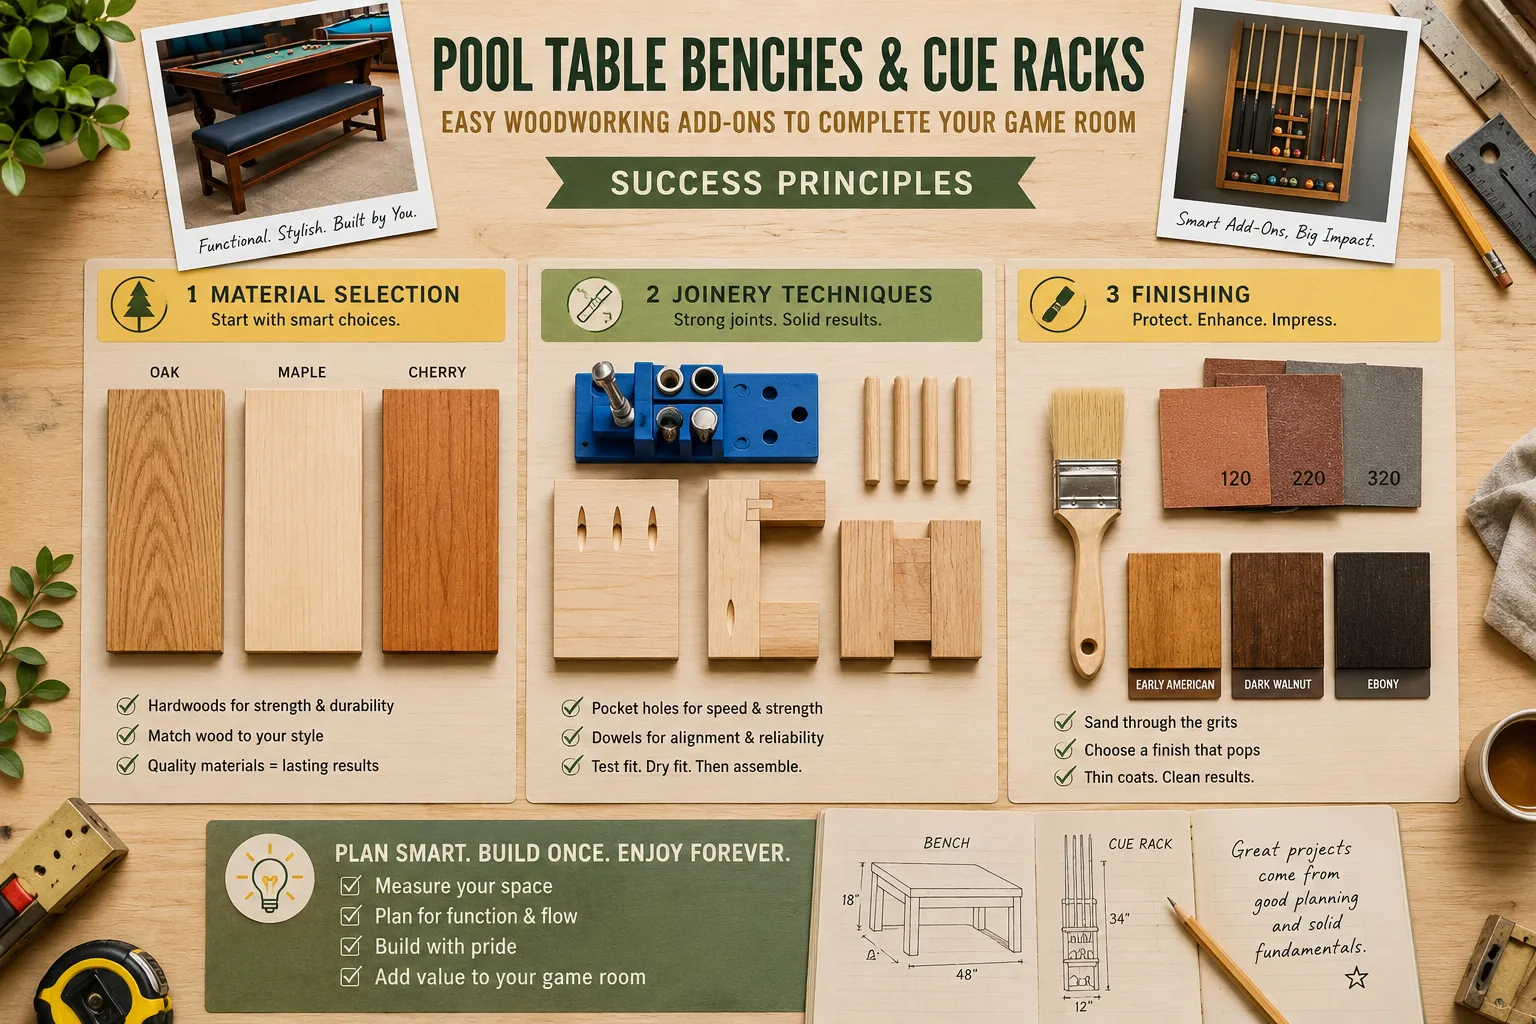
Undertaking woodworking projects like Pool Table Benches and Cue Racks: Easy Woodworking Add‑Ons to Complete Your Game Room can be incredibly rewarding. To ensure success, focus on fundamental woodworking practices, smart material choices, and efficient finishing techniques. These practical tips will guide you through the process, making it enjoyable and yielding high-quality results.
Tool Essentials for Beginner and Intermediate Woodworkers
You don’t need a professional workshop to build these projects. A few essential tools will get the job done efficiently.
- Measuring and Marking Tools: A good tape measure, combination square, marking knife or pencil are fundamental for accuracy.
- Cutting Tools:
- Circular Saw or Miter Saw: For straight, accurate cuts on lumber. A miter saw is excellent for precise crosscuts, while a circular saw with a guide can handle longer rips.
- Jigsaw: Useful for cutting curves or interior cutouts if your design requires them.
- Hand Saw: For quick cuts or situations where power tools are cumbersome.
- Drilling Tools:
- Cordless Drill/Driver: Indispensable for drilling pilot holes, driving screws, and using various drill bits.
- Pocket Hole Jig: As mentioned, this simplifies joinery significantly.
- Clamping Tools: Various sizes of clamps (bar clamps, F-clamps, pipe clamps) are crucial for holding pieces together during glue-up. Never underestimate the power of good clamping!
- Sanding Equipment: An orbital sander or belt sander (for initial heavy removal) makes finishing much easier. Don’t forget sanding blocks and various grits of sandpaper.
- Safety Gear: Always wear safety glasses, hearing protection, and appropriate respiratory protection (dust mask) when operating power tools or sanding.
For those considering building a dedicated workspace, reviewing guides on building a DIY heavy-duty workbench can be beneficial, even for smaller projects.
Optimizing Material Selection for Durability and Aesthetics
Choosing the right wood is critical for the longevity and appearance of your game room furniture.
- Matching Wood Species: If your pool table is a specific wood (e.g., oak, cherry, maple), try to match or complement it with your benches and cue rack. This creates a cohesive, integrated look.
- Solid Wood vs. Plywood: For structural components like bench legs and frames, solid wood is generally preferred for its strength and aesthetic. High-quality plywood can be used for bench tops or the backing of a cue rack, offering stability and cost-effectiveness. Consider a high-grade Baltic birch or cabinet-grade plywood for visible surfaces.
- Wood Grain and Figure: Pay attention to the wood grain when selecting boards. Flat-sawn boards show more figure, while quarter-sawn boards are more stable and have a straighter grain. Orient grain patterns to your advantage for visual appeal and structural integrity.
- Moisture Content: Ensure your wood is properly dried (kiln-dried is best) to prevent warping, twisting, and cracking after construction. Lumberyards often provide this information.
When sourcing wood, it’s worth exploring local lumberyards for better selection and potentially better prices than big-box stores.
Finishing Touches: Sanding, Staining, and Protection
A high-quality finish elevates your woodworking projects from functional pieces to cherished additions to your home.
- Sanding Progression: Start with a coarser grit (e.g., 80 or 100) to remove milling marks and imperfections, then progressively move to finer grits (120, 150, 180, 220). Sanding with the grain is essential to avoid scratches. For curved parts, a DIY clamp rack and tool holder wall can keep various sanding blocks and tools organized.
- Dust Removal: Before applying any stain or finish, thoroughly clean all surfaces. A tack cloth or compressed air works well to remove fine dust particles.
- Stain Application: Apply stain evenly, following the manufacturer’s instructions. Wipe off excess stain promptly to prevent blotching. Consider using a wood conditioner on blotch-prone woods like pine or cherry.
- Topcoat Application: Apply several thin coats of your chosen topcoat (polyurethane, varnish, lacquer, or oil finish), allowing adequate drying time between coats. Lightly sand with a very fine grit (320 or 400) between coats for a smoother finish, then wipe clean. This builds up a durable protective layer.
- Curing Time: Allow your finish ample time to cure completely before heavy use. While dry to the touch quickly, full hardness can take days or even weeks.
By paying attention to these practical woodworking aspects, your custom pool table benches and cue racks will not only be functional and beautiful but also enduring pieces that enhance your game room for years to come in 2026.
Conclusion
Elevating your game room from a mere space with a pool table to a truly refined entertainment area is an achievable goal for any woodworker. By focusing on Pool Table Benches and Cue Racks: Easy Woodworking Add‑Ons to Complete Your Game Room, you not only address practical needs like comfortable seating and organized storage but also infuse your personal style and craftsmanship into the heart of your home. These projects, while rewarding, are designed to be accessible, emphasizing straightforward joinery, thoughtful material selection, and careful finishing.
The satisfaction of crafting a sturdy, aesthetically pleasing bench that perfectly complements your pool table, or a sleek cue rack that keeps your equipment in pristine condition, is immense. It transforms your game room into a more inviting, functional, and visually cohesive space where every detail reflects quality and intention.
Actionable Next Steps:
- Assess Your Needs: Determine the ideal dimensions for benches and the number of cues your rack needs to hold.
- Sketch Your Design: Create simple sketches of your desired benches and cue rack, considering your game room’s existing aesthetic and available space.
- Choose Your Wood: Select a wood species that complements your pool table and fits your budget.
- Gather Tools and Materials: Ensure you have the necessary woodworking tools, lumber, fasteners, and finishing supplies.
- Start Building: Begin with precise measurements and cuts, employ your chosen simple joinery techniques, and move carefully through the assembly process.
- Finish Strong: Dedicate time to thorough sanding and applying a durable, beautiful finish that protects your creations for years to come.
By taking these steps, you will successfully complete your game room with custom woodworking pieces that are both easy to build and enduringly stylish.
References
- Fine Woodworking Magazine. (n.d.). Woodworking Essentials.
- Kreg Tool Company. (n.d.). Pocket-Hole Joinery Basics.
- The Wood Whisperer. (n.d.). Finishing Fundamentals.
seo_meta_title: “Pool Table Benches & Cue Racks: Easy Woodworking Adds” seo_meta_description: “Complete your game room in 2026 with custom-built pool table benches and cue racks. Easy woodworking projects for style, comfort, and organization.”