
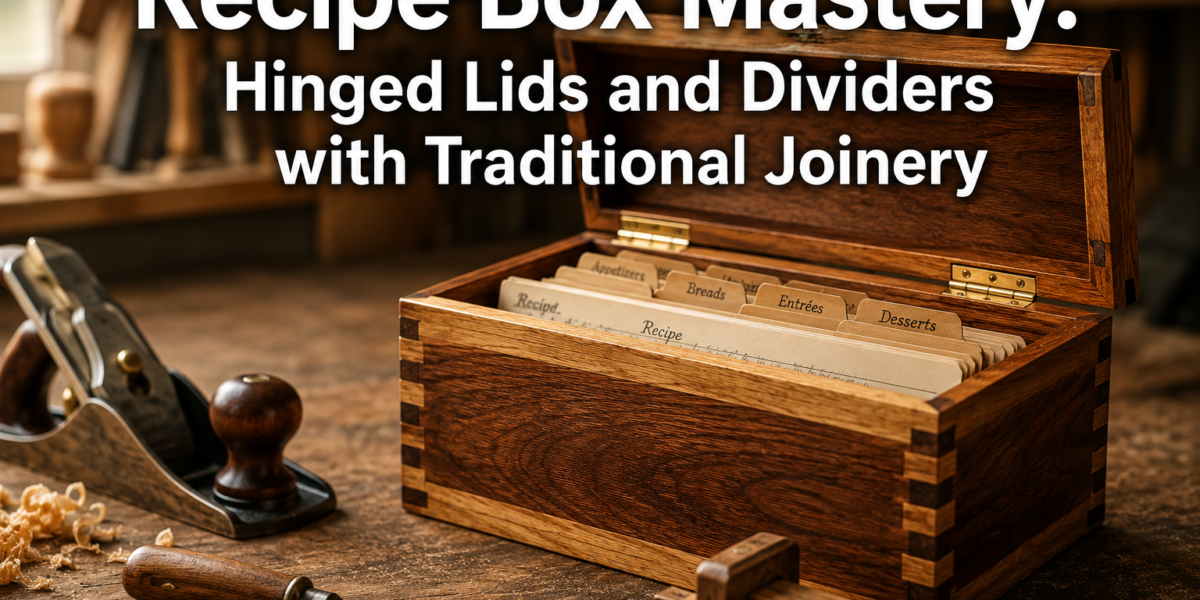

The aroma of freshly baked bread, the sizzle of a pan, and the warm glow of a kitchen light—these sensory memories are often tied to cherished family recipes. In 2026, as home cooking continues its strong revival, the demand for meaningful, personalized kitchen storage is soaring. While digital recipes are convenient, there’s an undeniable charm and practicality in a physical recipe card, especially when housed in a beautiful, handcrafted wooden box. This article delves into “Recipe Box Mastery: Hinged Lids and Dividers with Traditional Joinery,” offering a step-by-step guide for beginners to create heirloom kitchen storage. From precise box joinery to elegant engraving, discover how to craft a piece that is both functional and a testament to enduring craftsmanship.
Key Takeaways
- Heirloom Craftsmanship: Learn to build a wooden recipe box using traditional joinery techniques, transforming it into a lasting family heirloom.
- Essential Joinery: Master the fundamentals of dovetail and box joints, crucial for durable and aesthetically pleasing box construction.
- Functional Design: Understand how to integrate hinged lids and custom dividers for optimal organization and accessibility of recipe cards.
- Personalization through Engraving: Discover techniques for adding custom engraving, turning a functional item into a truly unique and sentimental piece.
- Beginner-Friendly Approach: Follow a structured guide suitable for woodworking novices, focusing on clear steps and accessible tools.
The Foundation of Enduring Storage: Mastering Box Joinery for Your Recipe Box
Creating a truly durable and beautiful recipe box begins with mastering foundational woodworking joints. Traditional joinery, such as dovetails and box joints, offers superior strength and aesthetic appeal compared to simple butt joints or screws. For the aspiring woodworker in 2026, understanding these techniques is the first step toward “Recipe Box Mastery: Hinged Lids and Dividers with Traditional Joinery.”

Choosing Your Wood
The selection of wood significantly impacts the final look and longevity of your recipe box. Hardwoods are generally preferred for their durability and attractive grain patterns.
Popular Wood Choices for Recipe Boxes:
- Cherry: Known for its rich, reddish-brown hue that deepens with age. It’s relatively easy to work with and takes a beautiful finish.
- Walnut: A premium choice, offering deep, dark browns and often striking grain patterns. It’s stable and carves well.
- Maple: Light-colored with a fine, even grain. It’s very durable and provides a clean, modern look.
- Oak (Red or White): A classic choice, known for its distinct grain and durability. White oak is particularly water-resistant, a bonus for kitchen items.
Consider the aesthetic of your kitchen and the desired feel of the heirloom piece when making your selection.
Essential Tools for Traditional Joinery
While complex machines can cut joints, traditional methods often rely on a few key hand tools, fostering a deeper connection to the craft.
- Marking Gauge: For precise layout lines.
- Dovetail Saw or Backsaw: Fine-toothed saws for accurate cuts.
- Chisels: A set of sharp chisels (1/4″, 1/2″, 3/4″ recommended) for cleaning out waste.
- Mallet: For driving chisels.
- Bench Vise: To secure your workpieces.
- Clamps: Essential for assembly and glue-up.
- Hand Plane: For squaring stock and refining surfaces.
- Router (optional): A router with a dovetail jig can speed up the process for box joints, but hand-cut methods are incredibly rewarding. For more on router techniques, see our guide on Mastering the Router Table: Beyond Basic Edges for Precision Joinery.
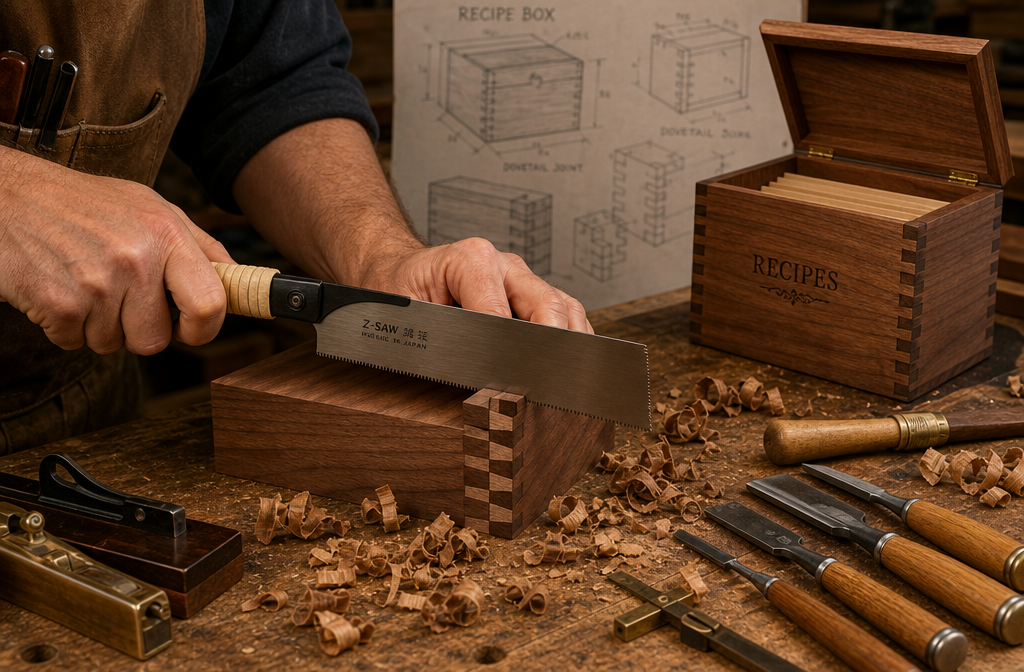
Step-by-Step: Crafting Dovetail Joints
Dovetail joints are renowned for their strength and beauty, making them ideal for the corners of a recipe box. They resist pulling forces, ensuring the box remains sturdy for generations.
- Prepare Your Stock: Mill your wood to the exact dimensions for the front, back, and side panels. Ensure all pieces are perfectly square and to thickness.
- Lay Out the Pins: Decide on the number and size of your dovetail pins. Use a marking gauge to scribe baseline depths on the end grain of the “pin” board. Mark the pin locations carefully.
- Cut the Pins: Using a dovetail saw, cut along the waste side of your pin lines. Then, use a chisel to remove the waste wood between the pins down to your baseline.
- Transfer the Layout: Place the completed pin board onto the “tail” board, aligning the edges perfectly. Use a sharp pencil or knife to transfer the pin shapes onto the tail board’s end grain.
- Cut the Tails: Carefully saw along the transferred lines on the tail board. Remove the waste between the tails with a chisel.
- Test Fit: Gently dry-fit the joint. It should be snug but not require excessive force. Make minor adjustments with a chisel if needed.
- Repeat: Apply this process to all four corners of your box. For a deeper dive into dovetails, check out our article on Mastering Dovetail Joinery for Drawers: Hand and Router Methods.
“The dovetail joint is a dance between precision and patience. Each cut, each stroke of the chisel, builds upon the last to create a joint that is as beautiful as it is strong.”
Box Joints: A Sturdy Alternative
Box joints (or finger joints) offer a strong, attractive, and slightly simpler alternative to dovetails, especially for beginners. They can be cut with a table saw and a jig, or carefully with hand tools.
- Prepare Stock: As with dovetails, ensure all pieces are milled precisely.
- Set Up Jig (Table Saw Method): Create or acquire a box joint jig for your table saw. The jig helps ensure even, repeatable cuts.
- Cut Fingers: Make a series of evenly spaced cuts (fingers) into the end grain of your first board.
- Register and Cut: Use the first board to register the second, ensuring the cuts align perfectly, then cut the fingers on the second board.
- Test Fit and Glue: Dry-fit the joint. If snug, apply a quality wood glue (like Titebond III for moisture resistance) and clamp firmly.
Regardless of the joint chosen, precise measurement and careful execution are paramount for creating a robust foundation for your recipe box.
Integrating Hinged Lids and Custom Dividers
With the main box structure complete, the next phase in “Recipe Box Mastery: Hinged Lids and Dividers with Traditional Joinery” focuses on making it fully functional and beautifully organized. This involves attaching a hinged lid and crafting custom internal dividers.
Crafting and Attaching the Hinged Lid
A well-fitted hinged lid is crucial for protecting recipe cards and completing the aesthetic of your box.
- Lid Material: The lid can be made from a single solid piece of wood or a panel-and-frame construction. Ensure it’s flat and dimensionally stable. The size should perfectly match the top opening of your box.
- Selecting Hinges:
- Brass Butt Hinges: A classic choice, offering durability and a traditional look. They require mortising (recessing the hinge into the wood) for a flush fit.
- Barrel Hinges: Small, hidden hinges that create a seamless look when the lid is closed. These require precise drilling.
- Stop Hinges: These hinges have an internal mechanism that prevents the lid from opening past a certain angle, often 90 or 100 degrees, preventing it from flopping open too far.
- Quadrant Hinges: Elegant and functional, often used in higher-end boxes, allowing the lid to open to a precise angle and sometimes featuring a decorative stay.
- Mortising Hinges (Butt Hinges):
- Marking: Position the hinges on the back edge of the lid and the back panel of the box. Mark their outlines precisely with a knife.
- Routing/Chiseling: Use a router with an appropriate bit or a sharp chisel to remove wood within the marked areas to the exact depth of the hinge leaf. The goal is for the hinge to sit perfectly flush with the wood surface. For more on routing, consider our guide on Mastering the Router Table: Beyond Basic Edges for Precision Joinery.
- Drilling Pilot Holes: Use a self-centering drill bit to create pilot holes for the hinge screws.
- Attachment: Screw the hinges securely into place.
- Testing the Lid: Ensure the lid opens and closes smoothly, without binding. Adjust hinge placement or mortise depth if necessary.
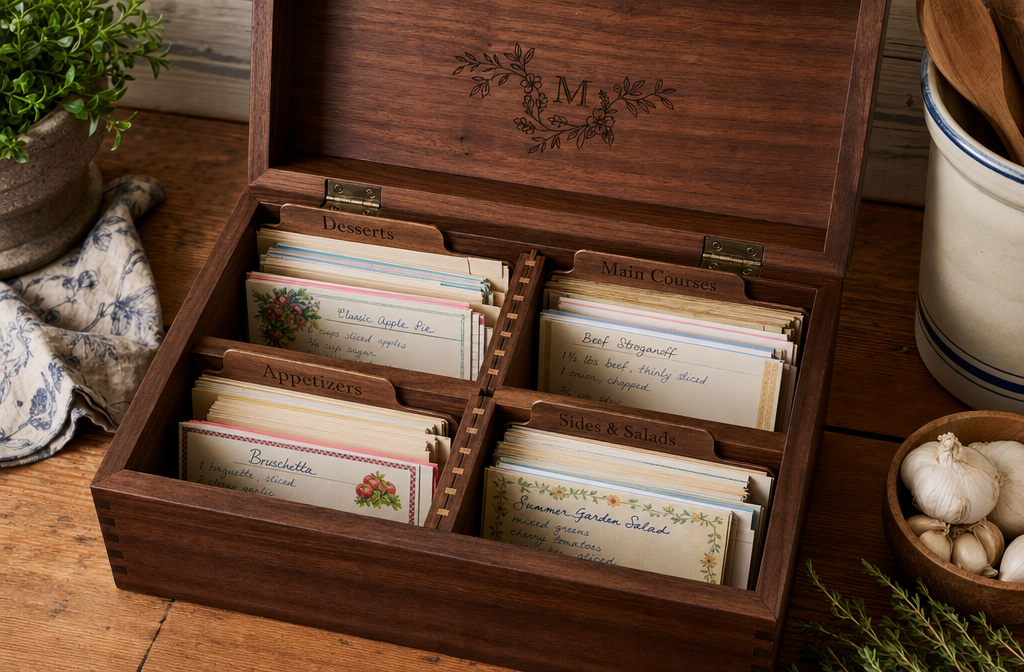
Designing and Installing Custom Dividers
Dividers transform a simple box into an organized recipe archive. They can be fixed or removable, depending on your preference.
Divider Design Considerations:
- Fixed Dividers: Permanently glued into dado or groove cuts within the box sides. Offer maximum stability.
- Removable Dividers: Often sit in shallow dados or simply rest in place, allowing for flexibility in organization. These might be useful if you plan to change categories often.
- Material: Use a thinner stock of the same wood as your box, or a contrasting wood for a decorative touch. Typically 1/8″ to 1/4″ thick.
- Height: Dividers should be slightly taller than your recipe cards for easy visibility of category tabs.
Methods for Creating Dividers:
- Simple Drop-In: The easiest method. Cut dividers to length and simply drop them into the box. These are easily removable but can shift.
- Dado Cuts: Use a table saw with a dado blade, or a router with a straight bit, to cut shallow grooves (dadoes) into the inner faces of the box’s long sides. The dividers then slide into these grooves.
- Layout: Carefully measure and mark the positions for your categories (e.g., Appetizers, Main Courses, Desserts, Breakfast, Drinks).
- Cutting: Precisely cut the dadoes to match the thickness of your divider stock.
- Fit: Ensure dividers slide in and out smoothly.
- Rabbeted Dividers: For a more secure fit without visible dadoes on the outside, a small rabbet can be cut on the ends of the dividers, which then fit into corresponding grooves.
“A well-organized recipe box is more than just storage; it’s a testament to a culinary journey, made accessible and beautiful through thoughtful design.”
Optional: Adding a Small Drawer or Storage for Utensils
For an extra touch of “Recipe Box Mastery: Hinged Lids and Dividers with Traditional Joinery,” consider integrating a small, shallow drawer beneath the main recipe card compartment. This can be perfect for holding a small pencil, a measuring spoon, or clips.

- Drawer Construction: Employ smaller-scale traditional joinery like half-blind dovetails (see Mastering Dovetail Joinery for Drawers) or simple dado joints for the drawer box.
- Runners: Wooden runners can be glued to the inside of the recipe box to support the drawer.
- False Bottom: Create a false bottom above the drawer to support the recipe cards, allowing the drawer to slide underneath.
These additions enhance the functionality and value of your handcrafted recipe box.
Finishing Touches: Sanding, Engraving, and Protection
The final stages of “Recipe Box Mastery: Hinged Lids and Dividers with Traditional Joinery” involve meticulous finishing, personalization, and protection. These steps elevate your project from a functional object to a cherished heirloom.
The Art of Sanding
Proper sanding is non-negotiable for a professional-looking finish. It removes tool marks, smooths the wood grain, and prepares the surface for staining or sealing.
- Grit Progression: Start with a coarser grit (e.g., 100-120 grit) to remove any major imperfections. Progress through finer grits (150, 180, 220) until the surface is uniformly smooth.
- Even Pressure: Apply even pressure and sand with the grain to avoid swirl marks.
- Dust Removal: Between grits, thoroughly remove all sanding dust with a tack cloth or compressed air. Fine dust left behind can scratch the surface when moving to a finer grit.
- Detail Sanding: Use sanding blocks or folded sandpaper for corners and intricate areas.
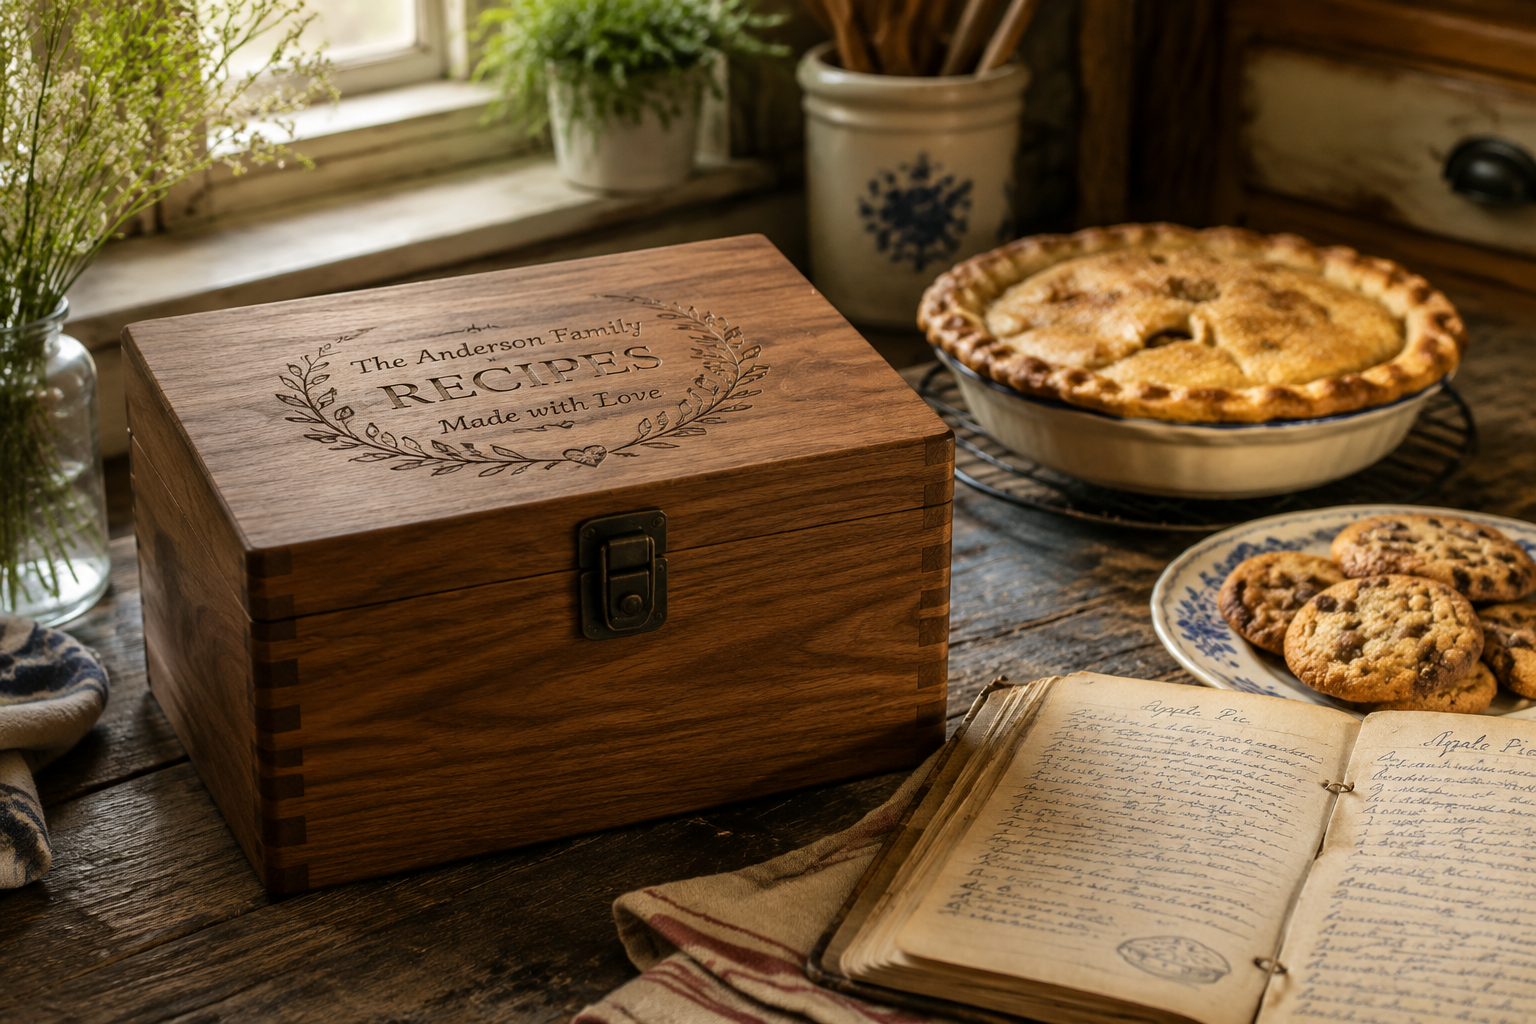
Personalization Through Engraving
Custom engraving transforms a functional box into a deeply personal and meaningful gift or family heirloom.
- Methods of Engraving:
- Laser Engraving: Offers incredible precision and detail. Many local woodworking shops or online services provide laser engraving. Ideal for intricate designs, names, or even family crests.
- Wood Burning (Pyrography): A hands-on method using a heated pen to burn designs into the wood. Allows for artistic expression and a rustic, handcrafted feel. Requires practice for clean lines. If you’re new to this, check out our guide on Unleash Your Inner Artist: A Deep Dive into Woodworking Burners.
- Router Carving: For deeper, more robust engravings, a small router with a V-groove bit can be used, often with templates. This creates a bold, sculptural effect.
- Hand Carving: The most traditional method, using chisels and gouges. This requires skill and patience but yields a truly unique, artisanal result.
- Design Ideas:
- Family Name or Monogram
- “Grandma’s Recipes” or “Our Family Cookbook”
- A significant date (e.g., wedding anniversary)
- A small, meaningful quote about cooking or family
- Simple culinary motifs (whisk, spoon, bread loaf)
Plan your engraving before applying any finish, as some finishes can make burning or laser etching more difficult or inconsistent.
Applying a Protective Finish
A durable finish protects the wood from spills, humidity, and wear, ensuring your recipe box lasts for generations. Given its kitchen environment, food-safe and moisture-resistant finishes are recommended.
- Oil Finishes (e.g., Mineral Oil, Tung Oil, Linseed Oil):
- Pros: Penetrate the wood, enhance natural grain, easy to apply, repairable. Often food-safe once cured.
- Cons: Offer less protection against scratches than film-building finishes, require reapplication over time.
- Application: Apply several thin coats, wiping off excess between coats. Allow ample drying time.
- Polyurethane (Water-Based or Oil-Based):
- Pros: Forms a durable, clear film that offers excellent protection against moisture and scratches.
- Cons: Can alter wood color slightly, harder to repair localized damage.
- Application: Apply 2-3 thin coats with a brush or spray, sanding lightly with fine-grit sandpaper (e.g., 320-400 grit) between coats for better adhesion and a smoother finish. Water-based polyurethanes are less odorous and dry faster. For spray application, see our article on Aerosol Polyurethane: Benefits, Application, and Types.
- Shellac:
- Pros: Natural, non-toxic, fast-drying. Excellent as a sealer or a barrier coat.
- Cons: Not highly water-resistant, can be susceptible to alcohol damage.
- Application: Apply thin coats, often thinned with denatured alcohol.
For items that will hold food, ensure any finish used is certified food-safe once fully cured. Always read product labels carefully.
Maintenance Tips for Your Heirloom Recipe Box:
- Wipe clean with a damp cloth, avoiding harsh chemicals.
- Reapply oil finish periodically if using an oil-based protector.
- Keep out of direct sunlight to prevent fading or drying out of the wood.
By meticulously attending to these finishing touches, your “Recipe Box Mastery: Hinged Lids and Dividers with Traditional Joinery” project will be complete, ready to hold culinary treasures and stand the test of time.
Conclusion
The journey of crafting a wooden recipe box with hinged lids and traditional joinery is more than just a woodworking project; it’s an investment in skill, patience, and the creation of a tangible legacy. In 2026, as the world increasingly gravitates towards digital convenience, there’s a profound satisfaction in returning to the timeless art of traditional craftsmanship. By mastering foundational joints like dovetails and box joints, carefully integrating functional hinges and dividers, and adding personalized engravings, you don’t just build a box—you build an heirloom.
This “Recipe Box Mastery: Hinged Lids and Dividers with Traditional Joinery” guide empowers even beginners to embark on this rewarding path. The finished product will not only serve as a beautiful and organized repository for cherished family recipes but also as a testament to your dedication to craftsmanship. It will be a piece passed down through generations, holding stories, flavors, and memories within its carefully joined walls.
Actionable Next Steps:
- Gather Materials: Select your preferred hardwood and source quality hardware (hinges, optional drawer pulls).
- Practice Joints: Before cutting into your project wood, practice dovetails or box joints on scrap pieces until you feel confident in your technique.
- Plan Your Design: Sketch out your box dimensions, lid style, and divider layout. Consider where you’ll add personalized engraving.
- Invest in Sharpening: Ensure your chisels and plane irons are razor-sharp. A sharp tool is a safe and effective tool.
- Start Building: Take it one step at a time, enjoying the process of bringing a beautiful, functional piece to life.
May your handcrafted recipe box be filled with delicious memories for years to come!

