

The surprising reality is that despite wood’s inherent flammability, meticulously crafted wooden candle holders, from delicate tealight designs to stately pillar stands, can offer a safe, warm, and exceptionally beautiful addition to any interior when proper design and burning techniques are employed. In 2026, the demand for natural, artisan-crafted decor continues to rise, and wooden candle holders for ambient decor stand at the forefront of this trend. This article will delve into the art and science of creating and using “Wooden Candle Holders: Tealight to Pillar Designs with Safe Burning Techniques,” focusing on tutorials for lathe turning, geometric cuts for heat-resistant designs, selecting wood types that resist charring, and achieving polished finishes for enduring elegance.
Key Takeaways
- Design for Safety: Incorporate heat-resistant liners (metal or glass) for all wooden candle holders, especially for tealight and pillar designs.
- Wood Selection Matters: Opt for dense, stable hardwoods like oak, maple, and walnut for better heat resistance and durability.
- Precision Craftsmanship: Utilize lathe turning for elegant, symmetrical forms and geometric cuts for secure candle seating and aesthetic appeal.
- Finishing for Protection & Beauty: Apply flame-retardant finishes and sealants, alongside high-quality polishes, to enhance durability and visual appeal.
- Adhere to Safe Burning Practices: Always use candles within their rated holders, trim wicks, avoid drafts, and never leave burning candles unattended.
Crafting Wooden Candle Holders: Design Principles and Techniques
Creating safe and aesthetically pleasing wooden candle holders requires a thoughtful approach to design and material selection. The inherent beauty of wood, with its varied grains and textures, makes it a prime material for decorative pieces. However, its combustible nature necessitates careful consideration of safety features, particularly when designing for tealight to pillar candles.

Material Selection: Wood Types for Heat Resistance
Choosing the right wood is fundamental to both the beauty and safety of your candle holders. While all wood is combustible, some species possess characteristics that make them more suitable for projects involving heat sources.
- Dense Hardwoods: Varieties such as oak, maple, walnut, cherry, and birch are excellent choices. Their higher density means they char slower and resist warping better than softer woods.
- Exotic Hardwoods (with caution): Woods like ipe or jatoba are incredibly dense and fire-resistant, but they can be challenging to work with and might be more expensive. Ensure sustainable sourcing.
- Avoid Softwoods: Pine, cedar, and fir are generally not recommended for direct contact with candle flames due to their lower density, higher resin content, and quicker charring.
A critical aspect of crafting “Wooden Candle Holders: Tealight to Pillar Designs with Safe Burning Techniques” is the integration of a heat-resistant barrier. This is non-negotiable for safety. Metal inserts (aluminum, brass, stainless steel) or glass cups should be snugly fitted into the wood to completely separate the flame and hot wax from the wooden structure. For tealight holders, this might be a simple metal cup; for pillar holders, it could be a wider metal or glass plate set into a recessed area.
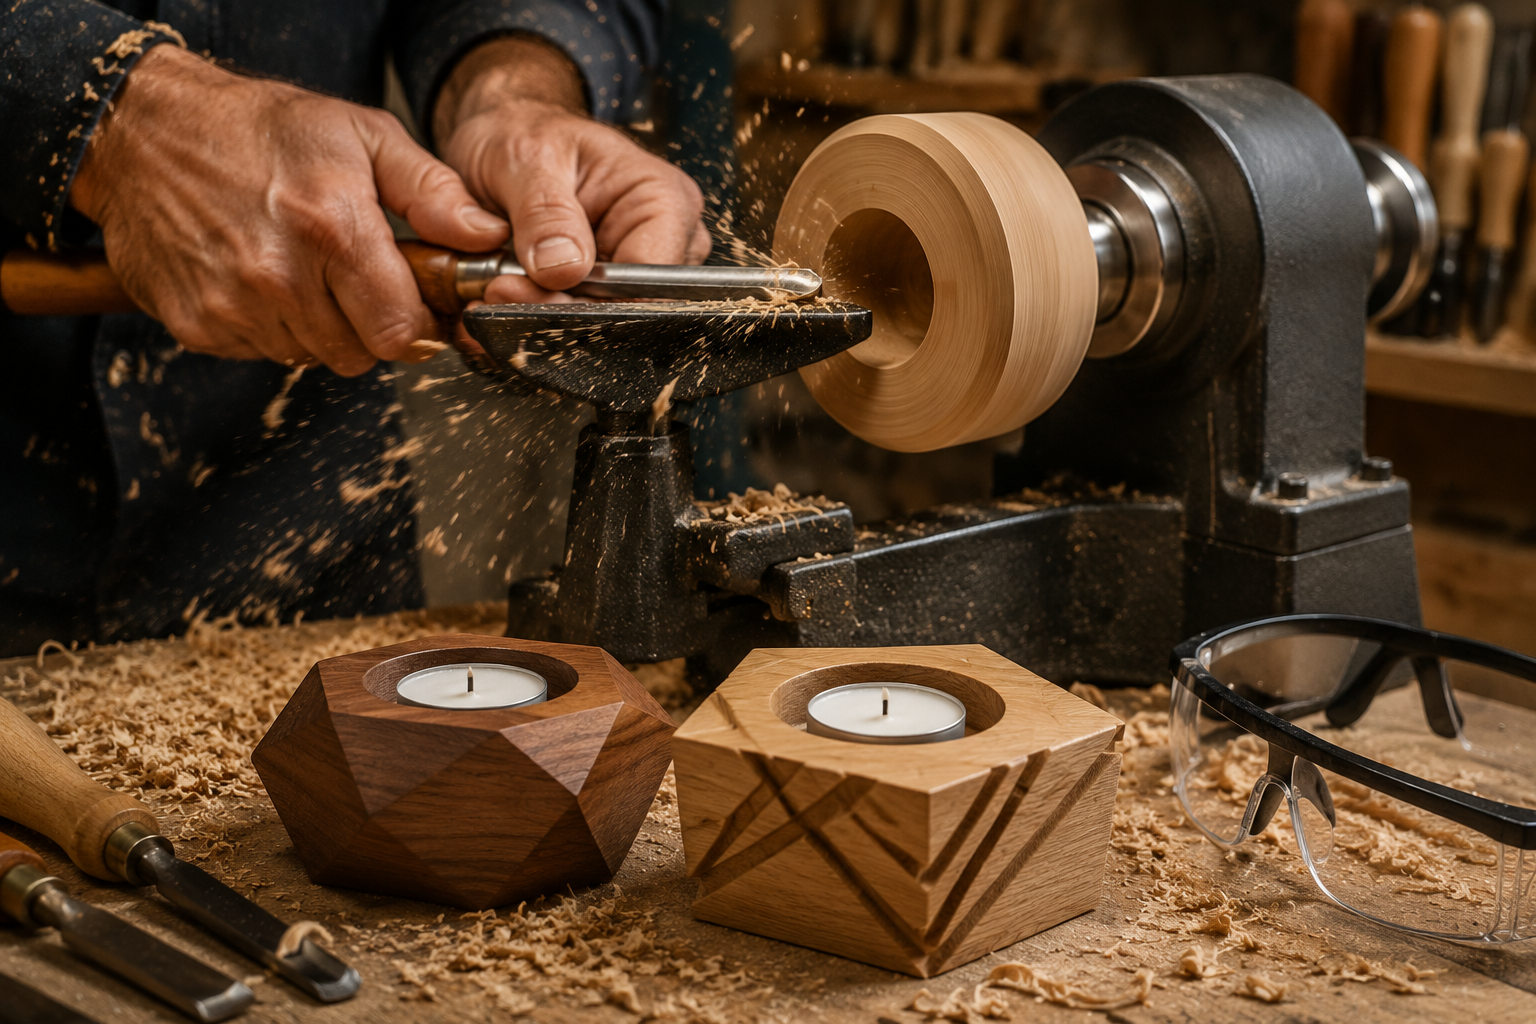
Lathe Turning for Elegant Forms
Lathe turning is an ideal technique for creating symmetrical and elegant wooden candle holders, especially for pillar and taper candle designs. This method allows for smooth curves, intricate profiles, and precise dimensions, resulting in a refined aesthetic.
Steps for Lathe Turning a Pillar Candle Holder:
- Wood Preparation: Select a solid, kiln-dried block of your chosen hardwood, ensuring it’s free of cracks or significant knots. Square the blank and mark its center points.
- Mounting: Securely mount the wood blank between the headstock and tailstock of the lathe.
- Roughing Out: Using a roughing gouge, turn the square blank into a cylinder.
- Shaping: Employ various turning tools like spindle gouges, skew chisels, and parting tools to create the desired profile. This could range from simple, classic lines to more ornate, decorative shapes.
- Creating the Candle Recess:
- For a pillar candle, use a parting tool or a drill chuck mounted in the tailstock to create a flat-bottomed recess at the top. The diameter should accommodate your metal or glass insert, with a slight taper for a snug fit.
- For a taper candle, a smaller, deeper hole is needed. A drill bit in the tailstock is usually the most accurate method.
- Sanding and Finishing: Once the shape is achieved, sand the piece on the lathe, progressively using finer grits for a silky-smooth finish.
- Parting Off: Use a parting tool to carefully separate the finished candle holder from the waste wood on the lathe.
- Base Finishing: Hand-sand and finish the base if necessary.
For those looking to expand their turning skills, exploring advanced wood carving techniques for decorative furniture accents can inspire further embellishments on turned pieces.
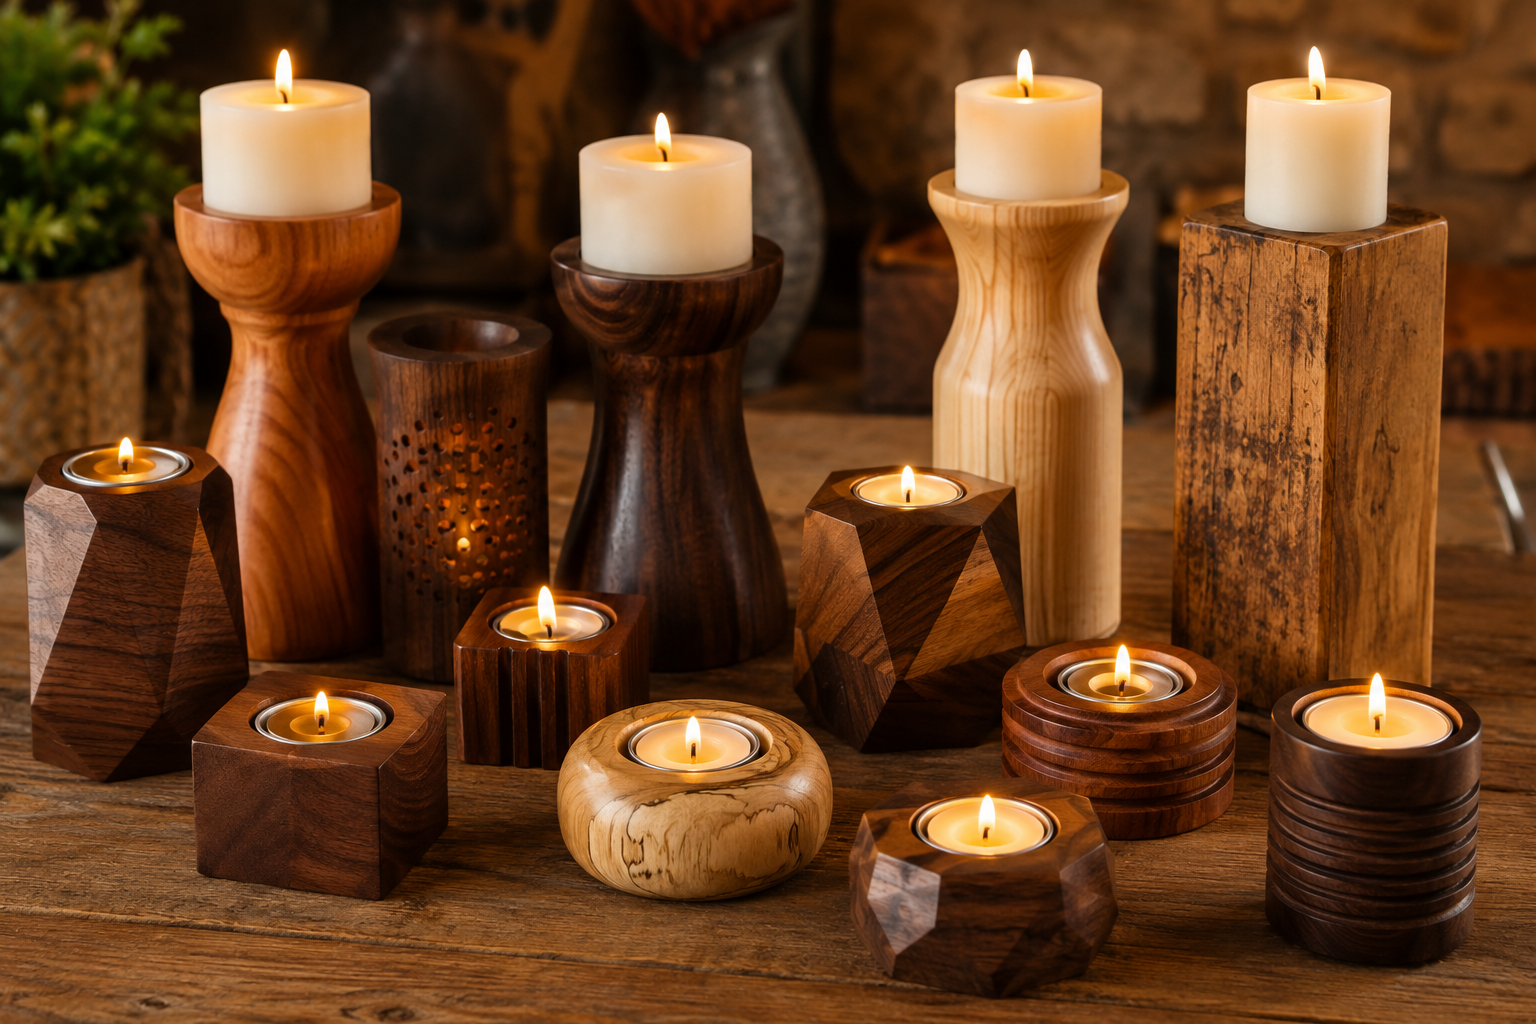
Geometric Cuts for Modern Designs
Beyond the lathe, geometric cuts offer a contemporary approach to “Wooden Candle Holders: Tealight to Pillar Designs with Safe Burning Techniques.” These designs often feature sharp angles, clean lines, and minimalist aesthetics, perfect for warm minimalism in woodworking.
Techniques for Geometric Candle Holders:
- Miter Saw Precision: A miter saw is invaluable for accurate angle cuts. By varying the angle and sequence of cuts, you can create intricate faceted designs from a single block of wood.
- Table Saw Grooves and Dados: Use a table saw to cut precise grooves or dados for recessed candle inserts or to create stacked, multi-level holders.
- Router Joinery: A router can create perfect circular recesses for tealight cups or more elaborate profiles. When combined with a router table, precision and repeatability are enhanced, making it ideal for crafting multiple matching pieces. Learning to master the router table is a significant advantage here.
- Layered Construction: Multiple pieces of wood can be cut into geometric shapes and then glued together to form a larger, multi-candle holder. This allows for contrasting wood types or grain patterns.
When making geometric cuts, always account for the dimensions of your heat-resistant inserts to ensure they fit perfectly and securely.
Finishing and Aesthetic Considerations
The finishing process is crucial for both the longevity and visual appeal of wooden candle holders. It’s also an opportunity to add an extra layer of safety.
Polished Finishes for Elegance
A high-quality finish not only protects the wood but also enhances its natural beauty, making the candle holder a standout decor piece.
- Sanding: Begin with thorough sanding, progressing through grits from 80 or 100 up to 220 or 320. For an exceptionally smooth finish, you might go even higher.
- Staining (Optional): If you desire a different color, apply a wood stain. Always test on a scrap piece first.
- Sealing: A wood sealer prepares the surface for the topcoat, ensuring an even finish.
- Topcoats for Durability and Shine:
- Polyurethane: Offers excellent durability and a wide range of sheens (matte, satin, semi-gloss, gloss). Apply multiple thin coats, sanding lightly between each. Consider a natural wood finishing technique for a classic look.
- Shellac: A natural, non-toxic finish that provides a beautiful, warm glow. It dries quickly but is less durable against heat and moisture than polyurethane.
- Oil Finishes: Penetrating oils (like tung oil or linseed oil) bring out the natural grain of the wood and provide a soft, natural look. They offer less surface protection than film-building finishes but are easy to repair.
- Wax Finishes: A final layer of paste wax can add a luxurious feel and a subtle sheen.
When choosing a finish, consider the aesthetic you’re aiming for. For a modern, sleek look, a high-gloss polyurethane or a simple oil finish might be appropriate. For a more rustic or antique feel, weathered wood finishing techniques could be explored, though always ensuring a smooth surface where the candle sits.
Incorporating Heat-Resistant Inserts
As previously mentioned, safety inserts are paramount. Here’s how to integrate them effectively:
- Tealight Cups: These are typically small, metal (often aluminum) or glass cups designed to fit standard tealights. The wooden holder should have a precisely drilled hole that allows the cup to sit flush or slightly recessed.
- Pillar Plates/Discs: For pillar candles, a larger metal or glass disc can be embedded into the top surface of the wooden holder. This creates a barrier between the candle’s base and the wood, catching any dripping wax and preventing heat transfer. Ensure the recess is wide enough to accommodate the full diameter of the pillar candle you intend to use.
- Secure Fit: The inserts should fit snugly to prevent wobbling or dislodging, which could lead to instability. Adhesives designed for high temperatures might be used to secure permanent inserts, but often a precise fit is enough.
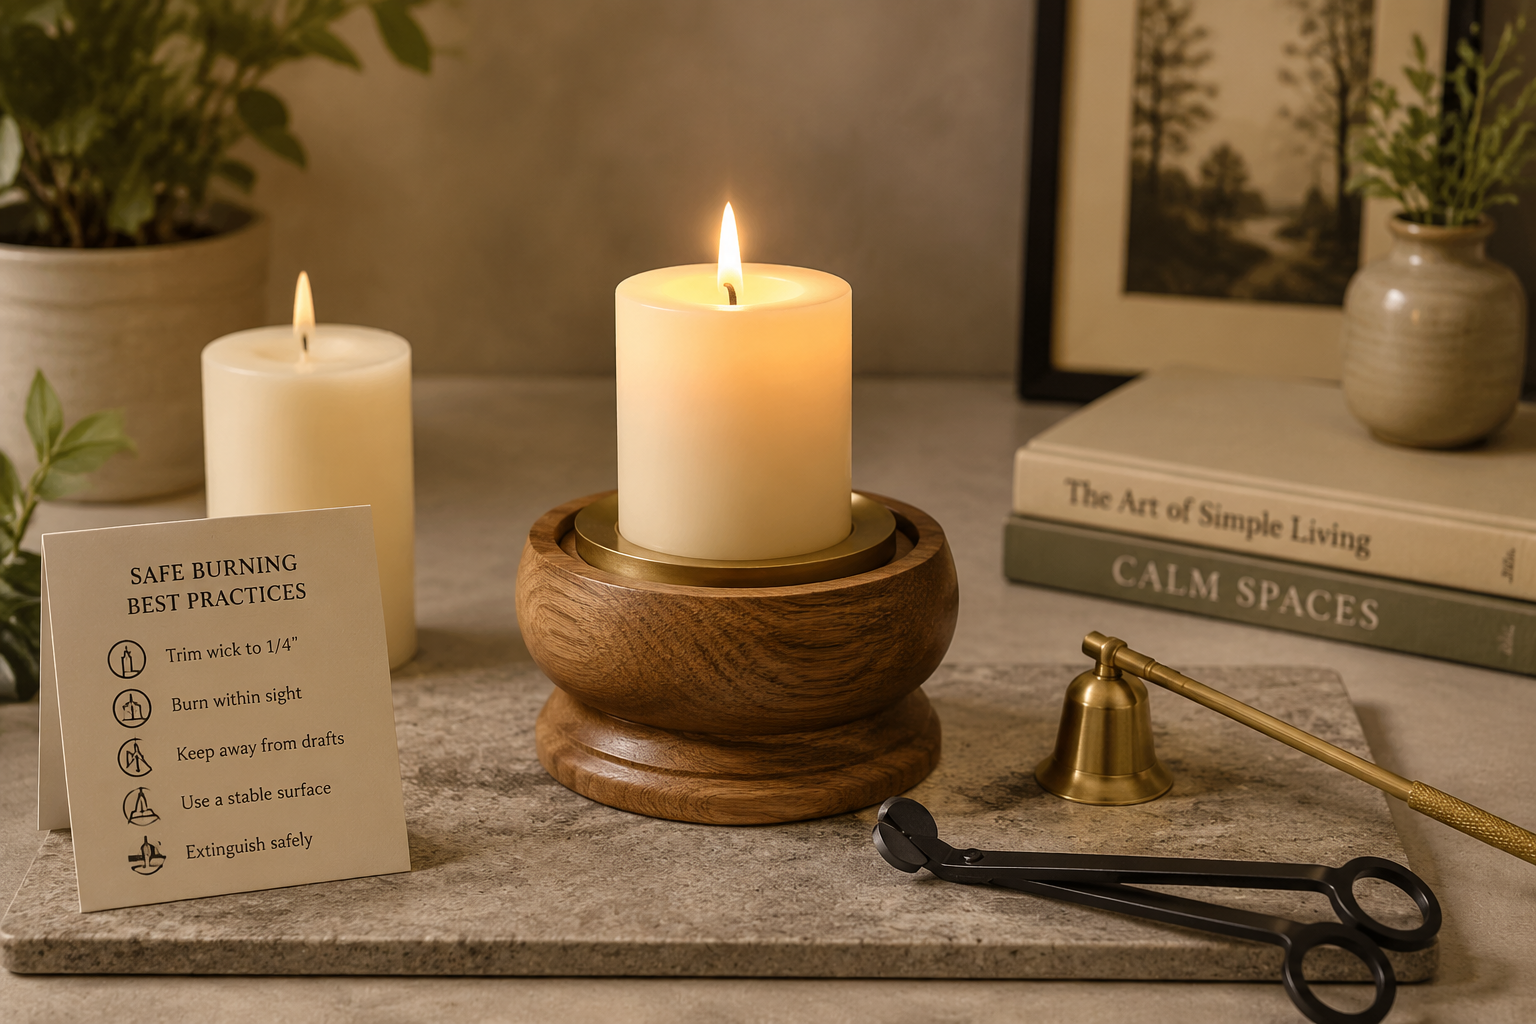
Safe Burning Techniques for Wooden Candle Holders
Even the most expertly crafted “Wooden Candle Holders: Tealight to Pillar Designs with Safe Burning Techniques” require responsible burning practices to ensure safety. Misuse can lead to fire hazards, regardless of the holder’s design.

Essential Safety Guidelines
- Always Use a Heat-Resistant Barrier: Reiterate that every wooden candle holder must contain a non-combustible insert (metal, glass) to separate the candle flame and hot wax from the wood. This is the single most important safety feature.
- Proper Candle Fit: Ensure the candle fits securely within its designated space and insert. A candle that is too large can overflow its barrier, and one that is too small can lean and become unstable.
- Trim Wicks: Before each use, trim candle wicks to about 1/4 inch. This prevents excessive flame height, sooting, and uneven burning, reducing the risk of overheating the holder.
- Stable Placement: Always place candle holders on a stable, flat, non-combustible surface. Avoid placing them near curtains, paper, or other flammable materials.
- Avoid Drafts: Drafts can cause flames to flicker and burn unevenly, potentially causing the flame to come into contact with the wooden holder or surrounding materials.
- Never Leave Unattended: This is a golden rule for candle safety. Always extinguish candles before leaving a room or going to sleep.
- Keep Away from Children and Pets: Place candle holders out of reach of curious hands and paws.
- Extinguish Properly: Use a snuffer to extinguish flames to avoid hot wax splattering.
- Monitor Burning Time: Adhere to the candle manufacturer’s recommended burning times. Over-burning can cause the candle to overheat and melt too quickly.
- Inspect Regularly: Before each use, inspect your wooden candle holder for any signs of charring, cracking, or damage to the heat-resistant insert. Discontinue use if any damage is present.
By following these guidelines, you can safely enjoy the warm glow and natural elegance that wooden candle holders bring to your home. The combination of expert craftsmanship, appropriate material selection, and diligent burning practices makes these decorative items a cherished and secure part of your decor. For those interested in home safety beyond candles, understanding how to craft secure items like robust floating shelves with hidden fasteners can be beneficial.
Conclusion
Wooden candle holders offer a unique blend of natural beauty and functional decor, capable of enhancing any living space from a cozy reading nook to an elegant dining table. From the intricate turns of a pillar design to the minimalist lines of a geometric tealight holder, the craftsmanship involved adds character and warmth. In 2026, the emphasis remains on creating pieces that are not only visually stunning but also inherently safe. By meticulously selecting appropriate wood types, integrating heat-resistant barriers, employing precise crafting techniques like lathe turning and geometric cuts, and applying durable, elegant finishes, artisans can create truly exceptional “Wooden Candle Holders: Tealight to Pillar Designs with Safe Burning Techniques.” However, the responsibility for safety extends to the user. Adhering to strict burning guidelines is paramount to enjoying these beautiful wooden creations without incident. With these considerations in mind, wooden candle holders can indeed illuminate your home with both style and serenity.
Actionable Next Steps:
- Research Wood Types: Before starting a project, thoroughly research the properties of different hardwoods to select the most suitable option for your candle holder.
- Invest in Inserts: Always source high-quality metal or glass inserts for your candle holders.
- Practice Techniques: Hone your lathe turning or precision cutting skills on scrap wood before working on your final piece.
- Prioritize Safety Gear: When woodworking, always use appropriate personal protective equipment (PPE) such as safety glasses, hearing protection, and dust masks.
References
- National Fire Protection Association (NFPA). (2023). Candle Fires. NFPA.
- Fine Woodworking. (2020). Turning Small Projects. Taunton Press.
- The Wood Database. (n.d.). Wood Species. Retrieved from https://www.wood-database.com/
