

Over 40% of consumers globally prioritize sustainable and ethically sourced products, a trend rapidly reshaping home design in 2026. This growing demand extends to furniture, particularly statement pieces like kitchen islands. Among the most sought-after options are those crafted from reclaimed wood, offering a unique blend of historical character, environmental responsibility, and functional elegance. Building a kitchen island from salvaged timber transforms discarded materials into a stunning, eco-friendly centerpiece, each piece telling its own story while adding warmth and authenticity to your home. This article will guide you through the essential process of sourcing, restoring, and building functional reclaimed wood kitchen islands.
Key Takeaways
- Reclaimed wood kitchen islands offer unique character, environmental benefits, and a storied history.
- Sourcing involves finding wood from old barns, factories, or demolition sites, requiring careful inspection for quality and safety.
- Restoration is crucial, involving cleaning, de-nailing, stabilization, and initial milling to prepare the wood for building.
- Designing a functional island means considering workflow, storage needs, and integrating modern features like sinks or cooktops.
- Proper finishing protects the wood and enhances its natural beauty, ensuring longevity and durability.
Sourcing Reclaimed Wood for Your Kitchen Island
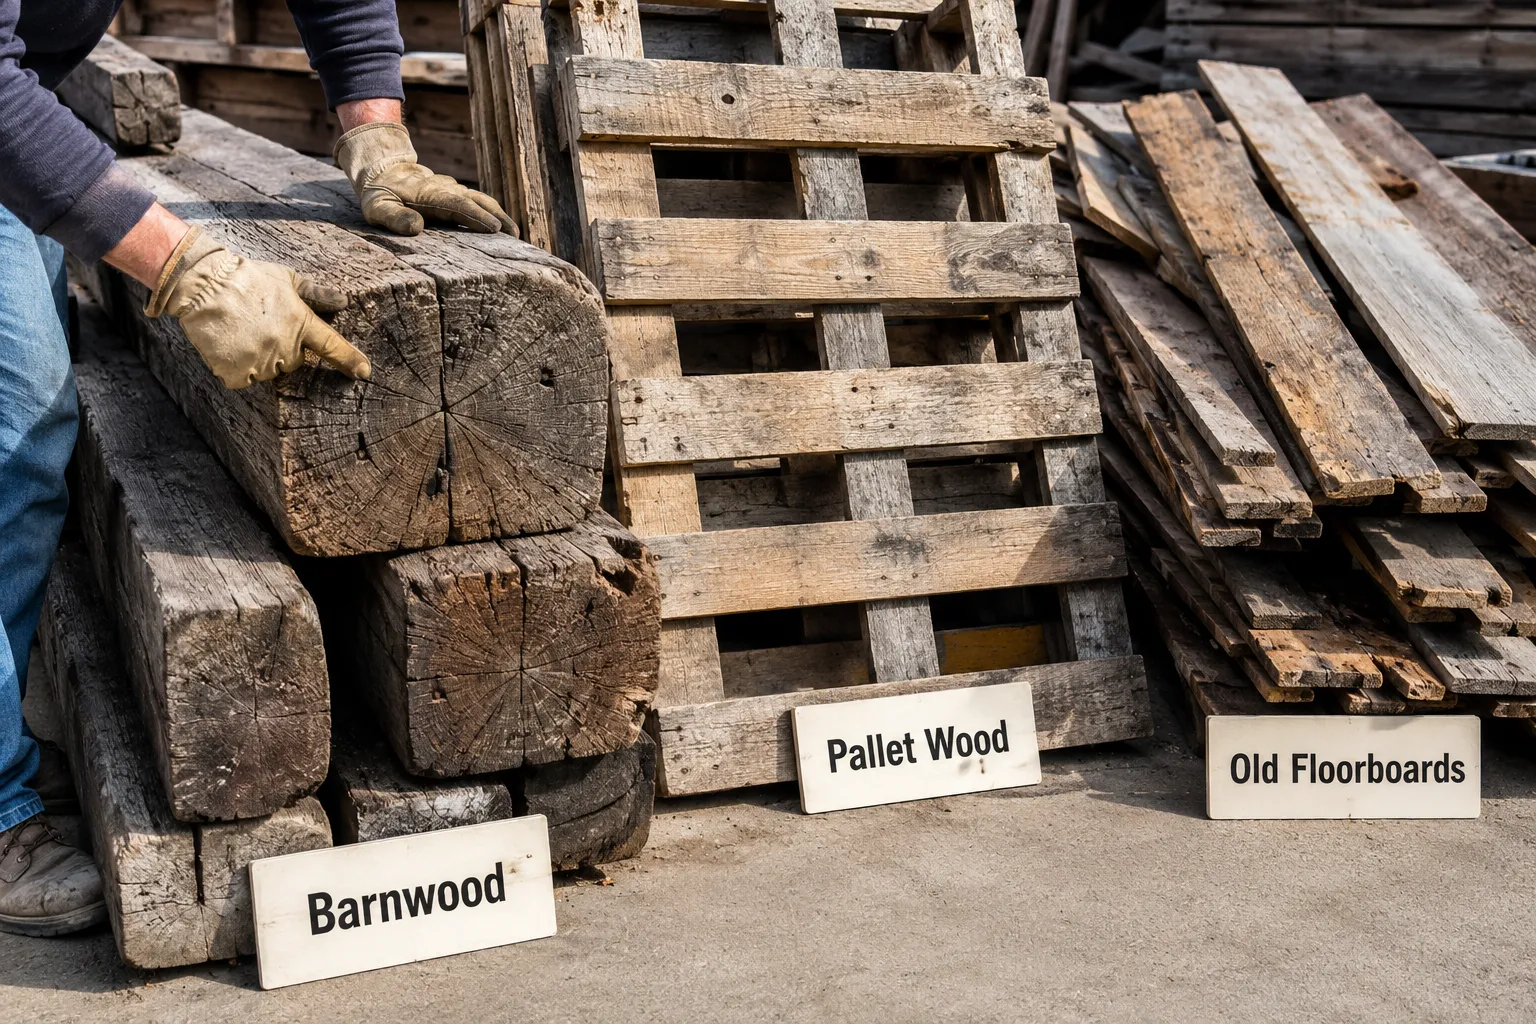
The journey of creating stunning reclaimed wood kitchen islands begins with finding the right materials. This process is more than just acquiring lumber; it’s about discovering timber with a past, understanding its origin, and preparing it for a new life. The quality and character of your finished island will largely depend on the wood you select.
Where to Find Reclaimed Wood
Finding suitable reclaimed wood requires a keen eye and often some investigative work. Here are some common sources:
- Old Barns and Agricultural Structures: Barns are a prime source for timbers rich in character, often featuring saw marks, nail holes, and a naturally weathered patina. These structures yield large beams and planks, perfect for robust island tops or frames.
- Deconstructed Factories and Warehouses: Industrial buildings frequently offer dense, old-growth lumber, such as oak, maple, or Douglas fir, often in large dimensions. This wood might have unique marks from machinery or previous uses.
- Demolition Sites: Residential and commercial demolition sites can be a treasure trove for flooring, framing lumber, and architectural elements. Always ensure you have permission to salvage and prioritize safety.
- Salvage Yards and Architectural Salvage Dealers: These businesses specialize in acquiring, processing, and selling reclaimed materials. They often have a wide selection of species and sizes, making the sourcing process more straightforward, though typically at a higher cost.
- Online Marketplaces: Websites and social media groups dedicated to reclaimed materials can connect you with sellers or individuals looking to offload wood from personal projects.
Inspecting and Selecting Reclaimed Timber
Once you’ve located potential sources, careful inspection is paramount. Reclaimed wood, by its very nature, carries imperfections, but some are more desirable than others.
What to Look For:
- Structural Integrity: Check for rot, extensive insect damage, or significant cracks that could compromise the wood’s strength. Minor surface imperfections are part of the charm, but deep structural damage should be avoided.
- Species Identification: Knowing the wood species is important for understanding its properties, workability, and appearance. Common reclaimed species include oak, pine, fir, maple, and chestnut.
- Moisture Content: Wood needs to be dry and stable to prevent warping or cracking after your island is built. Ideally, the moisture content should be between 6-8% for indoor use. A moisture meter is an invaluable tool for this.
- Foreign Objects: Be prepared for embedded nails, screws, bolts, or even lead paint. These require careful removal during restoration.
- Dimensions and Quantity: Estimate the dimensions and quantity of wood you’ll need for your island design. Factor in waste for milling and cutting.
“Every nail hole, every weathered groove, tells a piece of history. Selecting reclaimed wood is about choosing stories, not just lumber.”
Initial Preparation and Storage
After sourcing, some immediate steps are necessary:
- Initial Cleaning: Brush off loose dirt, cobwebs, and debris.
- Rough De-Nailing: Use a nail bar or pry bar to remove any obvious, protruding metal objects. A metal detector will be crucial later for finding hidden ones.
- Proper Storage: Store the wood in a dry, well-ventilated area, stacked with spacers (stickers) between layers to allow for air circulation. This helps prevent warping and further drying.
Remember, sourcing reclaimed wood is an investment of time and effort, but the unique character it brings to your kitchen island is unparalleled. You can also explore options for oversized rough hewn timber mantels for 2026 gas fireplaces as another way to integrate reclaimed timber into your home.
Restoration and Preparation for Building Reclaimed Wood Kitchen Islands
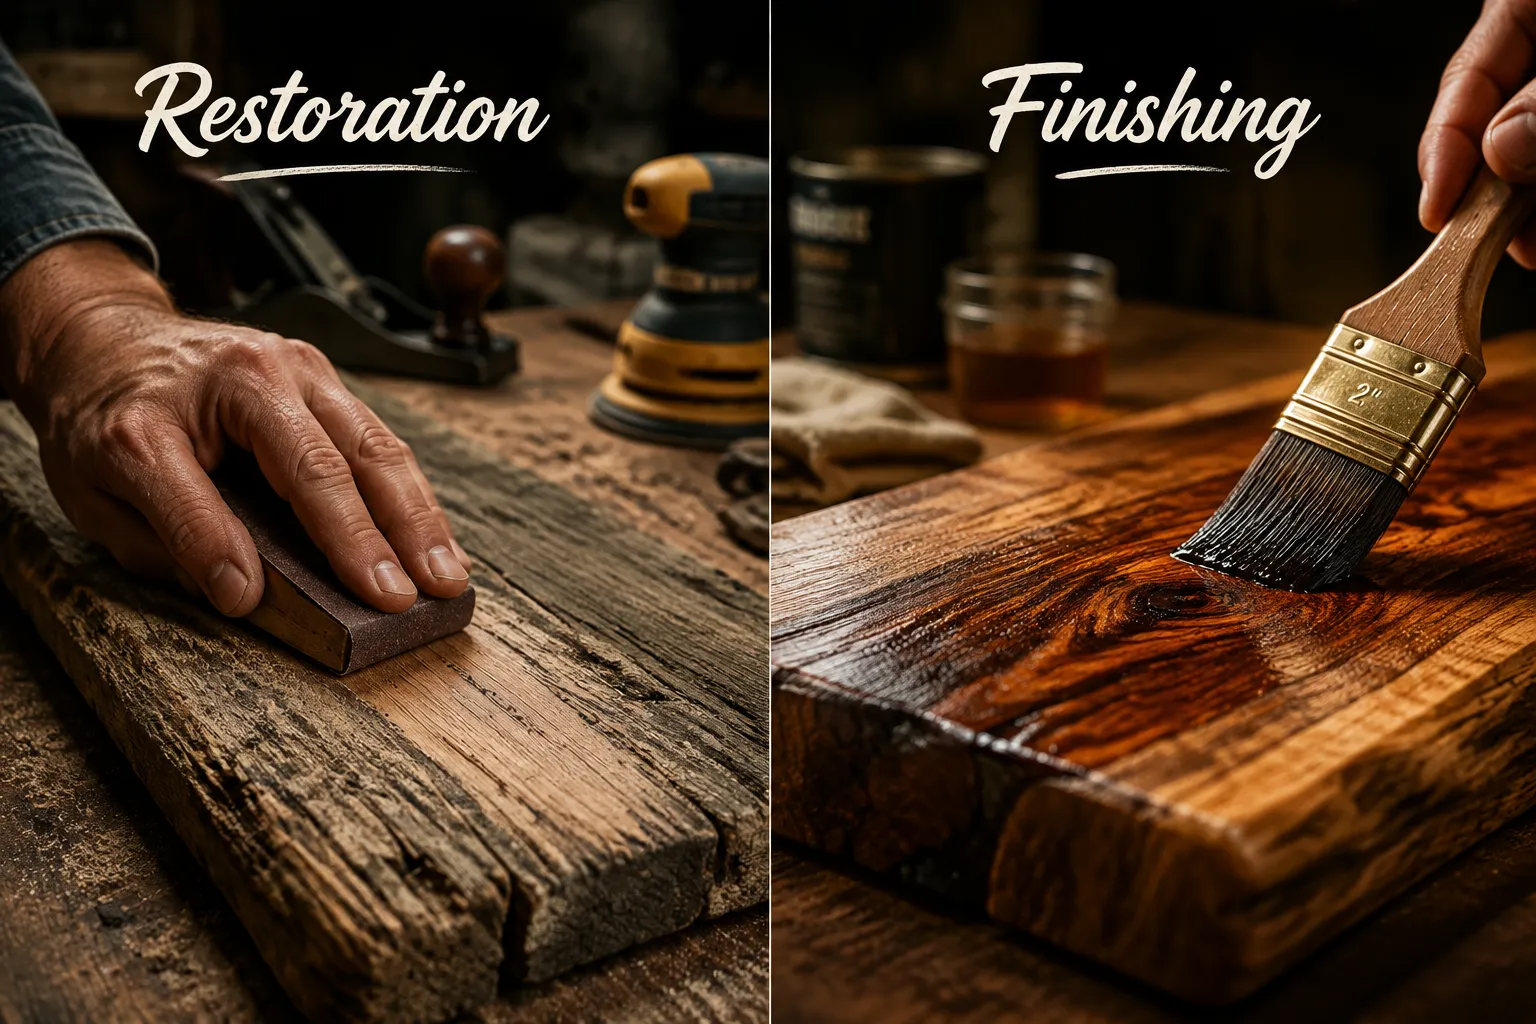
Once you’ve sourced your reclaimed timber, the next crucial step in creating beautiful reclaimed wood kitchen islands is restoration. This process transforms raw, aged wood into stable, workable material while preserving its unique character. It involves careful cleaning, stabilization, and precise milling.
Cleaning and De-Nailing
The first stage of restoration is thorough cleaning and removing all foreign objects.
- Deep Cleaning: Use a stiff brush, scraper, and sometimes a pressure washer (allowing ample drying time afterward) to remove stubborn dirt, flaking paint, and any biological growth. For chemical contaminants, consider professional cleaning services or specialized wood cleaners.
- Metal Detection and Removal: This is a critical safety step. Use a strong metal detector to locate all embedded metal objects, nails, screws, staples, and even bullet fragments. Mark their locations and carefully remove them. Hitting metal with a planer or saw blade can be dangerous and damage your tools.
- Pest Treatment: If there’s any sign of active insect infestation (e.g., powderpost beetles), the wood should be treated. Methods include heat treatment, freezing, or chemical fumigation, depending on the severity and type of pest.
Stabilizing and Dimensioning
Reclaimed wood often comes in irregular shapes and sizes and needs to be brought to stable, usable dimensions.
- Drying and Acclimation: Even if initially dry, reclaimed wood benefits from acclimating to your workshop or home environment for several weeks or months. This helps equalize its moisture content and reduces the risk of warping after construction.
- Initial Milling: This is where the wood begins to take its final shape.
- Jointing: Use a jointer to flatten one face and one edge of each board, creating reference surfaces.
- Planing: Run the jointed boards through a planer to achieve consistent thickness and a second flat face. Aim for the minimum material removal necessary to achieve desired flatness, preserving as much of the original character as possible.
- Table Sawing: Rip boards to their final width using a table saw, ensuring straight and parallel edges.
- Crosscutting: Cut boards to approximate length, removing any damaged ends or significant defects.
For more detailed information on getting the perfect finish, read our guide on finishing reclaimed wood for 2026 polishes that highlight texture and story.
Filling and Repairing Imperfections
While character is desirable, some imperfections may need attention for structural integrity or aesthetics.
- Epoxy or Wood Filler: For large cracks, knots, or old nail holes, use epoxy resin (often tinted) or a durable wood filler. This provides stability and a smooth surface while still celebrating the wood’s history.
- Patching: For larger voids or missing sections, consider cutting a small patch from a similar piece of reclaimed wood and gluing it in place. This seamlessly integrates repairs.
- Sanding: Begin sanding with a coarse grit (around 80-100) to remove milling marks, then progressively move to finer grits (up to 180-220) for a smooth surface. The level of smoothness depends on the desired final aesthetic, some prefer a slightly rougher, more rustic feel.
By carefully following these restoration steps, your reclaimed wood will be ready to be transformed into a functional and beautiful kitchen island. This meticulous preparation ensures the stability and longevity of your build, making the most of the wood’s inherent beauty.
Building Functional Centerpieces: Reclaimed Wood Kitchen Islands
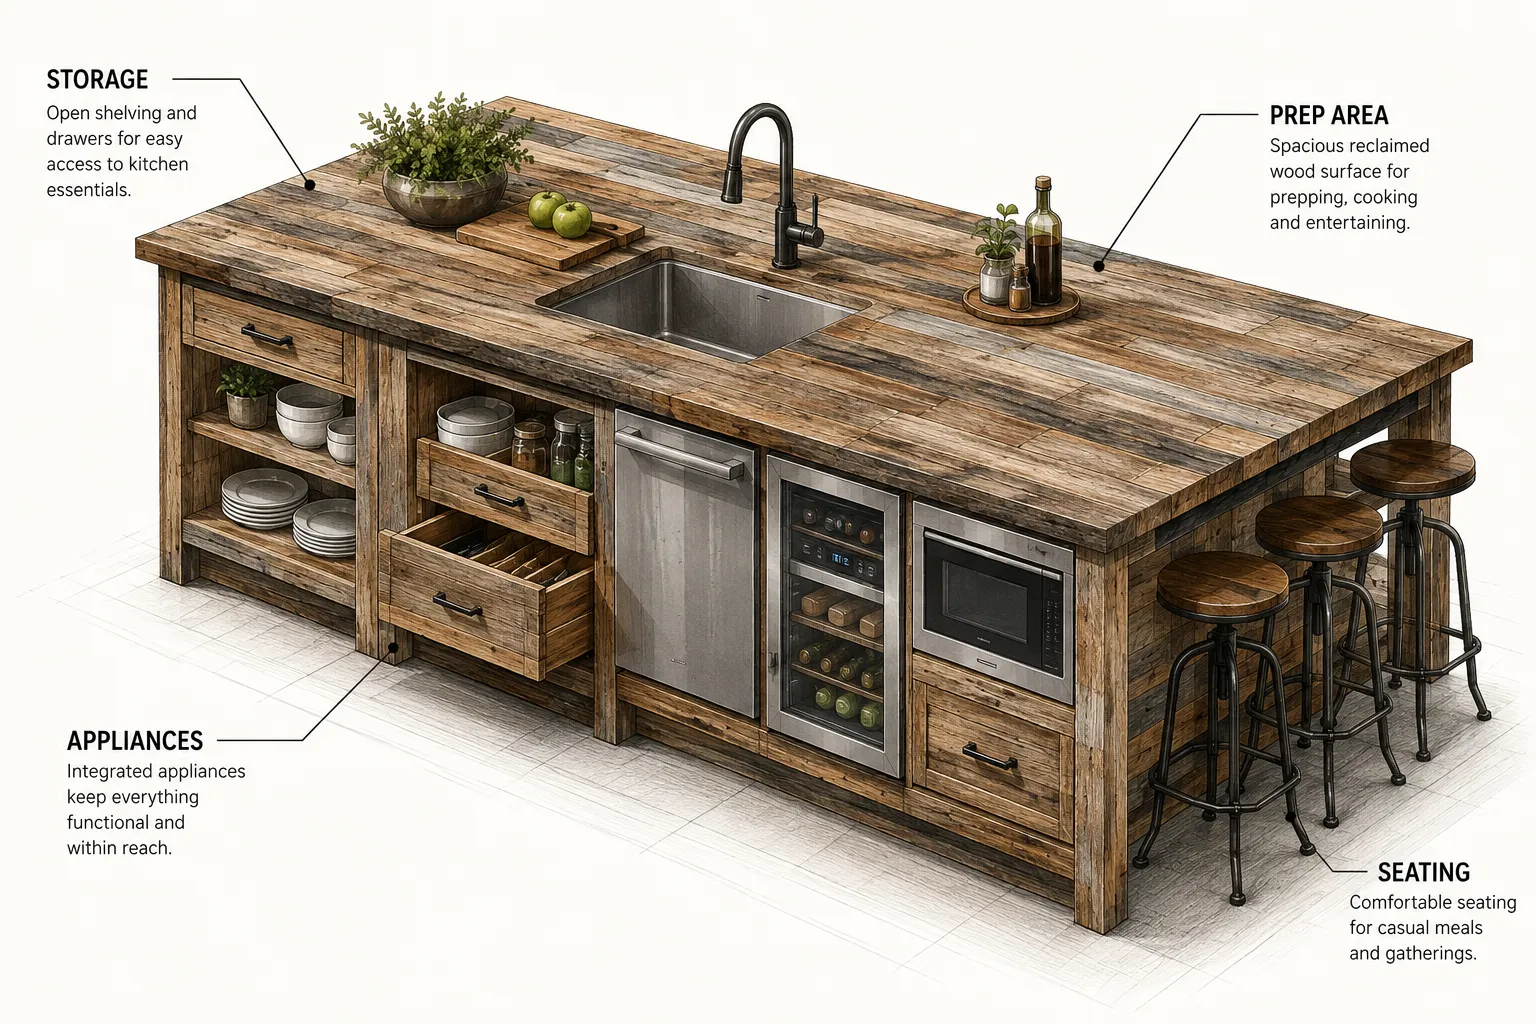
With your reclaimed wood carefully sourced and restored, the exciting phase of building functional reclaimed wood kitchen islands begins. This involves thoughtful design, robust construction, and careful integration of modern kitchen necessities.
Designing Your Reclaimed Wood Kitchen Island
A well-designed island serves multiple purposes. Consider the following:
- Functionality First: How will the island be used?
- Preparation Area: Ample countertop space for chopping, mixing, and plating.
- Dining/Seating: Integrate an overhang or specific seating area. You can explore options for bar stools and counter seating to complement your design.
- Storage: Drawers, open shelves, cabinets, or cubbies for kitchen essentials.
- Appliances: Will it house a sink, cooktop, microwave, or wine cooler?
- Size and Layout: Measure your kitchen carefully. Ensure adequate clearance around the island (at least 36-42 inches) for comfortable movement and appliance access.
- Aesthetic Integration: How will the reclaimed wood complement your existing kitchen decor? Consider leaving some original saw marks or nail holes for a rustic look, or opt for a smoother, more refined finish.
- Power and Plumbing: If integrating appliances or a sink, plan for electrical outlets and plumbing connections during the design phase.
Construction Techniques for Durability
Building with reclaimed wood requires attention to detail to ensure structural integrity and longevity.
- Strong Joinery: Given the often heavy and sometimes irregular nature of reclaimed timber, strong joinery methods are essential.
- Mortise and Tenon: Excellent for creating robust frames and legs.
- Dovetails/Box Joints: Ideal for sturdy drawers. You can learn more about hand tool joinery for visible wood joints.
- Pocket Hole Joinery: A quicker method for joining frame components, but consider supplementing with glue for maximum strength.
- Panel Glue-Ups: For large solid wood countertops, careful panel glue-ups are necessary. Ensure edges are perfectly straight and use high-quality wood glue and clamps to achieve strong, seamless bonds. For best results, consult the ultimate guide to wood glue.
- Frame and Panel Construction: For cabinet doors or side panels, a frame and panel design allows for wood movement, preventing cracking.
- Securing the Top: Given the weight of a solid reclaimed wood top, secure it to the base using fasteners that allow for seasonal wood expansion and contraction (e.g., Z-clips, tabletop fasteners, or elongated screw holes).
Integrating Modern Features and Storage
The beauty of a custom reclaimed wood island lies in its ability to blend rustic charm with modern convenience.
- Built-in Storage: Design custom storage solutions to fit your needs.
- Drawers: Varying depths for utensils, pots, and pans.
- Open Shelving: Ideal for displaying cookbooks or decorative items.
- Cabinets: For larger items or concealed storage.
- Consider adding specialized storage like a built-in spice rack (see spice racks that sell) or a knife block (check out building robust knife blocks).
- Appliance Integration: Precision cutting is essential for drop-in sinks, cooktops, or built-in microwaves. Ensure proper ventilation and electrical/plumbing access.
- Finishing Touches: Install high-quality hardware (hinges, drawer slides, pulls) that complements the reclaimed wood aesthetic.
Finishing Your Island
The final finish protects the wood and enhances its beauty.
- Sanding: Thorough final sanding up to 180-220 grit is crucial for a smooth feel.
- Sealing: For kitchen surfaces, a durable, food-safe finish is essential. Options include:
- Polyurethane/Varnish: Provides excellent protection against moisture and wear.
- Hardwax Oils: Penetrates the wood, offering a natural feel and easy spot repair.
- Butcher Block Oil/Wax: Food-safe and popular for chopping surfaces, requiring regular reapplication.
- Edge Treatment: Consider routering a slight chamfer or round-over on all exposed edges for comfort and durability.
Building a reclaimed wood kitchen island is a rewarding project that results in a truly unique and functional centerpiece for your home in 2026. The blend of history, craftsmanship, and personalized design creates an island that is not just furniture, but a conversation starter.
Conclusion
Reclaimed wood kitchen islands offer an unparalleled combination of character, sustainability, and functionality, making them a highly desirable addition to any home in 2026. From the careful process of sourcing unique timber, often steeped in history from old barns or factories, to the meticulous restoration that prepares it for a new purpose, each step adds to the story of your island. Building these functional centerpieces requires thoughtful design, robust joinery, and a keen eye for integrating modern conveniences while celebrating the wood’s natural beauty and imperfections. The result is more than just a piece of furniture; it’s a statement of environmental consciousness and timeless craftsmanship that enhances the heart of your home.
Whether you are a seasoned woodworker or looking for a significant home project, creating a reclaimed wood kitchen island is a deeply rewarding endeavor. It allows you to transform forgotten materials into a focal point that is both practical and aesthetically profound. Embrace the journey of discovery and creation, and you will craft an heirloom that will be cherished for generations.
Actionable Next Steps:
- Assess Your Needs: Determine the size, function, and desired features of your ideal kitchen island.
- Explore Sourcing Options: Research local salvage yards, architectural salvage dealers, or online marketplaces for reclaimed timber.
- Invest in Tools & Knowledge: Gather the necessary woodworking tools and deepen your understanding of joinery and finishing techniques.
- Start Small: If new to woodworking, consider smaller projects using reclaimed wood to hone your skills before tackling a large island. For instance, building statement furniture pieces can provide valuable experience.
- Plan Your Design: Sketch out your island’s dimensions, features, and overall aesthetic before cutting any wood.
SEO Meta Title: Reclaimed Wood Kitchen Islands: Sourcing & Building Guide 2026 SEO Meta Description: Discover how to source, restore, and build stunning reclaimed wood kitchen islands in 2026. Add character, sustainability, and functionality to your home.