
Approximately 75% of new hobbyists find themselves intimidated by woodworking, often due to perceived complexity or the need for expensive tools. Yet, the reality is far more accessible. Many rewarding and useful items can be crafted with minimal equipment and basic skills, often in just a single weekend. This article, “Woodworking Ideas for Crafters: 10 Beginner-Friendly Projects You Can Build in a Weekend,” aims to demystify woodworking, providing a clear pathway for anyone eager to transform raw wood into functional and beautiful creations in 2026.
Key Takeaways
- Accessibility: Woodworking is achievable for beginners with basic tools and foundational techniques.
- Weekend Projects: Numerous projects can be completed within a Saturday and Sunday, offering immediate gratification.
- Skill Building: Each project focuses on teaching core woodworking skills like measuring, cutting, joining, and finishing.
- Minimal Investment: Start with essential hand tools before considering power tools, keeping initial costs low.
- Creative Outlet: Woodworking provides a tangible and satisfying way to express creativity and make personalized items.
Getting Started: Essential Tools and Materials for Beginner Woodworking Ideas for Crafters: 10 Beginner-Friendly Projects You Can Build in a Weekend
Embarking on your woodworking journey doesn’t require a fully stocked professional shop. Many of the projects highlighted in these woodworking ideas for crafters can be completed with just a few fundamental hand tools. Focusing on these basic tools not only keeps your initial investment low but also helps you build essential skills before moving on to more complex equipment.
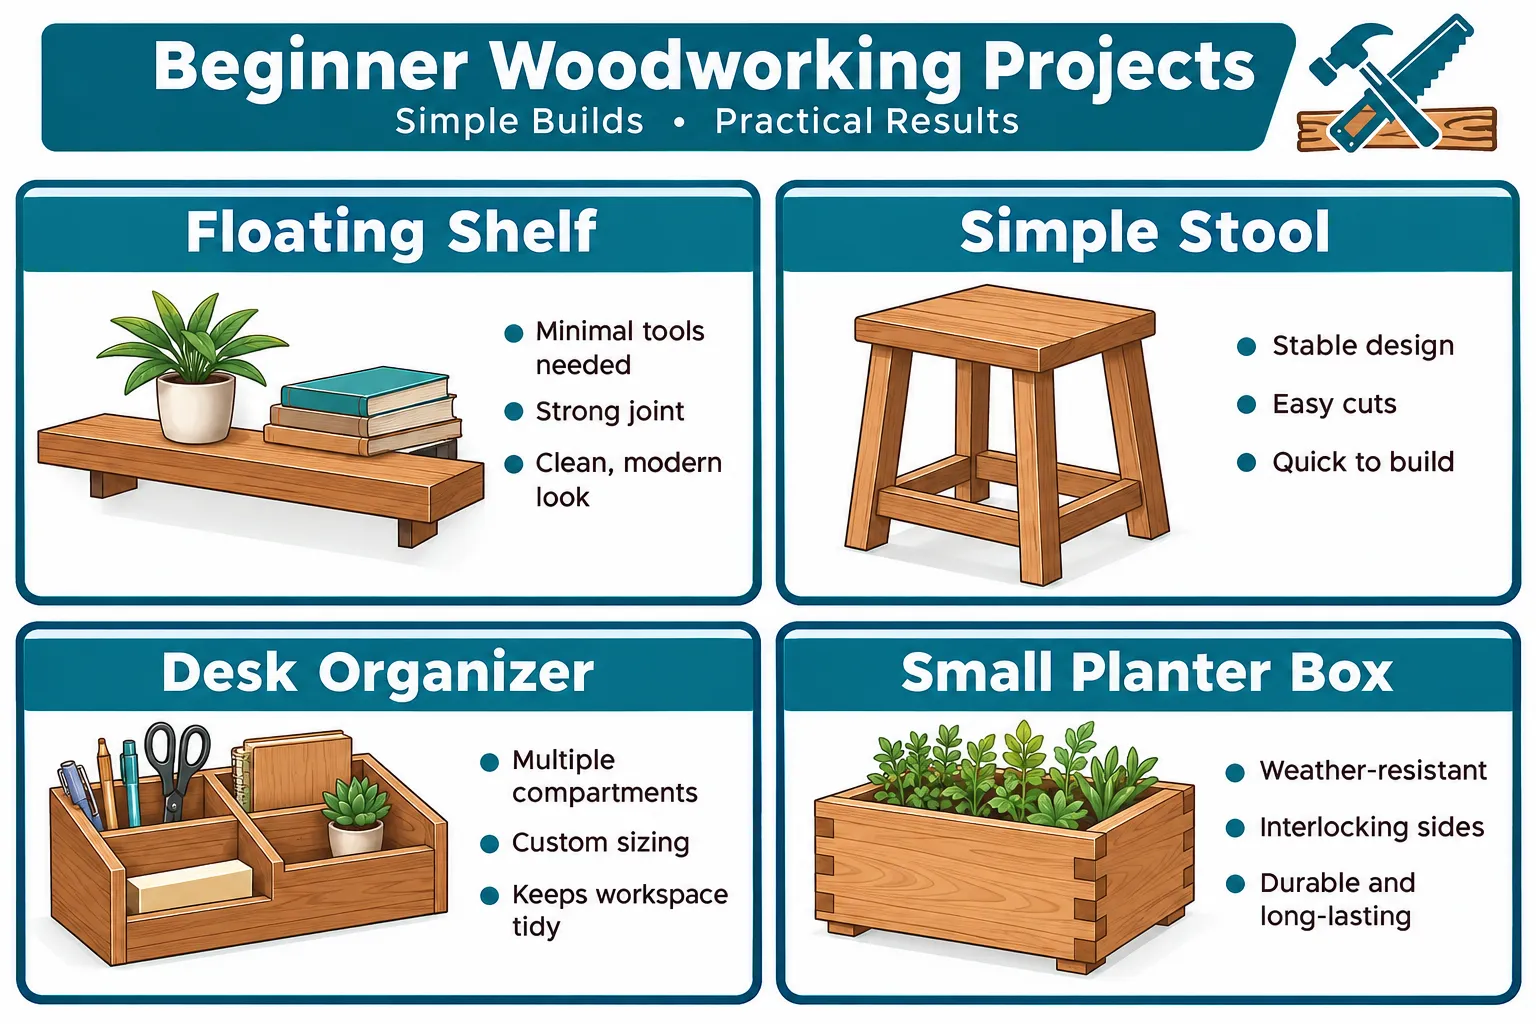
Your essential toolkit should include:
- Measuring Tape and Pencil: Accuracy is paramount in woodworking. A reliable tape measure and a sharp pencil are your first lines of defense against errors.
- Hand Saw or Circular Saw: For cutting wood to size. A hand saw is cost-effective and great for learning control, while a circular saw offers speed and precision with a bit more practice.
- Clamps: Essential for holding pieces securely while cutting, drilling, or gluing. Bar clamps or C-clamps are versatile.
- Drill (Cordless recommended): For drilling pilot holes and driving screws. A cordless drill offers portability and convenience.
- Screwdrivers and Hammer: For fastening and light assembly.
- Sanding Blocks or Random Orbital Sander: For smoothing rough edges and preparing surfaces for finishing.
- Wood Glue: A strong adhesive crucial for durable joints.
- Safety Gear: Safety glasses and ear protection are non-negotiable. Always prioritize your well-being.
When it comes to materials, pine is an excellent choice for beginners. It’s affordable, widely available, and easy to work with. Other good options include poplar or common whitewood. For specific projects, you might explore options like reclaimed wood, which adds character and sustainability to your craft. Learn more about sourcing reclaimed and salvaged wood.
Beyond the basic tools, consider setting up a small, dedicated workspace. This doesn’t need to be elaborate; even a sturdy table in a garage or shed can suffice. An organized space makes for a more efficient and enjoyable crafting experience. For tips on maximizing your workspace, explore creating ergonomic workshop layouts.
Top 10 Beginner-Friendly Woodworking Projects for a Weekend
Here are 10 woodworking ideas for crafters, perfect for beginners and designed to be completed within a weekend. Each project introduces fundamental skills while resulting in a functional and satisfying finished piece.
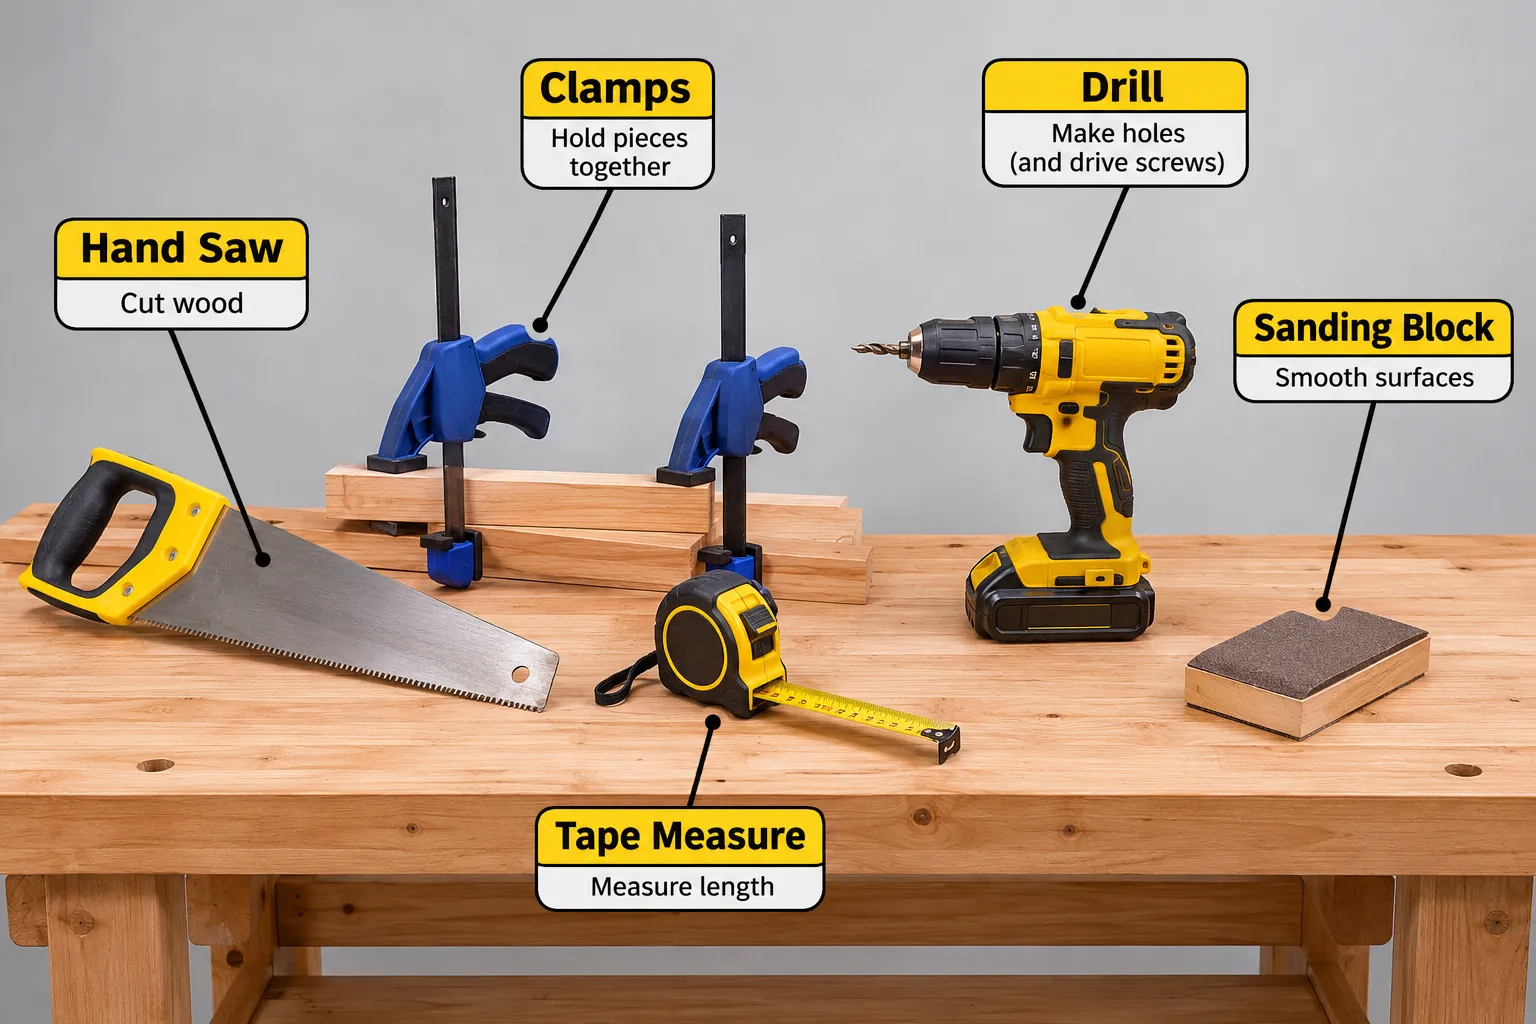
1. Simple Floating Shelf
Skills Learned: Measuring, straight cuts, basic joinery, mounting techniques. Why it’s great: Minimal materials, clean aesthetic, and highly functional for any room. How to build:
- Cut a board to your desired length.
- Route or cut a keyhole slot on the back for mounting screws.
- Sand smooth and finish.
- Mount using appropriate wall anchors. For a more advanced take, learn about building robust floating shelves.
2. Wooden Bookends
Skills Learned: Accurate cutting, sanding, gluing square joints. Why it’s great: Small project, uses scrap wood, and makes a great gift. How to build:
- Cut two pieces of wood for the base and two for the uprights.
- Glue and screw the uprights perpendicular to the bases, ensuring they are square.
- Sand thoroughly and apply a protective finish.
3. Basic Step Stool or Planter Stand
Skills Learned: Joinery (lap joints or dadoes), stability, load-bearing design. Why it’s great: Practical household item, teaches how to create sturdy structures. How to build:
- Cut pieces for the top, legs, and stretchers.
- Assemble using wood glue and screws, ensuring all joints are square and secure.
- Sand and finish.
4. Desk Organizer with Compartments
Skills Learned: Precise measurements, repetitive cuts, dados or simple butt joints. Why it’s great: Custom storage solution, great for office or craft supplies. How to build:
- Cut a base piece and several pieces for the dividers.
- Create dados (grooves) or simply butt-join the dividers onto the base and to each other.
- Glue and clamp, then sand and finish.
5. Small Wooden Planter Box
Skills Learned: Miter cuts (optional), drainage holes, weather-resistant finishing. Why it’s great: Adds greenery to your space, good for outdoor use. How to build:
- Cut four side pieces and a base.
- Assemble the sides using butt joints or mitered corners with glue and screws.
- Attach the base, ensuring small gaps or drill holes for drainage.
- Sand and apply a waterproof finish.
6. Picture Frame or Mirror Frame
Skills Learned: Accurate miter cuts (45 degrees), assembly of square corners. Why it’s great: Personalizes your home decor, good for showcasing photos or art. How to build:
- Cut four pieces of wood with 45-degree angles on each end.
- Glue and clamp the corners, reinforcing with small nails or splines if desired.
- Insert your picture or mirror and add backing.
7. Wooden Coasters or Trivets
Skills Learned: Repetitive cutting, sanding to a smooth finish, decorative patterns (optional). Why it’s great: Uses small offcuts, perfect for gifts or home use. How to build:
- Cut small squares or circles from a board.
- Sand all edges and faces thoroughly.
- Consider adding a simple routered edge or burning a design.
- Apply a waterproof, heat-resistant finish.
8. Simple Wall-Mounted Coat Rack
Skills Learned: Spacing, drilling, attaching hardware (hooks). Why it’s great: Practical entry-way item, customizable. How to build:
- Cut a board to the desired length.
- Measure and mark positions for hooks.
- Drill pilot holes and attach the hooks.
- Add keyhole slots or pre-drilled holes for wall mounting.
9. A Basic Serving Tray
Skills Learned: Handle installation, creating a recessed bottom (optional). Why it’s great: Functional and decorative, great for entertaining. How to build:
- Cut a baseboard and four side pieces.
- Assemble the sides around the base with glue and screws.
- Install handles on the short ends.
- Sand and apply a food-safe finish if desired. For projects that sell, a simple serving tray is a great item. Learn more about woodworking projects that sell.
10. Small Storage Crate
Skills Learned: Box joinery, repetition, assembly sequence. Why it’s great: Versatile storage, can be stacked or customized. How to build:
- Cut four side pieces and a base piece.
- Assemble the sides using butt joints and wood glue, reinforced with nails or screws.
- Attach the base.
- Sand and finish. For unique finishing touches, consider rustic wood finishing techniques.
Finishing Your Woodworking Projects: Adding the Final Touch in 2026
Finishing is where your project truly comes to life. It protects the wood, enhances its natural beauty, and gives it a professional look. For any of these woodworking ideas for crafters, the finishing steps are crucial.
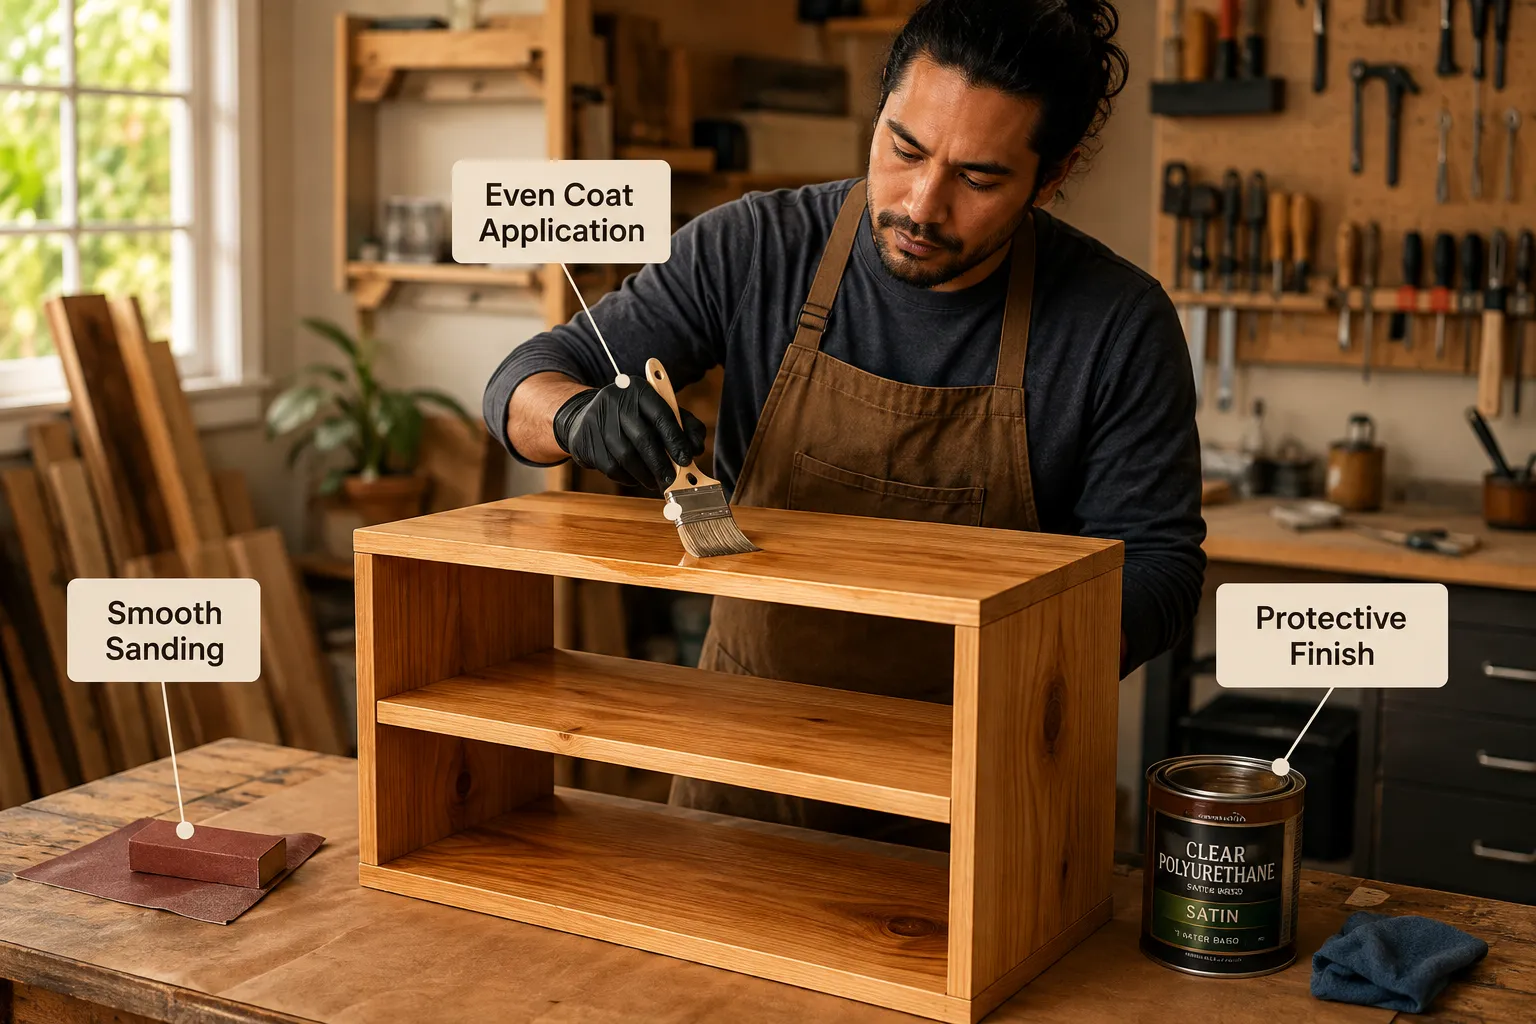
Sanding
Sanding is perhaps the most critical step before applying any finish. Start with a coarser grit sandpaper (e.g., 80-100 grit) to remove any major imperfections, saw marks, or glue squeeze-out. Gradually move to finer grits (120, 150, 180, 220). The goal is to achieve a smooth, uniform surface that feels soft to the touch. Always sand with the grain of the wood to prevent scratches.
Cleaning
After sanding, it’s essential to thoroughly clean all sawdust from your project. A shop vacuum followed by a tack cloth works best. Any remaining dust will get trapped in your finish, leading to a rough or bumpy surface.
Applying Finish
There are many types of finishes suitable for beginner projects:
- Oil Finishes (e.g., Tung Oil, Linseed Oil): These penetrate the wood, enhancing its natural color and providing a subtle, natural look. They are easy to apply with a rag and forgiving for beginners. Multiple thin coats are usually required.
- Wipe-On Polyurethane: A durable finish that offers good protection. Wipe-on versions are thinned, making them easier to apply evenly without brush marks.
- Wax: A simple finish that provides a soft sheen and some protection. Often applied over an oil finish.
- Paint: For a pop of color or a more modern look, acrylic or latex paints designed for wood work well. Always use a primer first for best results.
- Stain: Changes the color of the wood while allowing the grain to show through. Apply before your top coat (like polyurethane or lacquer).
Always read the manufacturer’s instructions for your chosen finish and apply it in a well-ventilated area. For general guidance on different wood types and their finishes, you might find information on premium wood selection for 2026 projects helpful, as different woods react differently to finishes.
Allow adequate drying time between coats and before handling your finished piece. Patience during the finishing process will pay off with a beautiful, lasting result.
Advancing Your Skills and Exploring More Complex Woodworking Ideas for Crafters
Once you’ve tackled a few beginner projects and gained confidence in basic techniques, you might be ready to explore more advanced woodworking ideas for crafters. The beauty of woodworking is its endless learning curve, with new skills and projects always on the horizon.
Consider delving into different types of joinery. While butt joints with screws and glue are perfectly fine for many beginner projects, learning more intricate joints like dovetails, mortise and tenon, or box joints can significantly strengthen your projects and enhance their aesthetic appeal. Resources like “Unlock The Secrets Of Brackets Woodworking A Comprehensive Guide” can provide insights into specific construction elements.
You could also experiment with new tools. A router, for instance, can add decorative edges, cut grooves, and create precise dados. A table saw, while requiring careful safety protocols, allows for extremely accurate and repeatable cuts. Remember to invest in quality safety equipment and learn proper operating procedures before using any new power tools.
Furthermore, explore different wood species. While pine is great for beginners, working with hardwoods like oak, maple, or cherry offers new challenges and rewards. Each wood has unique grain patterns, colors, and working properties. For those interested in unique aesthetics, exploring live edge wood projects can open up a world of organic designs.
Many woodworkers also enjoy customizing their creations with carving or special finishes. Introduction To Wood Carving For Beginners Tools Techniques And Simple Projects To Get Started is an excellent resource if you’re interested in adding intricate details to your work. The key is to keep practicing, stay curious, and enjoy the process of bringing your woodworking visions to life. The woodworking community is vibrant, with countless online tutorials, forums, and local workshops available to support your continued growth in 2026.
Conclusion
Embarking on the journey of woodworking is a deeply rewarding experience, offering both creative fulfillment and the satisfaction of building tangible, useful items with your own hands. The “Woodworking Ideas for Crafters: 10 Beginner-Friendly Projects You Can Build in a Weekend” presented here demonstrate that woodworking doesn’t require a massive investment of time or money to get started. With just a few basic tools and a willingness to learn, anyone can transform raw wood into beautiful and functional pieces in 2026.
Remember to prioritize safety, take your time with measurements, and enjoy each step of the process, from the first cut to the final coat of finish. As you complete these beginner-friendly projects, you’ll not only gain practical skills but also build confidence to tackle increasingly complex creations. So pick a project, gather your materials, and discover the joy of crafting with wood this weekend. Your next masterpiece awaits!