
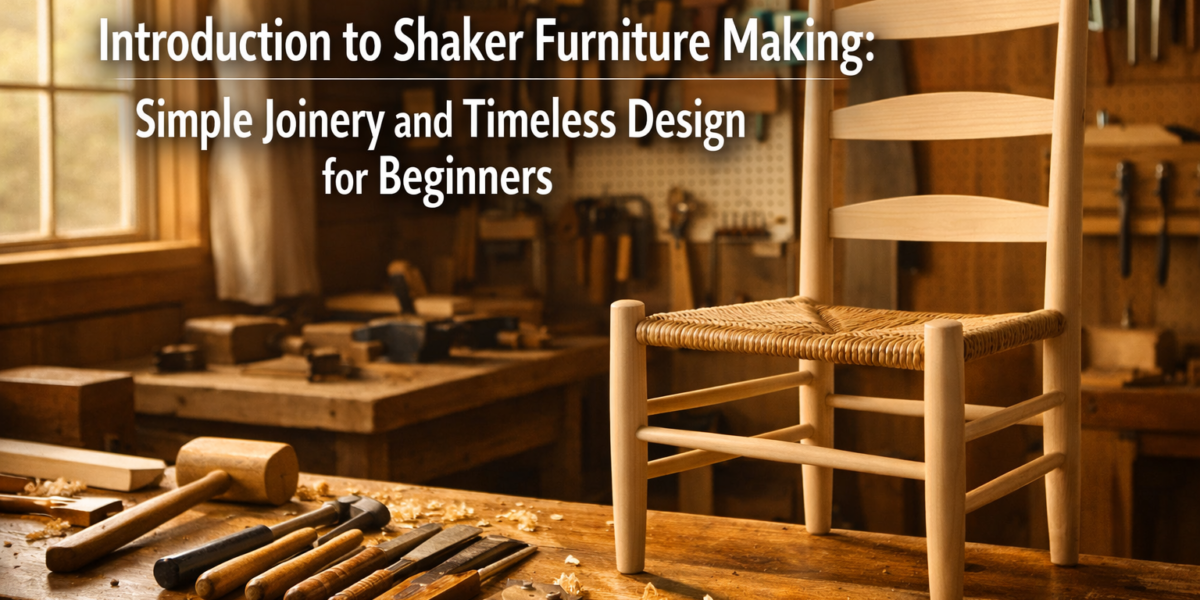

The world of furniture making can seem daunting, filled with complex machines and intricate techniques. Yet, a rich tradition exists that champions simplicity, utility, and honesty in construction: Shaker furniture. For those embarking on their woodworking journey in 2026, an Introduction to Shaker Furniture Making: Simple Joinery and Timeless Design for Beginners offers a profoundly rewarding starting point. This enduring style provides an ideal framework for mastering fundamental woodworking skills without overwhelming complexity, allowing beginners to create beautiful, functional pieces that stand the test of time.
Key Takeaways
- Shaker furniture embodies principles of utility, honesty, and simplicity, making it an excellent style for beginners.
- Basic hand tools and fundamental power tools are sufficient for most Shaker projects.
- Mastering simple joinery like mortise and tenon, dado, and rabbet joints is crucial.
- Focus on precise measurements and careful execution for clean, strong joints.
- Shaker design teaches valuable lessons in proportionality, craftsmanship, and efficient construction.
Understanding the Shaker Philosophy: Simplicity, Utility, and Honesty
The Shaker movement, a communal religious society originating in the 18th century, profoundly influenced American design through their distinctive approach to craftsmanship. Their furniture was not merely utilitarian; it was an expression of their core values:

- Simplicity: Ornamentation was shunned. Every line, every surface, served a purpose. This led to clean, uncluttered forms.
- Utility: Each piece of furniture had a clear function. If an item didn’t serve a practical purpose, it wasn’t made. This ensured efficiency in the home and workshop.
- Honesty: Materials were chosen for their inherent beauty and strength, and construction methods were straightforward and visible. There was no attempt to hide joints or structural elements; instead, they were celebrated as part of the design.
For a beginner, embracing these principles is liberating. It removes the pressure of intricate carving or complex decorative elements, allowing a focus on fundamental skills: accurate cutting, precise joinery, and careful finishing. This approach not only builds woodworking proficiency but also instills an appreciation for thoughtful design.

Why Shaker Furniture is Ideal for Beginners
Shaker furniture often relies on solid wood construction and robust, yet straightforward, joinery techniques. Projects typically feature straight lines and flat panels, reducing the need for complex curves or difficult shaping. This makes it an excellent choice for an Introduction to Shaker Furniture Making: Simple Joinery and Timeless Design for Beginners, as it builds confidence in core woodworking processes without requiring highly specialized tools or advanced skills.
Common Shaker Wood Choices:
- Cherry
- Maple
- Pine
- Walnut
These woods are relatively easy to work with and finish, contributing to the beginner-friendly nature of Shaker projects.
Essential Tools and Fundamental Joinery for Shaker Projects
Starting with Shaker furniture doesn’t demand a fully outfitted professional workshop. Many classic pieces can be built with a modest collection of hand tools, supplemented by a few key power tools. The emphasis is on precision and understanding how each tool contributes to accurate cuts and strong joints.
Recommended Starter Tools 🛠️
For an Introduction to Shaker Furniture Making: Simple Joinery and Timeless Design for Beginners, a combination of hand and power tools will serve you well:
- Measuring & Marking: Tape measure, ruler, combination square, marking knife, pencil, marking gauge. Precision here is paramount.
- Cutting: Hand saw (crosscut and rip), backsaw (for joinery), coping saw (for curves, though less common in Shaker), jigsaw, circular saw, or table saw. A mastering the band saw guide can also be beneficial for more advanced curve cutting.
- Shaping & Smoothing: Chisels (a basic set), hand plane (block plane or smoothing plane), sandpaper (various grits), sanding block. For detailed work, explore hand tool mastery for detail work.
- Assembly: Wood glue, clamps (bar clamps, pipe clamps), mallet.
- Safety Gear: Safety glasses, hearing protection, dust mask.
While power tools like a table saw can greatly speed up dimensioning lumber, hand tools teach a deeper understanding of wood grain and cutting dynamics.
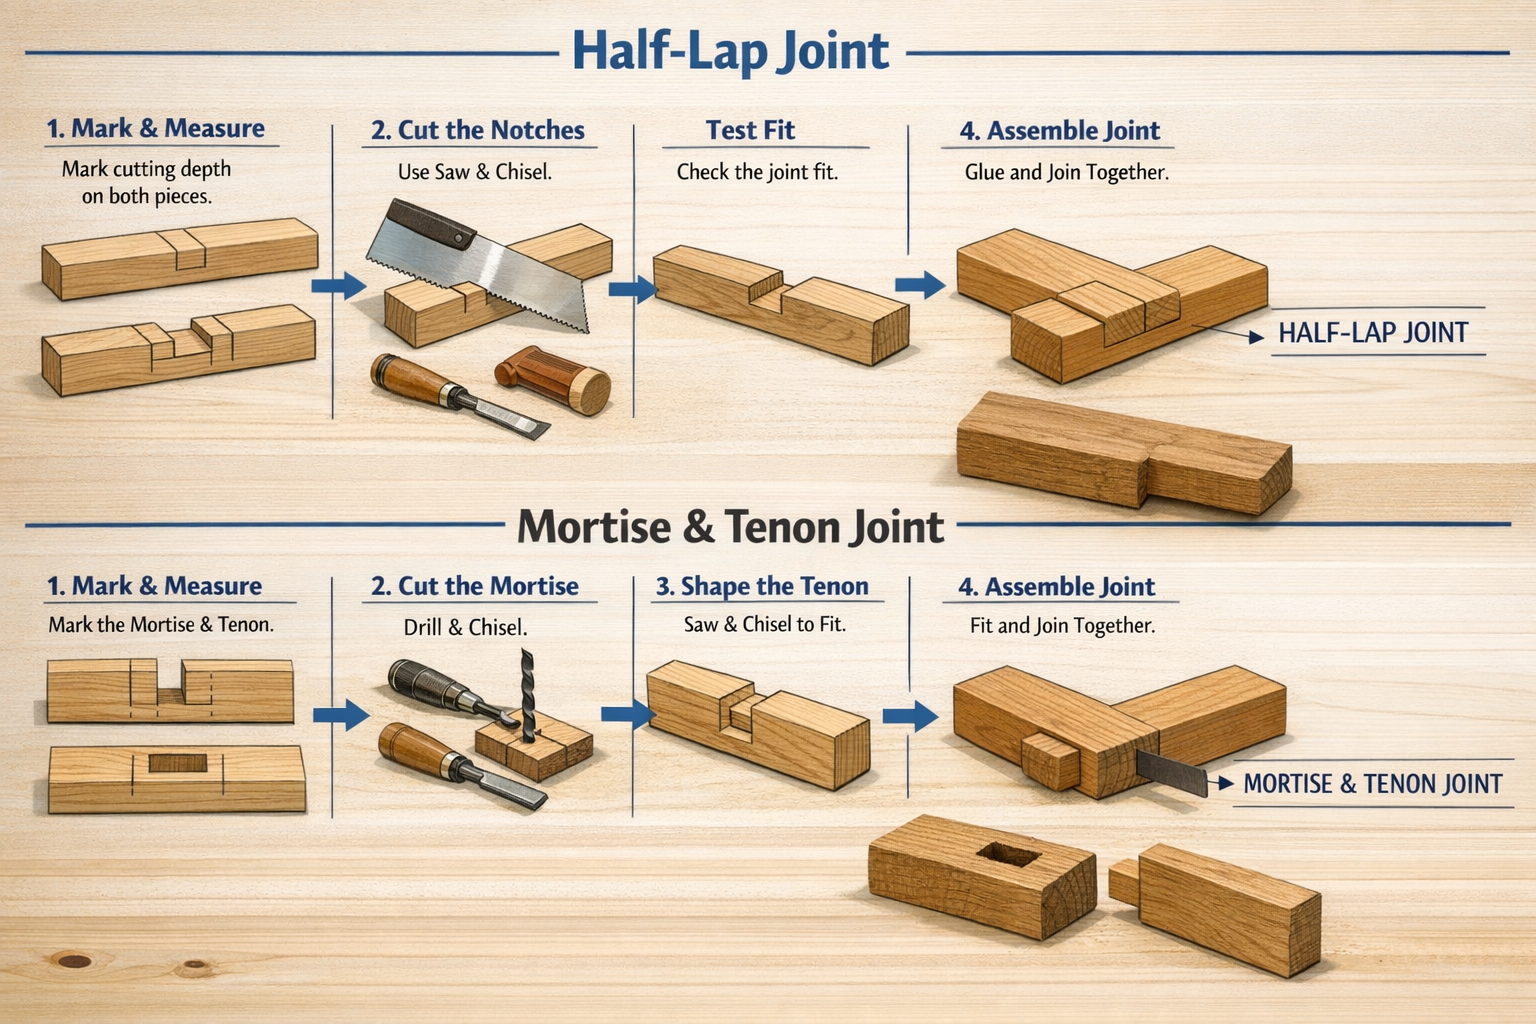
Mastering Simple Joinery Techniques
The strength and elegance of Shaker furniture lie in its joinery. Unlike modern furniture that often relies on screws and hidden fasteners, Shaker pieces celebrate the integrity of visible wood-to-wood connections. For beginners, focusing on these fundamental joints is critical:
- Mortise and Tenon Joint: This is the cornerstone of Shaker construction. A tenon (a projection) on one piece fits snugly into a mortise (a cavity) in another. It’s incredibly strong and visually appealing. Learn more in our guide on hand tool joinery for visible wood joints.
- Dado Joint: A groove cut across the grain of a board, into which another board fits. Perfect for shelves in bookcases or cabinet dividers.
- Rabbet Joint: A notch cut along the edge or end of a board, creating a step. Often used for back panels, drawer bottoms, or cabinet construction.
- Dovetail Joint: While more complex, dovetails embody the Shaker principle of honesty. Used for drawers, they are strong and beautiful. For those ready to advance, our guide to mastering dovetail joinery for drawers is a valuable resource.
- Butt Joint (reinforced): Simple end-to-end or edge-to-edge joints, often reinforced with dowels or biscuits for strength.
An understanding of essential woodworking joints is vital for any budding woodworker. Practice these joints on scrap wood until you achieve tight, consistent fits. Remember, glue is strong, but a well-fitted joint makes the glue even stronger.
First Projects: Applying Shaker Principles and Joinery
With an understanding of Shaker philosophy and basic tools, it’s time to build! Starting with smaller, manageable projects allows beginners to gain confidence and refine their skills before tackling larger furniture pieces.
Simple Shaker Projects for Beginners 👷♀️
These projects are excellent for an Introduction to Shaker Furniture Making: Simple Joinery and Timeless Design for Beginners:
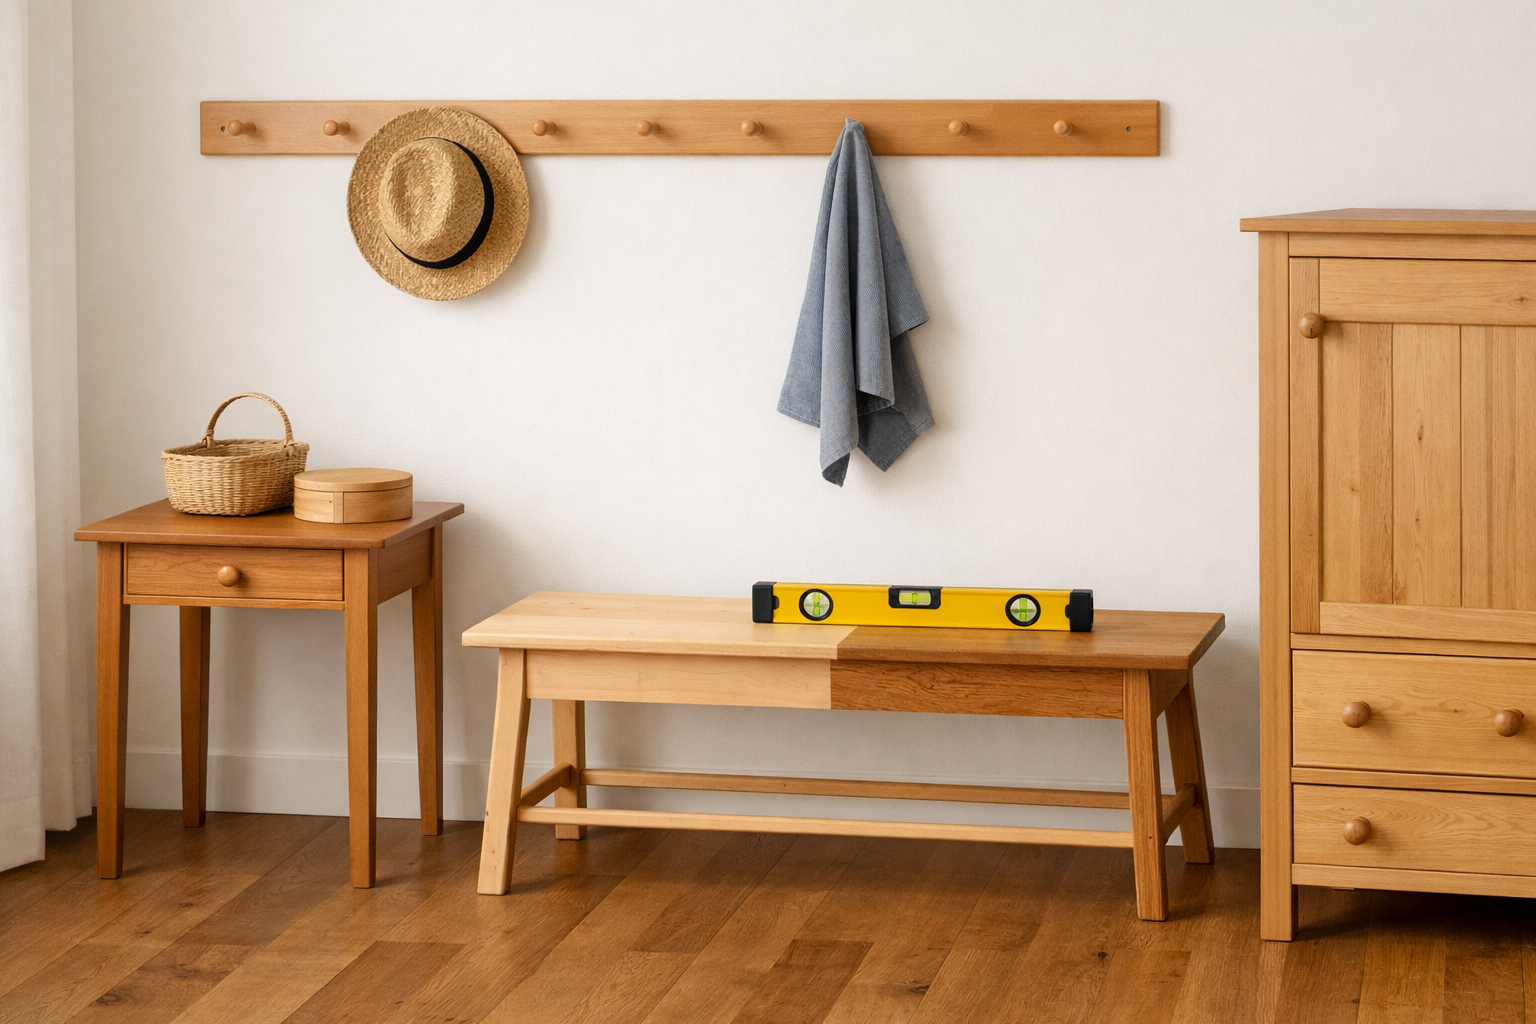
- Shaker Peg Rack: This is arguably the simplest Shaker project. It involves a single board with evenly spaced, turned pegs. It’s an excellent way to practice accurate measuring, drilling, and basic assembly. If you’re interested in woodturning for the pegs, check out our introduction to wood turning for beginners.
- Small Shaker Box: Traditionally made with bentwood sides and a solid top and bottom. A simpler version can use rabbet or dado joints for the sides and a small, fitted lid. This teaches precision in cutting and fitting small components. For more advanced box joinery, consider beyond the basic box.
- Simple Shaker Side Table/Stool: This project introduces mortise and tenon joinery for connecting legs to aprons (rails). It requires careful layout and precise cutting of the joints. The design is straightforward: four legs, four aprons, and a solid top.
- Small Wall Shelf: Utilizing dado or rabbet joints for attaching sides to the shelf, this project reinforces accurate cutting and assembly techniques.
Building a Shaker-Style Stool: A Step-by-Step Example
Let’s consider a basic Shaker stool to illustrate the process:
- Design & Dimensions: Sketch your stool, determining height, width, and depth. Keep it simple – straight legs, square aprons, and a flat top.
- Lumber Selection & Preparation: Choose a suitable hardwood (e.g., maple or cherry). Dimension your lumber for the legs, aprons, and top. Ensure all pieces are square and flat.
- Layout Joinery: Carefully mark the mortises on the legs and the tenons on the ends of the aprons. Accuracy here prevents gaps and ensures strength.
- Cut Joinery: Using hand tools (chisels, backsaw) or power tools (mortising machine, table saw with a tenoning jig), cut the mortises and tenons. Test fit frequently!
- Assembly: Apply a quality wood glue to the joints, assemble the apron-leg frames, and clamp them square. Allow ample drying time.
- Attach Top: Secure the top to the assembled base. Traditional Shaker methods often use “buttons” or screws from underneath to allow for wood movement.
- Sanding & Finishing: Sand all surfaces progressively with finer grits of sandpaper. Apply a durable, clear finish that highlights the natural beauty of the wood, such as oil, shellac, or lacquer.
This project, though seemingly simple, encapsulates the essence of Shaker furniture making. It emphasizes precision, functional design, and the beauty of well-executed joinery. By focusing on these core principles, beginners can create pieces that are not only practical but also deeply satisfying to build.

Conclusion
Embarking on an Introduction to Shaker Furniture Making: Simple Joinery and Timeless Design for Beginners is an enriching journey into woodworking. It offers a unique opportunity to learn fundamental skills, appreciate elegant design, and connect with a rich tradition of craftsmanship. By focusing on the Shaker principles of simplicity, utility, and honesty, beginners can build beautiful, durable furniture using accessible tools and straightforward joinery techniques. The satisfaction of creating something functional and enduring with your own hands is immense. Start with a simple peg rack or a small stool, practice your cuts and joints, and soon you’ll be crafting heirloom-quality pieces that reflect the timeless appeal of Shaker design.
Next Steps:
- Acquire essential hand tools and safety gear.
- Start with a small project like a Shaker peg rack or a simple box.
- Practice cutting mortise and tenon joints on scrap wood.
- Explore more advanced projects as your skills grow, such as building statement furniture pieces using Shaker principles.
