
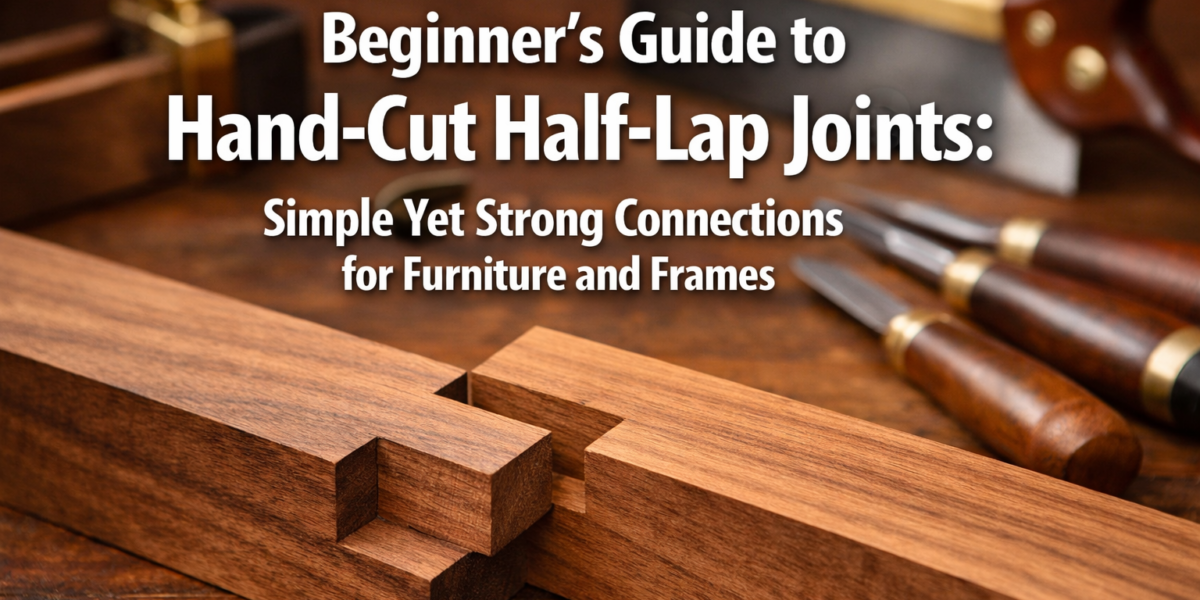

The average piece of furniture has over a dozen joints, each contributing to its overall strength and longevity. However, not all joints are created equal, and for beginners, the sheer variety can be intimidating. Dismissing complex joinery for a moment, let’s explore the fundamental techniques of hand-cut half-lap joints, a perfect starting point for beginners to create strong and visually appealing connections without complex tools. This Beginner’s Guide to Hand-Cut Half-Lap Joints: Simple Yet Strong Connections for Furniture and Frames will demystify one of woodworking’s most versatile and accessible joint types, empowering you to build durable pieces with confidence in 2026.
Key Takeaways
- Simplicity and Strength: Half-lap joints offer excellent mechanical strength for many projects while being straightforward to cut with basic hand tools.
- Versatile Applications: Ideal for frames, shelves, and various furniture components, especially where material thickness remains consistent.
- Precision is Paramount: Accurate marking and careful cutting are crucial for a tight, strong joint.
- Essential Hand Tools: A sharp chisel, hand saw, marking gauge, and square are your primary allies.
- Practice Makes Perfect: Start with scrap wood to refine your technique before working on project pieces.
Understanding the Half-Lap Joint: A Beginner’s Guide to Hand-Cut Half-Lap Joints: Simple Yet Strong Connections for Furniture and Frames
A half-lap joint is exactly what its name suggests: two pieces of wood are notched to half their thickness, allowing them to overlap and create a flush connection. When assembled, the combined thickness of the joint is equal to the original thickness of a single piece of wood, maintaining the overall dimension of your project. This simplicity belies its inherent strength, particularly against racking forces, making it an excellent choice for a wide array of woodworking projects.

Think of picture frames, table aprons, or simple shelving units – all benefit from the stability and clean lines a half-lap joint provides. Its elegance lies in its functional simplicity, requiring minimal material removal yet offering a robust mechanical lock, especially when combined with a strong wood glue. This joint is particularly popular in frame construction because it distributes stress over a larger surface area compared to butt joints, which rely solely on end-grain glue adhesion.
Types of Half-Lap Joints
While the basic principle remains the same, half-lap joints come in a few common variations, each suited for different applications:
- End Lap Joint: Used when one piece terminates at the end of another. Common for connecting rails to stiles in a simple frame.
- Middle Lap Joint (or T-Lap Joint): Joins the end of one board to the middle of another, forming a ‘T’ shape. Excellent for internal supports or cross-members.
- Cross Lap Joint: Where two boards cross each other, with both being notched in the middle. Creates a flush intersection, often seen in grid patterns or frame dividers.
- Corner Lap Joint: Essentially two end lap joints meeting at a corner, commonly used in boxes or frames where a continuous grain appearance isn’t the primary goal.
For beginners, mastering the end lap and cross lap joints will unlock a significant range of project possibilities.
Why Choose Hand-Cut Half-Lap Joints?
In a world of power tools, why advocate for hand-cutting?
- Accessibility: Requires minimal and relatively inexpensive tools.
- Skill Building: Develops fundamental woodworking skills like accurate marking, sawing, and chiseling.
- Quiet and Clean: No loud machinery, less dust, and a more peaceful workshop environment.
- Precision and Control: Hand tools allow for fine adjustments and a tactile feel that power tools often lack.
- Satisfaction: There’s immense satisfaction in crafting a perfect joint by hand.
This guide focuses on the hand-cut method, which not only yields excellent results but also builds a strong foundation in woodworking principles. For those looking to expand their hand tool repertoire, consider our guide on essential hand tools for every woodworker.
Essential Tools and Materials for Hand-Cut Half-Laps
Before diving into the cutting, gathering the right tools is paramount. Quality tools, especially sharp ones, will make the process smoother, safer, and result in better joints. This Beginner’s Guide to Hand-Cut Half-Lap Joints: Simple Yet Strong Connections for Furniture and Frames emphasizes that you don’t need a huge budget for these foundational tools.
Must-Have Hand Tools
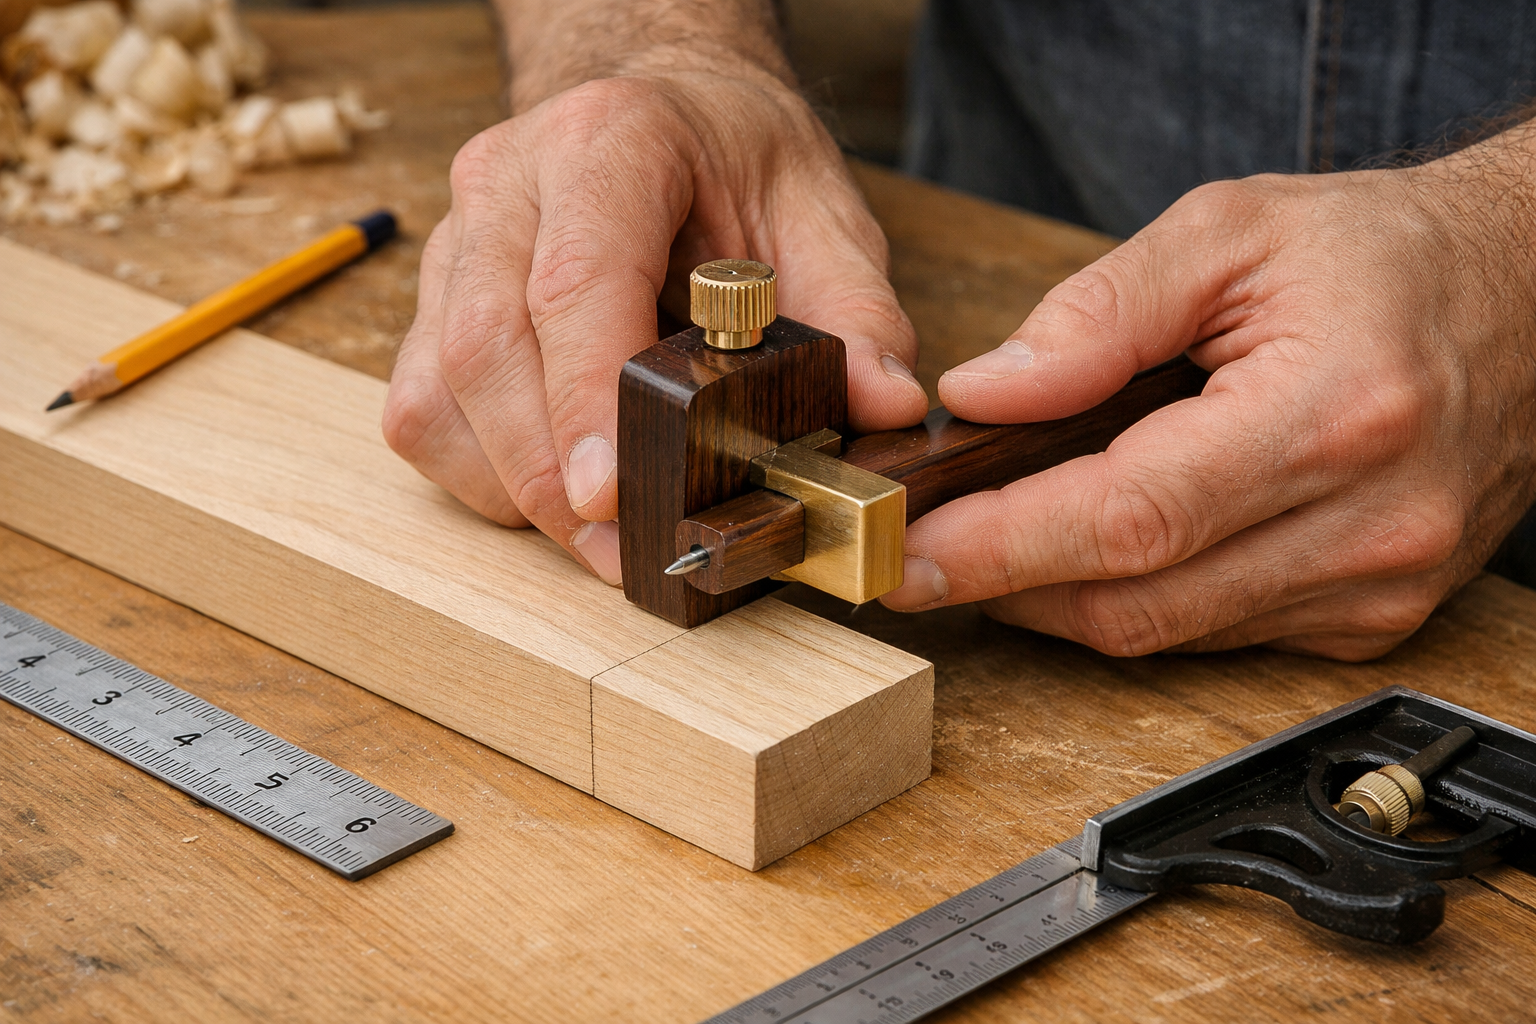
- Marking Gauge: Crucial for accurately scribing the depth of your lap. A simple pin-style marking gauge or a wheel marking gauge works wonders.
- Combination Square or Engineer’s Square: For accurately marking your shoulder lines square across the workpiece.
- Pencil: A sharp carpenter’s pencil or a mechanical pencil for crisp lines.
- Handsaw: A Japanese pull saw or a Western-style dovetail/backsaw with fine teeth is ideal for precision cuts.
- Chisels: A set of sharp bench chisels (1/2″ and 3/4″ are good starting points) is essential for removing waste and paring to your lines. Learn more about hand tool mastery for detail work.
- Bench Vise or Clamps: To securely hold your workpiece during marking and cutting.
- Mallet: For driving chisels, particularly when removing larger sections of waste.
- Paring Block (Optional but Recommended): A piece of scrap wood with a perfectly square edge, used to guide your chisel for perfectly vertical cuts.

Materials
- Wood: Start with a soft, stable wood like pine, poplar, or common dimensional lumber from your local hardware store. Using scrap wood for practice is highly recommended before working on your final project pieces. Consistent thickness is vital for half-lap joints.
- Wood Glue: High-quality PVA wood glue for a strong, lasting bond.
- Clamps: Bar clamps or parallel clamps to hold the joint securely while the glue dries.
Safety First!
Always prioritize safety in the workshop:
- Wear Safety Glasses: Wood chips can fly.
- Keep Tools Sharp: Dull tools are more dangerous as they require more force, leading to slips.
- Secure Your Workpiece: Never cut or chisel a piece that isn’t firmly held.
- Mind Your Fingers: Always direct cutting forces away from your body and hands.
Step-by-Step Guide to Hand-Cutting a Half-Lap Joint
With your tools ready and safety in mind, let’s break down the process of cutting a perfect half-lap joint. This systematic approach ensures accuracy, which is key to strong and beautiful joinery.
Step 1: Accurate Marking
Precision in marking is the foundation of a good half-lap joint.
- Define Joint Location: Decide where the joint will be on your workpiece. For an end lap, you’ll be cutting into the end of one board. For a cross lap, you’ll mark the middle section of both boards.
- Mark Shoulder Lines: Using your combination square and a sharp pencil, mark the length of the lap. If you’re joining two pieces of the same width, mark the width of the intersecting piece onto the first. For example, if you’re joining two 2-inch wide pieces, mark 2 inches from the end of the first piece. Ensure these lines are perfectly square across the face and edges.
- Mark Depth Lines: Set your marking gauge to exactly half the thickness of your wood. Scribe a line along the edges and across the end grain (for an end lap) or across the face (for a cross lap) between your shoulder lines. This line indicates the precise depth of your cut. Pro Tip: Make several light passes with the marking gauge rather than one heavy one for a cleaner, more accurate line.
Step 2: Sawing the Shoulders
This is where your handsaw comes into play.
- Set Up: Secure your workpiece in a vise with the shoulder line just proud of the vise jaws.
- Saw the Shoulder Lines: Carefully saw down to your scribed depth line. Position your saw just on the waste side of your pencil line, allowing the kerf to remove the line itself. Keep the saw blade perfectly vertical. For an end lap, you’ll saw across the face. For a cross lap, you’ll saw across the face of both pieces that intersect.
- Multiple Cuts: If your joint is wide, make several parallel saw cuts (called kerfs) within the waste area of the lap. This will make chiseling out the waste much easier.
Step 3: Removing the Waste
Now, it’s time to chisel. This step requires patience and a sharp tool.
- Secure the Workpiece: Orient the workpiece in your vise or clamped to your bench so you can comfortably work from one of the sawn shoulder lines towards the end of the piece.
- Rough Removal: Start by removing the bulk of the waste. Place your chisel bevel-down at a shallow angle, just shy of your depth line. Tap it with a mallet to remove small chips of wood. Work from the outside edges inwards.
- Paring to the Line: As you get closer to your final depth line, switch to a more controlled paring motion. Hold the chisel bevel-up, guiding it with your fingers, and push it horizontally, taking very thin shavings. Aim to shave right down to your scribed depth line. For perfectly flat surfaces, work from both directions into the middle of the lap.
- Clean the Corners: Use the chisel to clean up any remaining wood in the corners, ensuring they are square.


Step 4: Test Fit and Refinement
This is the moment of truth!
- Dry Fit: Carefully bring the two pieces together. They should slide together with light hand pressure. If it’s too tight, identify the high spots and use your chisel to pare away small amounts of wood. A perfectly fitting joint will have no gaps.
- Don’t Force It: Never force a joint together; you risk splitting the wood. It’s better to be slightly loose and rely on glue than too tight and cause damage.
- Refine as Needed: If the joint is slightly loose, it can sometimes be salvaged with glue, but aiming for a perfect fit is the goal.
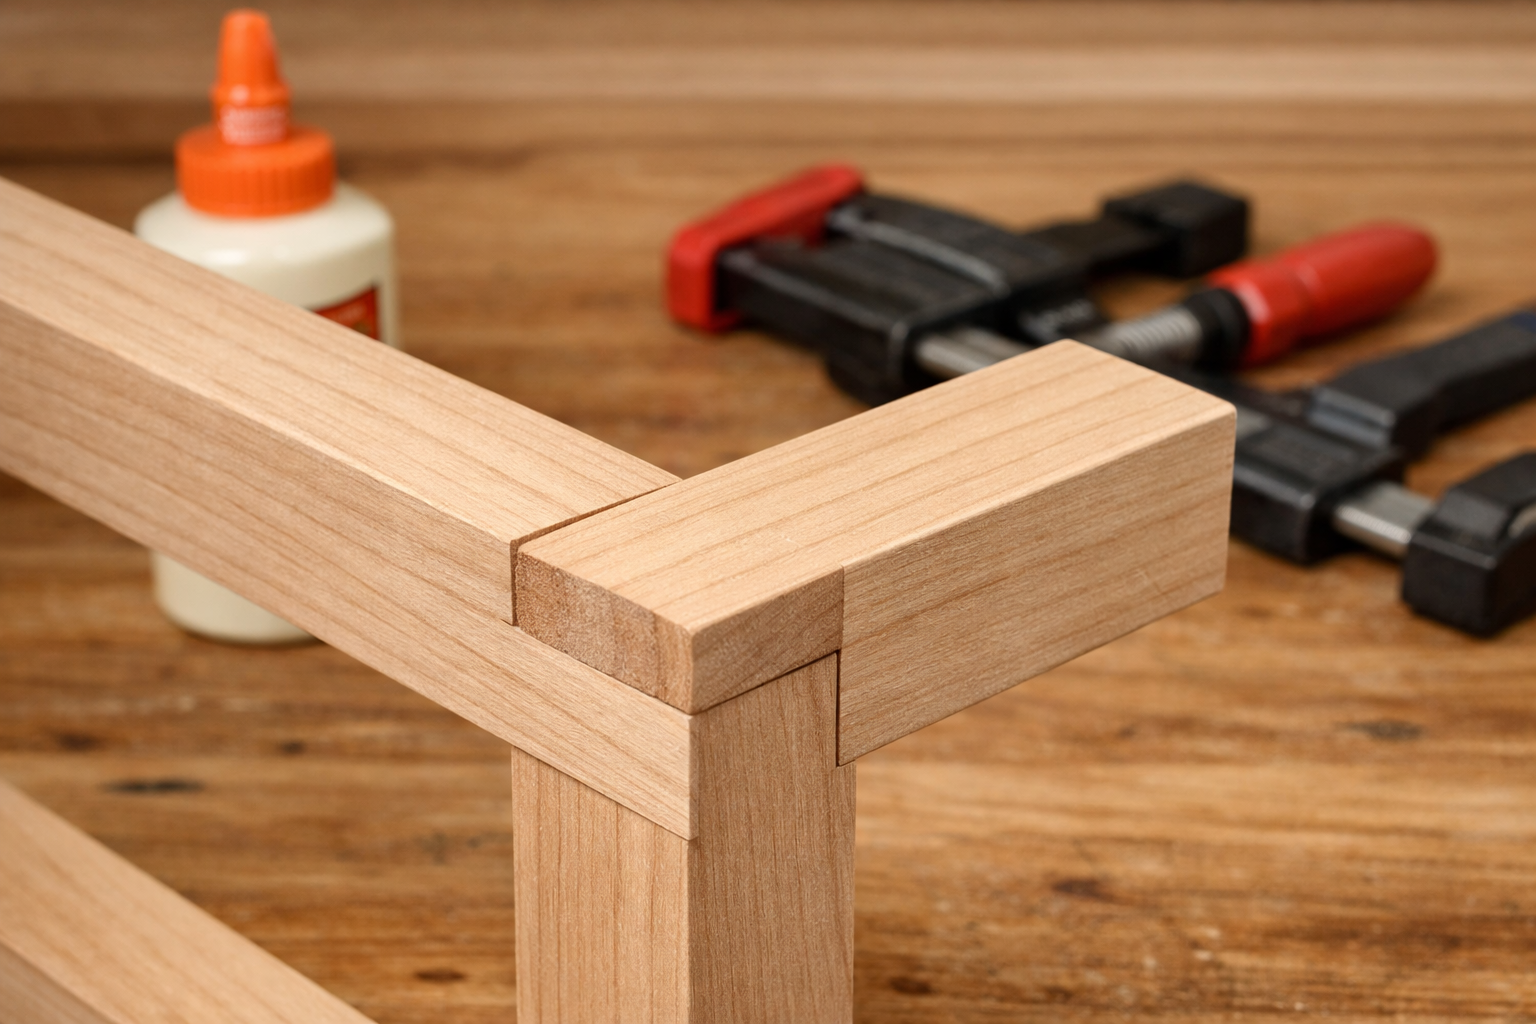
Step 5: Gluing and Clamping
Once satisfied with the fit:
- Apply Glue: Apply an even, but not excessive, coat of wood glue to both mating surfaces of the joint.
- Assemble: Bring the pieces together, ensuring they are properly aligned.
- Clamp: Apply clamps, ensuring even pressure across the joint. Check that the joint remains square as you tighten the clamps. Use a damp cloth to wipe away any glue squeeze-out immediately.
- Dry Time: Allow the glue to cure according to the manufacturer’s instructions, typically 30 minutes to an hour before removing clamps, and 24 hours for full strength.

Half-lap joints are exceptionally strong in tension and compression once glued. They are also less susceptible to seasonal wood movement than some other joints. For projects like building Adirondack chairs or crafting profitable wooden benches, these joints provide the necessary robustness for long-lasting outdoor use.
Common Mistakes and Troubleshooting for Beginners
Even with a Beginner’s Guide to Hand-Cut Half-Lap Joints: Simple Yet Strong Connections for Furniture and Frames, errors can occur. Learning from them is part of the process.
Common Mistakes
- Inaccurate Marking: The most frequent culprit. If your lines aren’t square or your depth isn’t consistent, the joint will be off.
- Cutting on the Wrong Side of the Line: Always cut on the waste side. Cutting on the keeper side makes the joint too small.
- Dull Tools: Leads to ragged cuts, tear-out, and makes chiseling incredibly difficult and frustrating.
- Forcing the Joint: Damages the wood fibers and prevents a strong glue bond.
- Insufficient Clamping Pressure: Not enough pressure means the glue won’t achieve its maximum bond strength.
- Rushing the Process: Woodworking, especially hand tool woodworking, rewards patience.
Troubleshooting Tips
- Gaps in the Joint:
- At the Shoulder: Your saw cut wasn’t perfectly straight or you didn’t saw deep enough. Use a sharp chisel to pare back the shoulder.
- At the Face/Depth: The bottom of your lap isn’t flat. Use a chisel to carefully flatten the bottom, ensuring it’s consistent.
- Joint is Too Loose:
- This is harder to fix. If it’s only slightly loose, extra glue might suffice, but it compromises strength. In critical applications, recutting might be necessary.
- For decorative pieces, wood shims can sometimes fill small gaps, but it’s not ideal for structural integrity.
- Tear-Out:
- Usually caused by dull chisels or chiseling against the grain. Always work with sharp tools and try to work from both directions into the middle when paring.
- Scribing deeply with a marking gauge can help prevent tear-out along the depth line.
Practice Makes Perfect
Don’t be discouraged by imperfect first attempts. Grab some cheap dimensional lumber or sourcing reclaimed and salvaged wood to practice. Focus on consistent marking, clean saw cuts, and controlled chiseling. Each joint you cut, whether perfect or flawed, will teach you valuable lessons and refine your skills. Before you know it, you’ll be creating sturdy and beautiful furniture frames, picture frames (see profitable beginner woodworking), and more, all with the simple yet strong half-lap joint.
Conclusion
The half-lap joint stands as a testament to the idea that fundamental woodworking skills can yield robust and elegant results. This Beginner’s Guide to Hand-Cut Half-Lap Joints: Simple Yet Strong Connections for Furniture and Frames has provided you with the knowledge and steps to confidently approach this versatile joint. By focusing on accurate marking, precise sawing, and careful chiseling, you can create strong, flush connections that form the backbone of countless woodworking projects, from simple frames to more intricate furniture pieces.
Embracing hand-cut joinery not only broadens your skillset but also deepens your connection to the craft. The tactile feedback, the quiet focus, and the satisfaction of a perfectly fitted joint are unique rewards of working with hand tools. As you progress, consider exploring more complex joints, but always remember the solid foundation that the humble half-lap provides.
Actionable Next Steps
- Gather Your Tools: Ensure your marking gauge, square, saw, and chisels are sharp and ready.
- Practice on Scraps: Don’t hesitate to use inexpensive wood to perfect your technique before working on your main project.
- Start a Simple Project: Apply your newfound skills to a small, manageable project like a simple picture frame, a small shelf, or a basic box.
- Continue Learning: Explore other fundamental joints like bridle joints or mortise and tenons as you gain confidence.
Happy woodworking in 2026!
