


The average piece of furniture has a lifespan of approximately 15 years before it’s often discarded or replaced, contributing significantly to landfill waste. Yet, beneath layers of worn varnish, scratches, and outdated aesthetics, many vintage wood furniture pieces hold not only superior craftsmanship and durable materials but also a unique history waiting to be rediscovered. Instead of succumbing to the throwaway culture, learning the art of Restoring and Refinishing Vintage Wood Furniture: Techniques for Bringing Old Pieces Back to Life offers a sustainable and deeply rewarding path to preserving timeless beauty and creating bespoke home accents. This guide explores the comprehensive techniques involved, from initial assessment and repair to stripping, sanding, and applying new, durable finishes that honor the original character of these cherished items.
Key Takeaways
- Assessment is Crucial: Before any work begins, thoroughly evaluate the furniture’s condition, identifying the wood type, construction, existing finish, and any damage to inform your restoration strategy.
- Gentle Disassembly & Repair: Carefully take apart pieces where necessary, and prioritize structural integrity. Minor repairs like regluing joints, filling cracks, and patching veneer are essential foundations for a lasting restoration.
- Effective Finish Removal: Choose the appropriate stripping method (chemical, heat, or mechanical) based on the existing finish and wood type to avoid damage.
- Meticulous Surface Preparation: Sanding is vital for a smooth, uniform surface. Progress through grits methodically, always sanding with the grain, and clean thoroughly between stages.
- Applying New Finishes: Select a finish that complements the wood and intended use (oil, varnish, lacquer). Apply thin, even coats, allowing adequate drying time, and achieve a professional look with proper buffing and waxing.
The Foundation: Assessment, Disassembly, and Structural Repair
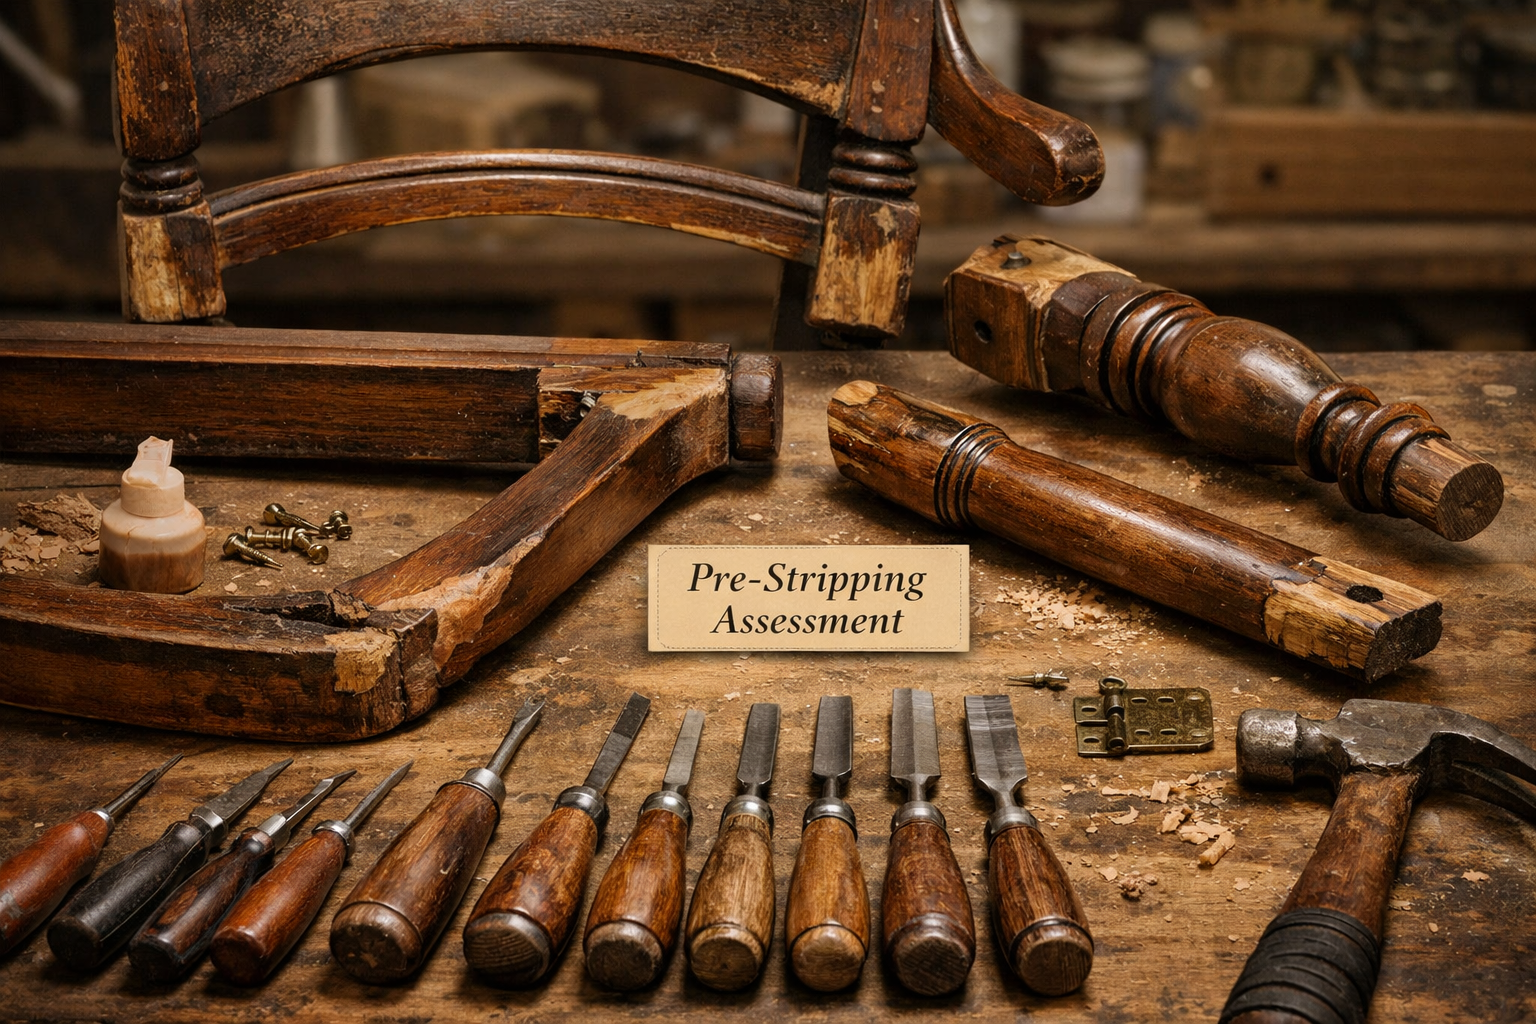
The journey of Restoring and Refinishing Vintage Wood Furniture: Techniques for Bringing Old Pieces Back to Life begins long before any sandpaper touches the wood. A thorough assessment is paramount to understanding the piece’s history, construction, and condition, guiding every subsequent step. This initial phase dictates the tools and techniques you’ll employ, ensuring you preserve the furniture’s integrity while bringing it back to life.

Comprehensive Initial Assessment
Before starting, take time to examine the piece carefully.
- Identify the Wood Type: Is it a hardwood like oak, walnut, or mahogany? Or a softwood like pine? Knowing the wood type influences stripping agents, sanding grits, and finishing products.
- Examine Construction: Vintage furniture often features superior joinery like dovetails, mortise and tenons, or dowels. Understanding the construction helps in careful disassembly and reassembly.
- Assess Existing Finish: Determine if the current finish is varnish, shellac, lacquer, paint, or oil. This dictates the most effective and safest stripping method. A simple test with denatured alcohol can dissolve shellac, while lacquer thinner can soften lacquer.
- Identify Damage: Look for loose joints, cracks, gouges, veneer damage, missing pieces, and water rings. Prioritize structural repairs over cosmetic ones. Check for woodworm holes (small, perfectly round holes usually with fine sawdust, called ‘frass’, nearby).
Careful Disassembly and Cleaning
For many vintage pieces, especially chairs or tables with wobbly legs, partial or full disassembly is necessary to address structural issues properly.
- Document Everything: Take photographs or make sketches of each step during disassembly. Label individual parts with tape to ensure correct reassembly. This is a critical step, especially for complex pieces.
- Remove Hardware: Carefully remove all hardware (hinges, pulls, casters). Clean hardware separately; often, a soak in warm soapy water or a mild oxalic acid solution can remove grime and rust. Be gentle with antique hardware, as replacement can be difficult or costly.
- Separate Joints: Use gentle force. Sometimes, a rubber mallet and a block of wood are sufficient to tap joints apart. If old hide glue was used, a little steam might help soften it. Avoid forcing joints, as this can cause irreparable damage.
- Thorough Cleaning: After disassembly, clean each component. A soft brush and mild soap-and-water solution can remove surface dirt and grime. For stubborn residue, mineral spirits can be effective. Ensure the wood dries completely before proceeding.
Structural Repairs: Reinforcing the Framework
Addressing structural weaknesses is the cornerstone of Restoring and Refinishing Vintage Wood Furniture: Techniques for Bringing Old Pieces Back to Life. A wobbly chair or a sagging table will not last, regardless of how beautiful the finish.
- Regluing Loose Joints: Scrape away old, brittle glue from tenons and mortises. Apply fresh wood glue (PVA glue is common, but hide glue is period-appropriate for many antiques) evenly, clamp the joint securely, and wipe away any squeeze-out immediately. Allow ample drying time, typically 24 hours.
- Repairing Cracks and Gouges: Small cracks can be filled with wood filler or epoxy tinted to match the wood. For larger cracks or missing sections, consider patching with a piece of matching wood, carefully shaped and glued into place.
- Veneer Repair: Lifted veneer can be reattached using veneer glue and clamping. Missing veneer patches require donor veneer, carefully cut and glued. Pressing the veneer flat with weights or clamps until dry is essential.
- Addressing Woodworm: If active woodworm is present (fresh frass), treat the piece with a proprietary woodworm killer. This often involves injecting the solution into the flight holes.

- Replacing Missing Parts: For intricate missing pieces, consider carving a replacement. Learning Advanced Wood Carving Techniques for Decorative Furniture Accents or even Introduction to Wood Carving for Beginners can be invaluable for this.
“True restoration is not just about making something look new; it’s about honoring its past and ensuring its future.”
Stripping, Sanding, and Preparing for a New Finish
Once the structural integrity is restored, the focus shifts to preparing the wood surface for its new lease on life. This involves carefully removing old finishes and meticulously sanding the wood to create the perfect canvas. These steps are crucial for achieving a professional and durable outcome when Restoring and Refinishing Vintage Wood Furniture: Techniques for Bringing Old Pieces Back to Life.
Removing Old Finishes Safely and Effectively
The method for stripping an old finish depends heavily on the finish type and the underlying wood.
- Chemical Strippers: These are effective for multiple layers of paint, varnish, or lacquer. Apply according to manufacturer instructions, allowing it to work, then scrape off the softened finish with a plastic scraper. Always work in a well-ventilated area and wear appropriate personal protective equipment (gloves, eye protection). Neutralize the stripper as directed, often with water or mineral spirits.
- Heat Guns: For very thick or stubborn paint layers, a heat gun can soften the finish, allowing it to be scraped away. Exercise caution to avoid scorching the wood. This method is generally not recommended for thin veneers or delicate woods.
- Mechanical Stripping (Sanding): For thin finishes or stained pieces where you want to go back to bare wood, careful sanding can be an option. However, it’s labor-intensive and carries the risk of sanding through veneers or creating uneven surfaces if not done correctly. It’s often used after chemical stripping to remove residual finish.
- Natural/Eco-friendly Strippers: For those seeking less harsh alternatives, some citrus-based or soy-based strippers offer a slower but safer approach.
The Art of Sanding: Achieving a Smooth Surface
Sanding is arguably the most critical step for achieving a beautiful finish. It smooths the wood, removes imperfections, and prepares the pores to accept stain or finish evenly.
- Start with Coarse Grit (but not too coarse): Begin with 100-120 grit sandpaper to remove any remaining finish residue and minor imperfections. Avoid grits coarser than 100 on most furniture, as they can leave deep scratches that are difficult to remove.
- Progress Through Grits: Gradually move to finer grits: 150, 180, and finally 220. The goal is to remove the scratches left by the previous grit. Do not skip grits. Each grit should be used until the surface appears uniformly sanded with that grit.
- Always Sand with the Grain: Sanding against the grain will create visible scratches that will be highlighted by stain or finish.
- Hand Sanding vs. Power Sanders: For flat surfaces, orbital or belt sanders can speed up the process. However, for contoured areas, delicate details, or fine finishing, hand sanding with sanding blocks is indispensable.
- Dust Removal: After each sanding stage, thoroughly remove all dust. A shop vacuum, a tack cloth, or a cloth dampened with mineral spirits are effective. Leftover dust can impede stain absorption and create a gritty finish.
Pre-Stain and Wood Conditioning
Some woods, particularly softwoods like pine or cherry, can absorb stain unevenly, leading to blotchy results.
- Wood Conditioner: Applying a pre-stain wood conditioner before staining helps equalize the wood’s porosity, allowing for a more uniform stain application. Follow product instructions for application and drying time.
- Grain Raising: Lightly dampen the wood with a cloth after final sanding and let it dry. This raises the grain, which can then be lightly sanded again with 220-grit sandpaper. This step helps prevent the grain from raising after the finish is applied, ensuring a smoother final result.

- Consider Sustainable Sourcing: When patching or replacing wood, consider Sourcing Reclaimed and Salvaged Wood or Sustainable Wood Sourcing for the Modern Woodworker for an eco-conscious approach.
Applying New Finishes and Final Touches
With the wood prepped, the exciting phase of applying new finishes begins, bringing out the wood’s inherent beauty and protecting it for years to come. This is where Restoring and Refinishing Vintage Wood Furniture: Techniques for Bringing Old Pieces Back to Life truly transforms a tired piece into a cherished heirloom.
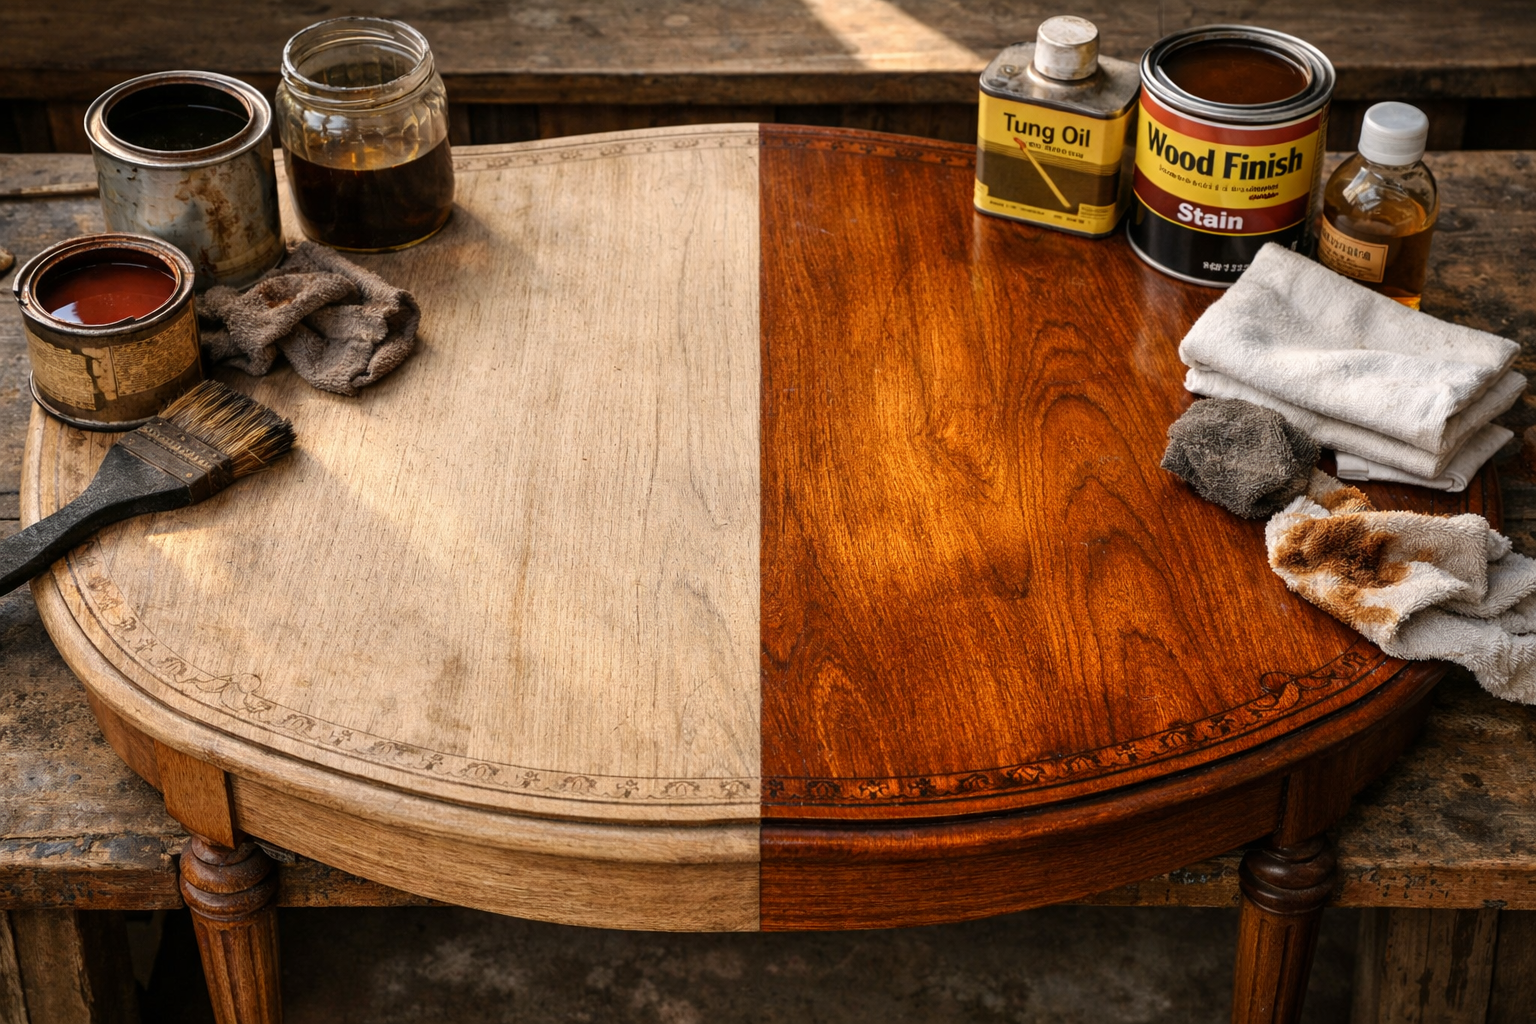
Choosing the Right Finish
The choice of finish depends on the desired look, durability, and the wood type.
- Stains: Stains add color while allowing the wood grain to show through. Apply evenly with a brush or rag, then wipe off excess to prevent blotching. Test stains on an inconspicuous area first.
- For specific wood types, consider guides like Mahogany Wood Finishing Techniques or Dark Wood Finishing Techniques.
- If you’re aiming for a particular aesthetic, explore options like Weathered Wood Finishing Techniques or Reclaimed Wood Finishing Techniques.
- Oils (Danish Oil, Tung Oil, Linseed Oil): These penetrate the wood, enhancing its natural color and providing a natural, matte to semi-gloss finish. They are easy to apply and repair but offer less protection against moisture and abrasion than surface finishes. For more on this, check out Danish Oil vs. Linseed: The Ultimate Wood Finishing Guide.
- Varnishes (Polyurethane, Spar Urethane): These form a durable, protective layer on the surface. Polyurethane is popular for its hard-wearing properties. Apply thin coats, sanding lightly with very fine grit (320-400) between coats to ensure good adhesion and a smooth finish.
- For spray application, Aerosol Polyurethane: Benefits, Application, and Types offers guidance.
- Shellac: A natural, traditional finish that provides a beautiful, warm glow. It’s easy to repair but susceptible to heat and alcohol damage.
- Lacquer: Dries very quickly and provides a hard, durable finish. Best applied with a spray gun for an even coat.
Application Techniques
Regardless of the finish chosen, proper application is key.
- Thin, Even Coats: Multiple thin coats are always better than one thick coat. Thick coats can lead to drips, uneven drying, and a cloudy appearance.
- Follow Manufacturer Instructions: Pay close attention to drying times, recoat windows, and application methods specified by the product manufacturer.
- Sand Between Coats: For varnishes and lacquers, light sanding with fine-grit sandpaper (320-400) between coats helps smooth out minor imperfections and promotes adhesion. Clean dust thoroughly.
- Brush vs. Wipe-On vs. Spray:
- Brushing: Best for thicker finishes like varnish, but requires good brush technique to avoid streaks.
- Wipe-On: Ideal for oils and thinned varnishes, offering easy, streak-free application.
- Spraying: Provides the smoothest, most even finish, especially for lacquers, but requires specialized equipment and ventilation.
Curing and Final Touches
Even after the final coat is applied and feels dry to the touch, most finishes require a longer ‘curing’ period to reach full hardness.
- Allow Full Curing: Avoid heavy use of the furniture during the curing period, which can range from a few days to several weeks, depending on the product.
- Rubbing Out the Finish: For a truly professional, high-gloss finish, consider “rubbing out” the final coat with very fine abrasive pads (like 0000 steel wool) and rubbing compounds. This polishes the surface to a mirror-like sheen.
- Waxing for Protection: A final coat of paste wax or furniture polish adds an extra layer of protection, enhances the sheen, and provides a smooth feel. Apply sparingly and buff to a soft luster.

- Reinstall Hardware: Carefully reinstall the cleaned or new hardware. Use care not to scratch the freshly finished surface.
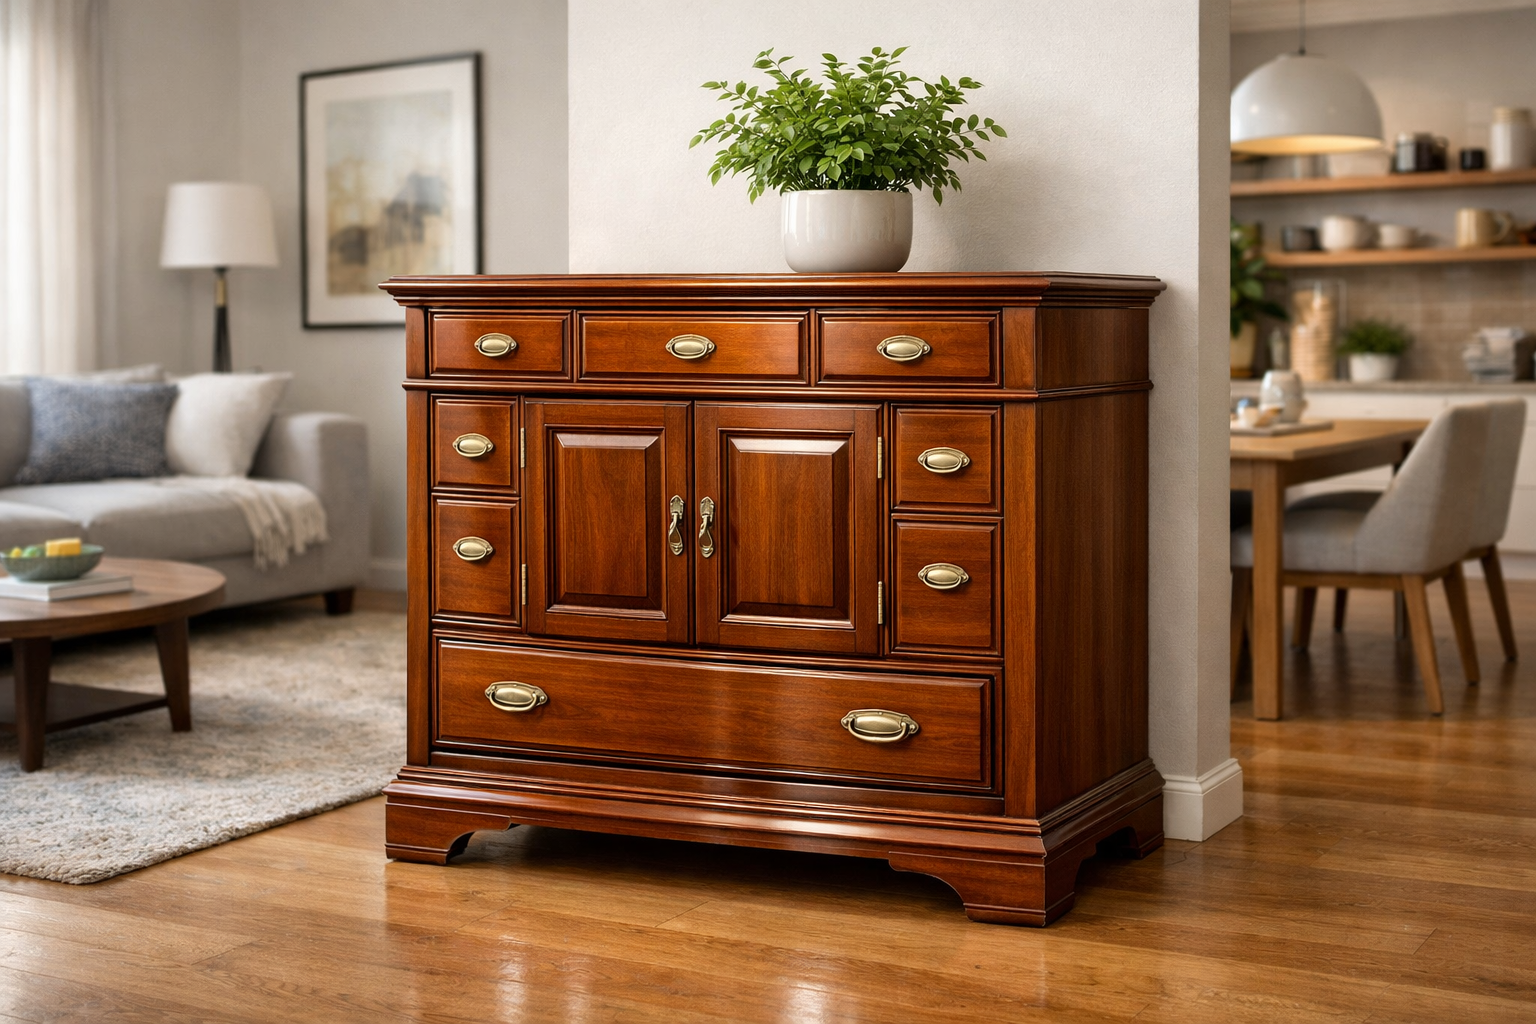
Conclusion
Restoring and Refinishing Vintage Wood Furniture: Techniques for Bringing Old Pieces Back to Life is more than just a DIY project; it’s a journey of patience, skill development, and creative expression. By understanding the wood, meticulously repairing structural issues, carefully removing old finishes, and applying new ones with precision, you not only preserve a piece of history but also create something uniquely yours. The satisfaction of transforming a neglected item into a beautiful, functional centerpiece for your home is unparalleled. Each scratch removed, each joint reinforced, and each layer of finish applied contributes to a story of revival, ensuring these magnificent pieces continue to be admired and used for generations to come in 2026 and beyond.
Actionable Next Steps:

- Start Small: Begin with a less valuable, simpler piece, like a wooden stool or a small side table, to practice techniques.
- Gather Your Tools: Invest in quality hand tools, safety gear, and a variety of sandpaper grits.
- Research Specifics: If you have a particular type of wood or finish in mind, delve deeper into specialized guides.
- Practice Patience: Rushing through any step will compromise the final result. Embrace the process and enjoy the transformation.
SEO Meta Title: Vintage Wood Furniture Restoration: Bring Old Pieces to Life SEO Meta Description: Learn techniques for restoring and refinishing vintage wood furniture in 2026. Repair, strip, sand, and apply new finishes to bring old pieces back to life.
