
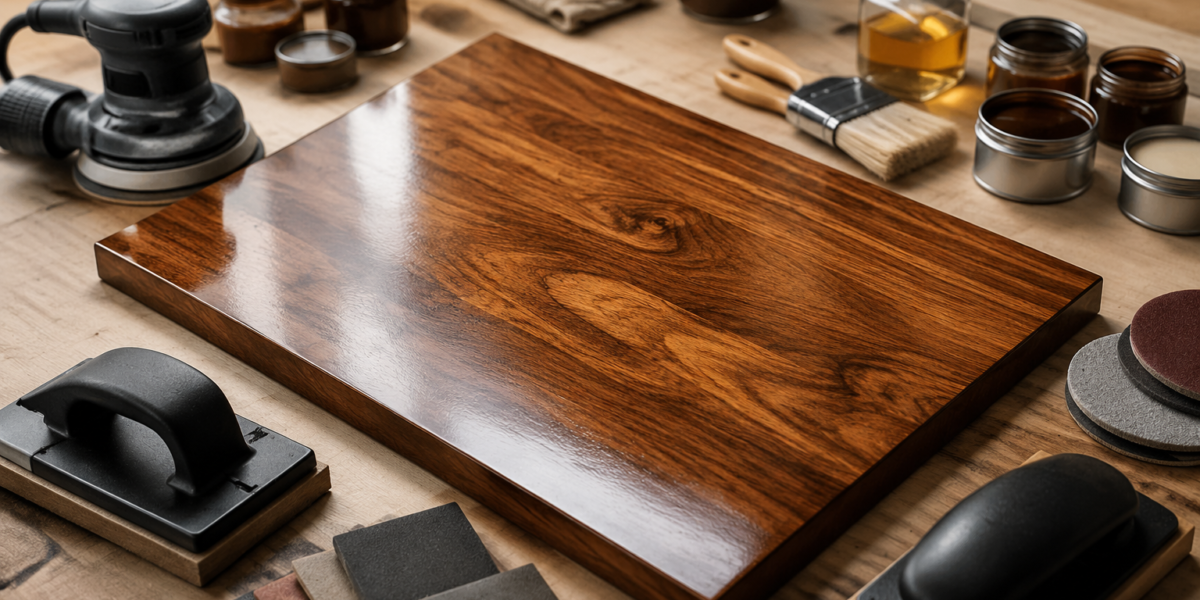

The pursuit of a truly flawless wooden surface often reveals that the conventional orbital sander, while efficient, marks merely the starting point in a comprehensive finishing journey. Achieving truly showroom-quality finishes demands an exploration of advanced sanding strategies, sophisticated filling techniques, and alternative finishing methods that extend far beyond basic machine sanding, ensuring a smooth, durable, and exceptionally beautiful final product. In 2026, woodworkers are increasingly turning to these refined methods to differentiate their craft and elevate the aesthetic and tactile quality of their creations. This article delves into the nuances of Advanced Sanding and Finishing for a Flawless Surface: Techniques Beyond the Orbital Sander.
Key Takeaways
- Beyond the Orbital: While orbital sanders are excellent for initial stock removal, achieving a truly flawless surface requires supplementary hand sanding and specialized block sanding to eliminate swirl marks.
- Grain Filling is Crucial: For open-pore woods, grain fillers are indispensable for creating a perfectly smooth substrate, preventing sunken finishes and enhancing depth.
- Progressive Grit Strategy: A meticulously planned, progressive sanding grit sequence, starting coarse and moving to very fine, is fundamental for scratch elimination and surface preparation.
- Finishing Alternatives: Explore various finishing methods like French polishing, spray application, and hand-rubbed oils for superior depth, protection, and aesthetic control.
- Dust Management: Effective dust extraction and a clean environment are paramount at every stage to prevent contamination and ensure a clear, unblemished finish.
The Art of Substrate Preparation: Advanced Sanding for a Flawless Surface: Techniques Beyond the Orbital Sander
The foundation of any exquisite finish lies in impeccable surface preparation. While an orbital sander is an invaluable tool for general stock removal and flattening, its inherent random orbit motion, despite minimizing visible scratch patterns compared to belt sanders, can still leave microscopic swirl marks. These become glaringly apparent under certain lighting conditions, especially after a high-gloss finish is applied. Advanced Sanding and Finishing for a Flawless Surface: Techniques Beyond the Orbital Sander emphasizes moving beyond this initial stage.

The key to eliminating these swirls and achieving a perfectly uniform surface is a combination of meticulous hand sanding and specialized block sanding.
Hand Sanding and Block Sanding Techniques
- Post-Orbital Sanding: After reaching your final grit with the orbital sander (typically 180 or 220, depending on the wood and desired finish), transition to hand sanding.
- Using Sanding Blocks: For flat surfaces, rigid sanding blocks are indispensable. They distribute pressure evenly, preventing dips and hills that can result from unsupported hand sanding. Choose a block that is firm but has a slight give (e.g., cork or rubber-backed). For curved or contoured surfaces, use flexible sanding pads or conformable sanding sponges.
- Grain Direction: Always sand with the grain. This is paramount. Cross-grain scratches are notoriously difficult to remove and will be magnified by any finish.
- Progressive Grits: Re-sand with the same final grit used by the orbital sander (e.g., 220-grit). Then, move to successively finer grits (e.g., 320, 400, 600, or even 800 for exceptional clarity). The goal is to progressively abrade away the scratches left by the previous, coarser grit.
- Tip: After each grit, wipe the surface thoroughly with a damp cloth (water or mineral spirits, depending on the wood/dust) to reveal any remaining scratches. These liquids temporarily simulate a finish and make hidden flaws visible.
- Abrasive Selection: Don’t underestimate the impact of high-quality abrasives. Ceramic or aluminum oxide papers are durable and effective. For the finest grits, consider stearated sandpaper, which helps prevent clogging, or specialized finishing abrasives like Abralon or Mirka Abranet, designed for ultra-fine sanding and often used wet.
- Light Source Inspection: Use a raking light (a strong light source held at a low angle to the surface) to inspect for any remaining imperfections, scratches, or swirl marks after each sanding stage. The raking light will cast shadows that highlight even the most minute flaws.
- Edge Preparation: Don’t neglect edges. These are often overlooked but crucial for a professional look. Use a small sanding block or a sanding sponge to gently ease sharp edges, creating a slight “break” that allows the finish to adhere better and resist chipping. For more intricate details, refer to techniques discussed in Advanced Wood Carving Techniques for Decorative Furniture Accents.

Dealing with Surface Imperfections
Even after thorough sanding, minor imperfections like small dents, divots, or pinholes can remain.
- Steam for Dents: For minor dents in solid wood (not veneer), a damp cloth and a hot iron can sometimes raise compressed fibers. Place a damp cloth over the dent and lightly press with a hot iron. The steam causes the wood fibers to swell. Repeat cautiously until the dent is minimized.
- Filling Solutions: For deeper imperfections, color-matched wood fillers or epoxy fillers are effective. Apply sparingly, let dry completely, and sand flush. For a truly seamless repair, mix fine sawdust from the project wood with wood glue to create a custom filler that blends almost perfectly. This is particularly useful for projects where visible joints are a design feature, as seen in Hand Tool Joinery for Visible Wood Joints.
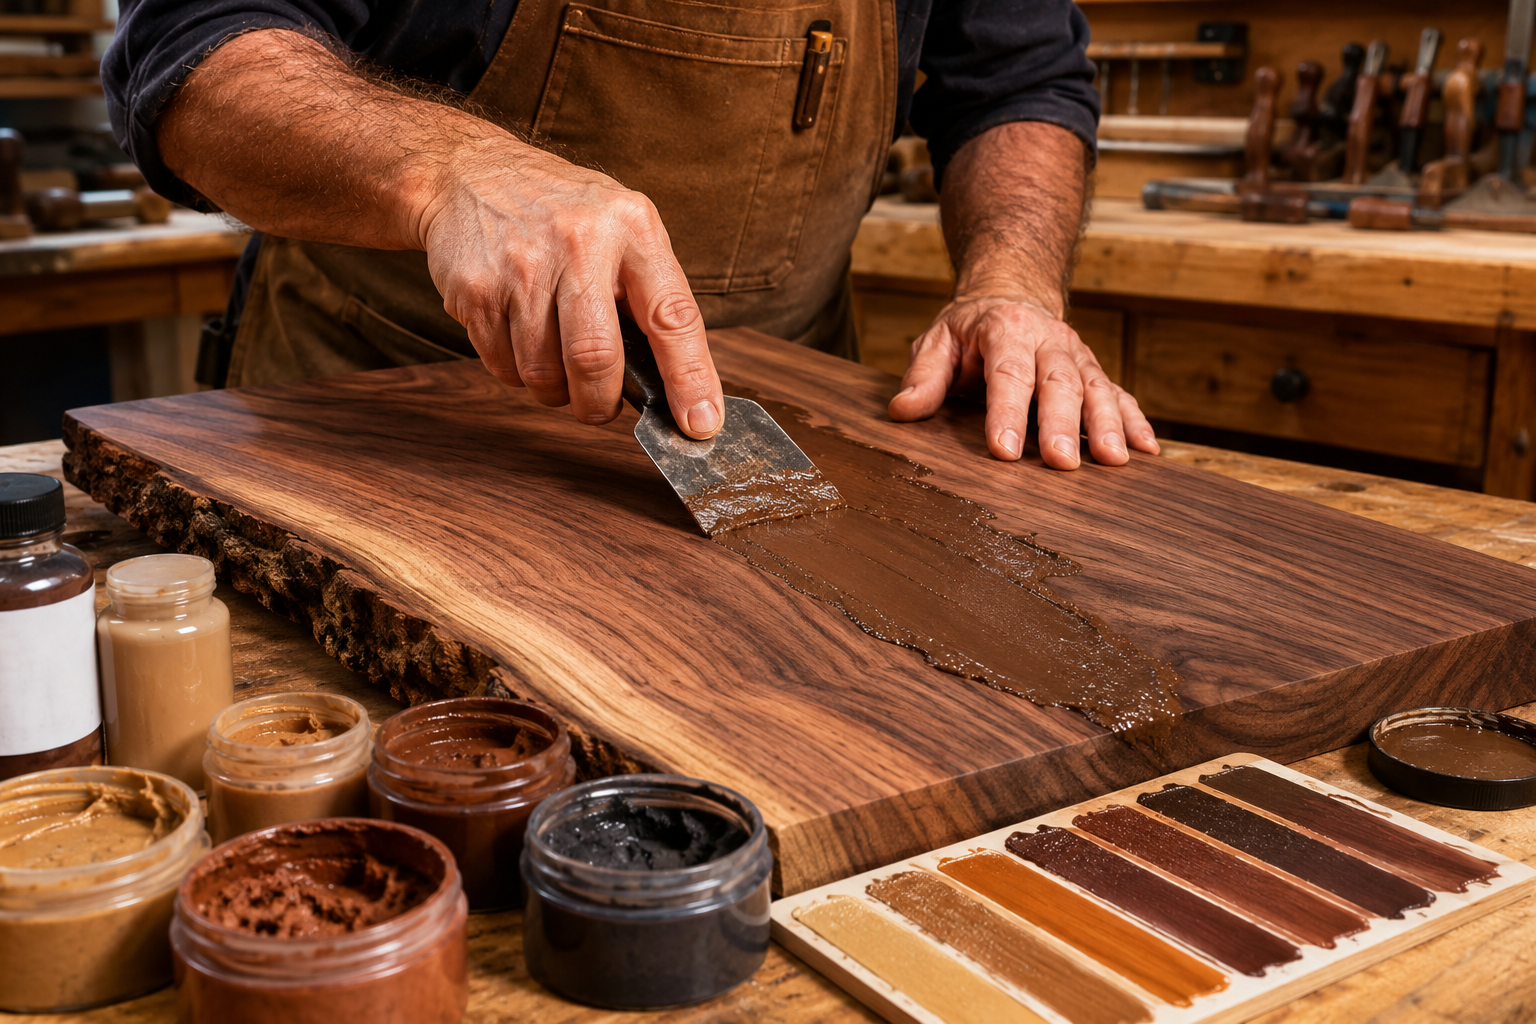
Grain Filling for Open-Pore Woods
Many beautiful hardwoods, such as oak, ash, mahogany, and walnut, are “open-pore” woods. This means they have visible, often deep, pores or vessels in their grain. If these pores are not filled, a finish applied over them will sink, creating a pitted or “orange peel” texture, especially with high-gloss finishes. Grain filling is a critical step for achieving that glass-smooth, mirror-like surface.
Types of Grain Fillers
- Paste Wood Fillers: These are traditional fillers, often oil-based, containing fine silica or other inert solids. They come in various colors and can be tinted to match or contrast with the wood.
- Water-Based Grain Fillers: Easier to clean up and less odorous, these are increasingly popular. They dry faster but may raise the grain slightly, requiring light re-sanding.
- Epoxy-Based Fillers: For exceptionally deep pores or very durable surfaces, thin epoxy can be used as a self-leveling grain filler. It offers excellent clarity and hardness but requires careful application.
Application Techniques
The goal is to force the filler into the pores, not just coat the surface.
- Preparation: Ensure the wood is sanded to at least 220-grit. Clean thoroughly to remove all dust.
- Application:
- Paste Filler: Apply liberally across the grain with a brush, rag, or rubber squeegee. Work it into the pores. Allow it to set slightly (it will dull).
- Removing Excess: Before it fully hardens, wipe across the grain with a coarse cloth (like burlap or sisal) to remove the bulk of the excess filler from the surface, leaving it packed into the pores. Then, wipe with the grain with a clean, softer cloth to remove any remaining haze.
- Drying: Allow ample drying time, which can range from hours to days depending on the filler type and humidity. Rushing this step will lead to shrinking and visible pores later.
- Sanding After Filling: Once completely dry, lightly sand the surface with fine-grit sandpaper (e.g., 320-400 grit) to remove any remaining filler haze or raised grain, leaving only the filler in the pores. The surface should feel perfectly smooth.
For specific wood types, like mahogany, specialized techniques for grain filling are often employed to enhance its natural beauty. See our guide on Mahogany Wood Finishing Techniques. Similarly, when working with oak, the robust grain structure demands a different approach to ensure a truly smooth finish, as outlined in Oak Wood Finishing Techniques.
Advanced Finishing Methods for Durability and Aesthetics
Once the surface is flawlessly prepared, the choice and application of the finish become paramount in achieving the desired aesthetic and providing lasting protection. Moving beyond basic wipe-on polyurethanes, several advanced techniques offer superior depth, clarity, and durability.
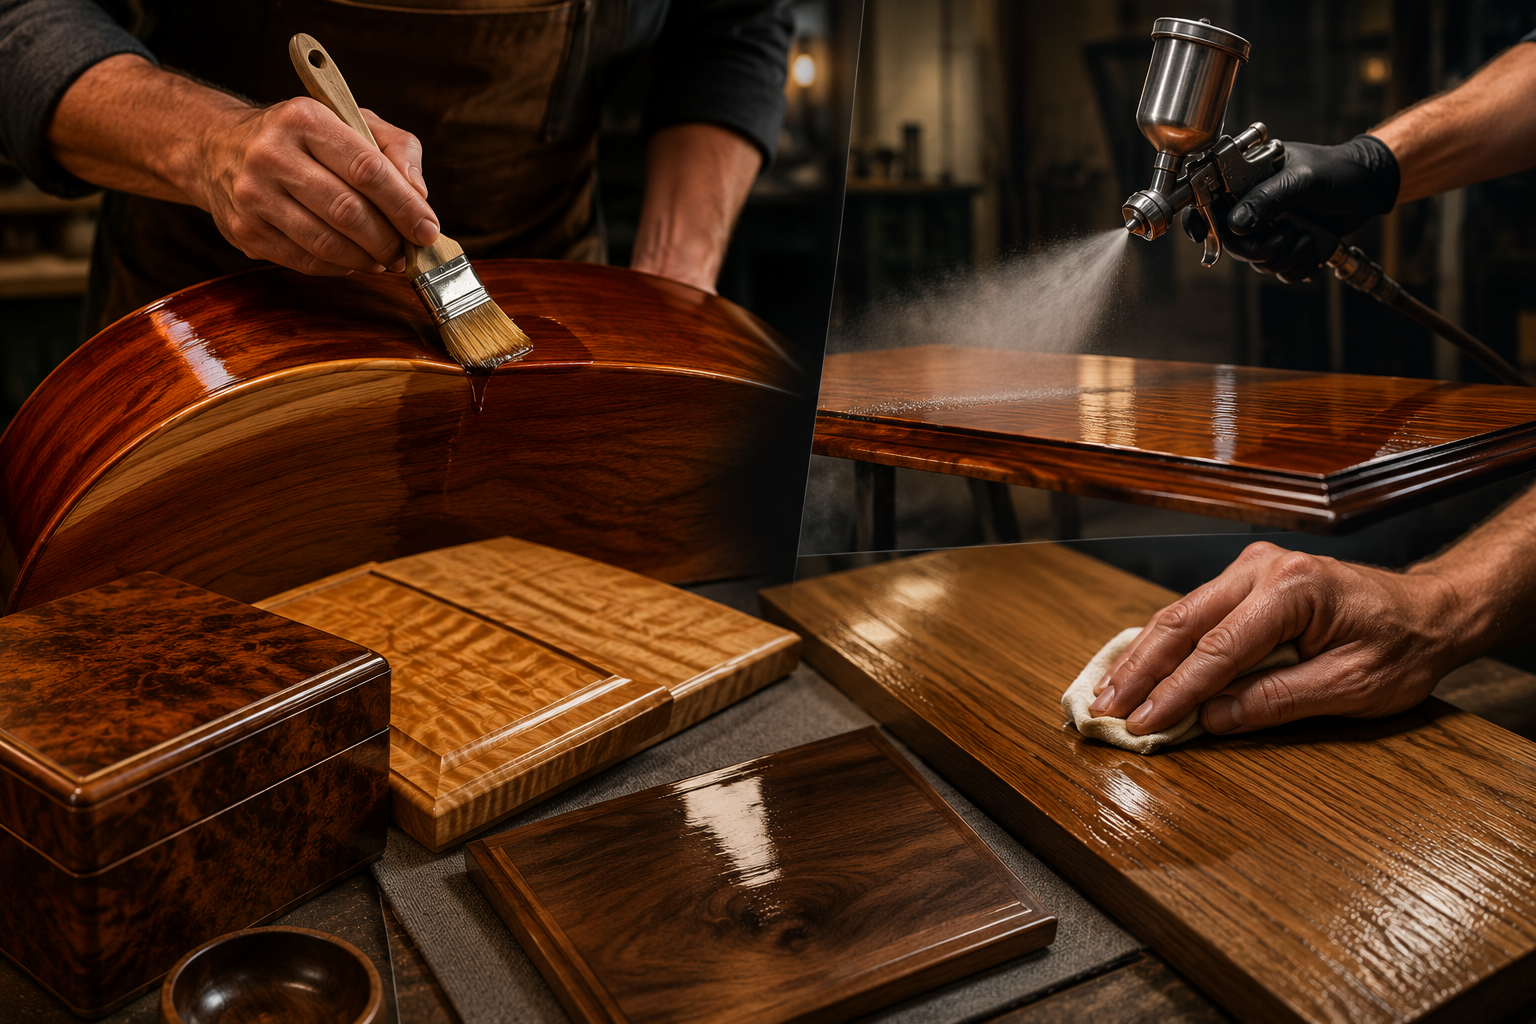
1. Spray Application
Spray finishing (using lacquer, varnish, or even sprayable water-based polyurethane) offers unparalleled smoothness and speed. It allows for multiple thin coats, which build depth without brush marks.
- Equipment: Requires a spray gun (HVLP is excellent for fine woodworking), an air compressor, and a clean, well-ventilated spray booth or area.
- Technique: Apply thin, even coats, overlapping each pass by 50%. Maintain a consistent distance and speed. Avoid over-applying, which can lead to runs and sags. Lightly scuff-sand between coats with 400-600 grit sandpaper for adhesion. For detailed guidance, explore Spray vs Brush Polyurethane and Sprayable Water-Based Polyurethane.
- Benefits: Flawless, even coverage; faster drying times; professional-level finish.
2. Hand-Rubbed Oil Finishes
For those seeking a natural, deep luster that enhances the wood’s inherent beauty, hand-rubbed oil finishes are a timeless choice.
- Types: Tung oil, linseed oil, Danish oil, and proprietary oil/varnish blends.
- Technique: Apply thin coats of oil, allowing each to penetrate fully before wiping off the excess. Build up multiple coats (often 5-10 or more) over several days or weeks. Each coat adds depth and protection. The final coats can be wet-sanded into the surface with very fine abrasives (e.g., 600-1000 grit wet/dry sandpaper) to create a slurry that further fills pores and micro-scratches.
- Benefits: Rich, warm glow; highlights grain; easily repaired; very tactile. For more on this, consider Natural Wood Finishing Techniques.
3. French Polishing
This historic technique, often used on fine furniture, creates an exquisite, deep, shimmering finish with incredible clarity. It uses shellac applied in numerous thin coats with a “fad” (a pad of cotton wrapped in lint-free cloth).
- Process: The technique involves rubbing the shellac into the wood in a circular or figure-eight motion, adding small amounts of lubricant (like mineral oil) to the pad to prevent sticking and improve flow. It’s a labor-intensive process requiring patience and practice.
- Benefits: Unparalleled depth, chatoyance, and a delicate, transparent appearance. Not as durable as modern varnishes but aesthetically stunning.
4. Rubbing Out and Polishing
Regardless of the finish applied, the final step for a truly flawless surface is often “rubbing out” and polishing. This process smooths the cured finish and enhances its sheen.
- Process:
- Leveling: After the finish is fully cured (which can take weeks for some varnishes), wet-sand the surface with ultra-fine grits (e.g., 1000, 1500, 2000, 3000 grit) using water with a small amount of dish soap as a lubricant. The goal is to flatten any dust nibs or minor imperfections.
- Compounding: Switch to automotive rubbing compounds (medium, then fine) applied with a clean cloth or a power buffer. These compounds contain fine abrasives that remove sanding marks and begin to restore gloss.
- Polishing: Finish with an automotive swirl remover or polishing compound to achieve a mirror-like shine.
- Benefits: Eliminates minor surface imperfections, creates a silky-smooth feel, and maximizes gloss and clarity.
Achieving such refined finishes requires meticulous attention to detail and a commitment to patience. It’s the difference between a good piece of woodworking and a truly exceptional one, transforming a simple surface into a work of art that demands appreciation. Considerations like humidity can also impact the application of certain finishes, as detailed in Applying Polyurethane in High Humidity.
Conclusion
Mastering Advanced Sanding and Finishing for a Flawless Surface: Techniques Beyond the Orbital Sander is a transformative skill for any woodworker. It’s a journey from efficiency to artistry, where the subtle nuances of surface preparation and finish application elevate a project from good to extraordinary. By embracing hand sanding, precise grain filling, and a range of sophisticated finishing techniques—from spray applications to hand-rubbed oils and French polishing—you can achieve a level of depth, clarity, and durability that a basic orbital sander simply cannot provide alone. In 2026, the demand for truly bespoke, high-quality finishes continues to grow, making these advanced skills more relevant than ever.
Actionable Next Steps:

- Invest in Quality Abrasives: Upgrade your sandpaper to high-quality aluminum oxide or ceramic options, and consider specialized finishing abrasives.
- Practice Hand Sanding: Dedicate time to perfecting your hand sanding technique, focusing on grain direction and even pressure with sanding blocks.
- Experiment with Grain Fillers: For your next open-pore wood project, incorporate a grain filling step. Start with water-based fillers for easier cleanup.
- Explore Finishing Options: Try a small project with a new finishing method, such as a hand-rubbed oil, or research local workshops for spray finishing techniques.
- Critically Inspect: Always use a raking light to inspect your work at every stage. Train your eye to spot imperfections before they become permanent.
By integrating these advanced techniques into your woodworking practice, you will unlock the potential for truly spectacular finishes, showcasing your craftsmanship and dedication to excellence.
References
- Flexner, B. (2005). Understanding Wood Finishing: How to Choose and Apply the Right Finish. Fox Chapel Publishing.
- Jewitt, A. (2012). The Workbench Book. Taunton Press.
- Kunz, M. (2018). Wood Finishing 101: The Step-by-Step Guide. Fine Woodworking.
SEO Meta Title: Flawless Wood Finishing: Advanced Sanding & Techniques SEO Meta Description: Master advanced sanding and finishing techniques beyond the orbital sander in 2026 for a truly flawless, durable, and beautiful wood surface.
