
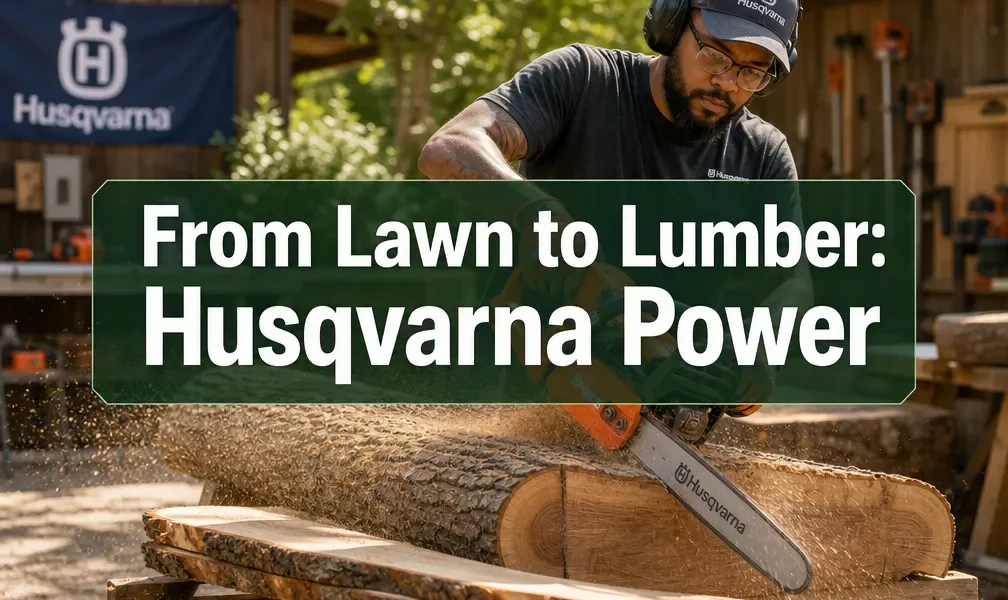
The average urban tree, when felled, often ends its life as firewood or mulch, its potential for crafting exquisite furniture or unique decorative pieces largely unrealized. Yet, with the right tools and knowledge, that same backyard tree can be transformed into valuable lumber, bridging the gap between a domestic landscape and a thriving woodworking project. This article explores the comprehensive process of “From Lawn to Lumber: Using Husqvarna Chainsaws to Buck, Slab, and Prepare Logs for Woodworking,” demonstrating how these powerful machines can be leveraged by hobbyists and professionals alike to unlock the hidden beauty within fallen timber.
Key Takeaways
- Safety First: Always prioritize personal protective equipment (PPE) and proper chainsaw operation techniques when handling logs.
- Husqvarna Versatility: Husqvarna chainsaws are capable of tasks from bucking (cross-cutting) to slabbing (ripping logs lengthwise) with appropriate attachments.
- Efficient Processing: Learn to safely and efficiently break down logs into manageable sections and then into rough lumber.
- Preparing for Milling: Understand the setup for slabbing logs and the initial steps for preparing wood for drying and further processing.
- Unlocking Value: Transform readily available urban or backyard trees into valuable, unique woodworking material, fostering sustainable practices.
Safety and Essential Gear for “From Lawn to Lumber: Using Husqvarna Chainsaws to Buck, Slab, and Prepare Logs for Woodworking”
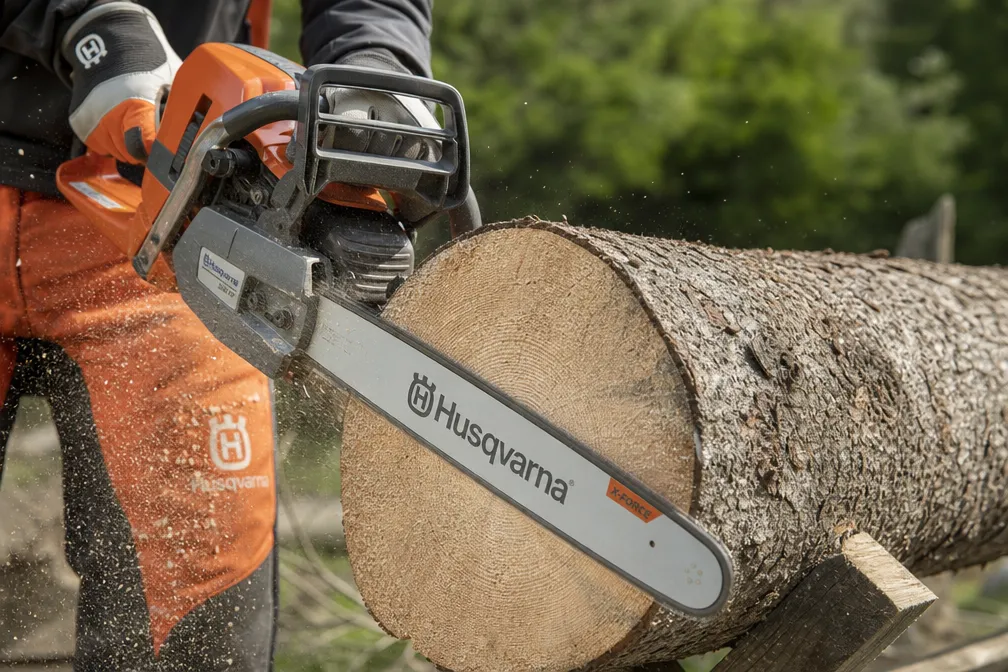
Embarking on the journey of transforming logs into lumber begins and ends with an unwavering commitment to safety. Chainsaws are incredibly powerful tools, and while Husqvarna models are designed with safety features, operator vigilance is paramount. Before even starting the engine, it is crucial to understand and implement a robust safety protocol.
Personal Protective Equipment (PPE)
Appropriate PPE is non-negotiable for any chainsaw operation. This includes:
- Head Protection: A hard hat with a face shield and ear protection integrated is ideal. The face shield protects against flying chips and debris, while ear protection guards against the chainsaw’s significant noise output.
- Eye Protection: Even with a face shield, safety glasses or goggles worn underneath provide an extra layer of defense against fine dust and errant particles.
- Hand Protection: Heavy-duty work gloves, preferably with anti-vibration features, protect hands from cuts, splinters, and reduce fatigue.
- Leg Protection: Chainsaw chaps or pants made from cut-resistant material are essential. These garments are designed to snag and stop the chainsaw chain upon contact, preventing severe injury.
- Foot Protection: Steel-toed boots with good ankle support offer protection against falling logs and provide stable footing.
Beyond personal gear, a well-maintained first-aid kit should always be readily accessible. Before any cutting begins, survey your work area for potential hazards, clear away obstructions, and ensure a stable, level surface for working with logs.
Husqvarna Chainsaw Selection and Maintenance
Husqvarna offers a range of chainsaws suitable for various tasks, from smaller homeowner models to professional-grade machines. For processing larger logs into lumber, a more powerful saw with a longer bar (typically 20 inches or more) will be necessary.
Consider these factors when choosing a Husqvarna chainsaw for this application:
- Engine Displacement (cc): Higher CC usually means more power, crucial for ripping through dense wood.
- Bar Length: Match the bar length to the diameter of the logs you intend to cut. A longer bar facilitates slabbing larger logs.
- Weight and Balance: A well-balanced saw reduces fatigue and improves control.
- Anti-Vibration System: Husqvarna’s LowVib® technology helps reduce operator fatigue during extended use.
Regular maintenance is critical for safe and efficient operation. This includes:
- Chain Sharpening: A sharp chain cuts efficiently and reduces kickback risk. Sharpen the chain frequently or replace it when dull.
- Chain Tension: Proper chain tension is vital. Too loose, and the chain can derail; too tight, and it can cause excessive wear or damage.
- Bar Maintenance: Keep the guide bar clean and check for burrs or damage.
- Air Filter and Spark Plug: Regular cleaning or replacement ensures optimal engine performance.
- Fuel Mix: Use the correct fuel-oil mixture for 2-stroke engines to prevent damage.
Before each use, perform a quick pre-operation check, ensuring all components are secure and functioning correctly. Understanding your chainsaw’s manual is an essential step in mastering its safe and effective use for “From Lawn to Lumber: Using Husqvarna Chainsaws to Buck, Slab, and Prepare Logs for Woodworking.”
Bucking and Initial Log Preparation for Woodworking
Once safety protocols are established and your Husqvarna chainsaw is ready, the first step in turning a tree into usable lumber is bucking the log. Bucking refers to cross-cutting a log into shorter, manageable sections. These sections are typically referred to as “rounds” or “blocks” and are the starting point for slabbing.
Efficient Bucking Techniques
Bucking logs requires careful planning to maximize yield and minimize waste.
- Assess the Log: Examine the log for branches, crotches, and internal defects. These can dictate where to make your cuts. Look for any metal inclusions (nails, fence wire) that could damage your chain.
- Determine Lengths: Decide on the desired lengths for your rough lumber. For example, if you plan to make a 6-foot tabletop, you’ll want to buck sections slightly longer to allow for trimming and squaring later. Consider standard lumber lengths (e.g., 8-foot, 10-foot) if you’re aiming for general stock.
- Support the Log: Whenever possible, elevate the log off the ground using sawhorses or smaller support logs. This prevents the chainsaw chain from hitting the dirt, which dulls it instantly. If the log is too heavy, make cuts with the bottom of the log slightly off the ground, or use wedges to open the cut.
- Cutting Strategy:
- Avoiding Pinching: When cutting a log that is supported on both ends, start with a shallow cut (underbuck) from the bottom (compression side) about one-third of the way through, then finish the cut from the top (tension side). This prevents the log from pinching the bar.
- Cutting from Top: If the log is fully supported along its length or cantilevered, you can often cut straight through from the top.
- Maintaining Control: Use the felling spikes (dogs) on your Husqvarna chainsaw to brace the saw against the log, providing leverage and control during the cut.
By bucking accurately, you create consistent blocks that are easier to handle and set up for the next stage. These blocks should be relatively straight and free of major defects that would compromise a slab. For those interested in maximizing material from unique pieces, particularly burls or unusual grain patterns, our guide on live-edge slab selection and preparation provides excellent insights.
Preparing for Slabbing: Setting Up a Mill
Turning a round log into flat slabs requires a chainsaw mill attachment. These attachments, often called Alaskan mills, bolt directly to your Husqvarna chainsaw’s bar and provide a stable guide for making long, straight rips.
Components of a Chainsaw Mill Setup:
- Chainsaw Mill Attachment: This device clamps to your saw’s bar and features a guide that runs along a straight edge or previous cut.
- Ripping Chain: This is critical. A standard cross-cut chain is designed to efficiently sever wood fibers. A ripping chain, however, has a different tooth geometry (often with a more acute angle and sometimes a skip-tooth pattern) that is optimized for cutting along the grain, producing a smoother finish and reducing strain on the saw.
- Guide System: For the first cut (which establishes a flat reference surface), you will need a perfectly straight guide. This can be a ladder, an aluminum beam, or a pair of 2x4s clamped together. Subsequent cuts will use the previously cut flat surface as their guide.
- Log Supports: Securely supporting the log is paramount. This can involve sturdy sawhorses, a purpose-built log bed, or simply bracing the log on the ground with wedges to prevent rolling.
The First Cut (Reference Face):
The most challenging cut is often the first one, as it establishes the flat reference plane.
- Secure the Log: Ensure the bucked log section is stable and won’t move during the cut.
- Attach the Guide: Position your straight guide (ladder, beam, etc.) securely along the top of the log. It needs to be perfectly straight and level, or precisely angled if you desire a specific taper.
- Install Chainsaw Mill: Attach the mill to your Husqvarna chainsaw, ensuring it’s securely fastened and the ripping chain is installed and tensioned correctly.
- Make the Cut: Guide the chainsaw mill along the straight edge. This cut will remove the top convex portion of the log, creating your first flat surface. This process demands patience and a consistent feed rate to prevent bogging down the saw or producing an uneven cut.
Once this initial flat surface is established, you can remove the external guide and use the newly milled surface as the reference for subsequent cuts, allowing you to mill consistent slabs.
Slabbing Logs and Post-Milling Preparation
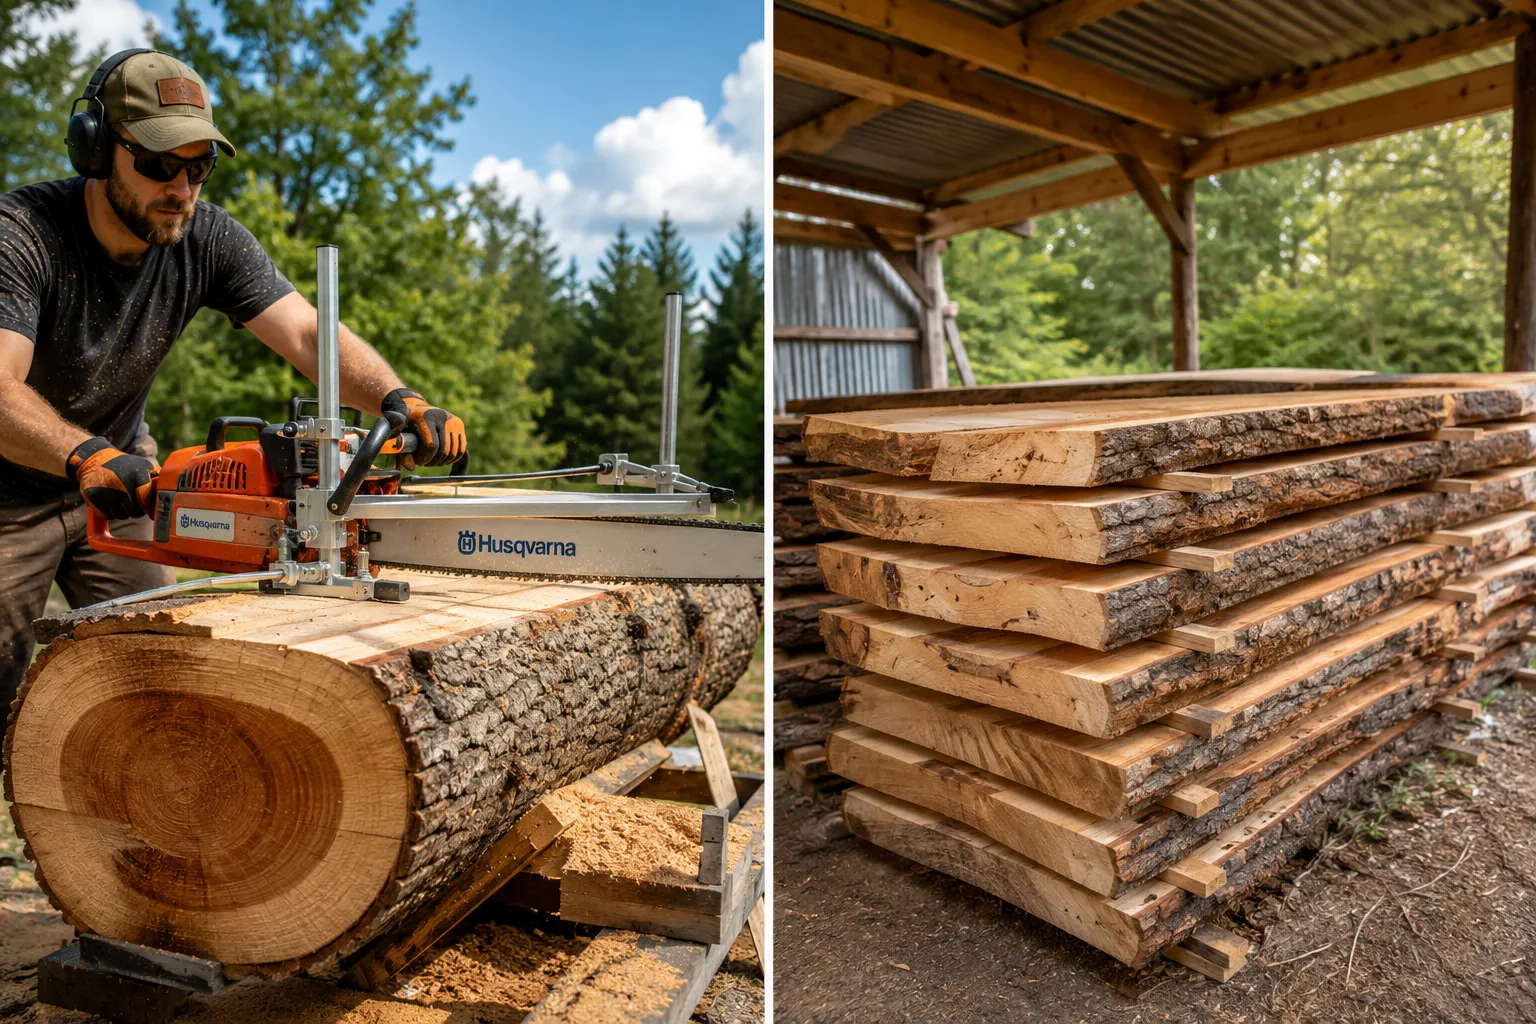
With the initial reference cut made, the process of “From Lawn to Lumber: Using Husqvarna Chainsaws to Buck, Slab, and Prepare Logs for Woodworking” truly takes shape as you begin to produce rough-sawn lumber.
Techniques for Efficient Slabbing
Slabbing logs with a chainsaw mill is a methodical process. Consistency is key to producing usable lumber.
- Determine Slab Thickness: Before each cut, set the desired slab thickness on your chainsaw mill. Account for material loss during future milling (e.g., planing) and drying.
- Consistent Feed Rate: Maintain a steady, even pressure and feed rate as you push the saw through the log. Rushing can lead to an uneven cut, excessive chain wear, and strain on the engine. If the saw bogs down, reduce the feed rate.
- Keep the Chain Sharp: Ripping through logs dulls a chain quickly. Have multiple sharp ripping chains on hand or be prepared to sharpen frequently. A dull chain increases cutting time, wastes fuel, and produces a rougher finish.
- Clear Chips: As you cut, sawdust and chips will accumulate. Periodically clear them away to ensure a clean cutting path and prevent binding.
- Flip and Repeat: After cutting a slab, remove it and adjust the mill for the next cut. Continue this process until you have milled all the desired slabs from the log. Remember to rotate the log to get the most out of it. Some woodworkers prefer to create a second flat face 90 degrees to the first, then slab from both directions for optimal yield.
The goal is to produce rough slabs that are relatively consistent in thickness, allowing for easier drying and subsequent milling.
Post-Milling Care and Drying
Freshly cut lumber, known as “green wood,” contains a significant amount of moisture and is not yet suitable for woodworking projects. Proper drying is crucial to prevent warping, cracking, and rot.
- End Sealing: Immediately after slabbing, seal the ends of each slab with a wax-based end sealer or latex paint. The ends of lumber dry fastest, leading to rapid moisture loss and severe end-checking (cracking). Sealing slows this process, allowing the entire slab to dry more uniformly.
- Sticking and Stacking: Create a stack of your slabs with “stickers” (small, dry strips of wood, typically 3/4 inch to 1 inch thick) placed between each layer. These stickers allow air to circulate freely around all surfaces of the wood.
- Sticker Alignment: Align stickers vertically, directly above each other, to prevent sagging and warping of the slabs.
- Spacing: Space stickers consistently, usually every 12 to 18 inches, depending on slab thickness and wood species.
- Location for Drying:
- Covered and Ventilated: Store the stack in a dry, covered, and well-ventilated area, away from direct sunlight and rain. A shed, carport, or open-sided barn is ideal.
- Off the Ground: Elevate the entire stack off the ground using concrete blocks or treated lumber to prevent moisture wicking and insect infestation.
- Weighting: Place a heavy weight (concrete blocks, extra logs) on top of the stack to help prevent the upper slabs from warping as they dry.
- Drying Time: Air drying takes time, often one year per inch of thickness for hardwoods. Monitor moisture content with a moisture meter to determine when the wood is ready for use.
- Rule of Thumb: Wood is generally considered air-dry when its moisture content reaches 12-19%, depending on local climate. For interior furniture, further kiln drying or controlled acclimatization in a workshop may be necessary to reach 6-8% moisture content.
Proper drying transforms green wood into stable, workable lumber, ready for the next stages of woodworking. For those embarking on projects with these new materials, understanding techniques like DIY router sleds and jigs for flattening slabs will be invaluable in preparing your rough-sawn slabs for fine craftsmanship.
Preparing Logs for Advanced Woodworking Projects in 2026
After your rough-sawn slabs have thoroughly air-dried, they are ready for the precision required for woodworking projects in 2026. The journey “From Lawn to Lumber: Using Husqvarna Chainsaws to Buck, Slab, and Prepare Logs for Woodworking” culminates in transforming these raw materials into finished pieces. This final stage involves milling the rough slabs into dimensionally stable, flat, and square lumber, suitable for intricate joinery and fine finishes.
Initial Milling: Squaring and Flattening
Even after careful slabbing and drying, chainsaw-milled lumber will still be rough and potentially warped or twisted. This is where more precise woodworking machinery comes into play.
- Flattening with a Router Sled: For slabs too wide for a traditional planer, a router sled is an indispensable tool. A large router is mounted in a sled that slides along parallel rails, systematically removing material from the slab’s surface. This technique allows you to create one perfectly flat face.
- Process: Secure the slab firmly to a workbench, shimming any high spots to prevent rocking. Use the router sled to skim off material until the entire top surface is flat.
- Jointing and Planing:
- Jointer: Once one face is flat (either from a router sled or by hand planing), the next step is to create one perfectly straight edge on the jointer. This machine flattens one face and squares one edge, creating two reference surfaces.
- Planer: With one flat face and one straight edge, the planer is used to achieve the desired thickness and create a second parallel face. Feed the jointed face down on the planer bed to ensure a consistent thickness.
- Table Saw: Finally, use a table saw to rip the other edge parallel to the first, and cross-cut the ends square, yielding dimensionally stable and perfectly square lumber.
This precise milling transforms the rough chainsaw slabs into boards ready for crafting projects like those seen in high-demand woodworking projects for 2026.
Considerations for Specialty Woodworking
The unique characteristics of home-milled lumber, especially live-edge slabs, offer distinct aesthetic advantages.
- Live Edge Design: Live-edge slabs retain the natural edge of the tree, providing a rustic and organic aesthetic. When working with these, careful attention is paid to preserving the bark (if desired and stable) and treating the natural irregularities as design elements. This approach aligns with trends like warm minimalism in wood design.
- Species-Specific Properties: Different tree species have varying properties:
- Hardness: Hardwoods like oak, maple, and walnut are excellent for furniture.
- Grain Pattern: The unique grain of urban trees can be a central feature of a piece.
- Color and Texture: Consider how the natural color and texture will contribute to the final aesthetic. Our guide to the essential guide to wood species for beginner furniture makers offers more details.
- Sustainability and Resourcefulness: Utilizing local, fallen trees for lumber is an inherently sustainable practice. It reduces the carbon footprint associated with transporting lumber from distant sources and gives a second life to trees that might otherwise be discarded. This ethos resonates with a growing number of woodworkers and consumers in 2026 who value resourcefulness and environmental responsibility.
By following these steps, “From Lawn to Lumber: Using Husqvarna Chainsaws to Buck, Slab, and Prepare Logs for Woodworking” transforms from a raw idea into tangible, beautiful timber. This wood, with its unique story and character, is then ready for a vast array of projects, from custom furniture to decorative pieces, enhancing homes and workshops alike.
Conclusion
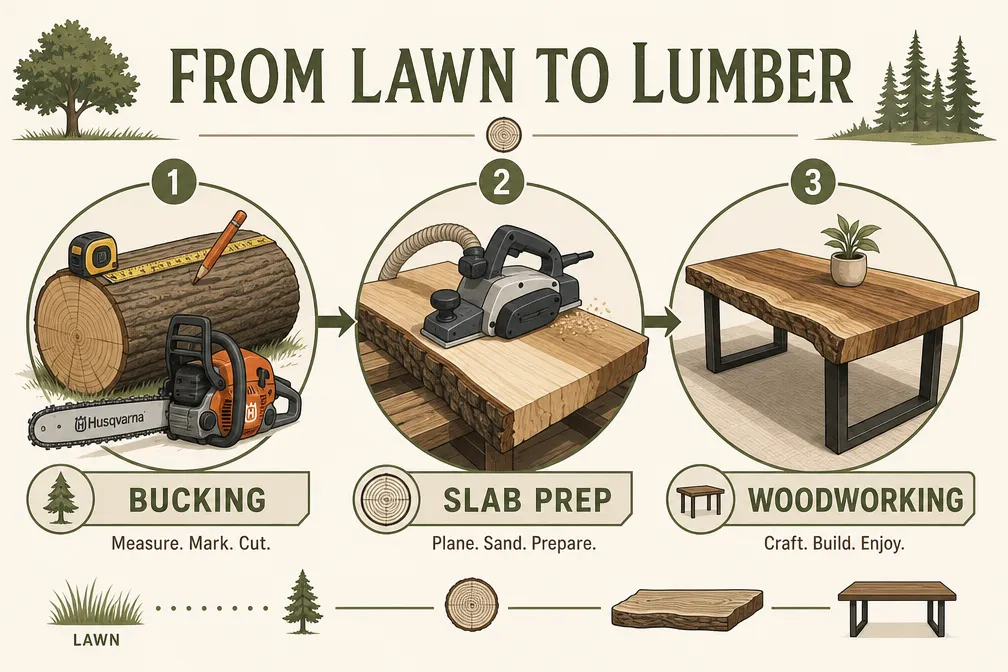
The journey “From Lawn to Lumber: Using Husqvarna Chainsaws to Buck, Slab, and Prepare Logs for Woodworking” is a profoundly rewarding process that empowers woodworkers to transform a readily available natural resource into valuable, unique material. It’s a testament to resourcefulness, skill, and patience. By prioritizing safety, mastering bucking techniques, efficiently slabbing logs with a Husqvarna chainsaw and appropriate attachments, and meticulously preparing the timber for drying and subsequent milling, hobbyists and professionals can unlock the full potential of urban and backyard trees.
This approach not only yields distinctive lumber for projects but also fosters a deeper connection to the materials and promotes sustainable woodworking practices. As 2026 progresses, the demand for custom, character-rich wood pieces continues to grow, making the ability to source and process your own lumber an invaluable skill. Embrace the power of your Husqvarna chainsaw, and embark on this journey to turn what was once a mere log into the foundation of your next masterpiece.
Actionable Next Steps
- Invest in Safety Gear: Before buying a chainsaw or mill, acquire all necessary PPE (helmet with face shield, ear protection, chaps, gloves, steel-toed boots).
- Research Chainsaw Mills: Explore various chainsaw mill attachments compatible with your Husqvarna model and consider investing in a dedicated ripping chain.
- Source Local Logs: Look for fallen trees from local arborists, construction sites, or even your own backyard, ensuring they are free of metal.
- Practice Bucking: Start with smaller logs to hone your bucking techniques and safe chainsaw operation.
- Build a Drying Stack: Once slabs are cut, immediately seal their ends and stack them properly with stickers in a well-ventilated, covered area for air drying.
References
- Stedman, T. (2020). Chainsaw Milling: The Definitive Guide to Milling Logs Into Lumber.
- Husqvarna Group. (n.d.). Chainsaw Safety Guidelines. Retrieved from Husqvarna Official Website
- USDA Forest Service. (n.d.). Wood Handbook: Wood as an Engineering Material. General Technical Report FPL-GTR-190.
SEO Meta Title: Husqvarna Chainsaws: From Log to Lumber for Woodworking 2026 SEO Meta Description: Transform backyard logs into valuable lumber using Husqvarna chainsaws. Learn to buck, slab, and prepare wood for woodworking projects in 2026.