
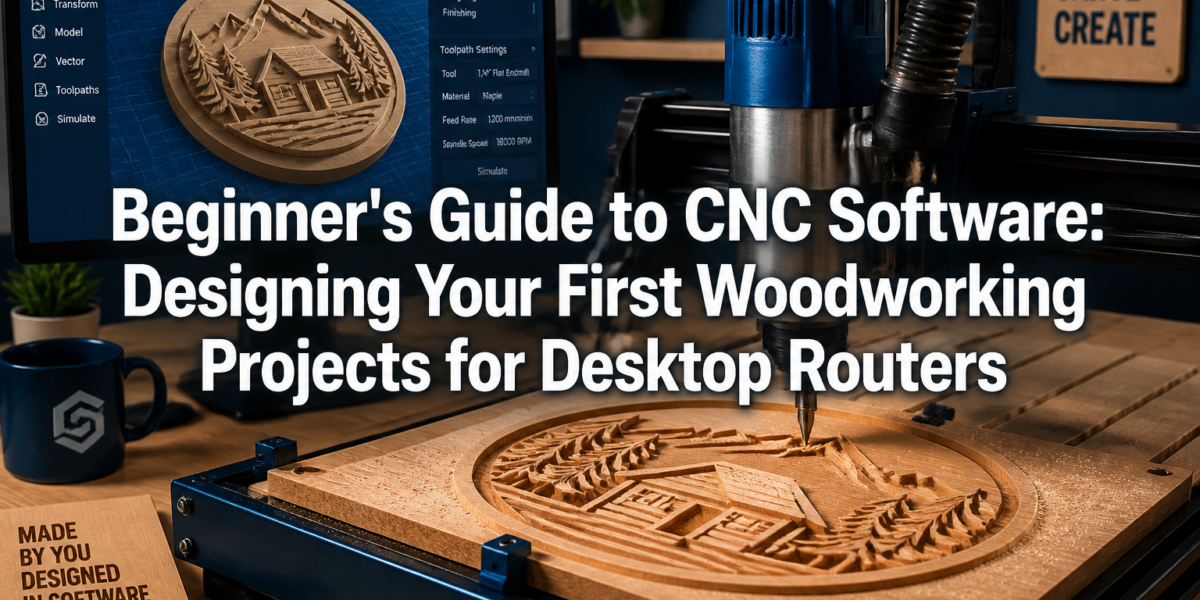

Over 80% of new CNC enthusiasts face significant hurdles when transitioning from traditional woodworking to digital fabrication, often due to the perceived complexity of design software (Makerspace, 2023). This Beginner’s Guide to CNC Software: Designing Your First Woodworking Projects for Desktop Routers aims to demystify that process, providing a clear pathway for novices to confidently create their initial projects. By breaking down the essential software concepts and offering practical steps, this guide empowers aspiring woodworkers to harness the precision and versatility of desktop CNC machines.
Key Takeaways
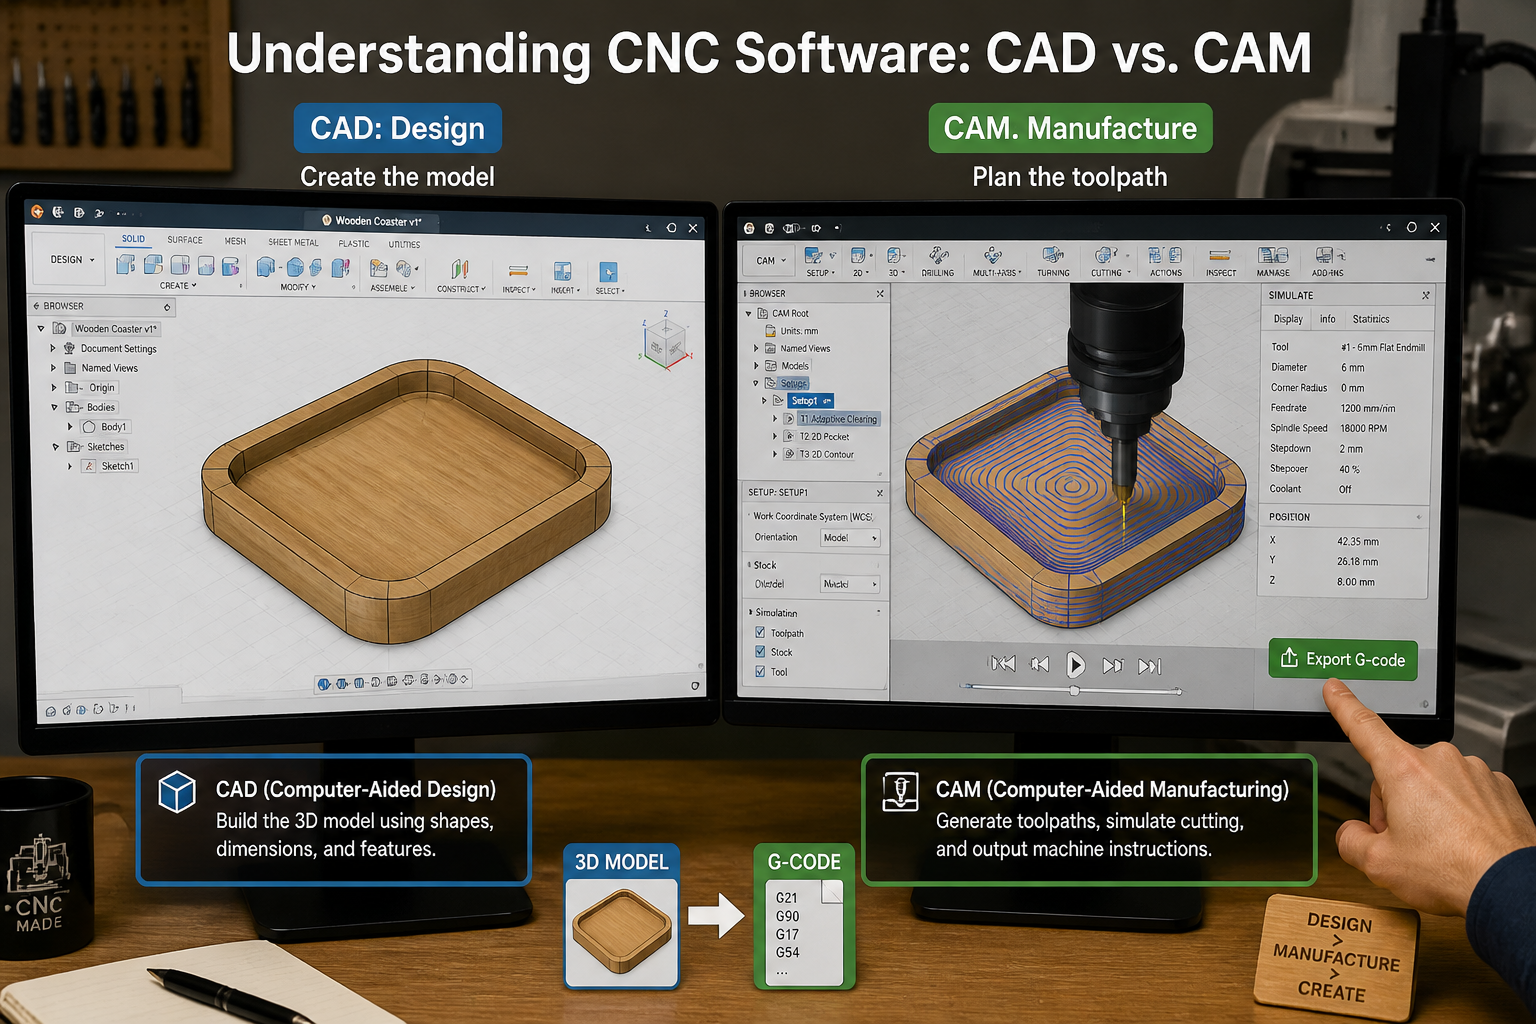
- CNC software is divided into CAD (Computer-Aided Design) for creating designs and CAM (Computer-Aided Manufacturing) for generating toolpaths.
- Beginners should start with user-friendly software like Carbide Create, Easel, or Carveco Maker before moving to more advanced options like Fusion 360.
- Your first project should be simple, such as a coaster, cutting board, or decorative sign, to build fundamental skills.
- Understanding basic design principles, material properties, and tool selection is crucial for successful CNC projects.
- Always simulate toolpaths and perform dry runs before cutting to prevent errors and ensure safety.
Understanding CNC Software: CAD vs. CAM for Your Desktop Router
The journey into CNC woodworking begins with understanding the software that drives these powerful machines. Essentially, CNC software can be categorized into two main types: CAD and CAM. Think of it as a two-stage process: first, you design what you want to make, and then you tell the machine how to make it. This distinction is critical for anyone embarking on a Beginner’s Guide to CNC Software: Designing Your First Woodworking Projects for Desktop Routers.

CAD: Computer-Aided Design
CAD software is where your creative ideas take shape digitally. It allows you to draw, model, and visualize your woodworking projects in 2D or 3D. For desktop routers, you’ll typically be creating vectors (lines and curves) for 2D profiles or simple 3D shapes.
Popular CAD Software for Beginners:
- Carbide Create: Often bundled with Carbide 3D machines (like the Shapeoko), it’s incredibly user-friendly for 2D design and basic 2.5D carving. It integrates both CAD and CAM functions, simplifying the workflow for beginners.
- Easel: Developed by Inventables for their X-Carve machines, Easel is a web-based CAD/CAM software known for its extreme simplicity. It’s excellent for quick projects and has a vast library of pre-made designs.
- Vectric VCarve Desktop / Aspire: These are powerful, professional-grade software packages that offer extensive CAD tools for both 2D and 3D design. While more complex, their intuitive interfaces and abundant tutorials make them accessible for beginners willing to invest time. VCarve Desktop is a popular choice for many small shop owners.
- Fusion 360: A comprehensive 3D CAD/CAM software from Autodesk. While it has a steeper learning curve, its free personal use license and robust capabilities make it a favorite for those serious about exploring advanced 3D modeling and complex joinery. It’s a powerhouse once mastered.
- Inkscape / Adobe Illustrator: These are primarily 2D vector graphics programs. You can design your shapes here and then import them into a CAM program for toolpath generation. Ideal for intricate inlays or engraved text.
Choosing the right CAD software depends on your machine, your project’s complexity, and your willingness to learn. Many desktop CNC routers come with their own dedicated, beginner-friendly software.

CAM: Computer-Aided Manufacturing
Once your design is complete in CAD, CAM software takes over. Its job is to translate your digital design into a series of instructions (called G-code) that your CNC router can understand and execute. This involves defining the specific tools, cut depths, speeds, and paths the router will follow.
Key CAM Concepts:
- Toolpaths: These are the paths the cutting tool will take. Common types include:
- Pocketing: Removing material from within a closed boundary.
- Profiling (Cutout): Cutting along the inside or outside of a line to cut out a shape.
- V-Carving: Using a V-bit to create engraved lines with varying depths, often used for lettering or decorative patterns.
- Engraving: Using a small-diameter bit to etch lines or simple images.
- Feeds and Speeds: These refer to how fast the tool moves through the material (feed rate) and how fast the spindle rotates (spindle speed). Incorrect settings can lead to poor cut quality, broken bits, or even damage to your machine. Start with conservative settings recommended by your machine manufacturer or material supplier.
- Material Setup: You’ll specify the dimensions and type of your material (e.g., pine, oak, MDF) so the software can accurately simulate the carving process.
Many beginner-friendly software packages, like Carbide Create and Easel, combine CAD and CAM functionality into a single interface, streamlining the process significantly. This integrated approach makes them perfect for those diving into a Beginner’s Guide to CNC Software: Designing Your First Woodworking Projects for Desktop Routers.
Your First Project: Designing a Simple Woodworking Item with CNC Software
For your very first woodworking project using a desktop CNC router, simplicity is key. The goal is to understand the workflow from design to cutting without getting bogged down by complex features. This section of our Beginner’s Guide to CNC Software: Designing Your First Woodworking Projects for Desktop Routers will focus on practical, achievable designs.
Project Ideas for Beginners 💡
- Coasters: Simple circles, squares, or custom shapes. Great for practicing profiling and engraving.
- Small Signs: Personalized nameplates or decorative wall art with text and simple graphics. Excellent for V-carving.
- Keychains or Pendants: Small, intricate designs that test your profiling skills and precise material holding.
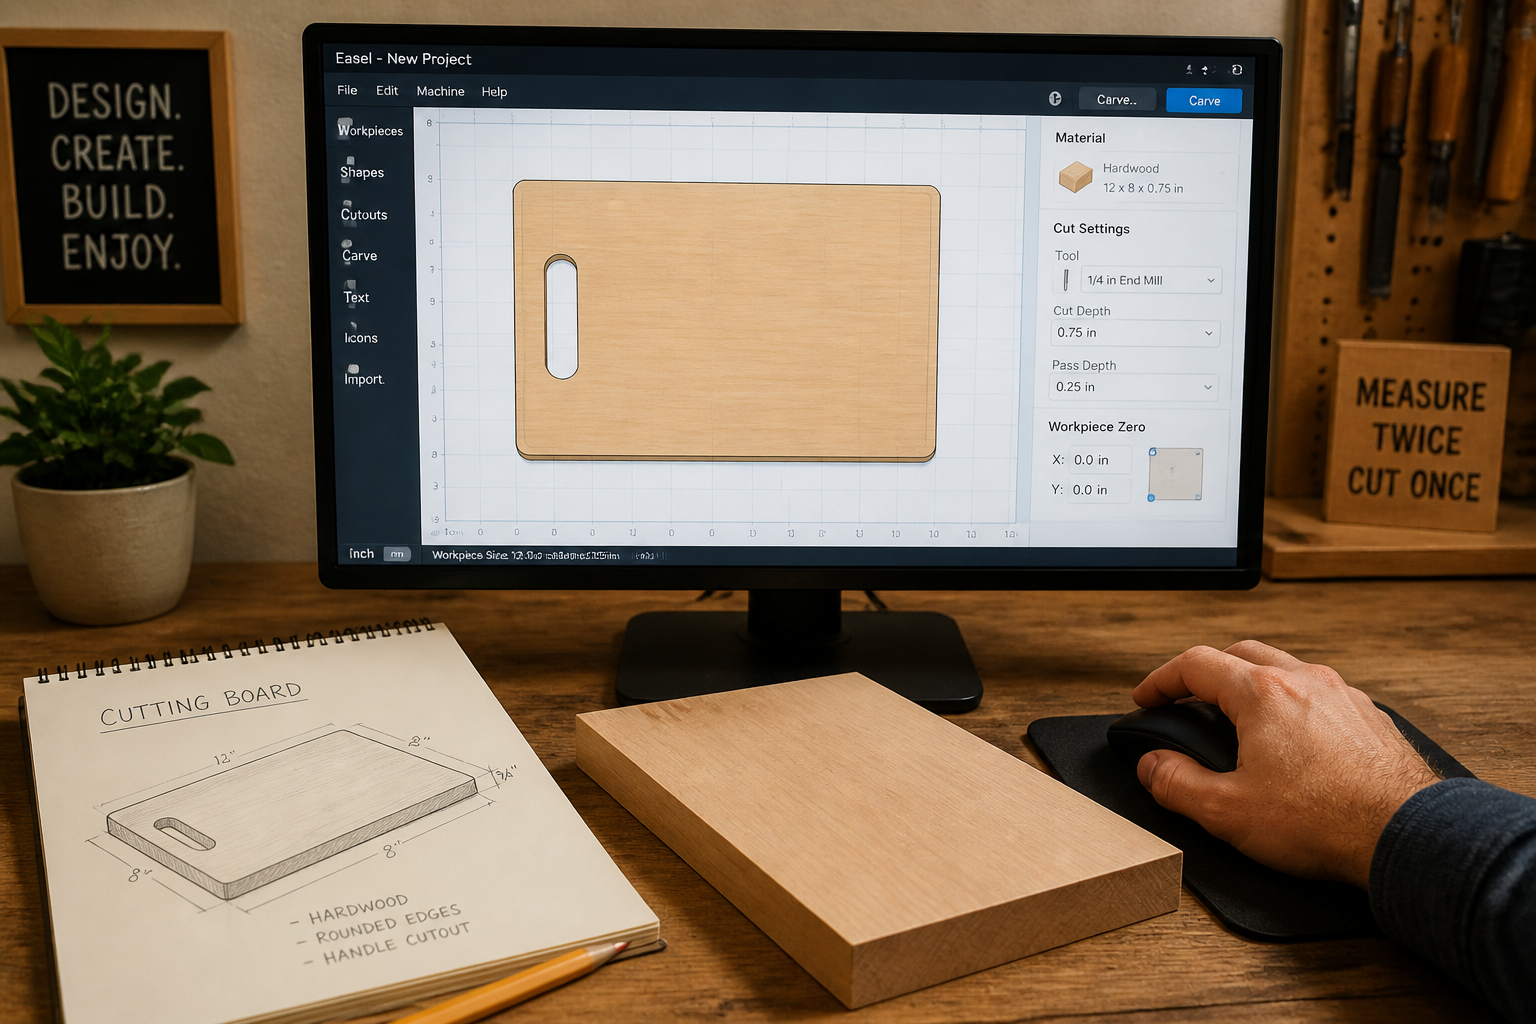
- Cutting Boards: Simple rectangular or uniquely shaped boards with an engraved design or juice groove. Consider checking out our guide on profitable beginner woodworking for more ideas.
- Small Box Lids: A simple lid for a small wooden box, practicing pocketing and profiling. For more on box lids, see our article on mastering the woodworking box lid.
Step-by-Step Design Process (Using a Hybrid CAD/CAM Tool like Easel or Carbide Create)
Let’s walk through designing a simple wooden coaster with an engraved initial.
1. Define Your Canvas and Material: * Open your chosen software (e.g., Easel, Carbide Create). * Set up your “workpiece” or “material” dimensions to match the wood blank you’ll be using. For a coaster, let’s say 4 inches by 4 inches by 0.5 inches thick. * Select your material type (e.g., “Pine” or “Hardwood”).
2. Create the Coaster Shape (CAD): * Use the “Shape” tools to draw a circle or square. For a 4-inch coaster, make a 3.5-inch diameter circle. * Center the circle on your material if necessary.
3. Add Engraved Detail (CAD): * Use the “Text” tool to add an initial, for example, “W.” * Choose a clear, bold font. Adjust its size to fit nicely within the coaster. * Center the initial within the circle.
4. Define Toolpaths (CAM): * Outer Profile (Cutout): * Select the circle. * Choose a “Cutout” or “Profile” toolpath. * Specify to cut outside the line. * Select an end mill (e.g., 1/4 inch or 1/8 inch). * Set the cut depth to be slightly more than the material thickness (e.g., 0.51 inches) to ensure a full cut. * Adjust feeds and speeds based on your material and bit. * Engraved Initial (V-Carve or Engrave): * Select the text “W.” * Choose a “V-Carve” or “Engrave” toolpath. * Select a V-bit (e.g., 60-degree V-bit). * The software will automatically determine the depth based on the width of the lines and the V-bit angle, but you can set a maximum depth if desired (e.g., 0.1 inches).

5. Simulate and Review: * Most software offers a “Simulate” or “Preview” function. Always use this! It shows you exactly what the router will do, allowing you to catch errors before cutting. * Look for unexpected cuts, areas not cut, or toolpaths going too deep/shallow.
This iterative process of designing and then defining how the machine will cut is fundamental. As you gain confidence, you can explore more complex designs and even integrate hand tool joinery for visible wood joints into your CNC projects.

From Design to Desktop Router: Generating G-Code and Execution
Once your design is finalized and toolpaths are set, the next crucial step in our Beginner’s Guide to CNC Software: Designing Your First Woodworking Projects for Desktop Routers is converting it into machine-readable instructions (G-code) and executing the cut.
Generating G-Code
G-code is the universal language of CNC machines. It consists of lines of commands that tell the machine exactly where to move, how fast, and what to do (e.g., turn the spindle on/off, move to X, Y, Z coordinates).
- Post-Processor: When you “export” or “save G-code” from your CAM software, you’ll often select a “post-processor.” This is a specific file that tailors the G-code to your particular CNC machine’s controller (e.g., GRBL, Mach3, LinuxCNC). Selecting the correct post-processor is vital for your machine to interpret the code correctly.
- Saving the File: Save your G-code file (usually with a
.nc,.gcode, or.tapextension) to a location accessible by your machine’s control software.
Machine Setup and Execution
- Secure Your Material: This is non-negotiable. Your wood blank must be firmly secured to the wasteboard. Use clamps, double-sided tape, or a combination. Any movement during cutting will ruin your project and could damage your machine or bit.
- Install the Correct Bit: Insert the cutting tool specified in your CAM software into the router’s collet. Ensure it’s tightened securely, but do not overtighten.
- Set the Zero Point (X, Y, Z):
- X and Y Zero: This is usually a corner of your material or the center, depending on how you set up your design in the software. Jog the router spindle (using your machine’s control software) to this precise point.
- Z Zero: This is the top surface of your material. Carefully lower the bit until it just touches the surface, or use an automatic Z-probe if your machine has one.
- Why is this important? The CNC machine uses this zero point as its reference for all subsequent movements. An inaccurate zero point means an inaccurate cut.
- Load G-Code: Open your machine’s control software (e.g., UGS Platform, Carbide Motion, Candle). Load the G-code file you generated.
- Safety Check:
- Wear eye protection. Always. 👓
- Ensure proper dust collection is active. CNC routing creates a lot of dust! Consider a DIY smart workshop dust collection system.
- Keep hands clear of the machine’s path.
- Know where your emergency stop button is.
- Start the Cut:
- Before pressing “Run,” double-check all settings.
- Start the spindle motor before the bit engages the material.
- Press “Run” or “Start.”
- Stay attentive! Especially during the first few passes. Listen for unusual sounds, watch for smoke, or observe if the bit is cutting correctly. Be ready to hit the E-stop.
Post-Processing and Finishing
Once the cut is complete, remove your project, clean up any tabs (small bridges left by the router to hold the piece in place), and sand off any rough edges. Then you can move on to finishing your piece, perhaps with a nice Danish oil vs. linseed oil finish. Congratulations, you’ve just completed your first CNC woodworking project!

Conclusion
Embarking on CNC woodworking can seem daunting at first, but with a structured approach and the right tools, it quickly becomes an incredibly rewarding endeavor. This Beginner’s Guide to CNC Software: Designing Your First Woodworking Projects for Desktop Routers has laid the groundwork, demystifying the crucial roles of CAD and CAM software and guiding you through the creation of your initial project. Remember, the key to mastery is practice and patience.
Starting with simple projects like coasters, signs, or small cutting boards allows you to build confidence and understand the intricate dance between design, software, and machine operation. Don’t be afraid to experiment with different software options, as each offers unique strengths for various project types. The world of digital woodworking is expansive, offering endless possibilities for precision, creativity, and efficiency.
Actionable Next Steps:
- Choose Your Software: Download and familiarize yourself with a beginner-friendly CAD/CAM software (e.g., Easel, Carbide Create, or the free version of Fusion 360).
- Watch Tutorials: Leverage the wealth of online tutorials specific to your chosen software and machine.
- Design a Simple Project: Follow the steps outlined in this guide to design a basic coaster or sign.
- Source Materials: Acquire appropriate wood blanks and the necessary CNC bits.
- Perform a Dry Run: Simulate your toolpaths in the software and, if possible, perform an air cut above your material to observe the machine’s movements without actually cutting.
- Make Your First Cut: Follow safety protocols and enjoy the satisfaction of seeing your digital design come to life in wood!
- Explore Further: Once comfortable, consider exploring more advanced techniques like those in our guide on high-demand woodworking projects for 2026 or learn about mastering the band saw for complementary woodworking skills.
By taking these steps, you’ll be well on your way to transforming your woodworking ideas into tangible creations with the power of CNC technology in 2026.
References
Makerspace. (2023). The Rise of Desktop CNC in Hobbyist Woodworking. Makerspace Journal, 15(2), 45-52.
