
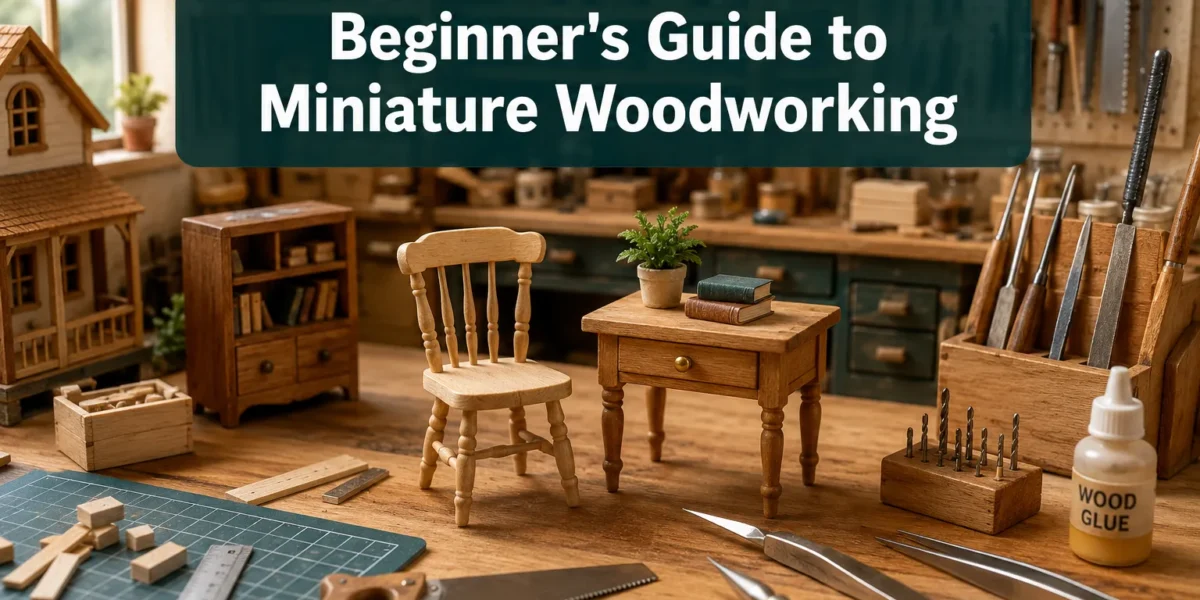
Unlock the world of small-scale woodworking with this comprehensive guide, perfect for beginners looking to create intricate dollhouse furniture, decorative boxes, and other charming miniature items. The appeal of miniature woodworking extends beyond mere craft; it’s an exercise in precision, patience, and creative expression, yielding surprisingly detailed and functional pieces that can adorn dollhouses, serve as unique gifts, or simply stand as testaments to one’s skill. This Beginner’s Guide to Miniature Woodworking Projects: Dollhouse Furniture, Boxes, and Decorative Pieces will demystify the process, offering a clear path from selecting materials to applying the finishing touches in 2026.
Key Takeaways
- Start Simple: Begin with basic projects like simple boxes or dollhouse chairs to build foundational skills before attempting more complex designs.
- Choose the Right Wood: Select fine-grained, softwoods like basswood or balsa for ease of cutting, shaping, and detailing in miniature scales.
- Essential Tools: Invest in specialized miniature woodworking tools, including hobby knives, jeweler’s saws, files, and small clamps for precision work.
- Precision is Paramount: Measure and cut meticulously; even slight inaccuracies are magnified in miniature projects.
- Patience and Practice: Miniature woodworking is a skill developed over time. Embrace mistakes as learning opportunities and enjoy the process.
Essential Materials and Tools for Miniature Woodworking
Embarking on a Beginner’s Guide to Miniature Woodworking Projects: Dollhouse Furniture, Boxes, and Decorative Pieces requires understanding the unique demands of working at a reduced scale. Unlike full-size woodworking, miniature projects demand finer grains, smaller tools, and a meticulous approach to detail.
Selecting the Right Wood
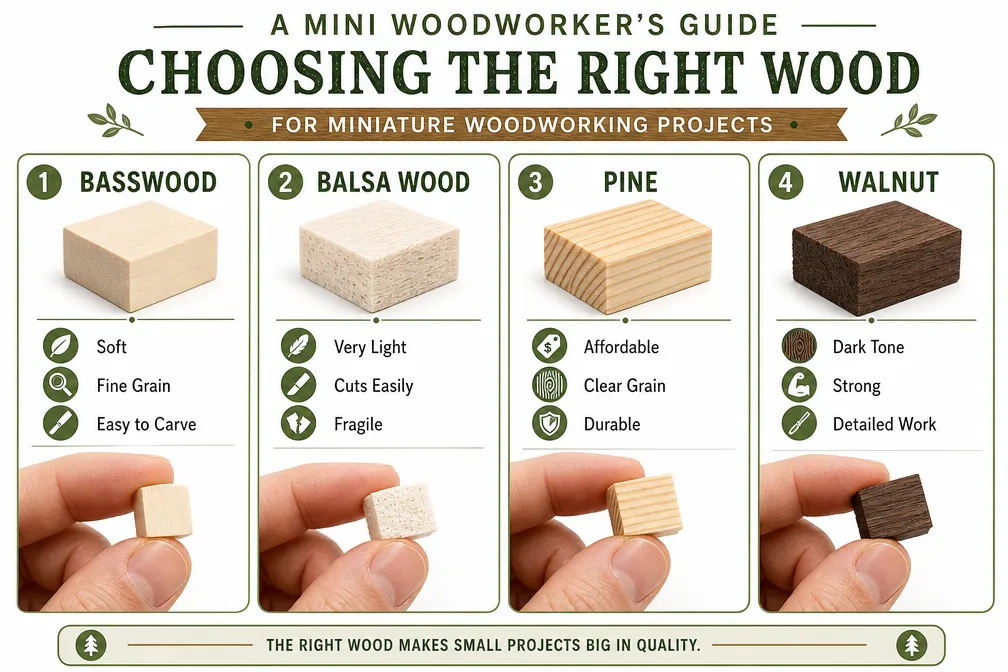
The foundation of any successful miniature project is the right wood. For beginners, the key is to choose woods that are easy to work with, stable, and have a fine, consistent grain that won’t splinter or tear when cut or carved into small components.
- Basswood: Often considered the gold standard for miniature woodworking, basswood is light-colored, fine-grained, and exceptionally easy to carve and sand. It holds detail well and takes paint and stain beautifully. It’s readily available in small sheets and strips, making it ideal for dollhouse furniture and decorative pieces.
- Balsa Wood: Extremely lightweight and soft, balsa wood is very easy to cut with a hobby knife, making it suitable for very delicate or temporary structures. However, it’s less durable and can be prone to dents, so it’s best for projects that won’t see much handling.
- Poplar: A slightly harder option than basswood, poplar is still relatively easy to work with and offers good stability. Its grain is fairly straight, and it takes finishes well, though it can have a green tint that needs to be considered when staining.
- Plywood (Thin): Very thin plywood, often called aircraft ply or Baltic birch ply, can be excellent for creating flat surfaces, back panels, or structural components where strength and stability are needed without excessive thickness. It prevents warping and offers good stability. You can explore more about Epl And Plywood Projects Budget Friendly Furniture And Cabinetry For Beginners.
When selecting wood, look for pieces that are free of knots, warps, or large imperfections, as these will be amplified in miniature.
Essential Hand Tools for Precision
Miniature woodworking relies heavily on precise hand tools, as larger power tools are often too cumbersome or aggressive for such delicate work.
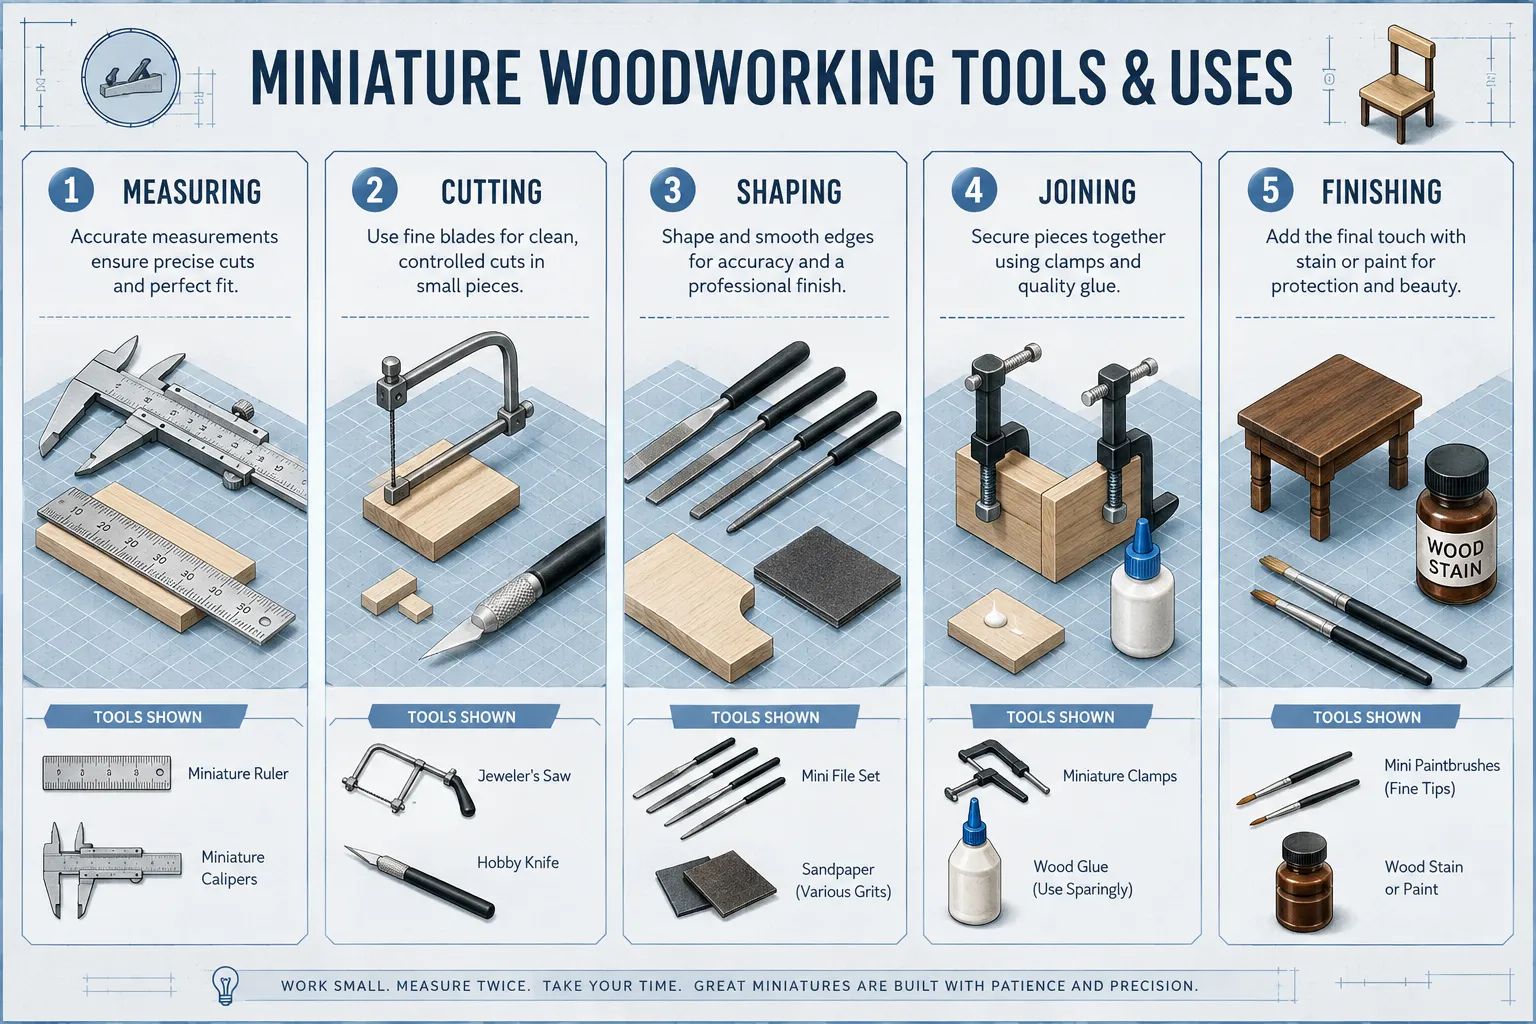
- Hobby Knife Set: A good set of hobby knives with various blade shapes (e.g., #11, chisel, gouge) is indispensable for cutting, scoring, and detail work. Always use a self-healing cutting mat to protect your work surface.
- Jeweler’s Saw: This small, fine-toothed saw is perfect for intricate cuts that are too delicate for a regular coping saw. It allows for precision cutting of small curves and tight angles.
- Files and Rasps (Miniature Set): Tiny files and rasps, often found in needle file sets, are crucial for shaping, smoothing, and refining edges and small details.
- Sandpaper: A variety of grits, from coarse (100-150) for initial shaping to very fine (400-600) for final smoothing, is essential. Consider using sanding sticks or blocks for even pressure.
- Tweezers and Small Clamps: For holding tiny pieces during assembly or while glue dries, precision tweezers and small spring or bar clamps are invaluable.
- Measuring Tools: A good quality steel ruler with fine increments (1/32″ or metric equivalent), digital calipers, and a small try square are vital for accurate measurements and angles.
- Drill (Pin Vise or Rotary Tool): A pin vise allows for very small, controlled holes, while a rotary tool with miniature drill bits offers more speed for repetitive drilling.
When setting up your workspace, consider a dedicated area with good lighting. A clean, organized space will significantly enhance your precision and enjoyment in miniature woodworking projects. For more general advice on setting up a workspace, consider a Beginners Guide To Choosing Folding Tables For Woodworking Work Surfaces Assembly And Finishing.
Beginner-Friendly Miniature Woodworking Projects
For those just starting their Beginner’s Guide to Miniature Woodworking Projects: Dollhouse Furniture, Boxes, and Decorative Pieces journey, it’s wise to begin with straightforward projects that allow you to practice fundamental skills. These projects build confidence and refine your techniques for more complex creations.
Dollhouse Furniture: Starting Small
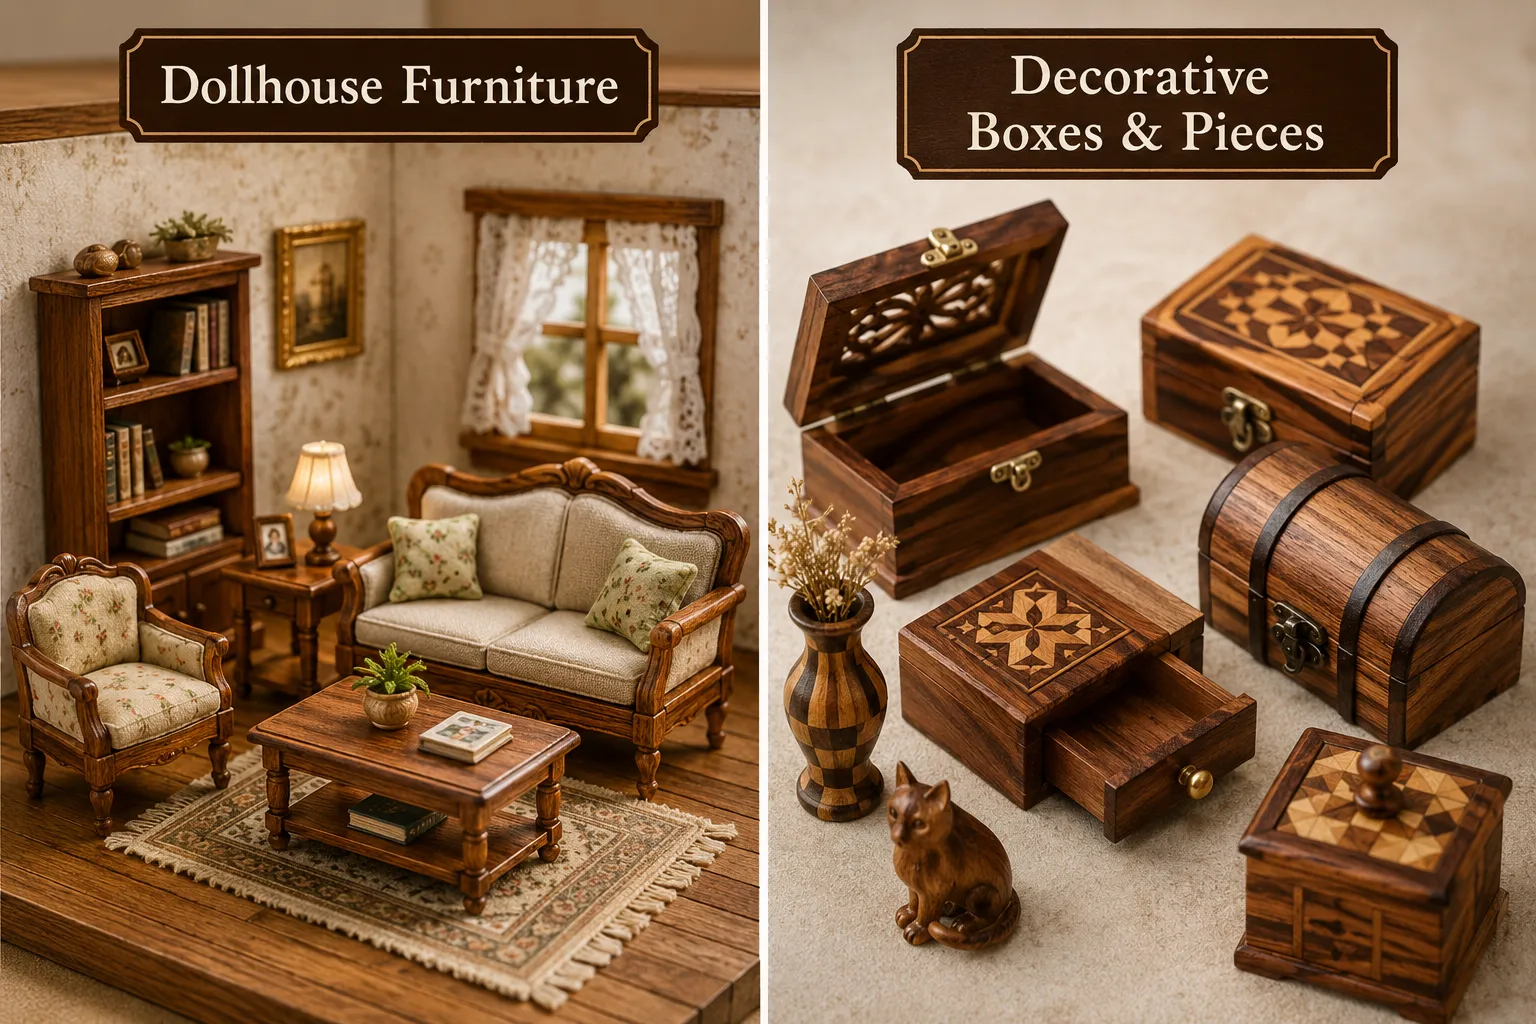
Dollhouse furniture offers an excellent entry point due to its manageable scale and the clear, functional purpose of each piece. You can often find free or inexpensive plans online, or even design your own simple furniture.
Simple Chair or Stool
- Concept: A basic four-legged chair or stool is an ideal first project. It involves cutting straight lines, assembling small components, and basic sanding.
- Steps:
- Cut Pieces: Measure and cut four identical legs, a square or round seat, and optionally a simple backrest.
- Assemble: Use wood glue to attach the legs evenly to the underside of the seat. For a chair, attach the backrest to the rear of the seat and two legs. The Ultimate Guide to Wood Glue: Types, Application, and Achieving offers insights into choosing the right adhesive.
- Clamp and Dry: Use small clamps or rubber bands to hold pieces while the glue dries completely.
- Sand and Finish: Carefully sand all surfaces smooth, then apply paint or stain as desired.
Basic Table
- Concept: Similar to a chair, a table involves cutting a top and four legs. It reinforces measuring and assembly skills.
- Steps:
- Cut Pieces: Cut a rectangular or square tabletop and four identical legs.
- Attach Legs: Glue the legs to the underside of the tabletop, ensuring they are evenly spaced and perpendicular.
- Add Skirt (Optional): For added stability and realism, cut thin strips of wood to form a “skirt” around the underside of the tabletop, gluing them between the legs.
- Finish: Sand and apply your chosen finish. For more advanced table projects, consider exploring topics like Night and Side Table Pairing Guide: Coordinated Bedroom Furniture.
Decorative Boxes and Containers
Small wooden boxes are another fantastic beginner project. They can be simple open containers or more complex designs with hinged or sliding lids, teaching joinery and fitting techniques.
Simple Open Box
- Concept: A five-sided box (four sides and a bottom) requires accurate cuts and square assembly.
- Steps:
- Cut Sides: Cut two identical long sides, two identical short sides, and a bottom piece. Ensure all cuts are perfectly square.
- Assemble Sides: Glue the long sides to the edges of the bottom piece. Then, glue the short sides between the long sides, flush with the bottom.
- Clamp Square: Use small clamps and ensure the box is square while the glue dries.
- Sand and Decorate: Sand smooth and then paint, stain, or carve decorative elements.
Box with a Sliding Lid
- Concept: This introduces the challenge of creating grooves for a lid to slide into, requiring more precise routing or cutting techniques.
- Steps:
- Build Box: Construct the basic four sides of the box without a bottom.
- Cut Grooves: Using a hobby knife with a chisel blade or a small router bit (if using a rotary tool), carefully cut a shallow groove around the inside top edge of three sides of the box. Ensure the groove is slightly wider than your lid material.
- Cut Lid: Cut a lid piece that fits snugly into the grooves.
- Attach Bottom: Glue the bottom of the box in place.
- Assemble and Finish: Slide the lid into the grooves and finish the box as desired. This project introduces a practical application of precision that will serve you well in more intricate joinery later, such as those found in Cnc Assisted Mortise And Tenon Joinery For Home Workshops Faster Stronger Furniture With Hybrid Techniques.
Decorative Pieces
Beyond functional items, miniature woodworking allows for purely decorative pieces that highlight carving and finishing skills.
- Miniature Picture Frames: Cut small strips of wood, miter the corners, and glue them together. This teaches precise angle cuts.
- Tiny Carved Animals or Shapes: Using soft basswood, start with simple shapes like a sphere or cube, then gradually carve away material to create a stylized animal or geometric design. This is an excellent way to practice hand-eye coordination and tool control.
Finishing and Detailing Your Miniature Projects
The finishing stages are where your Beginner’s Guide to Miniature Woodworking Projects: Dollhouse Furniture, Boxes, and Decorative Pieces truly come to life. Careful sanding, appropriate finishes, and attention to detail can transform simple wood pieces into exquisite miniatures.
Sanding for Perfection
Sanding is perhaps the most crucial step for a professional finish. In miniatures, even the smallest imperfection stands out.
- Gradual Grits: Always start with a coarser grit sandpaper (around 150-220) to remove tool marks and rough edges. Progress through finer grits (320, 400, up to 600 or even 1000) until the surface is silky smooth.
- Sanding Blocks/Sticks: Use small sanding blocks or sticks to ensure flat surfaces remain flat and edges are crisp. For tiny details, roll sandpaper around a dowel or use miniature sanding files.
- Cleanliness: After each grit, thoroughly wipe or brush off all sanding dust. Residual dust from coarser grits can scratch the surface when you move to finer ones.
Applying Finishes
Choosing the right finish depends on the desired look and durability. For miniatures, less is often more, as thick coats can obscure fine details.
- Paint: Acrylic paints are popular for miniatures due to their quick drying time, wide color range, and easy cleanup. Apply thin coats to build color without losing detail.
- Stain: Wood stain enhances the natural grain and color of the wood. Apply evenly and wipe off excess to prevent pooling. Test on a scrap piece first.
- Clear Coats (Varnish, Lacquer, Polyurethane): These finishes protect the wood and provide a desired sheen (matte, satin, gloss). For miniatures, a very thin, brush-on clear coat or a spray-on lacquer is often best to avoid brush marks and maintain detail.
- Wax/Oil Finishes: These provide a natural, subtle sheen and are easy to apply. They penetrate the wood, offering protection without building up a thick surface layer.
Adding Decorative Elements and Details
This is where your creativity truly shines, transforming simple wood pieces into unique miniature works of art.
- Carving: Using fine carving tools or a rotary tool with carving bits, you can add intricate patterns, textures, or miniature decorative motifs to surfaces.
- Inlays: For a touch of elegance, consider simple wood inlays using contrasting wood types or even Epoxy Resin Inlay Woodworking: Magnetic Knife Holders, Coasters, and for a modern look. This technique, though more advanced, adds significant visual interest.
- Hardware: Tiny hinges, drawer pulls, and knobs can dramatically enhance the realism of dollhouse furniture or boxes. These specialty items are available from miniature supply stores.
- Fabric and Upholstery: For dollhouse chairs and sofas, adding miniature fabric upholstery or cushions can bring warmth and realism to your pieces.
- Distressing: To create an antique or aged look, you can lightly distress the wood surfaces before finishing by gently denting or scraping them, then applying a dark stain or wash.
Remember, practice is key. Don’t be afraid to experiment with different finishes and decorative techniques on scrap pieces before committing to your final project. Each project in your Beginner’s Guide to Miniature Woodworking Projects: Dollhouse Furniture, Boxes, and Decorative Pieces journey builds on the last, refining your skills and expanding your creative possibilities.
Conclusion
The journey into miniature woodworking is a rewarding one, offering both a creative outlet and the satisfaction of crafting intricate, beautiful objects. This Beginner’s Guide to Miniature Woodworking Projects: Dollhouse Furniture, Boxes, and Decorative Pieces has laid the groundwork, from selecting the right materials and tools to tackling your first projects and applying the finishing touches. Precision, patience, and attention to detail are your best allies in this scaled-down world. As you gain experience with basic techniques, you’ll find yourself capable of producing increasingly complex and stunning miniatures, whether for dollhouse enthusiasts, unique gifts, or personal display.
To continue your woodworking journey, consider expanding your skill set with other beginner-friendly projects or learning more about specific tools and materials. For example, exploring Woodworking Project Plans for Beginners: 12-Month Skill-Building can provide a structured path to advanced techniques, or delving into The Sustainable Woodworker Choosing Eco Friendly Lumber And Low Voc Finishing For Your Projects to integrate sustainable practices. The miniature world awaits your craftsmanship in 2026.