

The average household in the United States spent over $2,500 on new furniture in 2023, often overlooking the wealth of untapped potential lurking in local thrift stores and estate sales. For the discerning woodworker, these forgotten pieces are not just old items; they are canvases awaiting transformation, rich with history and ripe for revival. This guide, “Restoring and Upcycling Thrift Store Furniture: A Woodworker’s Guide to Breathing New Life into Old Pieces,” offers a comprehensive roadmap for transforming discarded items into treasured heirlooms and functional, beautiful additions to any home in 2026.
Key Takeaways
- Strategic Selection: Learn to identify furniture with good bones and repairable issues, distinguishing between minor fixes and insurmountable flaws.
- Essential Toolkit: Understand the core tools and materials required for effective restoration, from basic hand tools to specialized abrasives and finishes.
- Structural Integrity: Master techniques for repairing common structural weaknesses like loose joints, broken components, and wobbly legs.
- Surface Preparation: Discover the art of stripping, sanding, and preparing wood surfaces for new finishes, ensuring durability and aesthetic appeal.
- Creative Upcycling: Explore various methods for modernizing and personalizing vintage furniture, blending traditional craftsmanship with contemporary design.
Selecting Your Project: Identifying Potential & Pitfalls
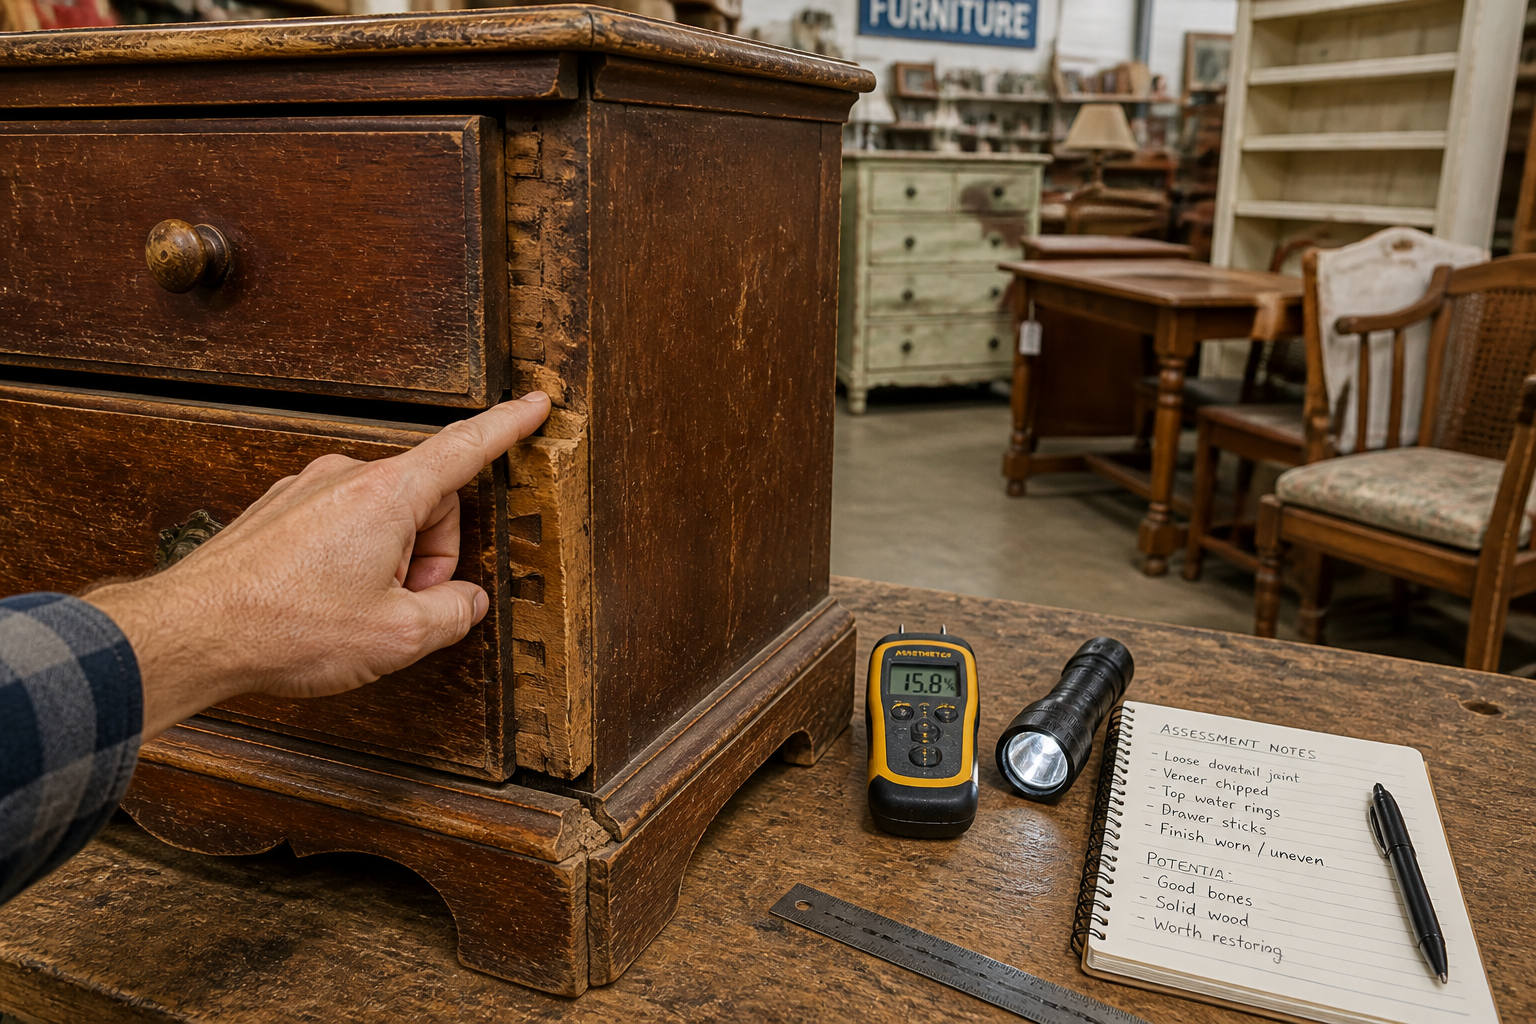
The journey of “Restoring and Upcycling Thrift Store Furniture: A Woodworker’s Guide to Breathing New Life into Old Pieces” begins long before the first sanding stroke. It starts with careful selection, a critical skill that differentiates a rewarding project from a frustrating one. Walking into a thrift store or estate sale requires a keen eye and a systematic approach to evaluating potential candidates.

What to Look For: “Good Bones”
When assessing furniture, prioritize structural integrity and quality craftsmanship. A piece with “good bones” typically means:
- Solid Wood Construction: Look for furniture made from solid hardwoods (oak, maple, cherry, mahogany) rather than particle board, MDF, or veneer over low-quality substrates. Solid wood is more durable, easier to repair, and holds finishes better. Tap on surfaces to gauge solidity; a hollow sound often indicates composite materials.
- Sturdy Joinery: Examine the joints. Dovetail joints, mortise and tenon, and dado joints are indicators of quality construction. Avoid pieces held together primarily by staples, nails, or visibly cheap glue. Loose joints are often fixable, but poorly constructed joints are a red flag.
- Minimal Water Damage or Rot: Small water rings or minor discoloration can often be sanded out. However, extensive water damage, active mold, or soft, crumbling wood indicating rot means the piece is likely beyond economical repair.
- Complete Components (mostly): While missing knobs or minor hardware are easy fixes, a piece with significant missing structural elements (e.g., a broken leg, missing drawer fronts) might require more advanced woodworking skills and potentially sourcing difficult-to-find replacements.
- Interesting Design or Shape: Beyond its current condition, consider the inherent aesthetic. Does it have unique carvings, interesting lines, or a classic style that would shine with a refresh? Sometimes, the appeal is in the form factor itself.
Red Flags to Avoid
Knowing what to pass on is as important as knowing what to pick up. Be wary of:
- Extensive Veneer Damage: While small chips can be repaired, large areas of missing or peeling veneer can be labor-intensive and challenging to fix seamlessly. If the substrate beneath is particle board, the repair often isn’t worth the effort.
- Pest Infestation: Look for small, perfectly round holes (pinholes) and fine sawdust (frass) around the base or inside drawers. These are signs of woodworm or other boring insects. Treating an infestation can be costly and may not save the piece.
- Severe Structural Cracks: Deep cracks that run through entire boards, especially weight-bearing ones, can compromise the integrity of the furniture and be very difficult to repair without significant expertise and tools.
- Unpleasant Odors: Persistent musty, smoky, or pet odors embedded in the wood can be incredibly difficult to eliminate, even with extensive cleaning and airing.
- Lead Paint: If dealing with older pieces (pre-1978), assume lead paint might be present. This requires special handling, protective gear, and proper disposal protocols, adding complexity and cost to the project. Test kits are available for confirmation.
Careful selection saves time, money, and effort, setting the stage for a successful restoration project. Remember, the goal is to find a piece that, with your woodworking skills, can truly be given a second life. For a deeper dive into evaluating wood, consider resources on sourcing reclaimed and salvaged wood: quality assessment, restoration, and safe handling.
Essential Tools, Techniques, and Materials for Revival
Once you’ve secured your hidden gem, the real work of “Restoring and Upcycling Thrift Store Furniture: A Woodworker’s Guide to Breathing New Life into Old Pieces” begins. A well-equipped workshop and a methodical approach to restoration techniques are paramount. This section outlines the necessary tools, common repairs, and surface preparation methods that will form the backbone of your project.
The Woodworker’s Toolkit for Restoration
A comprehensive toolkit is crucial. While specific projects may call for specialized items, these are the core essentials:
- Hand Tools:
- Clamps: Essential for gluing repairs (bar clamps, pipe clamps, C-clamps).
- Chisels and Mallet: For precise joinery work and removing old glue.
- Hand Planes: For leveling surfaces, smoothing, and fitting (block plane, jointer plane).
- Scrapers (Cabinet Scrapers): Excellent for removing old finish without excessive dust.
- Screwdrivers/Nut Drivers: For hardware removal and reinstallation.
- Power Tools:
- Orbital Sander: Indispensable for efficient surface preparation (various grits).
- Detail Sander: For intricate areas and corners.
- Heat Gun/Chemical Stripper: For removing stubborn old finishes.
- Drill/Driver: For pilot holes, new hardware, and general fastening.
- Shop Vac: For dust extraction, critical for health and clean finishes.
- Safety Gear:
- Respirator/Dust Mask: Crucial for sanding and stripping.
- Safety Glasses: Eye protection at all times.
- Gloves: Chemical-resistant for strippers, work gloves for general handling.
Structural Repairs: Rebuilding Integrity
Many thrift store finds suffer from loose joints or broken components. Addressing these first ensures the furniture’s longevity and stability.
- Disassembly and Cleaning: Carefully disassemble components if necessary. Use a putty knife or chisel to scrape away old, brittle glue from joints. A dental pick can be useful for tight spaces. Clean thoroughly with denatured alcohol or mineral spirits to remove grease and grime.
- Regluing Joints: For loose mortise and tenon or dowel joints, apply fresh wood glue (e.g., Titebond III for durability) to both surfaces, reassemble, and clamp firmly. Ensure the piece is square before tightening clamps. Allow ample drying time (at least 24 hours).
- Repairing Cracks and Gaps:
- Small cracks: Can be filled with wood filler, tinted epoxy, or a mixture of sawdust and wood glue.
- Larger cracks/splits: May require glue and clamps, or the insertion of a precisely cut wood patch (dutchman patch) for structural integrity and aesthetic blending.
- Replacing Broken Components: If a leg or other structural piece is beyond repair, consider fabricating a new one. This might involve wood lathe turning for turned legs or using traditional joinery for square components.
Surface Preparation: The Foundation of a Great Finish
A beautiful finish starts with meticulous surface preparation.
- Stripping Old Finishes:
- Chemical Strippers: Effective for multiple layers of paint or varnish. Apply, let dwell, and scrape off with a plastic or dull metal scraper to avoid damaging the wood. Always work in a well-ventilated area and wear protective gear.
- Heat Gun: Good for blistering and scraping off paint or thick varnish. Use caution to avoid scorching the wood.
- Mechanical Sanding: For pieces with thin, clear finishes, you might be able to sand directly, starting with a coarser grit (80-100) and progressing to finer grits.
- Sanding Sequence: This is where patience pays off.
- Start with a coarse grit (60-80) to remove deep scratches and remaining finish.
- Move to medium grit (100-120) to remove sanding marks from the previous grit.
- Progress to fine grit (150-180) for general smoothing.
- Finish with very fine grit (220-320) for a silky smooth surface, ready for staining or clear coats.
- Always sand with the grain of the wood to prevent visible scratches.
- Cleaning Dust and Debris: After each sanding stage, thoroughly clean the surface. Use a shop vac, then a tack cloth or a cloth dampened with mineral spirits to remove all dust particles. Remaining dust will compromise the final finish.
For more detailed information on repairing older pieces, refer to resources on restoring antique wooden furniture: techniques for repairing. Mastering these foundational steps is crucial for achieving a professional result in your “Restoring and Upcycling Thrift Store Furniture: A Woodworker’s Guide to Breathing New Life into Old Pieces” project.

Finishing and Upcycling: Breathing New Life into Old Pieces
With structural repairs complete and surfaces perfectly prepped, the exciting phase of finishing and upcycling begins. This is where your vision truly comes to life, transforming a forgotten object into a modern treasure. “Restoring and Upcycling Thrift Store Furniture: A Woodworker’s Guide to Breathing New Life into Old Pieces” encompasses not just repair, but also a thoughtful approach to aesthetics and long-term protection.
Choosing Your Finish
The right finish protects the wood and defines the furniture’s new aesthetic. Consider the piece’s intended use and desired look:
- Stains:
- Oil-Based Stains: Penetrate deep into the wood, highlighting grain, and offer rich, deep colors. They require longer drying times but are very durable.
- Water-Based Stains: Faster drying, low odor, and easier cleanup. They tend to create a more even, less ambering color.
- Gel Stains: Thicker consistency, ideal for difficult woods or achieving a more uniform color over diverse grain patterns.
- Application Tip: Always test your stain on an inconspicuous area or a scrap piece of the same wood before applying to the entire surface.
- Clear Protective Topcoats:
- Polyurethane (Oil-Based or Water-Based): Highly durable and water-resistant, suitable for high-use surfaces like tabletops. Can be glossy, satin, or matte.
- Shellac: A natural, traditional finish that provides a warm glow. Dries quickly, easy to repair, but less resistant to heat and alcohol than poly.
- Varnish: Offers excellent protection and durability, often used on outdoor furniture (spar varnish) or fine indoor pieces.
- Oil Finishes (e.g., Danish Oil, Tung Oil, Linseed Oil): Penetrate the wood, providing a natural-looking, soft luster that enhances the grain. They offer good protection but may require reapplication over time. For more on this, check out our guide on Danish oil vs. linseed oil: the ultimate wood finishing guide.
- Paint:
- Chalk Paint: Known for its matte finish and minimal prep (often no sanding required). Can be distressed for a vintage look.
- Milk Paint: Gives a beautiful, historical, chippy finish. Also low VOC and very durable.
- Acrylic Latex Paint: Versatile and available in endless colors. Requires a good primer for optimal adhesion and durability on furniture.
- Tip: Always use a high-quality primer before painting, especially if changing from a dark to a light color or if the wood has tannins that might bleed through.
Creative Upcycling Techniques
Beyond simple restoration, upcycling involves reimagining a piece to suit modern tastes or new functions.
- Color Blocking and Two-Tone Finishes: Use contrasting paint or stain colors on different sections of a piece (e.g., dark body, light drawers) to create visual interest.
- Hardware Transformation: Swapping out old, dated hardware for contemporary pulls, knobs, or hinges can drastically update a piece’s look. Consider brass, matte black, or brushed nickel for a modern touch.
- Adding New Functionality:
- Bookshelf to Bar Cart: Add castors, a new top, and maybe some wine rack inserts.
- Dresser to Vanity: Integrate a sink cutout and new top.
- Cabinet to Pet Bed: Remove lower doors, add a cushion, and paint for a stylish pet retreat.
- For inspiration on creative transformations, look at projects like upcycling old pallets: creative and sustainable woodworking projects.
- Textural Elements:
- Wallpaper/Fabric Accents: Line drawer interiors or cabinet backs with decorative wallpaper or fabric for a surprise element.
- Stenciling: Add patterns or designs using stencils and paint.
- Applied Moldings/Trim: Enhance plain panels with decorative trim for a more custom, architectural look.
- Distressing and Antiquing: For a rustic or vintage feel, use techniques like sanding through paint layers, applying dark glazes, or using crackle finishes.
When “Restoring and Upcycling Thrift Store Furniture: A Woodworker’s Guide to Breathing New Life into Old Pieces,” remember that attention to detail in the finishing stage is what elevates a project from amateur to professional. A well-chosen finish and thoughtful upcycling can make a piece truly unique and valuable.
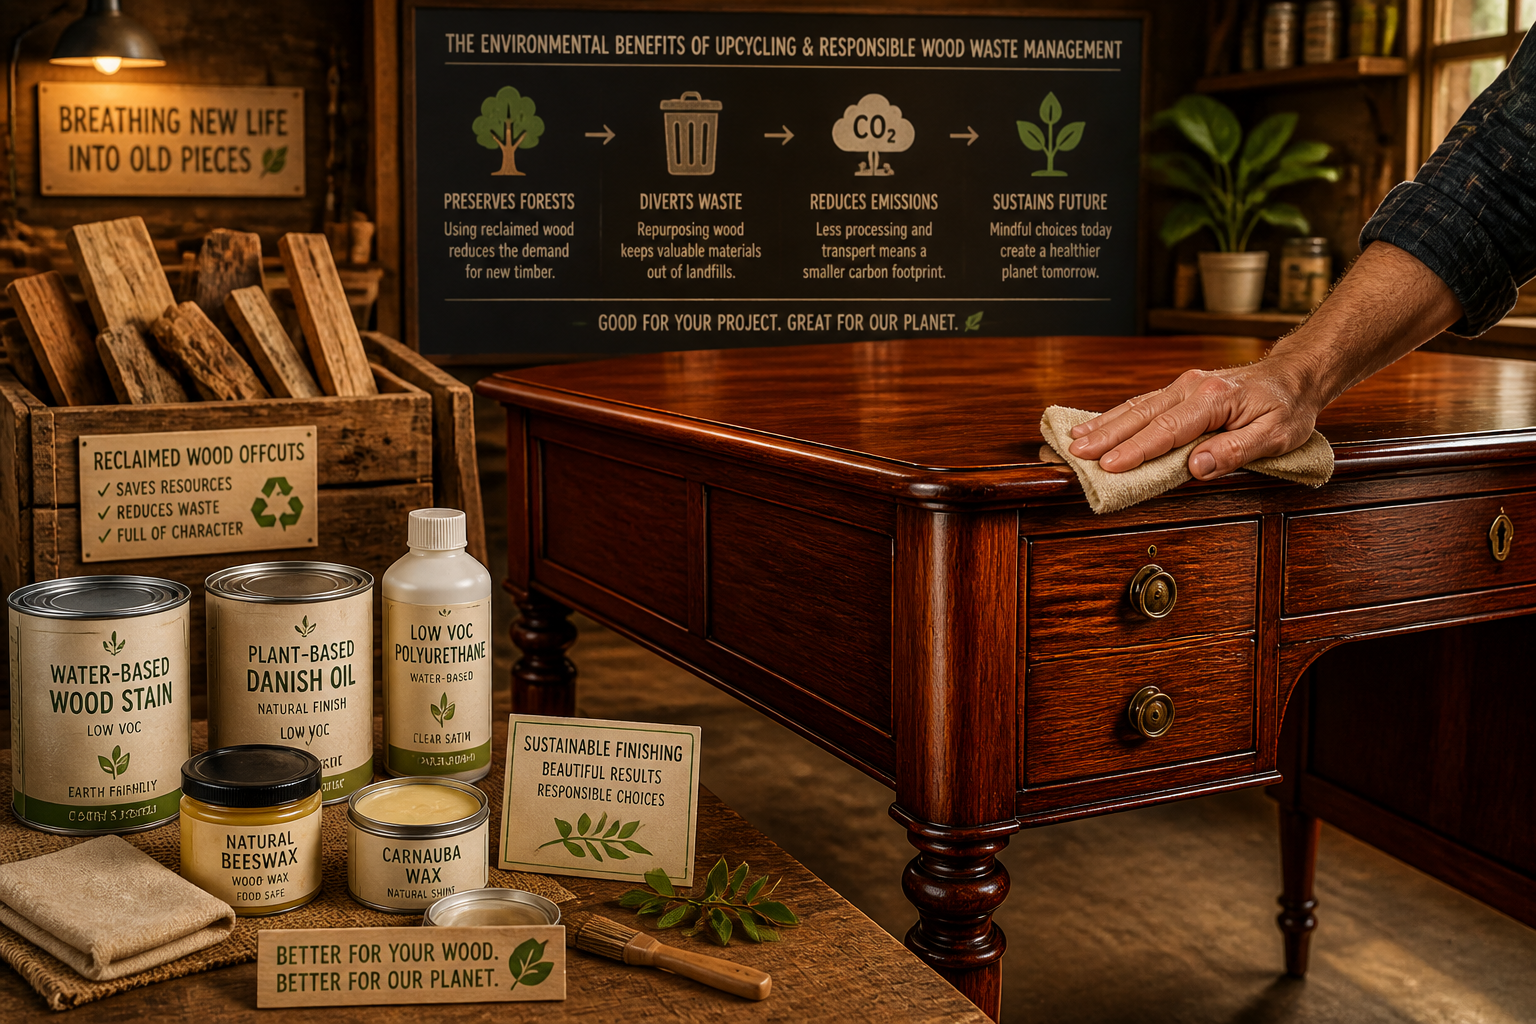
Conclusion
The act of “Restoring and Upcycling Thrift Store Furniture: A Woodworker’s Guide to Breathing New Life into Old Pieces” is more than just a hobby; it’s a sustainable practice that combines environmental consciousness with the satisfaction of craftsmanship. In 2026, as interest in unique, handcrafted items and eco-friendly living continues to grow, the ability to transform a discarded piece into a functional work of art holds immense value. This guide has illuminated the path from initial selection through meticulous repair and creative finishing, empowering woodworkers to see the hidden potential in every dusty corner.

By embracing solid woodworking principles, understanding material limitations, and applying thoughtful design choices, you can breathe new life into forgotten furniture, creating pieces that tell a story, reduce waste, and enrich your living spaces. The next time you walk past a forgotten dresser or a wobbly chair, remember the potential it holds—a testament to your skill, vision, and dedication to the timeless craft of woodworking.
Actionable Next Steps:
- Visit Local Thrift Stores: Actively seek out potential projects, applying the selection criteria discussed in this guide.
- Start Small: Begin with a less complex piece, such as a small side table or stool, to practice your skills before tackling larger projects.
- Invest in Quality Tools: Gradually build your toolkit with reliable hand and power tools that will serve you for many projects to come. Consider resources like creating ergonomic workshop furniture: building custom workbenches to improve your workspace.
- Experiment with Finishes: Test different stains, paints, and topcoats on scrap wood to understand their properties and how they interact with various wood types.
- Share Your Creations: Document your process and share your restored and upcycled pieces. This not only inspires others but also helps you reflect on your techniques and progress.
SEO Meta Title: Restore & Upcycle Thrift Furniture: Woodworker’s Guide SEO Meta Description: Transform old thrift store furniture into stunning pieces. This woodworker’s guide covers selection, repair, finishing, and creative upcycling techniques.
