

The year is 2026, and the fusion of digital design and woodworking craftsmanship has never been more accessible. While manual carving has a revered history, the advent of Computer Numerical Control (CNC) carving has demystified the creation of intricate decorative wood panels and signage for countless hobbyists and small business owners. Many aspiring woodworkers believe CNC machines are complex, expensive tools reserved for industrial operations. However, the truth is that entry-level CNC routers and user-friendly software have opened a world of precision and creativity, allowing even novices to produce stunning, professional-quality results with minimal prior experience. This comprehensive guide will navigate the entire process, providing a Beginner’s Guide to CNC Carving for Decorative Wood Panels and Signage: From Design to Finishing.
Key Takeaways
- Accessibility: Entry-level CNC machines and intuitive software make intricate carving accessible to beginners.
- Design Freedom: CAD/CAM software allows for limitless custom designs, from simple text to complex 3D reliefs.
- Process Overview: CNC carving involves distinct stages: design, CAM programming, machine setup, carving, and finishing.
- Safety First: Understanding and implementing safety protocols is crucial for a successful and injury-free experience.
- Finishing Matters: Proper sanding and finishing enhance the beauty and longevity of your carved pieces.
Understanding the Basics of CNC Carving for Decorative Wood Panels and Signage
CNC carving is essentially automated woodworking. Instead of manually pushing a chisel, a computer controls a router bit that moves along X, Y, and Z axes to remove material from a workpiece. For beginners, the initial hurdle often lies in demystifying the terminology and the machine itself.

A CNC router, the primary tool for this process, operates based on G-code – a programming language that tells the machine precisely where to move, how fast, and how deep to cut. This G-code is generated from your digital design using specialized software.
What is a CNC Router?
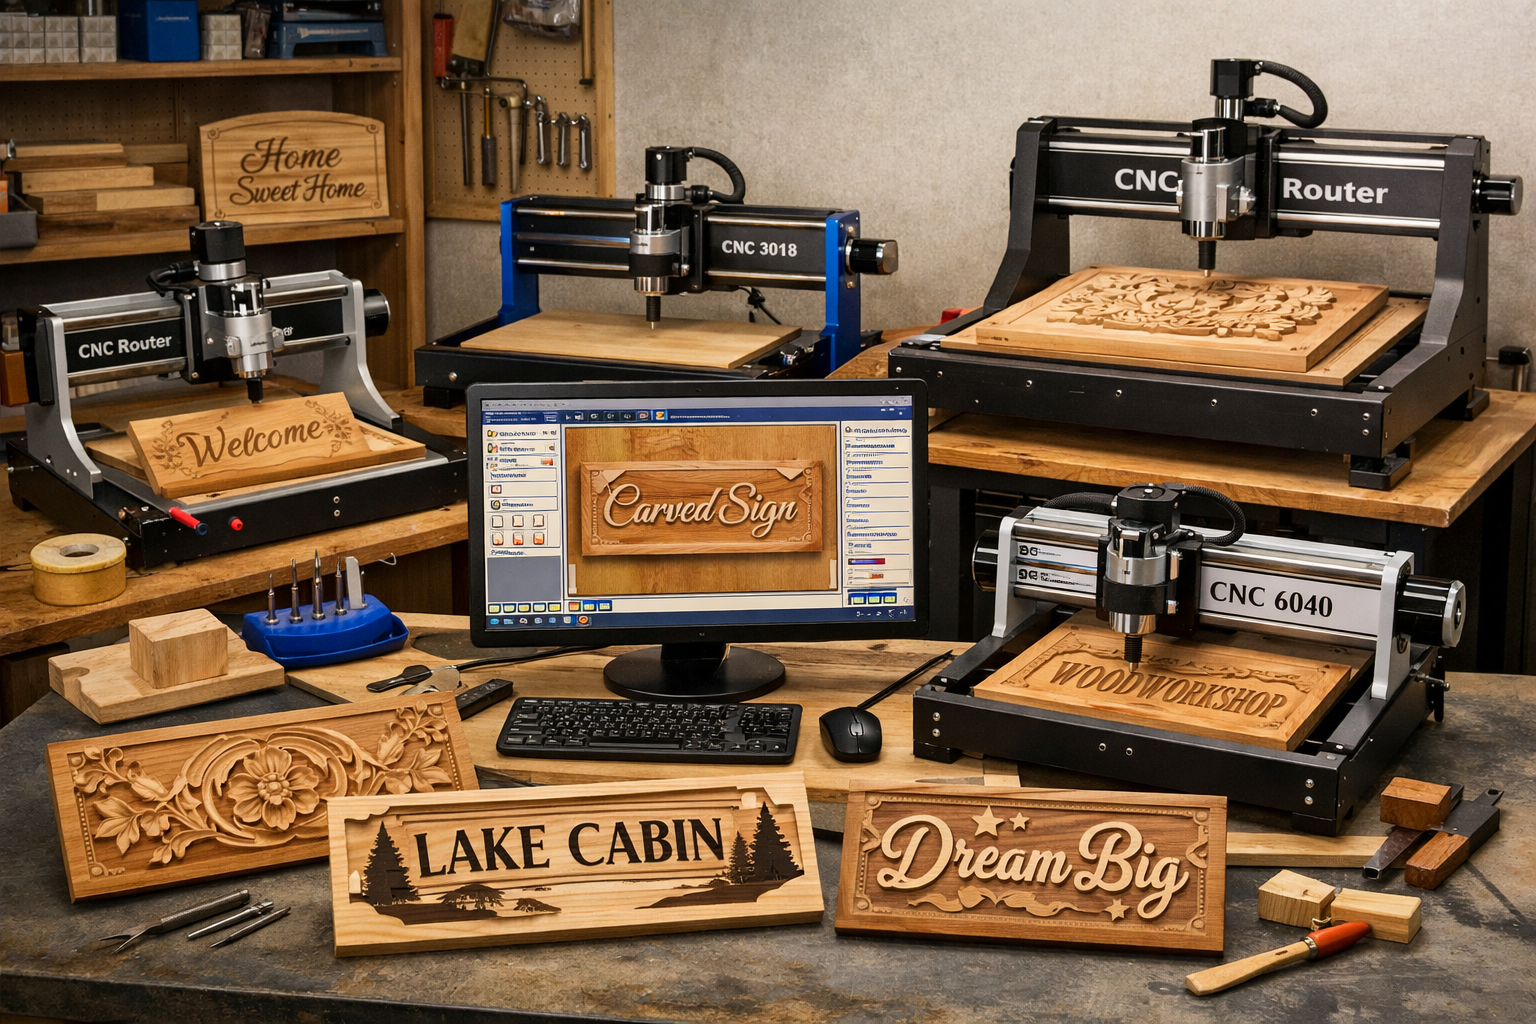
At its core, a CNC router is a machine that holds a spinning router bit and moves it precisely across a piece of material, typically wood, plastic, or soft metals. For decorative wood panels and signage, even compact desktop or entry-level hobby machines can achieve impressive results. These machines vary in size, power, and rigidity, but the fundamental principle remains the same.
Key Components of a Basic CNC Router:
- Gantry/Frame: The structural components that hold everything together.
- Spindle: The motor that spins the router bit.
- Workbee/Table: The flat surface where your material is secured.
- Steppers/Servos: Motors that drive the movement along the axes.
- Controller: The electronic brain that interprets G-code and controls the motors.
For those interested in setting up their own woodworking equipment, exploring a Beginner’s Guide to CNC Routers for Small Woodshops: From Setup to First Project can provide a foundational understanding.
Essential Software for CNC Carving
Before any wood touches a router bit, your design must exist digitally. This involves two primary types of software:
CAD (Computer-Aided Design) Software: Used to create your design. Think of it as a digital drafting table.
- Examples: Inkscape (free, 2D), Fusion 360 (free for hobbyists, 2D/3D), Vectric Aspire/VCarve (paid, specialized for CNC).
- Purpose: Designing the actual decorative panel or sign, including text, logos, or intricate patterns.
CAM (Computer-Aided Manufacturing) Software: Translates your CAD design into machine-readable G-code (toolpaths).
- Examples: Often integrated into CAD software (e.g., Fusion 360 CAM workspace, Vectric products) or standalone (e.g., Estlcam).
- Purpose: Defining cutter paths, feed rates, spindle speeds, and depth of cut for your chosen router bits. Understanding The Essential Guide to Router Bits: Choosing the Right Profile is crucial here.
From Concept to Carve: Designing and Preparing Your Project
The journey of creating a decorative wood panel or sign begins long before the router bit starts spinning. This phase is critical for ensuring a successful and aesthetically pleasing outcome.
Step 1: Design Your Decorative Panel or Sign
This is where your creativity comes alive. Whether you’re making a personalized family sign, an intricate wall art panel, or custom branding for a business, the design process is fundamental.
- Brainstorming & Sketching: Start with rough sketches to conceptualize your idea. Consider the size, shape, and overall aesthetic.
- Software Selection: Choose CAD software that suits your skill level and project complexity.
- For 2D designs (text, outlines, simple engravings): Inkscape or a basic vector design program.
- For 2.5D designs (relief carving, V-carving): Vectric VCarve is excellent for beginners.
- For full 3D designs (sculptural elements): Fusion 360 or Vectric Aspire.
- Design Principles:
- Readability for Signs: Ensure text is clear and appropriately sized for viewing distance.
- Balance & Composition for Panels: Arrange elements aesthetically.
- Tool Access: Design features keeping in mind the limitations of router bits (e.g., tight internal corners might require smaller bits or lead to uncarved areas).
- Importing Assets: You can import existing vector graphics (SVG) or image files (for tracing).
“A well-planned design is half the battle won in CNC carving.”
Step 2: Choose Your Wood and Router Bits
The type of wood and router bits you select will significantly impact the final look and carve quality.
- Wood Selection:
- Softwoods (Pine, Poplar): Easier to carve, generally less expensive, but can splinter more easily. Great for practice.
- Hardwoods (Maple, Cherry, Walnut, Oak): Produce finer detail, less splintering, durable, but harder on bits. Often preferred for high-quality decorative pieces.
- Plywood (Baltic Birch, Cabinet Grade): Stable, consistent, but edge grain can be challenging to finish well. Consider 1/2 Plywood for Cabinets: Strength, Durability, and Design Considerations for material insights.
- Router Bit Selection:
- End Mills (Flat/Square): Used for roughing passes, cutting outlines, and creating flat-bottomed pockets.
- Ball Nose: Ideal for 3D contouring and creating smooth, rounded surfaces.
- V-Bits (Conical): Perfect for V-carving text, intricate details, and creating chamfers. The depth of cut dictates the width of the line, offering dynamic carving.
- Straight Bits: For cutting straight dadoes, rabbets, and profiles.
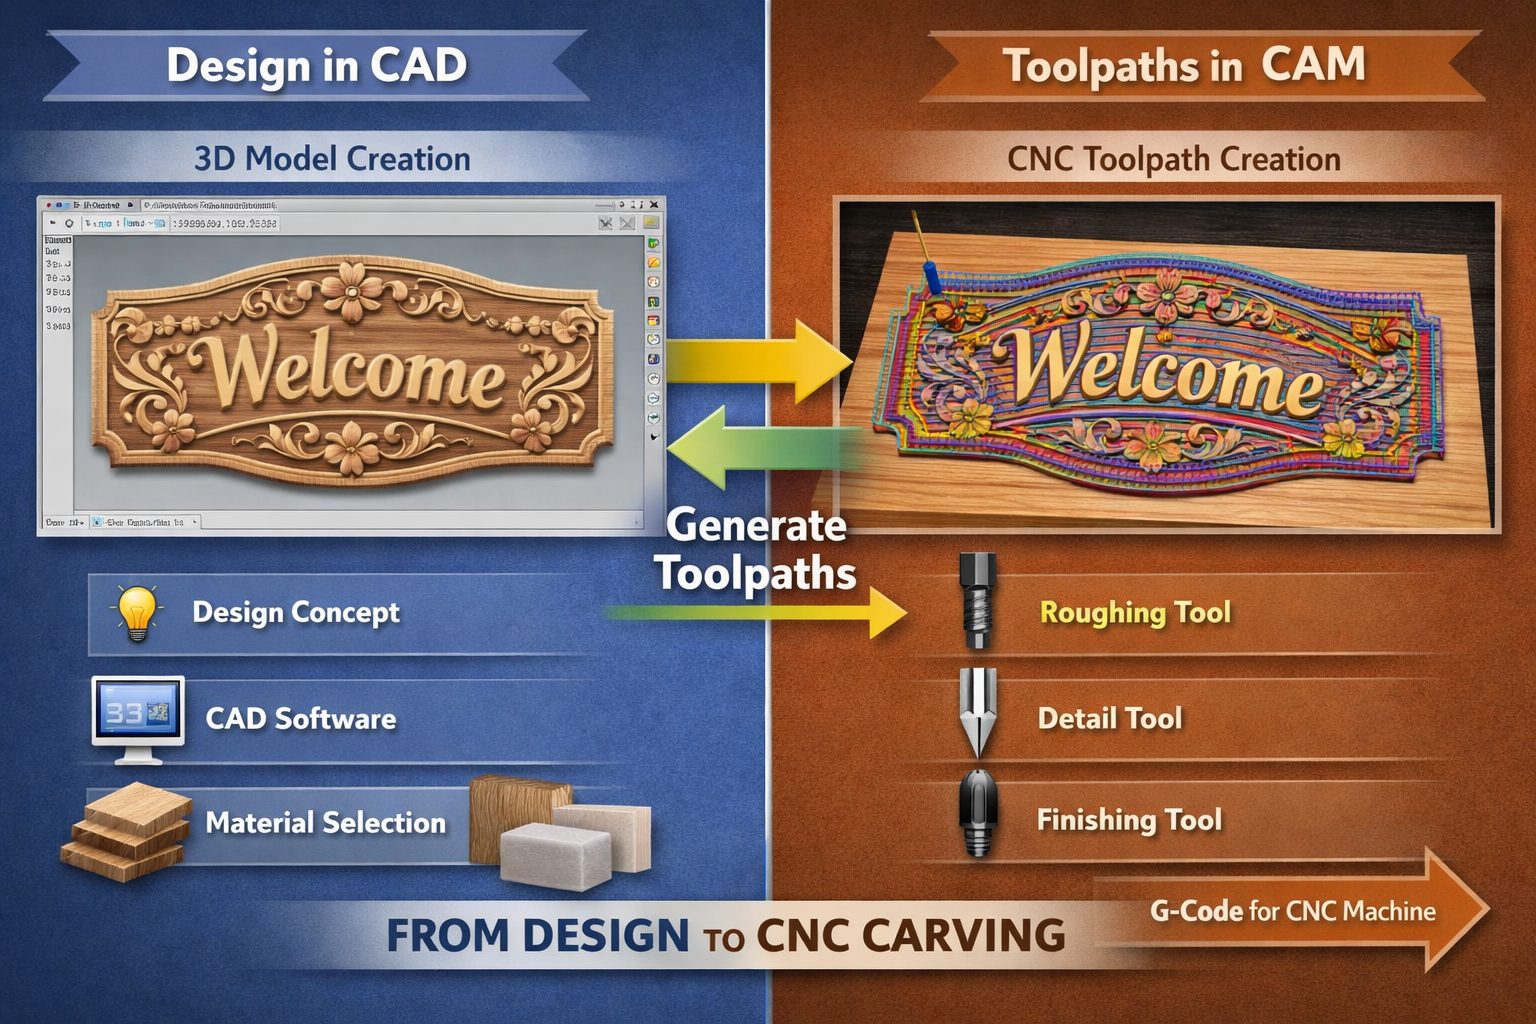
Step 3: CAM Programming – Generating Toolpaths
This is the bridge between your design and the machine. In your CAM software, you’ll define how the router carves your design.
- Material Setup: Define the dimensions of your wood blank.
- Tool Selection: Specify which router bit you’re using for each operation.
- Toolpath Strategy:
- Roughing: Large, aggressive cuts to remove bulk material quickly with a larger bit.
- Finishing: Slower, shallower cuts with a smaller, finer bit for detail and smooth surfaces.
- V-Carving: Uses a V-bit to automatically adjust depth based on line width, creating sharp corners and elegant text.
- Pocketing: Carves out an area to a specific depth.
- Profiling: Cuts along an outline, either inside or outside a shape.
- Feeds and Speeds: These are critical parameters.
- Feed Rate: How fast the router moves horizontally (inches or millimeters per minute).
- Spindle Speed: How fast the bit rotates (RPM).
- Depth of Cut: How deep the bit cuts per pass.
- Tip: Start with conservative settings recommended by your software or bit manufacturer and adjust as needed. Too fast a feed rate or too deep a cut can break bits or burn wood.
- Simulate Toolpaths: Most CAM software offers a simulation feature. Use it! This allows you to visualize the carving process and identify potential errors before cutting actual wood, saving material and time.
- Post-Process & Export G-Code: Once satisfied, the CAM software “post-processes” your toolpaths into a G-code file specific to your CNC machine’s controller. Save this file to a USB drive or transfer it directly to your CNC machine.
Carving and Finishing Your Masterpiece
With your G-code ready, it’s time to bring your digital design to life. This stage requires careful machine setup, vigilant monitoring, and meticulous finishing.
Step 4: Machine Setup and Calibration
Proper setup is crucial for accuracy and safety.
- Secure the Workpiece: Your wood must be firmly clamped or screwed to the wasteboard. Any movement during carving will ruin your project.
- Install the Router Bit: Insert the chosen bit securely into the collet of your spindle. Ensure it’s pushed in far enough to prevent slipping but not bottomed out.
- Set the Z-Zero: This tells the machine the top surface of your material. There are various methods:
- Manual: Jog the bit down until it just touches the surface, then set Z-zero in your control software.
- Touch Plate: An automated sensor that accurately finds the material’s surface.
- Set the X/Y Zero: This defines the starting point of your carve (usually a corner or the center of your material).
- Dust Collection: Attach a dust shoe and connect it to a dust collection system. CNC routers generate a lot of dust and chips, which can clog bits, obscure visibility, and pose health risks. For optimal workshop cleanliness, consider Building a DIY Smart Workshop Dust Collection System.
- Safety Precautions: Always wear safety glasses and hearing protection. Ensure your emergency stop button is easily accessible.
Step 5: The Carving Process
Once everything is set up, load your G-code file into the CNC control software and start the carve.

- Observe Closely: Stay near the machine, especially during the initial passes. Listen for unusual noises and watch for any problems (e.g., bit deflection, burning, loose workpiece).
- Chip Evacuation: Good chip evacuation is vital. If chips aren’t clearing, the bit can overheat, dull, or break. Your dust collection system should handle this, but you might need to adjust feed rates or use compressed air.
- Tool Changes: For projects requiring multiple bits, the machine will pause for manual bit changes. Re-zeroing the Z-axis after each change is critical if your machine doesn’t have an automatic tool changer.
- Patience: Intricate carvings can take hours. Don’t rush the process.
Step 6: Post-Carving Cleanup and Sanding
Once the carving is complete, remove your workpiece from the machine.
- Remove Tabs/Hold-downs: If you used tabs to hold the piece in place, carefully cut or sand them off.
- Initial Cleanup: Use a brush or compressed air to remove loose dust and chips.
- Sanding: This is arguably the most critical step for achieving a professional finish.
- Rough Sanding: Start with a coarser grit (e.g., 120-150) to remove tool marks and rough edges.
- Fine Sanding: Progress through finer grits (e.g., 180, 220, 320) until the surface is smooth to the touch. Pay extra attention to carved details. Use small sanding blocks or even sandpaper wrapped around a pencil for intricate areas.
- Tip: Sand with the grain of the wood as much as possible to avoid cross-grain scratches.
Step 7: Finishing Your Decorative Wood Panel or Sign
Finishing protects the wood and enhances the carved details. The choice of finish depends on the desired look and the project’s intended use.
- Staining: Enhances wood grain and adds color. Apply evenly and wipe off excess. Consider experimenting with Gray Stain on Maple: Techniques, Ideas, and Prevention for a modern look.
- Painting: Can create bold, contrasting designs. Often, you might paint the entire panel, then carve through the paint to expose the wood, or paint carved sections after the initial carve.
- Clear Coats (Polyurethane, Lacquer, Oil Finishes):
- Polyurethane: Durable, water-resistant, available in various sheens (gloss, satin, matte). Aerosol Polyurethane: Benefits, Application, and Types can be a good starting point.
- Oil Finishes (e.g., Tung Oil, Linseed Oil): Penetrate the wood, providing a natural, warm look and good protection. They are easy to apply and repair.
- Lacquers: Fast-drying, durable, and provide a clear, hard finish.
- Wax: Offers a soft sheen and some protection, often used over other finishes or for a very natural look.
- Application: Apply finishes according to manufacturer instructions, typically in thin coats with light sanding between coats for best results.

Conclusion
Embarking on CNC carving for decorative wood panels and signage might seem daunting initially, but with the right approach, it’s an incredibly rewarding endeavor. From understanding the basics of your machine and software to meticulously crafting your designs and applying the perfect finish, each step contributes to transforming a simple piece of wood into a personalized work of art. The Beginner’s Guide to CNC Carving for Decorative Wood Panels and Signage: From Design to Finishing provides a clear roadmap to empower you to create stunning, durable pieces that showcase your unique style.
Actionable Next Steps:
- Research Entry-Level CNC Routers: Explore options like desktop machines or smaller gantry-style CNCs suitable for hobbyists.
- Download Free CAD Software: Start experimenting with design in Inkscape or Fusion 360 to get a feel for digital creation.
- Watch Tutorials: Dive into online video tutorials for your chosen software and CNC machine type.
- Practice on Scrap Wood: Don’t be afraid to make mistakes; they are part of the learning process. Start with simple designs on inexpensive wood.
- Join a Community: Engage with online CNC carving forums or local woodworking groups to learn from experienced users.
The world of CNC carving is vast and continually evolving. By mastering these foundational steps, you’re well on your way to adding a powerful new dimension to your woodworking skills in 2026.
References
- Woodcraft Wiz. (2026). Beginner’s Guide to CNC Routers for Small Woodshops: From Setup to First Project. Woodcraft Wiz.
- Woodcraft Wiz. (2026). The Essential Guide to Router Bits: Choosing the Right Profile. Woodcraft Wiz.
- Woodcraft Wiz. (2026). 1/2 Plywood for Cabinets: Strength, Durability, and Design Considerations. Woodcraft Wiz.
- Woodcraft Wiz. (2026). Building a DIY Smart Workshop Dust Collection System: Integrating IoT Sensors for Automated Air Quality and Tool Activation. Woodcraft Wiz.
- Woodcraft Wiz. (2026). Gray Stain on Maple: Techniques, Ideas, and Prevention. Woodcraft Wiz.
- Woodcraft Wiz. (2026). Aerosol Polyurethane: Benefits, Application, and Types. Woodcraft Wiz.
