
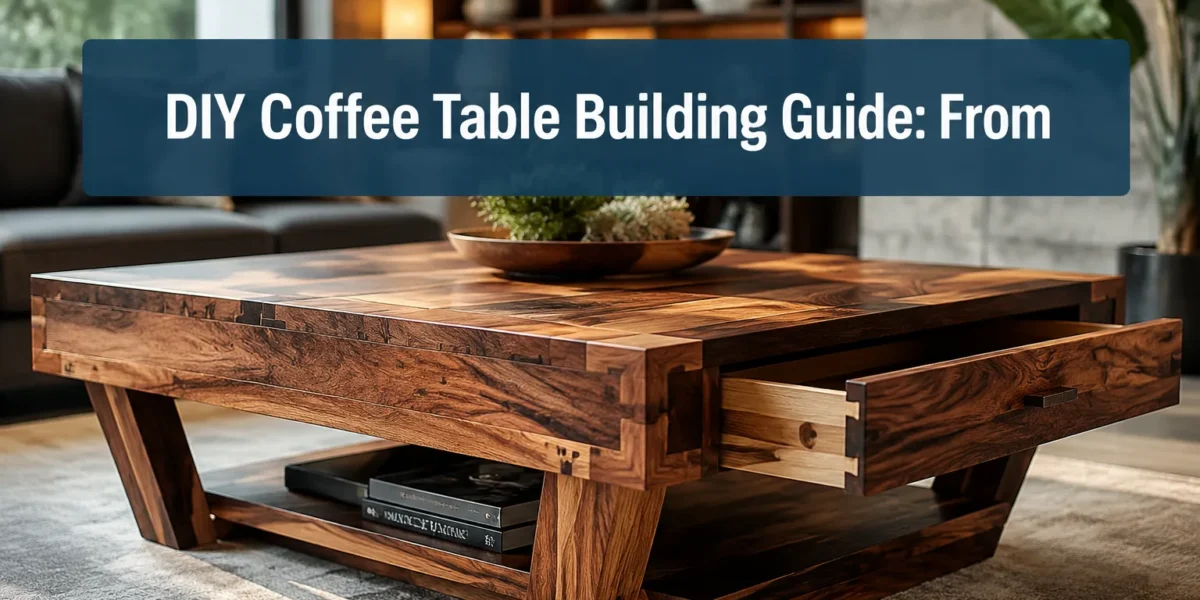
The pursuit of a truly bespoke living space often leads homeowners beyond mass-produced furniture, inspiring a journey into custom craftsmanship. While many DIY projects focus on fundamental construction, elevating a coffee table from a functional piece to a captivating centerpiece demands a deeper dive into advanced woodworking. This comprehensive DIY Coffee Table Building Guide: From Design to Finished Centerpiece (Advanced Techniques) is crafted for those ready to push their skills, exploring intricate joinery, exotic materials, and professional finishing methods to create a piece that not only serves its purpose but also tells a story of artistry and precision.
Key Takeaways
- Advanced coffee table construction leverages complex joinery like dovetails, mortise and tenon, and bridle joints for superior strength and aesthetic appeal.
- Material selection extends beyond common lumber to include exotic woods, reclaimed timber, and composite panels, offering unique visual and tactile qualities.
- Precision in every step, from dimensioning rough lumber to final assembly, is critical for achieving professional-grade results.
- Integrating smart features such as wireless charging, hidden compartments, or ambient lighting adds significant value and functionality.
- Mastering advanced finishing techniques is essential for protecting the wood, enhancing its natural beauty, and ensuring long-term durability.
The Art of Design: Conceptualizing Your Advanced Coffee Table
Creating an advanced coffee table begins long before the first cut. The design phase is where vision meets practicality, incorporating aesthetic principles with structural integrity and functional innovation. Consider the table not just as a surface, but as a sculptural element that complements your interior design while offering practical solutions.
Conceptualizing Advanced Aesthetics and Functionality
An advanced coffee table design moves beyond simple rectangles and basic leg attachments. It involves a thoughtful exploration of form, texture, and integrated features.
- Form and Silhouette: Experiment with unconventional shapes (e.g., organic curves, geometric tessellations, multi-tiered designs) or classic forms elevated through intricate details. How will the table interact with the existing furniture, and what statement will it make?
- Material Harmony: The choice of wood is paramount. Instead of standard pine or oak, consider the essential guide to wood species for beginner furniture makers for its unique grain patterns, color variations, and working properties. Combining different wood species or incorporating other materials like glass, metal, or epoxy resin can create striking contrasts.
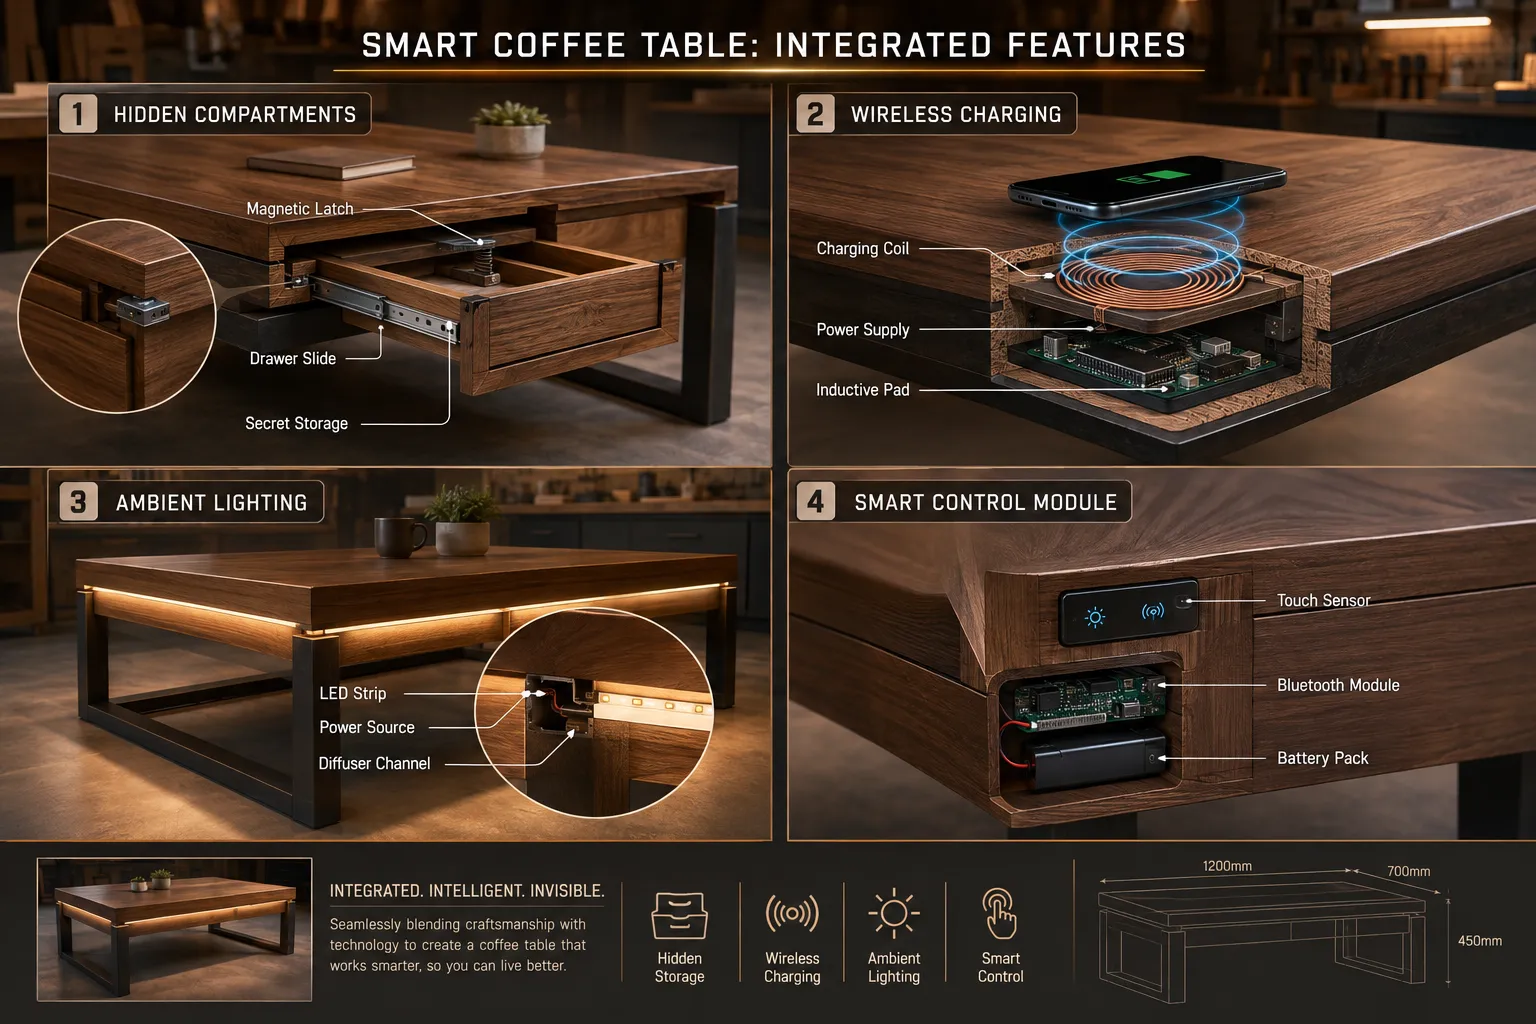
- Integrated Features: Advanced tables often include smart, subtle functionalities. This could range from hidden drawers with magnetic latches, integrated wireless charging pads, subtle ambient LED lighting, or even modular sections that can be reconfigured.
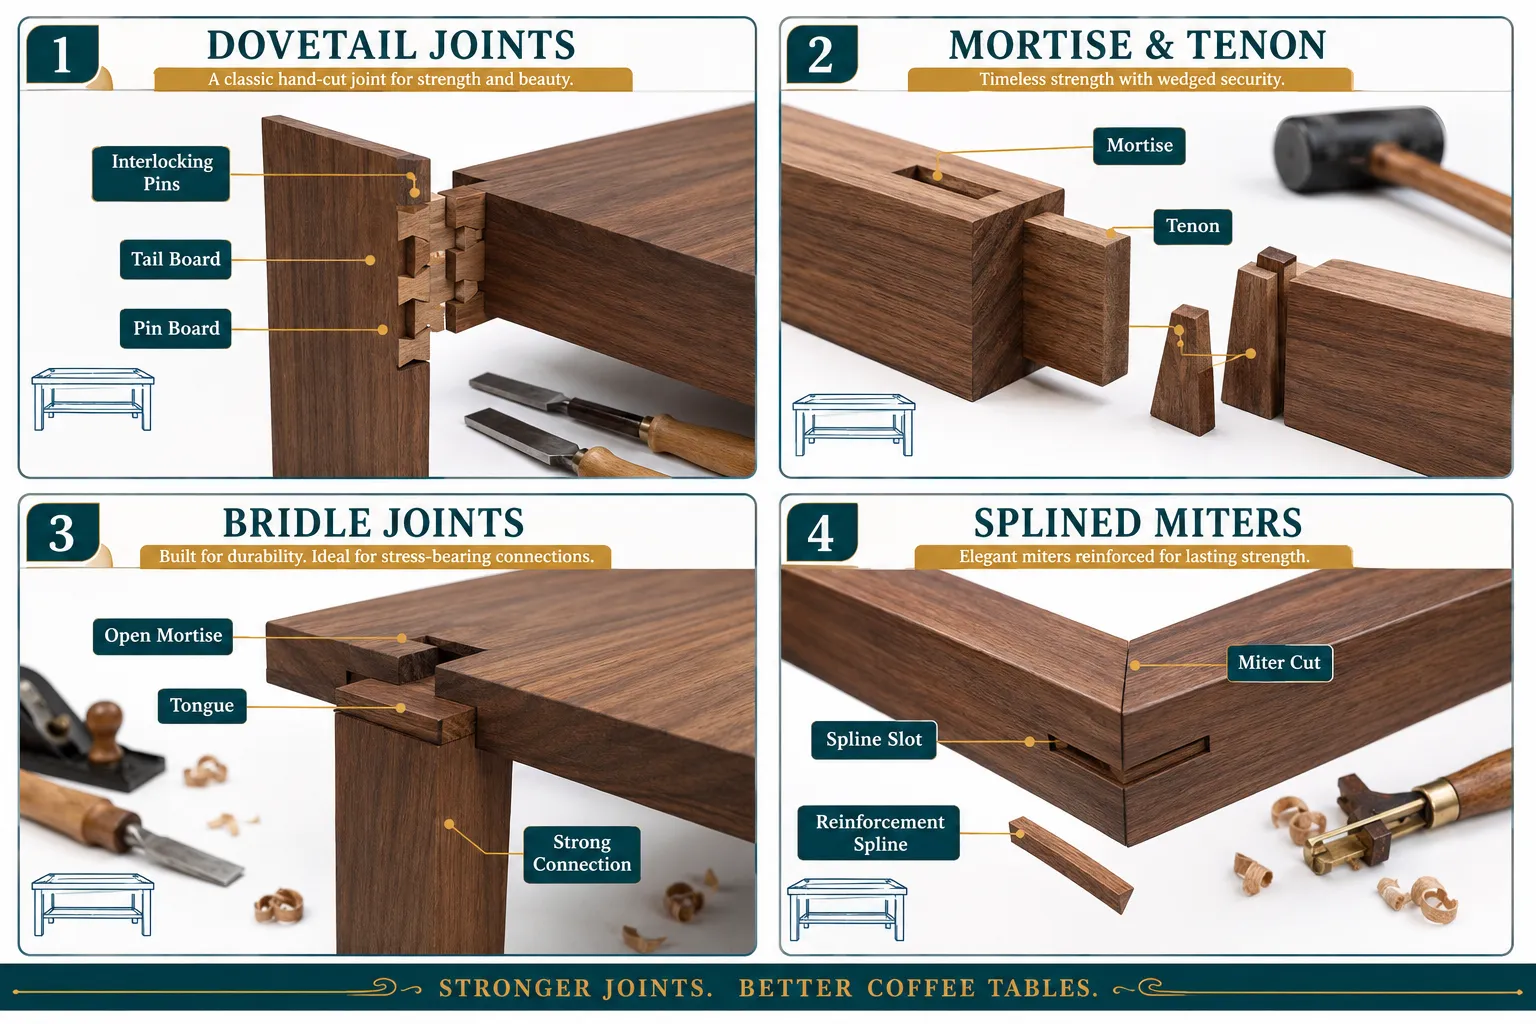
- Joinery as Design Element: Rather than hiding joints, celebrate them. Exposed dovetails, through mortise and tenon joints, or decorative splines can become integral aesthetic features, showcasing your craftsmanship. Explore hand tool joinery for visible wood joints for inspiration.
Detailed Sketching and Digital Rendering
Once conceptualized, the design needs to be meticulously planned.
- Rough Sketches: Begin with freehand sketches to explore different angles, proportions, and feature placements. Don’t be afraid to iterate rapidly.
- Dimensioned Drawings: Translate your best concepts into detailed, dimensioned drawings. This includes top, front, and side views, along with any necessary cross-sections or exploded views. Pay close attention to thicknesses, clearances, and joint details.
- Digital Modeling (CAD/3D): For advanced designs, CAD software (e.g., SketchUp, Fusion 360) is invaluable. It allows for precise dimensioning, visualization from all angles, material application, and even virtual assembly to catch potential errors before cutting wood. This step is particularly helpful for understanding complex joinery and ensuring all components fit together seamlessly.
“The true measure of a craftsman isn’t just in the final polish, but in the intelligent anticipation of every joint and every curve during the design phase.”
Materials, Tools, and Precision Joinery for Your DIY Coffee Table Building Guide: From Design to Finished Centerpiece (Advanced Techniques)
With a robust design in hand, selecting the right materials and mastering advanced joinery techniques become the focus. This stage elevates your project from basic construction to fine furniture making.
Selecting Premium Materials
The materials chosen significantly impact the table’s appearance, durability, and cost.
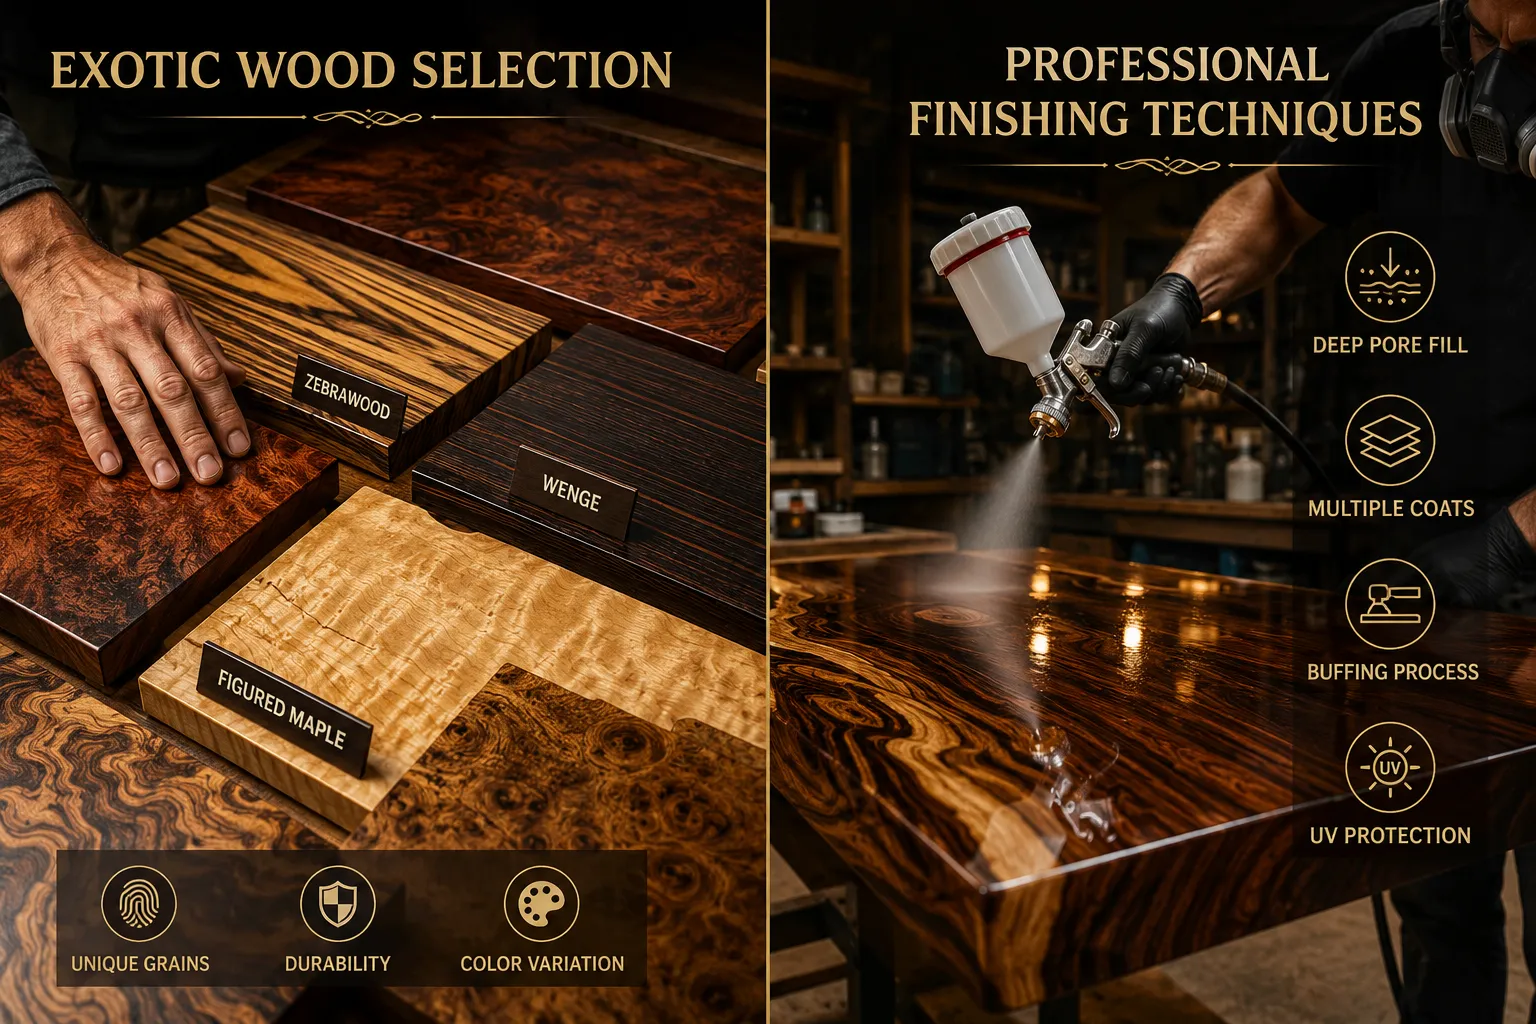
- Exotic Hardwoods: Consider woods like Walnut, Cherry, Mahogany, Wenge, Zebrawood, or highly figured Maple. These offer exceptional beauty, stability, and workability, though they come at a higher price point.
- Reclaimed or Live-Edge Slabs: For a rustic or modern-industrial aesthetic, a live-edge slab offers unique character. Reclaimed timber can provide rich patina and a story, but requires careful preparation (e.g., de-nailing, flattening).
- Specialty Plywoods: High-quality Baltic birch plywood or marine-grade plywood can be used for structural elements or specific design features, especially when combined with solid wood for contrast.
- Hardware and Accents: Choose high-quality drawer slides, hinges, or decorative metal accents that complement the wood. For smart features, source reliable electronic components (e.g., Qi charging modules, LED strips, microcontrollers).
Essential Advanced Tools
While basic hand tools are always valuable, advanced coffee table construction often benefits from power tools that offer precision and efficiency.
- Table Saw: A Pro Tech 10 Table Saw or similar high-quality saw with a precision fence is essential for accurate ripping and cross-cutting.
- Router and Router Table: Crucial for joinery (e.g., dados, rabbets, tenons), edge profiling, and creating decorative elements. Consider a DIY Router Table Build: Precision, Safety, and Custom Features for Advanced Woodworking Operations for custom solutions.
- Jointer and Planer: For dimensioning rough lumber, achieving perfectly flat surfaces, and consistent thicknesses.
- Bandsaw: Excellent for cutting curves, resawing thin lumber, and roughing out intricate shapes.
- Chisels and Hand Planes: Indispensable for fine-tuning joints, cleaning up corners, and achieving superior surface finishes. Ensure your essential guide to hand tool sharpening and maintenance is up-to-date.
- Specialty Jigs: Custom jigs for specific cuts or operations can dramatically improve accuracy and repeatability. Explore Beginners Guide To Essential Woodworking Jigs Improving Accuracy And Safety On Table Saws And Routers for ideas.
Mastering Advanced Joinery Techniques
The hallmark of a high-quality coffee table is strong, well-executed joinery. For this DIY Coffee Table Building Guide: From Design to Finished Centerpiece (Advanced Techniques), we focus on methods that offer both structural integrity and aesthetic appeal.
- Dovetail Joints: Ideal for drawers or connecting panels, dovetails provide exceptional mechanical strength and a classic, elegant look. Hand-cut dovetails are a mark of true craftsmanship.
- Mortise and Tenon Joints: A cornerstone of furniture making, these joints are incredibly strong and versatile. Variations include through mortise and tenons (visible on the exterior), blind mortise and tenons, and wedged tenons.
- Bridle Joints: Strong and visually appealing, bridle joints are excellent for connecting frame members, especially legs to aprons. They are essentially an open mortise and tenon.
- Finger Joints (Box Joints): Similar to dovetails but with straight “fingers,” these are strong and decorative, often used for connecting corners of boxes or drawer cases.
- Splined Miters: For crisp 45-degree corner joints that need reinforcement, splines (thin pieces of wood inserted into opposing dados) add significant strength and prevent joint failure.
- Domino or Dowel Joinery: While simpler than some traditional joints, high-quality domino or dowel systems, when used correctly with precise alignment, can create incredibly strong and invisible joints.
Assembly, Integration, and Professional Finishing
The final stages of building your advanced coffee table involve meticulous assembly, integrating any special features, and applying a finish that protects the wood and enhances its natural beauty. This is where the attention to detail truly shines.
Precise Assembly Techniques
Careful assembly is crucial to maintain the accuracy achieved during dimensioning and joinery.
- Dry Fit First: Always dry fit all components before applying glue. This allows you to identify and correct any fit issues, ensure all joints are tight, and plan your clamping strategy.
- Optimal Clamping: Use sufficient clamps to apply even pressure across all glue lines. Cauls (sacrificial pieces of wood) can help distribute pressure and prevent clamp marks.
- Controlled Glue-Up: Work efficiently during glue-up, especially with complex assemblies. Use a glue with an appropriate open time for your project complexity. Clean up excess glue immediately with a damp cloth to prevent difficult-to-remove glue squeeze-out that can impede finishing.
- Squaring and Flatness: Verify that the table remains square and flat during glue-up. Use winding sticks, straight edges, and large squares to check for twist or racking.
Integrating Advanced Features
This DIY Coffee Table Building Guide: From Design to Finished Centerpiece (Advanced Techniques) emphasizes integrating smart features seamlessly.
- Hidden Compartments: Design with precision. Magnetic latches, concealed hinges, and spring-loaded mechanisms can be used for hidden drawers or storage sections. Ensure smooth operation and minimal visual disruption.
- Wireless Charging: Embed Qi charging coils discreetly beneath the tabletop surface. Test for optimal charging range and power delivery through your chosen wood thickness. Plan for power supply routing and ventilation.
- Ambient Lighting: Integrate LED strips into routed channels on the underside of the table or within specific design elements. Use diffusers for a soft, even glow. Consider remote-controlled or app-controlled smart LEDs for dynamic lighting options.
- Cable Management: For any integrated electronics, plan for effective cable routing to keep wires hidden and organized, maintaining a clean aesthetic.
Achieving a Professional Finish
The finish is the protective layer that seals your craftsmanship. For a premium centerpiece, go beyond basic polyurethanes. Refer to warm matte finishes for dining room tables for further inspiration.
- Progressive Sanding: Start with a coarse grit (e.g., 80-100) to remove milling marks, then systematically work through finer grits (120, 150, 180, 220). For exotic woods or high-end finishes, you might go up to 320 or even 400 grit. Sanding between coats is also critical. Learn more about beyond basic sanding achieving a flawless finish with progressive grits and finishing techniques.
- Surface Preparation: After the final sanding, thoroughly clean the surface to remove all dust. A tack cloth or vacuum with a brush attachment works well.
- Stains or Dyes (Optional): If desired, apply a stain or dye to alter the wood’s color. Always test on scrap pieces first.
- Pore Fillers: For open-grain woods (e.g., Ash, Oak, Walnut), a pore filler creates a perfectly smooth, glass-like surface, preventing the finish from sinking into the grain.
- Application Method:
- Hand-rubbed Oils: Linseed oil, Tung oil, or Danish oil penetrate the wood, offering a natural look and feel. They are easy to repair but provide less protection against moisture and scratches.
- Wipe-on Polyurethane/Varnish: A good balance of protection and ease of application. Multiple thin coats are better than a few thick ones.
- Spray Finishes (Lacquers, Conversion Varnishes): For the most durable and professional-looking finish, especially high-gloss, spray application is often preferred. This requires specialized equipment and proper ventilation. These finishes offer superior hardness and chemical resistance.
- Buffing and Polishing: For a high-gloss finish, after the final coat has fully cured, buffing and polishing with fine compounds can create a mirror-like shine.
Conclusion
Building an advanced coffee table is a deeply rewarding endeavor that significantly hones your woodworking skills. From meticulously designing a piece that integrates complex aesthetics and innovative functionalities, to mastering intricate joinery, selecting premium materials, and applying professional-grade finishes, each step contributes to a truly unique and lasting centerpiece. By embracing these advanced techniques, you move beyond mere construction, crafting an heirloom-quality piece that reflects your dedication, artistry, and vision.
Ready to take on your next challenge? Consider exploring further building statement furniture pieces designing and constructing coffee tables benches and console tables that sell for 500 in 2026 or dive into specific project guides like the DIY Coffee Table Building Guide: From 2×4 Sketch To Finished Centerpiece. The journey of transforming raw lumber into a magnificent, functional work of art is one of continuous learning and immense satisfaction.
SEO Meta Title: DIY Coffee Table: Advanced Build Guide & Finishing (2026) SEO Meta Description: Master advanced DIY coffee table building in 2026. This guide covers complex designs, joinery, exotic wood, and professional finishing for a stunning centerpiece.