
The pursuit of clean lines and uncluttered spaces has solidified minimalist design as a dominant aesthetic in contemporary interior décor. Central to achieving this look are storage solutions that appear to defy gravity, blending seamlessly into the architectural fabric of a room. This guide will navigate you through the process of creating stunning DIY Floating Shelves with Hidden Joinery: Modern Minimalist Designs Using Pocket Holes and Floating Brackets, providing the expertise needed to craft functional art that elevates any space in 2026. This approach ensures maximum strength and stability while maintaining an exquisitely minimalist profile.
Key Takeaways
- Hidden Joinery Aesthetics: Floating shelves achieve their minimalist look by concealing all support mechanisms, making them appear to float effortlessly.
- Pocket Hole Advantages: Pocket hole joinery offers a strong, concealed method for assembling the shelf box, providing a clean finish without visible screws.
- Floating Bracket Strength: Robust floating shelf brackets are key to structural integrity, securely anchoring the shelf to wall studs or appropriate drywall anchors.
- Precision is Paramount: Accurate measurements, straight cuts, and careful installation are crucial for a professional-looking, level, and sturdy floating shelf.
- Material Choice Matters: Selecting the right wood or engineered material impacts both the shelf’s aesthetic appeal and its load-bearing capacity.
Understanding the Foundations of DIY Floating Shelves with Hidden Joinery: Modern Minimalist Designs
The allure of floating shelves lies in their visual lightness and the absence of bulky visible supports. This aesthetic is achieved through a combination of thoughtful construction techniques and specialized hardware. For those embarking on DIY Floating Shelves with Hidden Joinery: Modern Minimalist Designs Using Pocket Holes and Floating Brackets, a solid understanding of these foundational elements is essential.
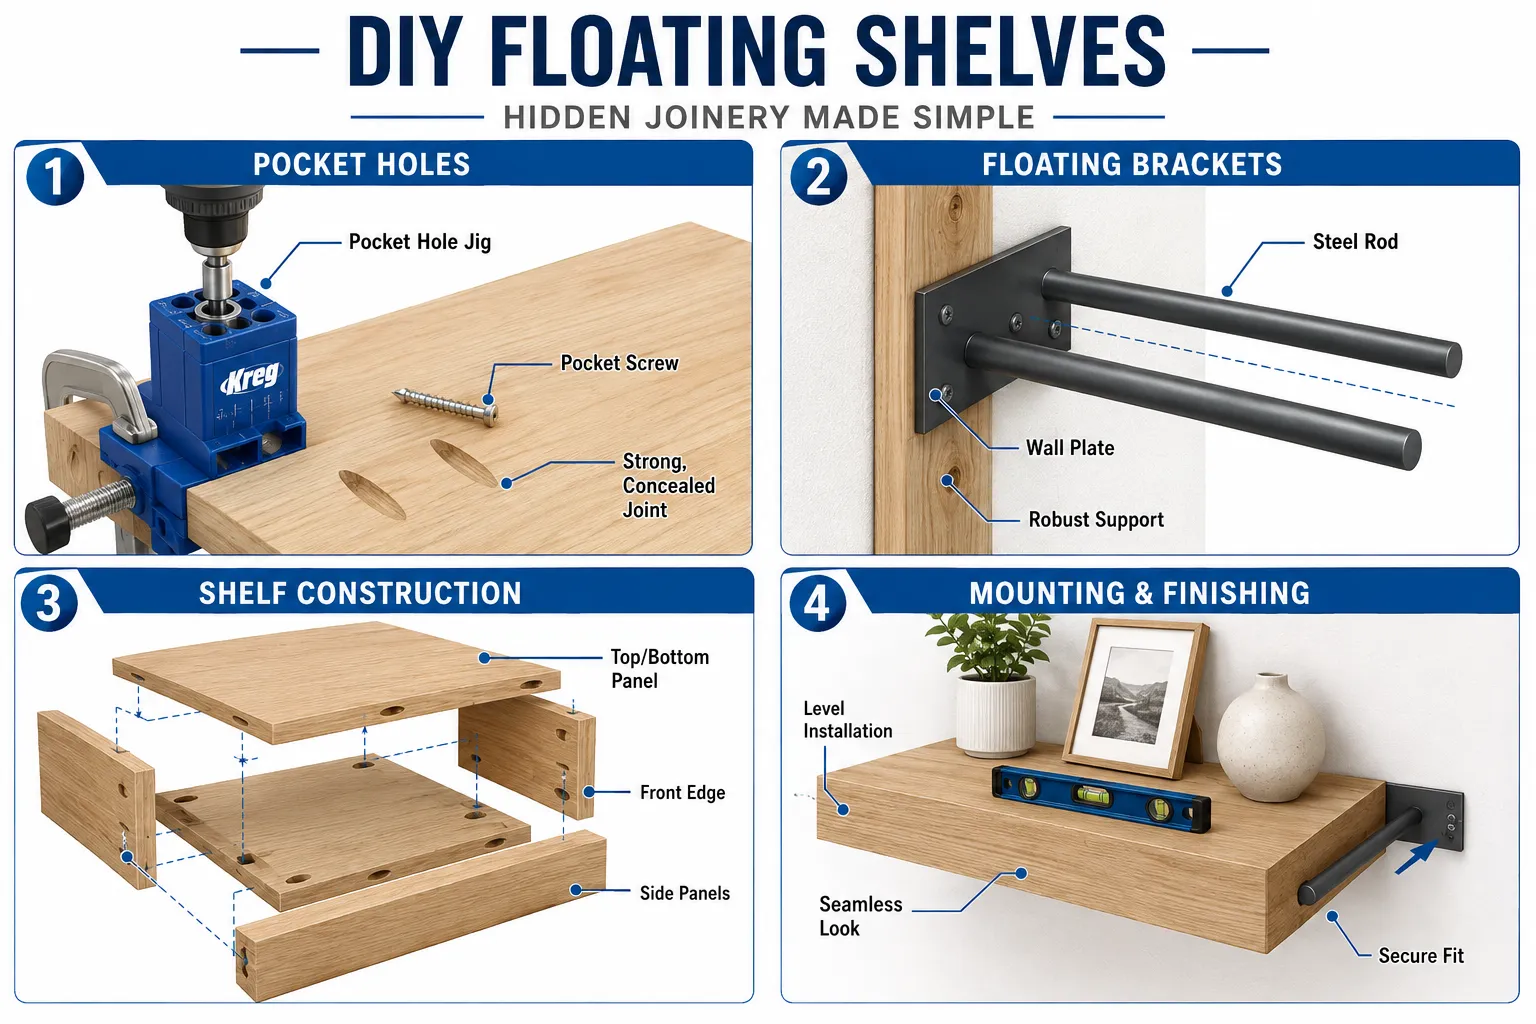
At its core, a floating shelf is typically a hollow box or a solid slab of wood that mounts to a hidden support system. The “hidden joinery” aspect refers to the methods used to both construct the shelf itself and attach it to the wall without any visible fasteners or brackets. This not only enhances the minimalist appeal but also provides a more integrated, custom look.
The Role of Pocket Holes in Shelf Construction
Pocket holes are a game-changer for many DIY woodworkers, offering a strong and simple way to create right-angle joints without complicated traditional joinery. A specialized jig is used to drill an angled hole into one piece of wood, allowing a self-tapping screw to be driven into an adjacent piece. When done correctly, the screw pulls the pieces tightly together, creating a robust joint that is also concealed.
For floating shelves, pocket holes are ideal for assembling the internal frame or box structure. Imagine building a hollow box for your shelf: the top, bottom, and side panels can be joined with pocket holes drilled on the interior surfaces, making the joint invisible once the shelf is assembled. This method is particularly effective for achieving crisp, clean edges that are characteristic of modern minimalist designs. The resulting strength is considerable, especially when combined with a good quality wood glue. For more insights into joinery techniques, explore articles like Introduction To Shaker Furniture Joinery Simplicity Strength And Timeless Design Principles or The Art Of Japanese Wood Joinery For Furniture Master The Beauty Of Mortise And Tenon Dovetail And Halving Joints.
Floating Brackets: The Invisible Backbone
The true magic behind a floating shelf’s ability to “float” is the hidden floating bracket. These brackets typically consist of sturdy metal rods or plates that are securely mounted to the wall. The shelf itself is then designed with corresponding holes or a cavity that slides over these rods or plates, concealing the entire support mechanism within the shelf structure.
There are several types of floating brackets available, each with its own installation requirements and weight capacity:
- Rod-style brackets: These are individual metal rods that screw directly into wall studs. The shelf is drilled with corresponding holes and slides over the rods. Ideal for shelves with moderate depth and length.
- Plate-style brackets: These feature a flat metal plate that mounts to the wall, with multiple rods or arms extending outward. The shelf often has a routed channel or a series of holes to fit over these extensions. These tend to offer greater weight capacity, especially for longer or heavier shelves.
- Heavy-duty steel frameworks: For very long, deep, or exceptionally heavy shelves (e.g., holding a collection of books or heavy pottery), a full steel framework might be concealed within the entire length of the shelf box, providing maximum support.
Choosing the right bracket type is critical and depends on the shelf’s dimensions, intended load, and the wall construction (drywall, plaster, concrete). Always aim to anchor brackets into wall studs for maximum strength, using appropriate heavy-duty anchors if stud mounting isn’t possible. The robust nature of these brackets is what allows for the sleek, unsupported look, and understanding their function is key to building Robust Floating Shelves Power Tool Guide For Warm Minimalism.
Step-by-Step Guide to Constructing DIY Floating Shelves with Hidden Joinery
Building your own DIY Floating Shelves with Hidden Joinery: Modern Minimalist Designs Using Pocket Holes and Floating Brackets is a rewarding project that combines precision woodworking with practical home décor. This detailed guide will walk you through the process, ensuring a sturdy and aesthetically pleasing result.
1. Planning and Material Selection
Before making any cuts, meticulous planning is essential.
- Determine Dimensions: Measure your space carefully. Consider the length, depth, and thickness of your desired shelves. A typical thickness for a visually robust floating shelf is 1.5 to 2.5 inches.
- Choose Wood Type:
- Solid Wood: Hardwoods like oak, maple, walnut, or cherry offer superior strength, durability, and natural beauty. Softwoods like pine are more affordable but may show dents more easily.
- Plywood/MDF: For hollow box construction, high-quality plywood (e.g., Baltic birch) or MDF (medium-density fiberboard) can be used, often faced with veneer or painted for a finished look. Plywood offers good stability, while MDF is very smooth for painting.
- Consider the aesthetic you want to achieve, aligning with a Warm Minimalism In Wood Design Creating Uncluttered Spaces With Substantial Character Rich Materials.
- Select Brackets: Based on your shelf’s dimensions and anticipated load, choose appropriate floating shelf brackets. Ensure they are designed to support the weight you intend to place on the shelves.
- Tools:
- Miter saw or table saw for precise cuts
- Pocket hole jig system (e.g., Kreg Jig)
- Drill/driver
- Level, tape measure, pencil
- Stud finder
- Wood glue
- Clamps
- Sander and sandpaper (various grits)
- Finishing supplies (stain, paint, polyurethane)
2. Cutting and Preparing the Wood
Accuracy in this stage directly impacts the final appearance.
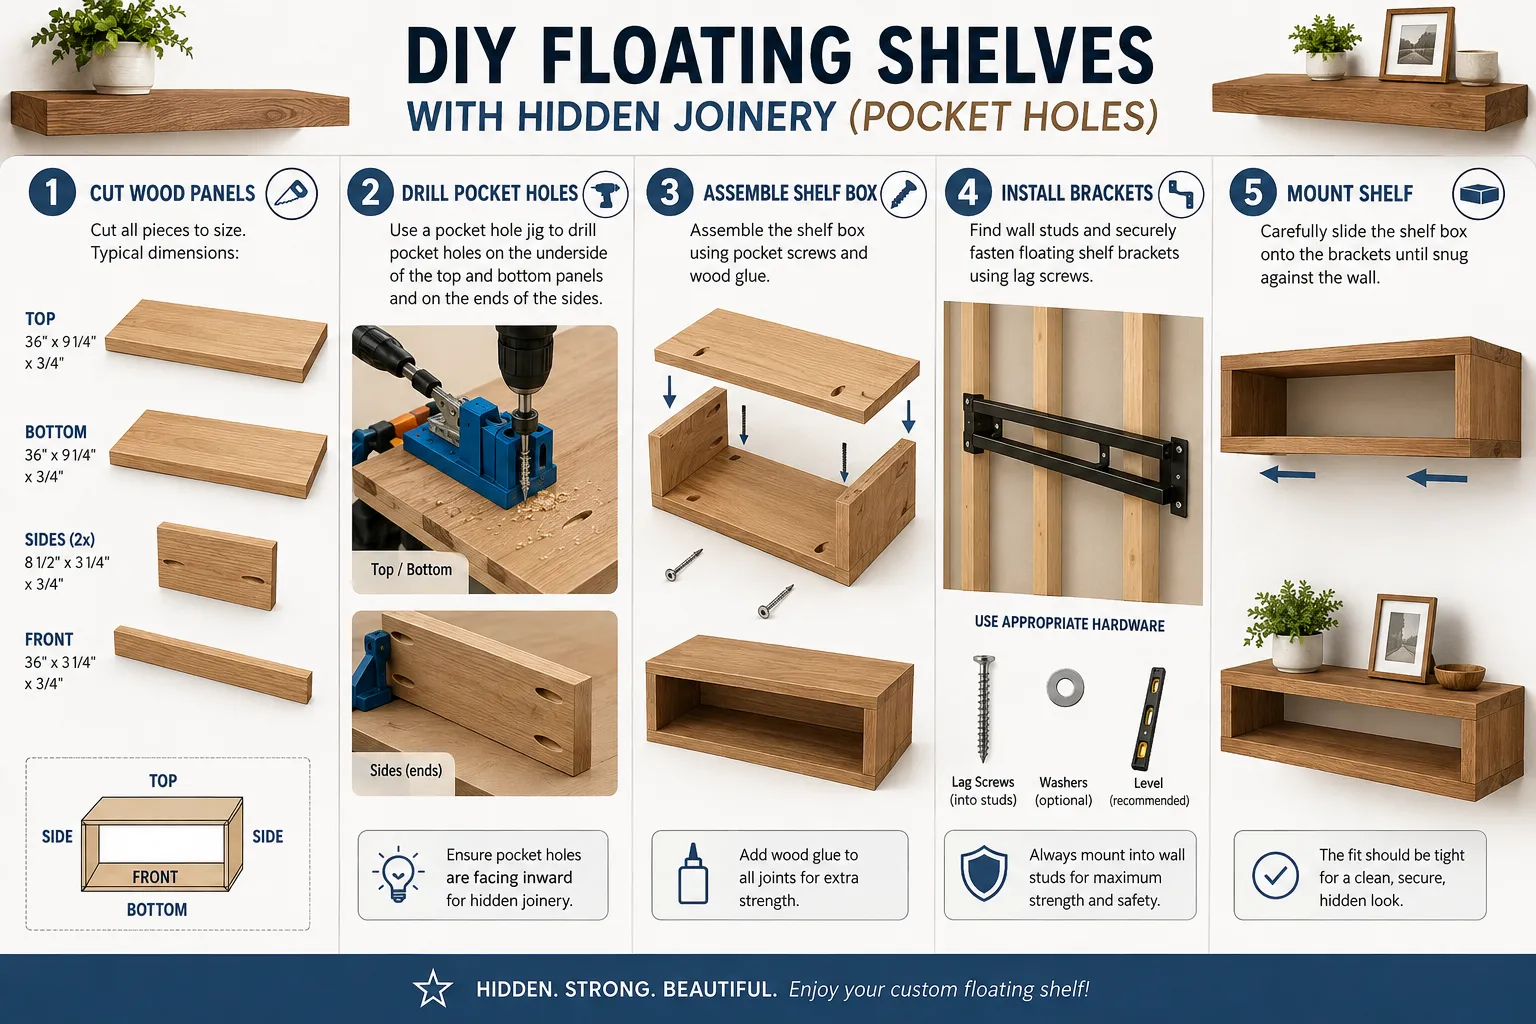
- Cut Shelf Components: For a hollow box shelf, you’ll need:
- Two long panels (top and bottom)
- Two short side panels
- One front edge strip (optional, for a thicker appearance) Using your miter saw or table saw, cut all pieces to your exact dimensions. Ensure all cuts are perfectly square.
- Drill Pocket Holes: Using your pocket hole jig, drill pocket holes on the interior faces of the panels that will form the joints. For instance, drill holes along one long edge of the bottom panel and both short ends of the side panels. Adjust the jig for your wood thickness according to the manufacturer’s instructions.
3. Assembling the Shelf Box
This step uses the hidden joinery to create the shelf structure.
- Dry Fit: Lay out your pieces and perform a dry fit to ensure everything aligns perfectly before applying glue.
- Apply Glue and Assemble: Apply a thin, even coat of wood glue to the mating surfaces. Use appropriate clamps to hold the pieces together while driving the pocket screws. Start by attaching the side panels to the bottom panel, then the top panel. If using a front edge strip, attach it last using pocket holes on its back face.
- Tip: Ensure your screws are the correct length for your wood thickness to avoid piercing through the exterior.
- For guidance on adhesive, refer to The Ultimate Guide To Choosing And Using Wood Glues Types Strengths And Best Practices For Lasting Joints.
- Wipe Excess Glue: Immediately wipe away any squeeze-out glue with a damp cloth. Dried glue will prevent stain or paint from absorbing evenly.
- Allow to Cure: Let the glue cure completely according to the manufacturer’s instructions, typically 24 hours, before proceeding.
4. Preparing the Shelf for Brackets
This step ensures the shelf can slide onto the hidden supports.
- Measure and Mark: Carefully measure and mark the exact locations for the bracket rods or plates on the back of your assembled shelf box. If using rod-style brackets, ensure the holes are precisely aligned and spaced to match the bracket spacing.
- Drill or Route Holes:
- For rod-style brackets: Use a drill bit slightly larger than the diameter of your bracket rods to drill corresponding holes into the back of the shelf box. Drill deep enough so the shelf can fully seat against the wall. A drill press can help ensure perfectly straight holes.
- For plate-style brackets: You may need to route a channel or series of recesses into the back of the shelf to accommodate the bracket’s plate and arms. A router with the appropriate bit is necessary here. Mastery of a router table can greatly assist in this step; see Mastering The Router Table Beyond Edge Profiling For Advanced Joinery And Precision Cuts.
- Test Fit: Always test fit the shelf onto the brackets before finishing. This allows for any necessary adjustments.
5. Sanding and Finishing
The finish defines the aesthetic of your minimalist design.
- Sanding: Start with a coarser grit sandpaper (e.g., 80 or 100) to smooth any imperfections, then progress through finer grits (150, 220) for a silky-smooth surface.
- Clean: Remove all dust with a tack cloth or vacuum.
- Apply Finish: Apply your chosen finish according to the product instructions. This could be wood stain followed by polyurethane, paint, or a natural oil finish. For an eco-conscious approach, consider Natural Wood Finishing Without Chemicals Plant Based Stains Oils And Protective Coatings For Health Conscious Makers And Eco Conscious Buyers. Apply multiple thin coats, sanding lightly between coats if recommended.
6. Wall Installation
This is where your hidden joinery truly comes to life.
- Locate Studs: Use a stud finder to locate and mark the wall studs where your shelf will be installed. This is crucial for maximum weight capacity.
- Mark Bracket Positions: Hold your finished shelf against the wall at the desired height and use a level to ensure it’s straight. Mark the exact locations where your floating brackets need to be installed, ensuring they align perfectly with the holes/channels in your shelf.
- Install Brackets: Securely mount the floating brackets to the wall studs using the appropriate screws. Use a level at every step to ensure the brackets are perfectly horizontal and properly spaced.
- Mount Shelf: Carefully slide the finished shelf onto the installed brackets. It should fit snugly. If it’s too tight, slightly enlarge the holes/channels. If too loose, you may need to add shims or adjust the bracket fit.
With these steps, your DIY Floating Shelves with Hidden Joinery: Modern Minimalist Designs Using Pocket Holes and Floating Brackets will be ready to display your favorite items, enhancing your space with a touch of modern elegance.
Embracing Modern Minimalist Design with DIY Floating Shelves
The essence of modern minimalist design lies in functionality, simplicity, and a deliberate absence of clutter. DIY Floating Shelves with Hidden Joinery: Modern Minimalist Designs Using Pocket Holes and Floating Brackets perfectly embody these principles, offering versatile storage and display solutions that enhance a room’s aesthetic without overpowering it. In 2026, home decor trends continue to favor clean lines and purposeful design, making these shelves a popular and timeless choice.
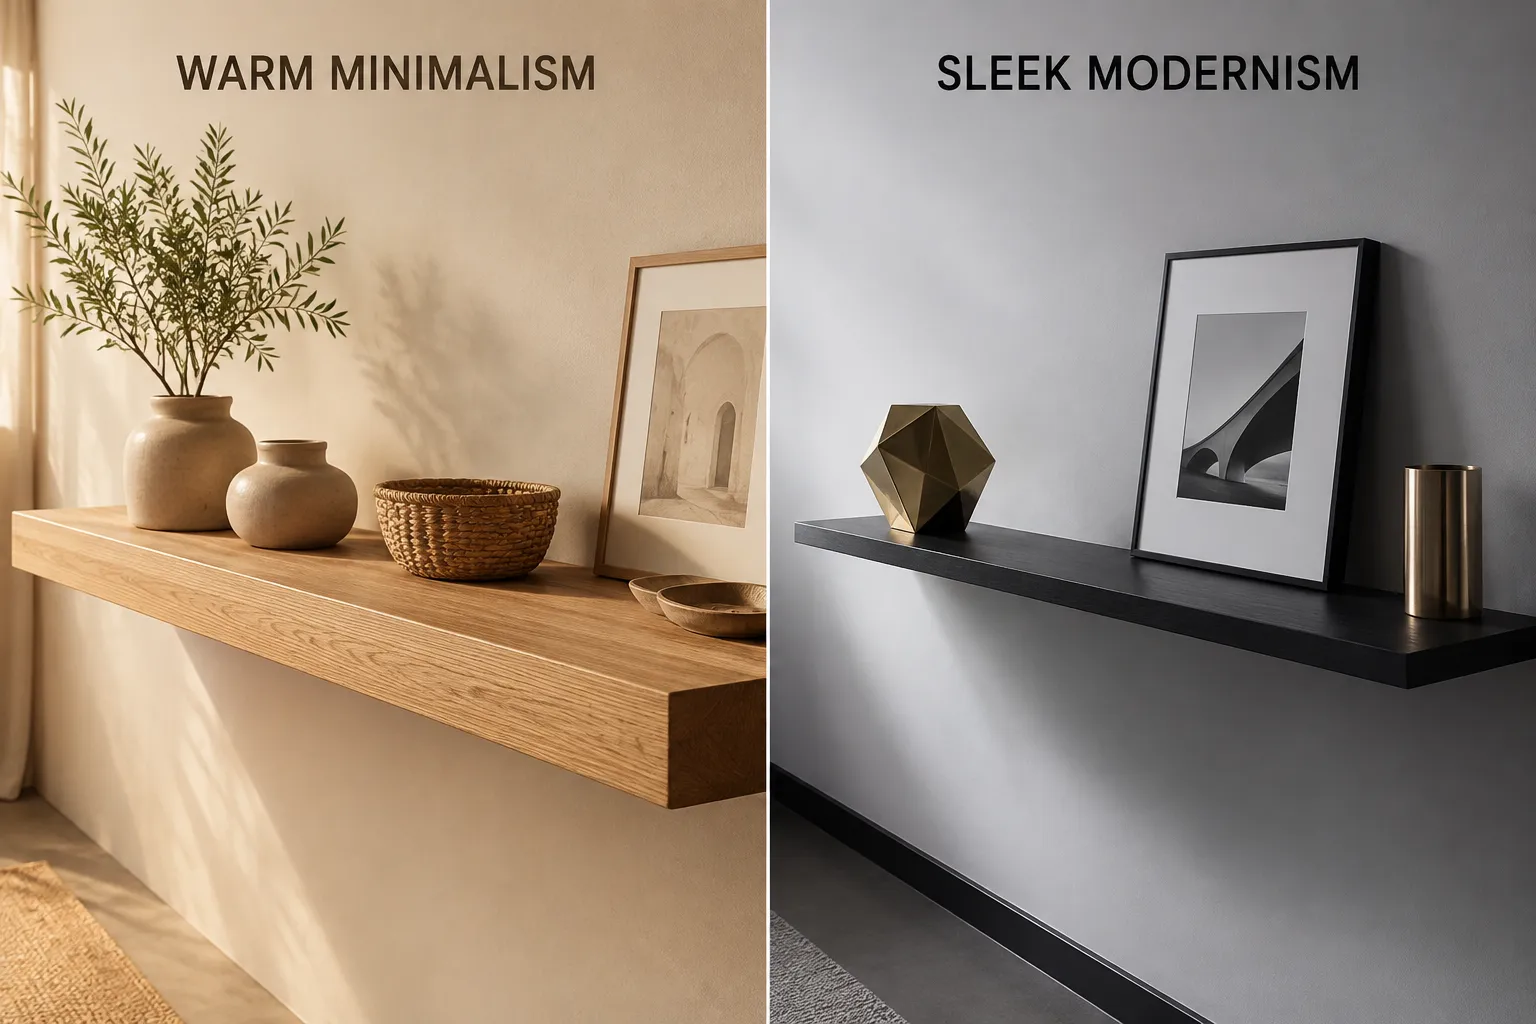
These shelves are more than just practical; they are design statements. By eliminating visible supports, they create an illusion of lightness, allowing the objects displayed on them, or the wall itself, to become the focal point. This contributes to an open, airy feel that is characteristic of minimalist interiors.
Integrating Floating Shelves into Various Spaces
The adaptability of floating shelves makes them suitable for almost any room in the house:
- Living Rooms: Showcase curated art pieces, small plant arrangements, or a selection of aesthetically pleasing books. Longer, lower shelves can complement a media console, while vertical arrangements add architectural interest.
- Bedrooms: Serve as sleek bedside tables (see Crafting Custom Floating Nightstands Modern Bedroom Storage With Hidden Features) or provide minimalist display space for personal items. Their unobtrusive nature helps maintain a serene sleeping environment.
- Kitchens: Replace upper cabinets for an open, contemporary look, displaying dishes, spices, or decorative items. Choose durable, easy-to-clean finishes.
- Bathrooms: Offer practical storage for towels, toiletries, and decorative elements, making small spaces feel larger and more organized.
- Home Offices: Keep workspaces tidy by providing discreet storage for books, documents, or decorative items, promoting a focused and uncluttered environment. Consider how these shelves could complement Custom Wood Charging Stations And Desk Organizers Blending Modern Tech With Timeless Craftsmanship.
Customization and Personalization
One of the greatest advantages of DIY projects is the ability to customize every aspect to your exact specifications.
- Dimensions: Tailor the length, depth, and thickness to perfectly fit your space and needs. A row of shallow shelves can be ideal for displaying small collectibles, while a deep, single shelf might serve as a floating desk.
- Wood Type and Finish: Experiment with different wood species for distinct grain patterns and colors. From a rustic live-edge look (explore DIY live-edge ‘narrative’ furniture builds like coffee tables and) to a smooth, painted finish that matches your wall color, the possibilities are vast.
- Arrangement: Play with various configurations, symmetrical rows for a classic look, staggered arrangements for a dynamic display, or even corner installations to maximize unused space.
- Lighting: Integrate subtle LED strip lighting into the underside of your shelves for an added layer of sophistication and mood lighting, further enhancing the “floating” effect. This can also tie into Diy Smart Home Integration With Custom Woodwork Hiding Tech With Style.
By embracing the principles of minimalist design and leveraging the precise techniques of hidden joinery and robust floating brackets, you can create shelves that are not only functional but also works of art, transforming your living spaces with elegance and personal style.
Conclusion
Creating DIY Floating Shelves with Hidden Joinery: Modern Minimalist Designs Using Pocket Holes and Floating Brackets is a project that delivers significant aesthetic and functional value. The seamless integration and clean lines achieved through hidden joinery methods, like pocket holes for internal construction and robust floating brackets for wall attachment, provide a sophisticated, custom look that aligns perfectly with modern minimalist design principles.
The process, while requiring precision and attention to detail, is well within the capabilities of most DIY enthusiasts. By carefully planning, selecting appropriate materials, employing accurate cutting and assembly techniques, and ensuring secure installation, you can craft durable and visually striking shelves that appear to float effortlessly. These shelves offer versatile storage and display solutions, capable of transforming any room by enhancing its openness and reducing visual clutter.
For your next woodworking endeavor, consider the elegance and practicality of these hidden-joinery floating shelves. They are a testament to how thoughtful design and careful execution can elevate everyday spaces into expressions of personal style and modern sophistication.
Next Steps:
- Assess Your Needs: Determine where floating shelves would best serve your home and what items they will hold.
- Gather Materials: List all necessary wood, brackets, and finishing supplies.
- Practice Cuts: If new to woodworking, practice your cuts and pocket hole techniques on scrap wood.
- Start Small: Begin with a smaller, simpler shelf if it’s your first time, then progress to larger, more complex designs.
- Share Your Creation: Once complete, share your finished project and inspire others!
SEO Meta Title: DIY Floating Shelves: Hidden Joinery for Modern Minimalism SEO Meta Description: Learn to build DIY floating shelves with hidden joinery in 2026. Master pocket holes & floating brackets for sleek, modern minimalist designs.