

The persistent hum of a portable air conditioner often drowns out the satisfying whir of a planer or the precise cut of a saw blade in a small workshop. More than just a nuisance, an exposed portable AC unit can be an inefficient, dust-collecting eyesore that takes up valuable floor space and disrupts workflow. This article will guide you through constructing a DIY Portable AC Wooden Enclosure for a Small Workshop: Build a Ventilated Cover That Looks Good and Cools Better, transforming a functional necessity into an integrated, efficient, and aesthetically pleasing component of your workspace. By carefully considering ventilation, noise reduction, and dust management, you can create an enclosure that not only cools more effectively but also contributes to a cleaner, more organized, and quieter woodworking environment.
Key Takeaways
- A custom wooden enclosure significantly improves portable AC efficiency and workshop aesthetics.
- Proper ventilation design is critical to prevent overheating and ensure optimal cooling performance.
- Integrating sound dampening materials can drastically reduce operational noise from the AC unit.
- The enclosure can double as a dust barrier, keeping AC internals cleaner and improving workshop air quality.
- Consider mobility and access for maintenance during the design and build process.
Why a DIY Portable AC Wooden Enclosure is a Workshop Upgrade
Many small workshop owners grapple with temperature control, especially during warmer months. Portable air conditioning units offer a flexible solution, but they often come with drawbacks: they’re loud, they gather dust easily, and their industrial appearance can clash with a carefully curated workspace. Building a DIY Portable AC Wooden Enclosure for a Small Workshop: Build a Ventilated Cover That Looks Good and Cools Better addresses these issues head-on.
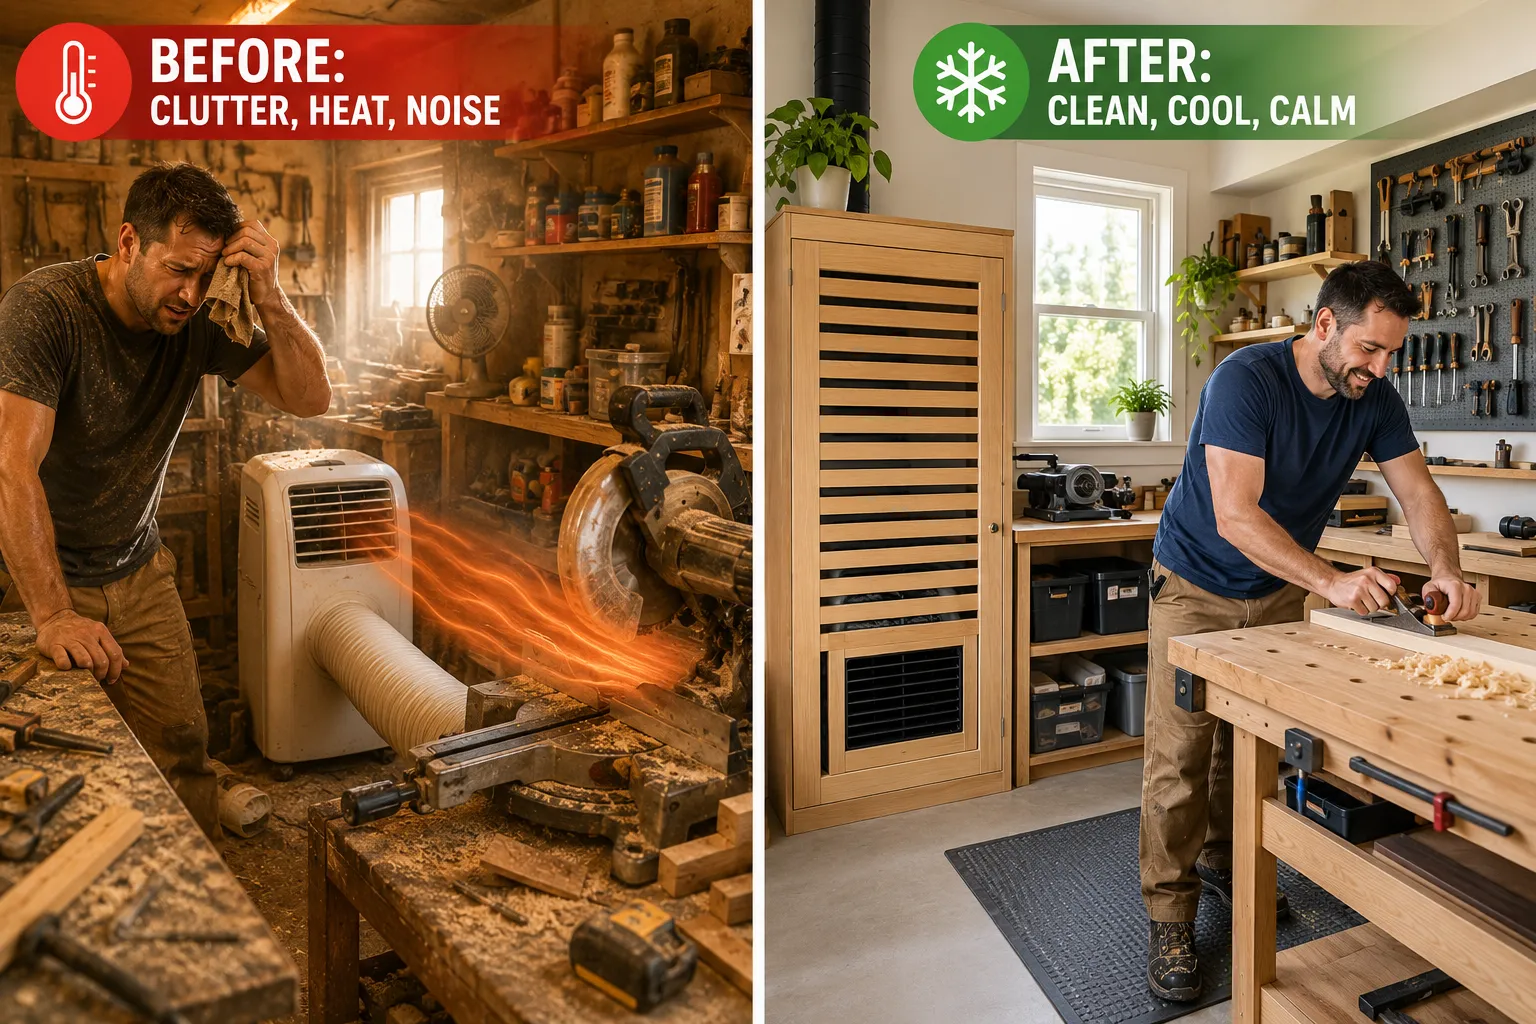
A custom enclosure provides several distinct advantages:
- Improved Aesthetics: It transforms an unsightly appliance into a piece of workshop furniture. You can choose wood species, finishes, and design elements that complement your existing setup. Imagine a sleek, natural wood cabinet rather than a plastic box.
- Enhanced Cooling Efficiency: By creating dedicated intake and exhaust pathways, the enclosure can optimize airflow, preventing recirculation of hot air and ensuring the AC unit operates at peak efficiency. This means a cooler workshop with less energy waste.
- Significant Noise Reduction: Wood and carefully chosen insulation materials can absorb and block much of the noise generated by the AC compressor and fan. This is a major benefit in a small workshop where acoustics can make power tool operation even more challenging.
- Superior Dust Protection: Workshops are inherently dusty environments. An enclosure acts as a barrier, shielding the AC unit’s sensitive internal components from fine sawdust and woodchips. This prolongs the life of your unit and maintains its efficiency. For comprehensive dust management, consider integrating the enclosure design with a broader DIY dust collection system for a small workshop.
- Space Optimization: A well-designed enclosure can integrate the AC unit seamlessly into your workshop layout. It can be built with a flat top surface, turning otherwise wasted space into an additional temporary workspace or storage area. This aligns perfectly with principles of efficient small workshop layouts for 2026 where every inch counts.
- Increased Safety: Encasing the unit can protect it from accidental bumps and splashes, especially important in a busy workshop environment.
Designing Your Ventilated AC Enclosure: Key Considerations
The success of your DIY Portable AC Wooden Enclosure for a Small Workshop: Build a Ventilated Cover That Looks Good and Cools Better hinges on careful planning and design. Neglecting critical factors like airflow can lead to an overheated unit and diminished cooling capacity.
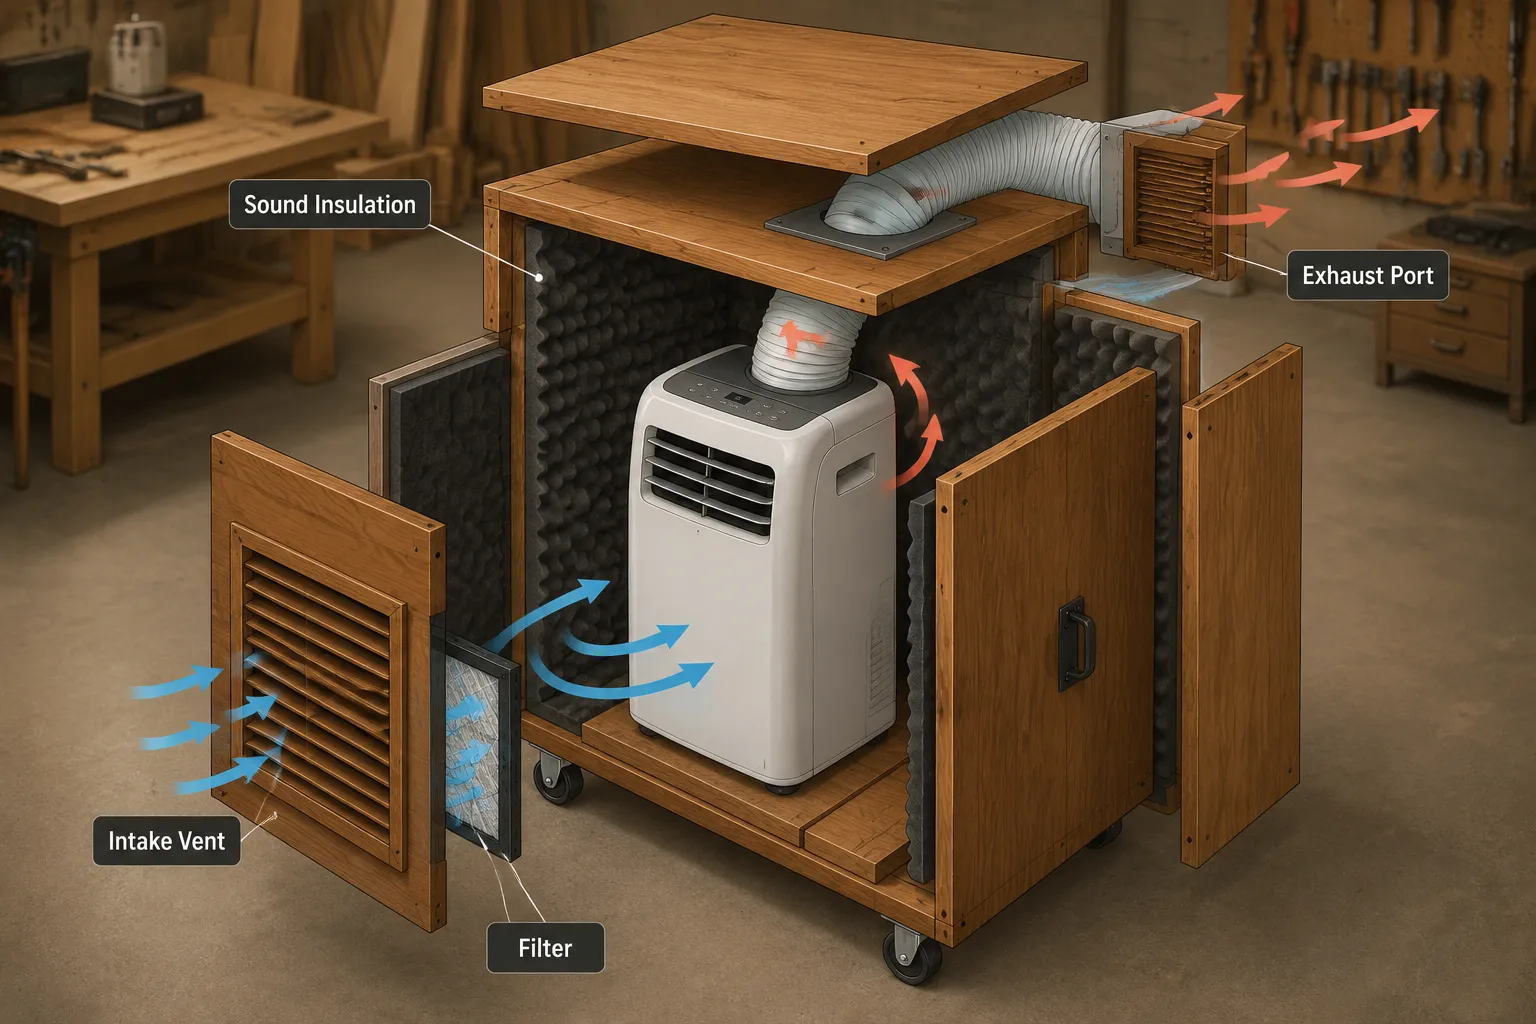
Before you even grab a saw, measure your portable AC unit meticulously. Account for its height, width, depth, and crucially, the location of its air intake and exhaust vents. Most portable AC units draw air from the back or sides and exhaust hot air through a flexible duct that typically vents out a window. Your enclosure must accommodate these existing features without restricting them.
Ventilation is Paramount
The primary function of a portable AC unit is to move heat. Your enclosure must facilitate this process, not hinder it.
- Air Intake: Design large, unobstructed intake grilles near the bottom of the enclosure, preferably on multiple sides, to draw in ambient room air. Consider using slatted designs or perforated metal sheets for aesthetics and airflow. Integrating a simple, replaceable filter (like furnace filter material) at the intake can help keep the AC unit clean.
- Hot Air Exhaust: The enclosure must provide a clear, airtight pathway for the AC’s exhaust hose to exit the workshop. This usually means a sealed opening in the enclosure that connects to a window or wall vent. Minimize bends and length of the exhaust hose for optimal performance.
- Internal Air Circulation: Ensure there’s adequate space (at least 2-3 inches on all sides) around the AC unit inside the enclosure for air to circulate freely. Overheating is a major concern; insufficient internal circulation will defeat the purpose of the enclosure.
Noise Reduction Strategies
While an enclosure can naturally dampen some sound, strategic additions will make a significant difference.
- Mass and Density: Use dense wood like plywood or MDF for the enclosure walls.
- Insulation: Line the interior walls, top, and bottom of the enclosure with sound-absorbing materials. Acoustical foam panels, mass loaded vinyl, or even thick felt can be effective. Ensure these materials do not block any vents or come into contact with heat-generating components.
- Isolation: Place rubber feet or vibration-dampening pads under the AC unit inside the enclosure to reduce structure-borne noise transmission.
Material Selection
Choosing the right materials balances durability, aesthetics, and cost.
- Plywood/MDF: Excellent choices for the main structure. Plywood offers strength and screw-holding ability, while MDF provides a very smooth finish.
- Solid Wood: Can be used for decorative elements, trim, or if you prefer a more traditional look. Remember wood movement if building with solid panels.
- Vent Grilles: Wood slats, decorative metal grilles, or even perforated hardboard can be used for intake and exhaust openings.
- Finishing: A good quality wood finish not only protects the wood but also enhances its appearance. For interior workshop items, consider durable finishes that withstand dust and minor impacts, similar to those used for building a custom wooden enclosure for your Stihl chainsaw.
Access and Mobility
Consider how you will access the AC unit for filter cleaning, maintenance, or moving it.
- Hinged Panels: A hinged top or side panel allows easy access to controls and for cleaning.
- Casters: Adding heavy-duty locking casters makes the enclosure mobile, allowing you to move the AC unit as needed within the workshop or to another location. This adds to the overall functionality of the DIY Folding and Expandable Work Tables many small workshops employ.
Building Your Enclosure: Step-by-Step Guide (2026 Focus)
With a solid design in hand, it’s time to build your DIY Portable AC Wooden Enclosure for a Small Workshop: Build a Ventilated Cover That Looks Good and Cools Better. This guide assumes basic woodworking skills and tools.
1. Cut the Panels
Based on your design, accurately cut all the main panels (front, back, sides, top, bottom) from your chosen sheet goods (plywood or MDF). Use a table saw for precise, straight cuts. Remember to account for material thickness if using rabbet or dado joinery.
2. Create Ventilation Openings
- Intake Grilles: Cut openings for your intake grilles on the sides and/or front panels. Use a jigsaw or router for clean edges. If using wood slats, cut and assemble them into a frame.
- Exhaust Port: Cut a circular opening in the back panel for the AC unit’s exhaust hose to pass through. The diameter should match your exhaust hose. A flange or collar around this opening will create a seal when the hose is installed.
3. Assemble the Carcass
Assemble the side, front, and back panels to the base using your preferred joinery (e.g., screws and glue, dado joints, pocket holes). Ensure the assembly is square and sturdy. If you plan for a hinged top, secure only the bottom and sides initially.
4. Integrate Sound Dampening
Line the interior surfaces of the enclosure with your chosen sound-absorbing material. Cut the material to fit precisely and adhere it securely using spray adhesive or construction adhesive. Ensure no material blocks the airflow pathways or comes into contact with the AC unit’s heat exchanger.
5. Construct the Top and Access Panel
- If your design includes a flat, fixed top, attach it securely to the assembled carcass.
- If you’re building a hinged access panel, attach hinges to the top and corresponding side/back panel. Add a small handle or pull for easy opening. Magnetic catches can help keep it securely closed.
6. Add Mobility (Optional)
Attach heavy-duty locking casters to the bottom of the enclosure. Ensure they are rated to support the weight of the enclosure plus the AC unit.
7. Finishing Touches
- Sanding: Sand all exterior surfaces smooth, progressing through grits (e.g., 80, 120, 180, 220) to prepare for finishing.
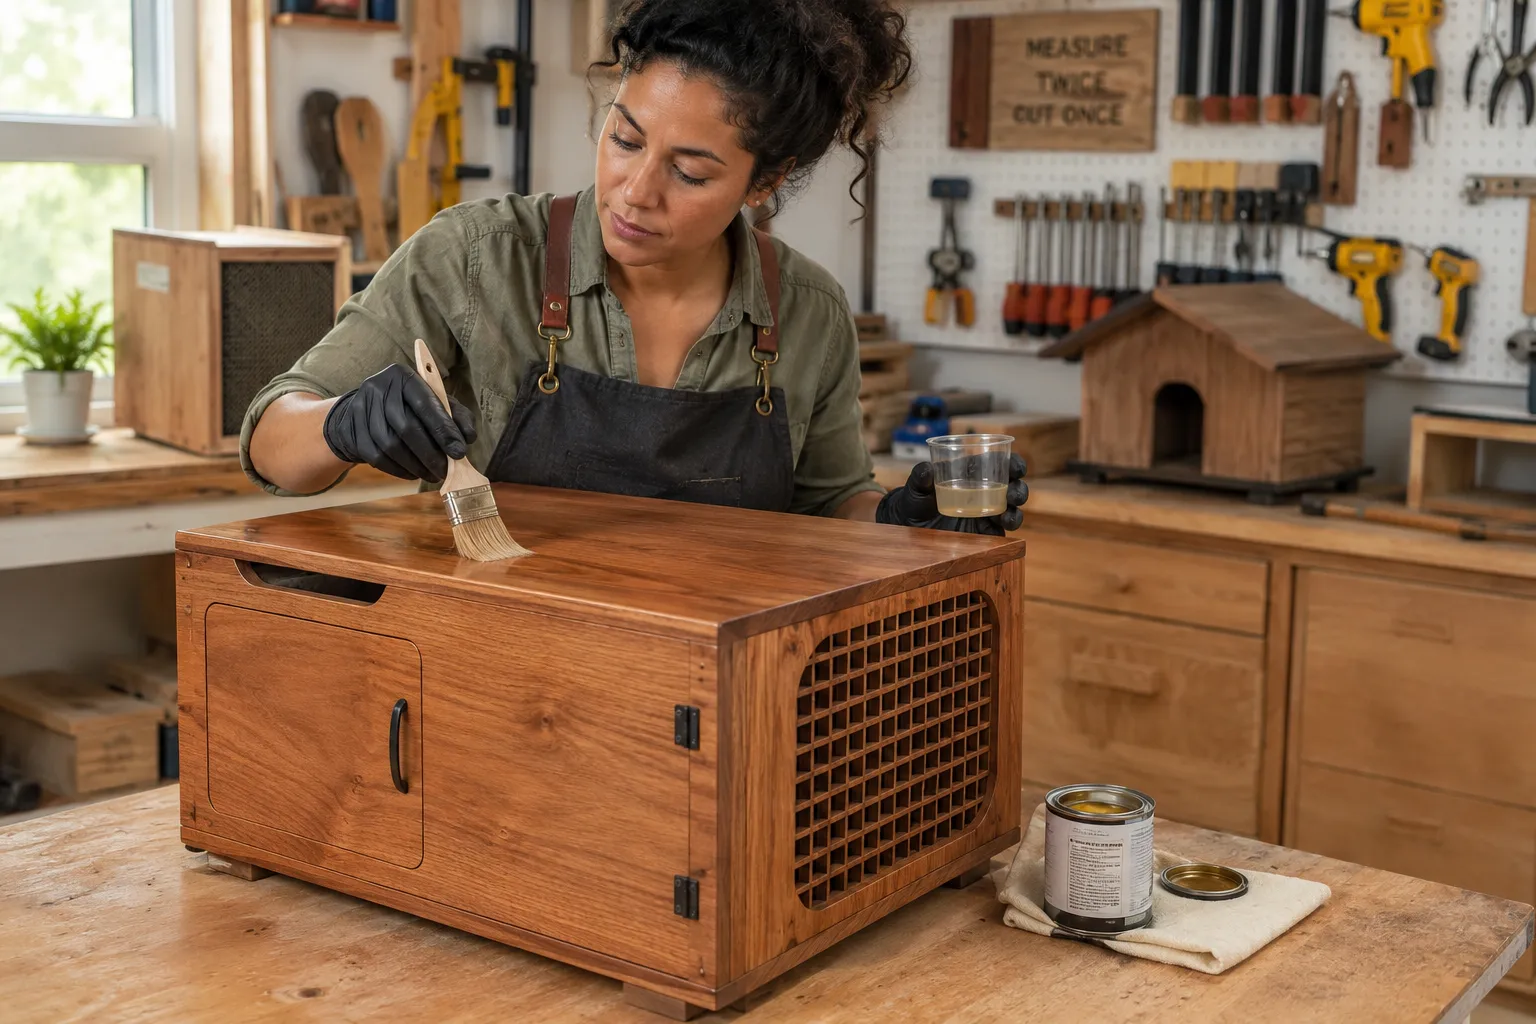
- Finishing: Apply a durable finish. Options include clear polyurethane for natural wood beauty, paint to match your workshop aesthetic, or a stain followed by a protective topcoat. Consider mastering wood finishing with oil-based products for a deep luster and robust protection.
- Install Grilles and Hardware: Attach your intake grilles and any remaining hardware (handles, catches).
8. Install the AC Unit
Carefully place your portable AC unit inside the finished enclosure. Connect the exhaust hose to the enclosure’s exhaust port, ensuring a tight seal to prevent hot air from escaping back into the workshop. Run the power cord through a small, drilled hole in the back or bottom, ensuring it doesn’t get pinched.
9. Test and Adjust
Turn on the AC unit and monitor its performance. Check for any hot spots around the enclosure, indicating inadequate ventilation. Listen for excessive vibration or rattling. Make any necessary adjustments to airflow or sound dampening.
Conclusion
Transforming a utilitarian portable air conditioner into an integrated, efficient, and aesthetically pleasing element of your workspace is a highly rewarding project. Building a DIY Portable AC Wooden Enclosure for a Small Workshop: Build a Ventilated Cover That Looks Good and Cools Better not only addresses the immediate need for cooling but also contributes significantly to overall workshop organization, noise reduction, and dust management. In 2026, a well-designed workshop prioritizes both function and comfort, allowing you to focus on your craft without distraction. By carefully planning your ventilation, selecting appropriate materials, and executing a thoughtful design, you can achieve a cooler, quieter, and more visually appealing workshop where creativity can truly flourish.
Next Steps:
- Measure and Sketch: Start by taking precise measurements of your portable AC unit and sketching several enclosure designs that fit your workshop layout.
- Material Sourcing: Compile a cutting list and source your preferred wood, sound dampening materials, and hardware.
- Build Smart: Follow the step-by-step guide, prioritizing ventilation and safety at every stage.
- Enjoy the Comfort: Relish a cooler, quieter, and more organized workshop, ready for your next project.
SEO Meta Title: DIY Portable AC Enclosure for Workshop: Cool & Quiet SEO Meta Description: Build a DIY portable AC wooden enclosure for your small workshop in 2026. Get better cooling, less noise, and dust protection with this guide.