
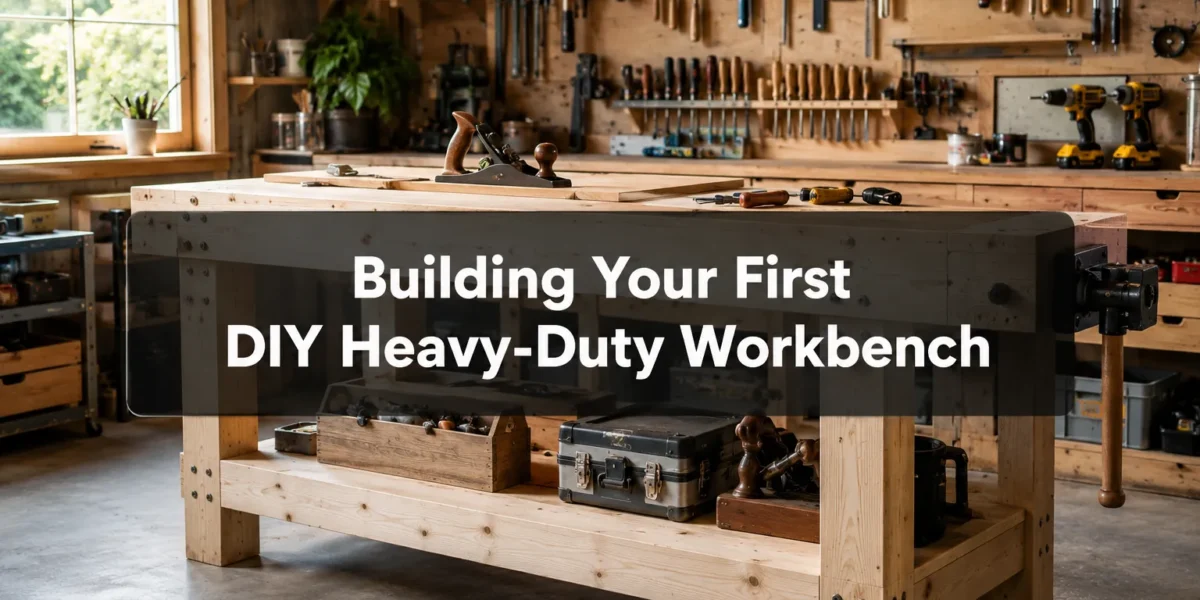
The average home workshop often begins with a flimsy, store-bought workbench that wobbles under the lightest pressure, betraying the very purpose of a stable work platform. Instead, imagine confidently tackling robust joinery, precise planing, and heavy assembly on a bench so solid it feels like an extension of the earth itself. This guide on Building Your First DIY Heavy-Duty Workbench: A Step-by-Step Guide to Roubo and Nicholson Styles will show you how to construct such a foundational piece using readily available construction lumber, empowering you with a stable platform for all future projects in 2026.
Key Takeaways
- Foundation First: A heavy-duty workbench is the bedrock of any serious woodworking, providing stability essential for accurate and safe operations.
- Roubo vs. Nicholson: Understand the distinct advantages of the Roubo (massive, leg vises, split top) and Nicholson (simpler, face/end vises, dog holes) styles to choose the best fit for your needs.
- Construction Lumber Advantage: Both workbench styles can be built affordably and effectively using readily available dimensional lumber like Douglas fir or Southern Yellow Pine.
- Precision is Paramount: While robust, success hinges on careful measuring, cutting, and joining to ensure a flat, square, and stable bench.
- Essential Tool Integration: Vises, dog holes, and planing stops are critical features that transform a heavy slab of wood into a functional work-holding marvel.
Choosing Your Heavy-Duty Workbench Style: Roubo or Nicholson
{{IMG_SLOT_1}}
When considering Building Your First DIY Heavy-Duty Workbench: A Step-by-Step Guide to Roubo and Nicholson Styles, the choice between these two classic designs often comes down to a balance of complexity, cost, and specific workholding preferences. Both offer exceptional stability, but they achieve it through different structural approaches and feature sets.
The Roubo Workbench: A Legacy of Mass and Stability
The Roubo workbench, named after André-Jacob Roubo from his 18th-century work L’Art du Menuisier, is renowned for its sheer mass and robust construction. Its defining characteristic is the thick, laminated top and massive legs, often connected through oversized mortise and tenon joinery. This design prioritizes inertia, making it exceptionally stable for heavy hand-tool work like planing, chopping mortises, or heavy pounding.
Key Features of a Roubo:
- Massive Top: Typically 3-4 inches thick, laminated from multiple boards, providing incredible resistance to deflection and vibration.
- Heavy Legs: Often 4×4 or 6×6 inches, directly integrated into the benchtop through through-mortises or housed into the top.
- Leg Vise: A prominent feature, offering powerful clamping pressure across the entire height of the leg.
- Holdfast Holes: Strategically placed holes in the top and sometimes legs for quick, versatile workholding with holdfasts.
- Optional Split Top: Some Roubo designs feature a split top, allowing for a planing stop or a gap to clamp workpieces vertically.
Pros and Cons of a Roubo:
| Feature | Pros | Cons |
|---|---|---|
| Stability | Unmatched, ideal for heavy hand tool use. | Can be difficult to move. |
| Workholding | Powerful leg vise, versatile holdfasts. | Vises can be more complex to build/install. |
| Construction | Extremely durable, heirloom quality. | Requires substantial lumber, can be more complex joinery. |
| Cost | Higher material cost due to volume of lumber. | |
| Workshop Space | Takes up significant space due to its heft. |
For woodworkers prioritizing ultimate stability and heirloom quality, the Roubo is an excellent choice. It excels in traditional hand-tool applications and can withstand decades of heavy use.
The Nicholson Workbench: Elegant Simplicity and Versatility
The Nicholson workbench, often attributed to the 19th-century British woodworker James Nicholson, presents a simpler, yet highly effective design. Its strength comes from a clever apron system that stiffens a lighter top and legs. This style is quicker to build and requires less material, making it an excellent option for a first heavy-duty workbench.
Key Features of a Nicholson:
- Apron System: A sturdy perimeter apron surrounds the top, providing rigidity without needing a super-thick laminated slab.
- Overhanging Top: The top often overhangs the apron, allowing for easy clamping of workpieces.
- Dog Holes: A series of holes in the top and front apron for use with bench dogs and planing stops.
- Simpler Vises: Typically uses a simple face vise and/or an end vise, often store-bought or easily constructed.
- Lighter Construction: While still heavy-duty, it uses less material than a Roubo, making it somewhat more portable.
Pros and Cons of a Nicholson:
| Feature | Pros | Cons |
|---|---|---|
| Stability | Very stable for most woodworking tasks, good vibration dampening. | Not as monolithic as a Roubo for extreme hand planing. |
| Workholding | Versatile dog holes, easy clamping with overhang. | Face/end vises may not offer the same power as a leg vise. |
| Construction | Simpler, faster build, less complex joinery. | Still requires accurate construction. |
| Cost | Lower material cost due to less lumber. | |
| Workshop Space | More adaptable to smaller spaces due to lighter footprint (relatively). |
The Nicholson workbench is a highly practical and accessible option. It offers excellent performance for a wide range of woodworking tasks and is often recommended for those taking on their first major workbench build. If you need a more space-saving option for your workshop, you might also consider a DIY Folding Work Table.
Step-by-Step Construction with Construction Lumber
{{IMG_SLOT_2}}
Building Your First DIY Heavy-Duty Workbench, whether a Roubo or Nicholson, becomes significantly more accessible and affordable when utilizing construction lumber. Dimensional lumber like 2x4s, 2x6s, or 2x8s (e.g., Douglas fir, Southern Yellow Pine) is readily available, strong, and can be laminated to achieve the required thickness for a robust workbench.
Before you begin, ensure you have the necessary DeWalt Power Tools for Your Woodworking Workshop or other quality tools. Remember to follow Essential Safety Practices for Power Tools in the Home Workshop throughout the build.
1. Lumber Selection and Preparation
The success of your heavy-duty workbench starts with good lumber.
- Choose Wisely: Select straight, dry boards with minimal knots, twists, or cups. Construction lumber often has rounded edges (e.g., “radiused edges”); you’ll need to mill these flat and square.
- Dimensioning: If possible, joint and plane your lumber to consistent thicknesses and square edges. This step is critical for strong glue-ups. If you don’t have a jointer/planer, a router sled can help flatten boards. Consider using essential jigs for accurate crosscuts for precise cuts.
- Cut List: Develop a detailed cut list based on your chosen workbench plans. Standard workbench dimensions are around 24-30 inches deep, 60-84 inches long, and 34-38 inches high (depending on your height).
2. Building the Workbench Top (Lamination)
The top is the heart of a heavy-duty workbench.
Roubo Top: For a Roubo, you’ll laminate multiple boards face-to-face to achieve a thickness of 3-4 inches.
- Glue-up Strategy: Arrange your milled boards, alternating growth rings to minimize warping. Apply a generous, even layer of quality wood glue (e.g., Titebond II or III) to mating surfaces.
- Clamping: Clamp the boards tightly together, both horizontally and vertically, to ensure no gaps. Use cauls (sacrificial boards clamped across the top and bottom) to help keep the lamination flat during drying.
- Flattening: Once dry (24 hours), the laminated slab will need to be flattened. This can be done with a hand plane, a router sled, or a large planer. Achieving a perfectly flat surface is crucial.
Nicholson Top: A Nicholson top is generally lighter, often 2-2.5 inches thick, but still benefits from lamination for stability. The process is similar to the Roubo top but with fewer layers.
3. Constructing the Base
The base provides the support and determines the overall rigidity of the bench.
- Legs:
- Roubo: Legs are typically very substantial (e.g., 4×4 or 6×6 stock), often laminated from two or three pieces of construction lumber. Mortise and tenon joints are the traditional choice for connecting legs to the top and stretchers. For help with joinery, refer to a Beginner’s Guide to Hand Tool Joinery: Mastering Mortise and Tenon.
- Nicholson: Legs can be simpler, often made from 2x4s or 2x6s, creating a strong but less bulky structure.
- Stretchers: These connect the legs and stiffen the base.
- Joinery: Through-mortise and tenon joints are ideal for their strength, especially for a Roubo. Drawboring these joints (drilling the tenon hole slightly offset from the mortise hole) pulls the joint super tight. For a Nicholson, stout mortise and tenons, or even robust bolted connections, can suffice.
- Assembly: Ensure the base is perfectly square and level. Use clamps and winding sticks to check for twist. Strong wood glue-ups are paramount.
4. Attaching the Top to the Base
- Roubo: The massive legs often pass through the top (through-mortise), and wedges are driven in from the top to secure them. Alternatively, the legs can be housed into deep mortises in the underside of the top.
- Nicholson: The top often sits on top of the apron and legs. It can be secured with screws through elongated holes (to allow for wood movement), or traditional bench bolts. The apron itself provides significant connection strength.
5. Installing Vises and Workholding Features
These additions transform a simple table into a versatile workbench.
- Vises:
- Leg Vise (Roubo): Typically installed on the front leg, providing immense clamping force. It involves a threaded screw, a chop (the moving jaw), and a parallel guide.
- Face Vise/End Vise (Nicholson & Roubo): These are common additions. They can be store-bought (e.g., quick-release vises) or shop-made. Mount them flush with the benchtop and face for seamless workholding.
- Dog Holes:
- Placement: Drill a series of 3/4-inch or 1-inch holes in the benchtop, typically offset from the front edge, to accommodate bench dogs.
- Bench Dogs: These allow you to clamp workpieces against a vise or use a planing stop.
- Planing Stops: A simple board inserted into a dog hole or a dedicated slot can act as a crucial stop for planing operations.
Careful planning and execution during these steps will result in a heavy-duty workbench that will serve you reliably for decades.
Refining and Utilizing Your Heavy-Duty Workbench in 2026
{{IMG_SLOT_3}}
Once the primary construction of your heavy-duty workbench is complete, the final steps involve refining its surfaces, adding specialized accessories, and understanding how to best utilize its capabilities. This ultimate stage ensures your Roubo or Nicholson workbench is not just a sturdy table, but a finely tuned instrument for precision woodworking.
Final Flattening and Smoothing
Even after the initial flattening, wood can move, and minor imperfections might remain.
- Reflattening: Use a long straightedge and winding sticks to check the benchtop for flatness and twist. Any high spots can be planed down using a jointer plane or a large scrub plane, followed by finer planes.
- Smoothing: After flattening, a smoother plane can be used to achieve a silky-smooth surface. Avoid excessive sanding, as a planed surface is often better for workholding and allows wood to slide easily when needed.
- Edge Treatment: Lightly chamfer or round over the edges and corners of the benchtop to prevent chipping and improve comfort.
Essential Workbench Accessories
These additions maximize the functionality of your heavy-duty workbench:
- Bench Dogs: Invest in a good set of bench dogs. Both metal and wooden dogs have their uses. Wooden dogs are less likely to damage your workpieces.
- Holdfasts: These traditional, versatile clamping tools are indispensable for both Roubo and Nicholson benches. They provide quick, powerful clamping anywhere there’s a dog hole.
- Planing Stop: A simple wooden bar that fits into dog holes to brace work during planing. For Roubo benches, the “deadman” or “sliding planing stop” offers even more versatility.
- Bench Hooks/Shooting Boards: While not directly part of the bench, these jigs utilize the bench’s stability for accurate cross-cutting and end-grain planing.
- Tool Tray (Optional): Some designs incorporate a shallow tray at the back of the bench to keep frequently used hand tools within easy reach, without cluttering the main work surface.
- Custom Storage: Consider building custom storage for hand tools beneath your bench, perhaps drawers or shelves, to keep essential items close by.
Best Practices for Workbench Usage
A great workbench is only as good as how it’s used.
- Keep it Clear: Resist the urge to use your workbench as a storage surface. A clear benchtop allows for maximum flexibility and safer operation.
- Workholding is Key: Learn to effectively use your vises, dog holes, and holdfasts. Proper workholding prevents movement, ensuring accuracy and safety. For instance, when working on a modern live edge coffee table, secure the slab firmly.
- Protect the Top: While heavy-duty, your benchtop can still be dinged. Use sacrificial blocks or pads when clamping delicate work or when performing operations that might mar the surface.
- Regular Maintenance: Periodically check your vises for smooth operation and lubricate screw mechanisms. Reflatten the top if it starts to show signs of dishing or warping over time.
- Leveling: Ensure your workbench remains level on the floor. Adjustable feet can be very useful for this, especially on uneven workshop floors.
By investing the time and effort into Building Your First DIY Heavy-Duty Workbench: A Step-by-Step Guide to Roubo and Nicholson Styles, you are creating the most important tool in your workshop. This robust foundation will elevate the quality of all your subsequent woodworking projects, from small wooden toys to larger furniture pieces.
Conclusion
Building Your First DIY Heavy-Duty Workbench: A Step-by-Step Guide to Roubo and Nicholson Styles is an undertaking that transforms not just your workshop, but your entire woodworking practice. Whether you opted for the monumental stability of a Roubo or the versatile simplicity of a Nicholson, you have now crafted the most critical tool for precision, safety, and efficiency. This bench, built with your own hands from readily available construction lumber, stands as a testament to your dedication and skill, ready to support countless projects for years to come.
Your next steps should focus on outfitting your new workbench to maximize its potential. Experiment with different bench dog configurations and the strategic use of holdfasts. Practice clamping techniques and get accustomed to the immense stability your new workholding powerhouse provides. Don’t shy away from projects that require heavy planing or chopping; this workbench was built for precisely those tasks. As you grow in your woodworking journey, remember that a solid foundation, like the one you’ve just built, is paramount to achieving professional results and enjoying the craft to its fullest.
SEO Meta Title: Build Your First Heavy-Duty Workbench: Roubo & Nicholson Styles
SEO Meta Description: Master building your first DIY heavy-duty workbench in 2026. This step-by-step guide covers Roubo and Nicholson styles using construction lumber for ultimate stability.