

The year 2026 marks a fascinating convergence in the woodworking world: the resurgence of hybrid joinery that fuses classic mortise-and-tenon techniques with the unparalleled precision of CNC-milled alignment pockets and modular metal inserts. This innovative approach is quickly becoming a key trend for hobbyists and professionals alike, enabling faster, more precise builds that retain the timeless appeal of handcrafted furniture while leveraging modern technology [1]. For beginners, this fusion offers a compelling pathway into woodworking, significantly lowering the barrier to entry for creating beautiful, durable pieces. This article delves into the exciting realm of beginner furniture builds using CNC-assisted traditional joinery, exploring how this method empowers new woodworkers to achieve professional-grade results from their first project.
Key Takeaways
- CNC-assisted traditional joinery combines the strength and aesthetics of classic techniques with the precision and speed of computer numerical control.
- This hybrid method is ideal for beginners, simplifying complex joinery processes and reducing common errors.
- Software tools, project selection, and proper material preparation are crucial steps for successful CNC-assisted builds.
- Safety protocols and a foundational understanding of woodworking are still essential, even with technological assistance.
- The approach offers a practical way to create durable, high-quality furniture with a handcrafted feel.
The Synergy of CNC and Traditional Joinery for Beginners
Traditional woodworking joinery, such as the mortise-and-tenon, dovetail, or finger joint, has been the backbone of furniture construction for centuries. These methods are renowned for their mechanical strength, durability, and aesthetic appeal, allowing wood to expand and contract naturally while maintaining structural integrity. However, mastering these joints by hand requires significant skill, patience, and specialized tools, often daunting for those new to the craft.
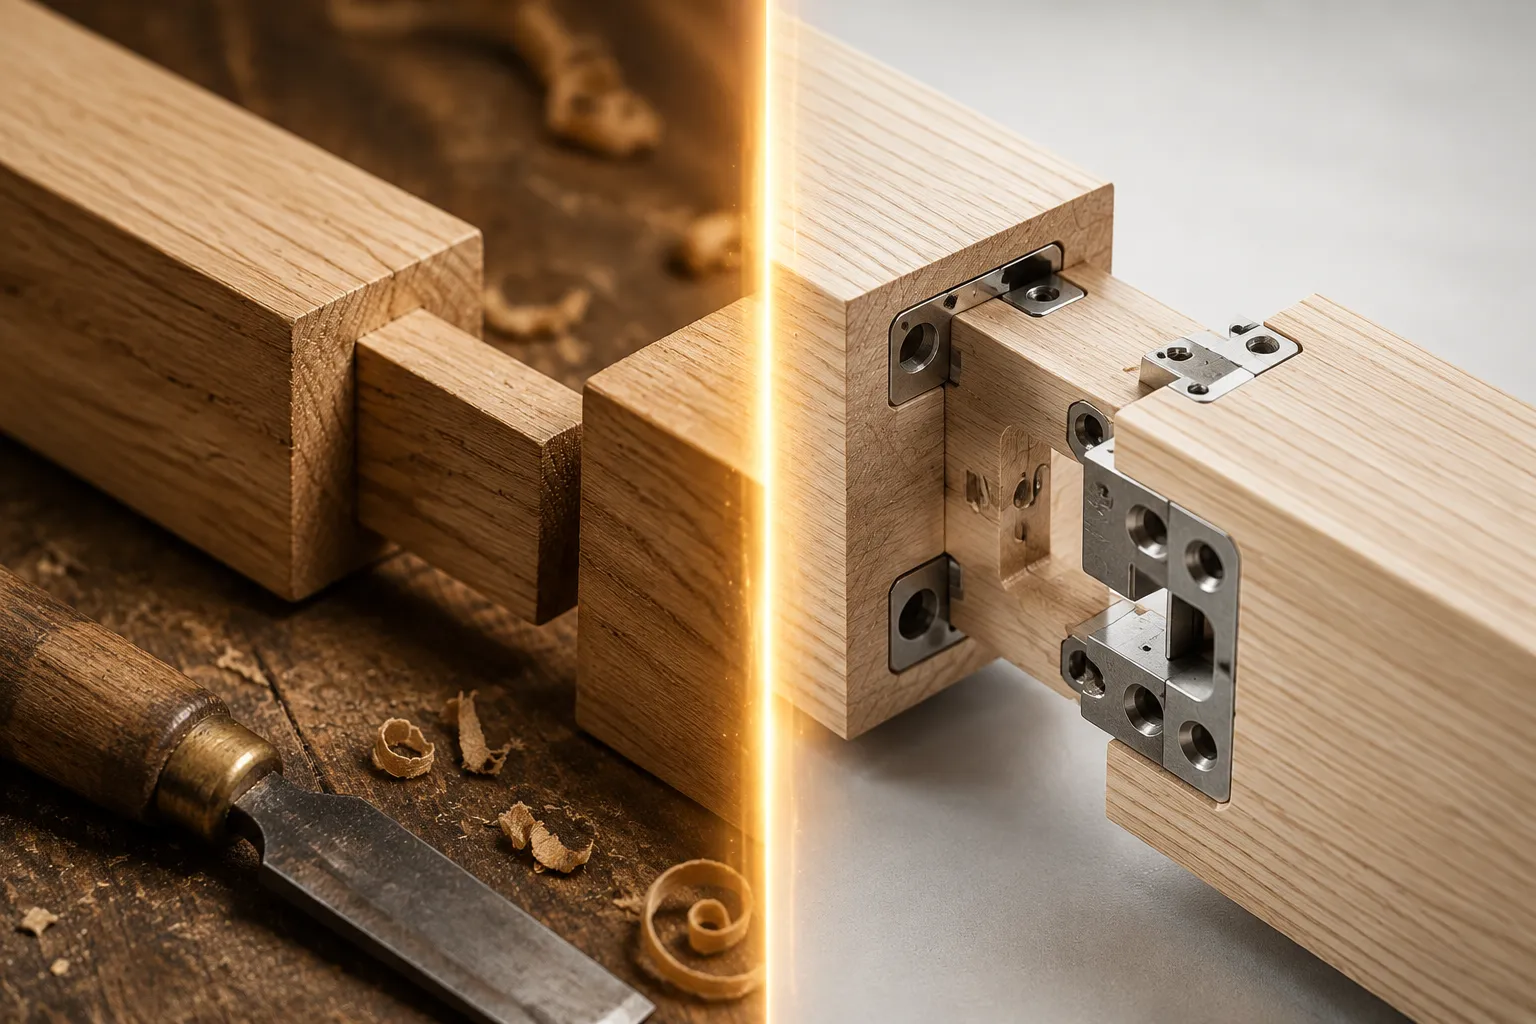
Enter Computer Numerical Control (CNC) technology. Once exclusive to industrial settings, desktop and hobbyist CNC routers have become increasingly accessible and affordable. These machines can precisely cut, carve, and engrave materials based on digital designs. When applied to traditional joinery, CNC technology doesn’t replace the classic joint; instead, it enhances it.
The concept of beginner furniture builds using CNC-assisted traditional joinery revolves around using the CNC router to perform the most critical and repetitive aspects of joinery, particularly for creating precise mortises, tenons, and other interlocking shapes. For instance, a CNC can cut perfect mortises and tenons that fit together with zero gaps, eliminating the frustration of ill-fitting joints that often plague beginners. Furthermore, the integration of modular metal inserts, precisely milled by the CNC, can add additional strength or allow for knock-down assembly, enhancing the design possibilities and practicality of the furniture piece. This hybrid approach significantly reduces the learning curve associated with traditional methods, allowing beginners to focus on design, assembly, and finishing rather than struggling with cutting perfect angles or depths.
This blend of old and new allows beginners to:
- Achieve unprecedented precision: CNC machines cut to within thousandths of an inch, ensuring joints fit perfectly every time.
- Save time: Complex cuts that would take hours by hand can be completed in minutes by a CNC.
- Reduce material waste: Accurate cuts minimize errors, leading to less scrapped wood.
- Boost confidence: Successful, professional-looking results from early projects are highly motivating.
While the CNC handles the intricate cuts, the woodworker still engages in crucial traditional steps: wood selection, design, sanding, assembly, and finishing. This means you still get the satisfaction of creating something by hand, but with a powerful assistant handling the most demanding parts. For those interested in improving their traditional joinery skills, resources like Mastering the Domino Joiner: Precision Joinery for Furniture and Cabinet Making or Mortise and Tenon Joinery for Live Edge Furniture: Essential Techniques can provide deeper insights into the manual aspects that complement CNC work.
Getting Started: Essential Tools and Software for CNC-Assisted Woodworking
Embarking on beginner furniture builds using CNC-assisted traditional joinery requires a foundational understanding of the tools and software involved. While the investment might seem significant initially, the increasing accessibility of hobbyist-grade equipment makes this endeavor more feasible than ever in 2026.
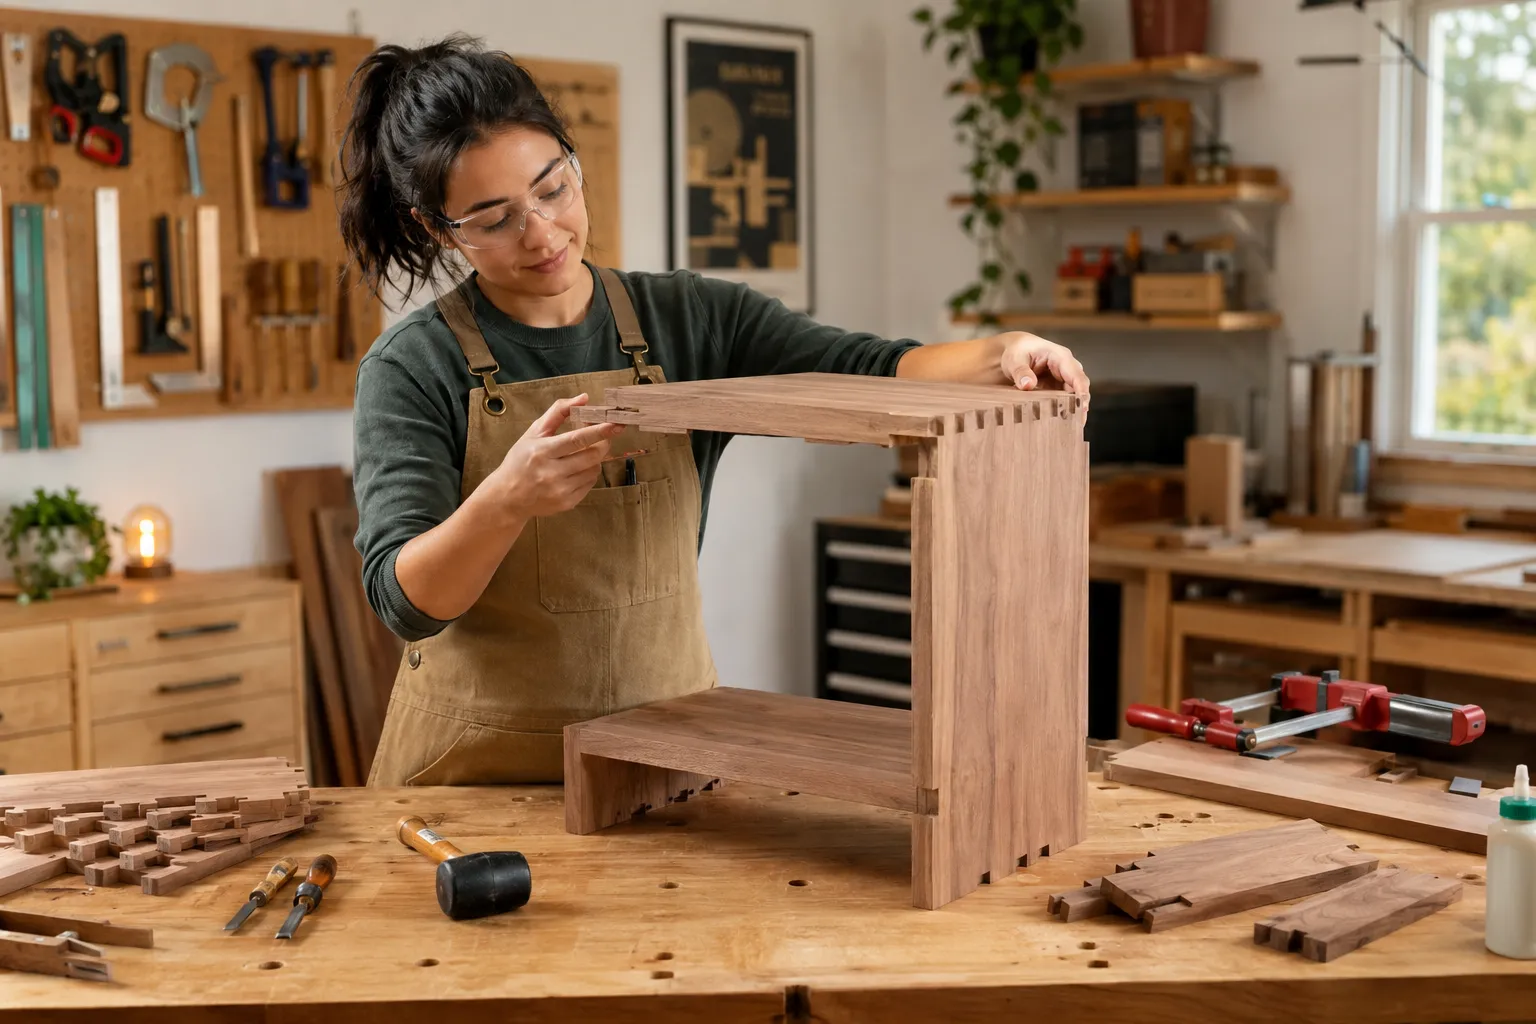
Key Equipment
- CNC Router: For beginners, a desktop or entry-level CNC router is an excellent starting point. These machines are compact, relatively affordable, and capable of cutting most furniture-grade lumber. Look for models with a decent work area (e.g., 24×24 inches or larger for small furniture) and robust construction.
- Woodworking Clamps: Essential for securing workpieces during assembly and gluing. A variety of sizes and types (bar clamps, F-clamps, pipe clamps) will be useful.
- Measuring and Marking Tools: While CNC provides precision, manual measurements are still critical for material preparation and checking components. This includes tape measures, squares, and marking knives. Our guide on The Ultimate Guide to Measuring and Marking Tools: Achieving Accuracy offers detailed insights.
- Sanding Supplies: Sandpaper in various grits, sanding blocks, and potentially an orbital sander are necessary for preparing surfaces and achieving a smooth finish.
- Finishing Supplies: Your choice of wood finish (oils, varnishes, paints) along with brushes or rags. For specific techniques, check out Mastering Wood Finishing with Oil-Based Products: Techniques for Deep Luster.
- Safety Gear: Eye protection, hearing protection, and dust masks are non-negotiable when working with woodworking machinery.
Essential Software
The digital workflow for CNC woodworking involves two main types of software:
- CAD (Computer-Aided Design) Software: This is where you design your furniture piece and create the precise geometry of your traditional joints.
- Beginner-Friendly Options:
- Fusion 360 (Autodesk): Offers a free hobbyist license and combines CAD, CAM, and simulation capabilities. It has a steep learning curve but is incredibly powerful.
- Onshape (PTC): Cloud-based, collaborative CAD with a free tier for non-commercial use.
- SketchUp: Easier to learn for 3D modeling, though its native joinery tools might require plugins for advanced precision.
- Beginner-Friendly Options:
- CAM (Computer-Aided Manufacturing) Software: This software takes your CAD design and translates it into G-code, the language your CNC machine understands.
- Often integrated with CAD: Fusion 360 includes CAM capabilities.
- Stand-alone Options:
- VCarve Desktop/Pro (Vectric): A popular choice known for its intuitive interface and powerful toolpath generation, often bundled with hobbyist CNC machines.
- Easel (Inventables): Web-based and very beginner-friendly, especially if you own an Inventables X-Carve.
Choosing Your First Project
For beginner furniture builds using CNC-assisted traditional joinery, selecting the right first project is critical for success and building confidence. Start with simple designs that incorporate straightforward traditional joints.
Recommended Beginner Projects:
- Simple Stool: A great project to practice basic mortise-and-tenon or finger joints for the legs and aprons.
- Small Side Table: Similar to a stool but with a top, allowing you to explore more complex joinery or decorative elements for the tabletop attachment. See “How to Build a Space-Saving Console Table: Design Ideas and Joinery” – https://woodcraftwiz.com/how-to-build-a-space-saving-console-table-design-ideas-and-joinery-for-entryways-and-hallways/ for inspiration on table construction.
- Shelving Unit: Modular shelves often use simple interlocking joints that CNC can cut with ease, offering a practical and rewarding outcome.
- Cutting Board with Integrated Handles: While not furniture, this project allows you to learn CNC basics for shape cutting and pocketing, providing a tangible skill-building experience.
Focus on projects that utilize readily available lumber and don’t require overly complex assemblies. The goal is to get comfortable with the design, CNC programming, and assembly process before tackling more ambitious pieces.
Designing and Executing Your First CNC-Assisted Furniture Build
The process of creating beginner furniture builds using CNC-assisted traditional joinery moves through several distinct phases, each benefiting from a methodical approach.
1. Design and Digital Modeling
The journey begins in your CAD software. Here, you will:
- Sketch and Refine: Start with rough sketches of your furniture idea, considering its dimensions, proportions, and function.
- Model in 3D: Translate your sketch into a precise 3D model. This is where you define every component and, crucially, design your traditional joints. For example, if you’re building a simple stool, you’ll model the legs, aprons, and seat. For the leg-to-apron connection, you’ll design a mortise on the leg and a corresponding tenon on the apron directly within the software.
- Incorporate CNC-Specific Features: This is where the “assisted” part truly shines.
- Precision Pockets: Design slightly oversized pockets for mortises where the CNC can mill them perfectly, ensuring a clean fit.
- Alignment Features: Add small, hidden indexing pins or holes in your design that the CNC can cut. These features simplify assembly by guiding components into their exact positions.
- Modular Inserts: If using, design precise cavities for metal inserts that will reinforce the joints or allow for mechanical fastening.
- Consider Wood Movement: Always design with the natural expansion and contraction of wood in mind, even with CNC precision. Refer to Understanding Wood Movement: How to Design Furniture That Lasts a Lifetime for crucial insights.
2. CAM Programming and Toolpath Generation
Once your 3D model with integrated joints is complete, you move to the CAM phase.
- Select Material: Specify the type and thickness of wood you’ll be using. This helps the software calculate optimal cutting parameters.
- Choose Tooling: Select the appropriate CNC router bits (end mills) for each cut. For example, a straight bit for mortises and tenons, and a small-diameter bit for intricate details.
- Generate Toolpaths: The CAM software will calculate the precise path the router bit needs to take to cut your components. You’ll define parameters such as cutting depth, speed (feed rate), and spindle speed.
- Simulate Cuts: Most CAM software offers a simulation feature, allowing you to visualize the cutting process before sending it to the machine. This is a critical step for identifying potential errors or collisions.
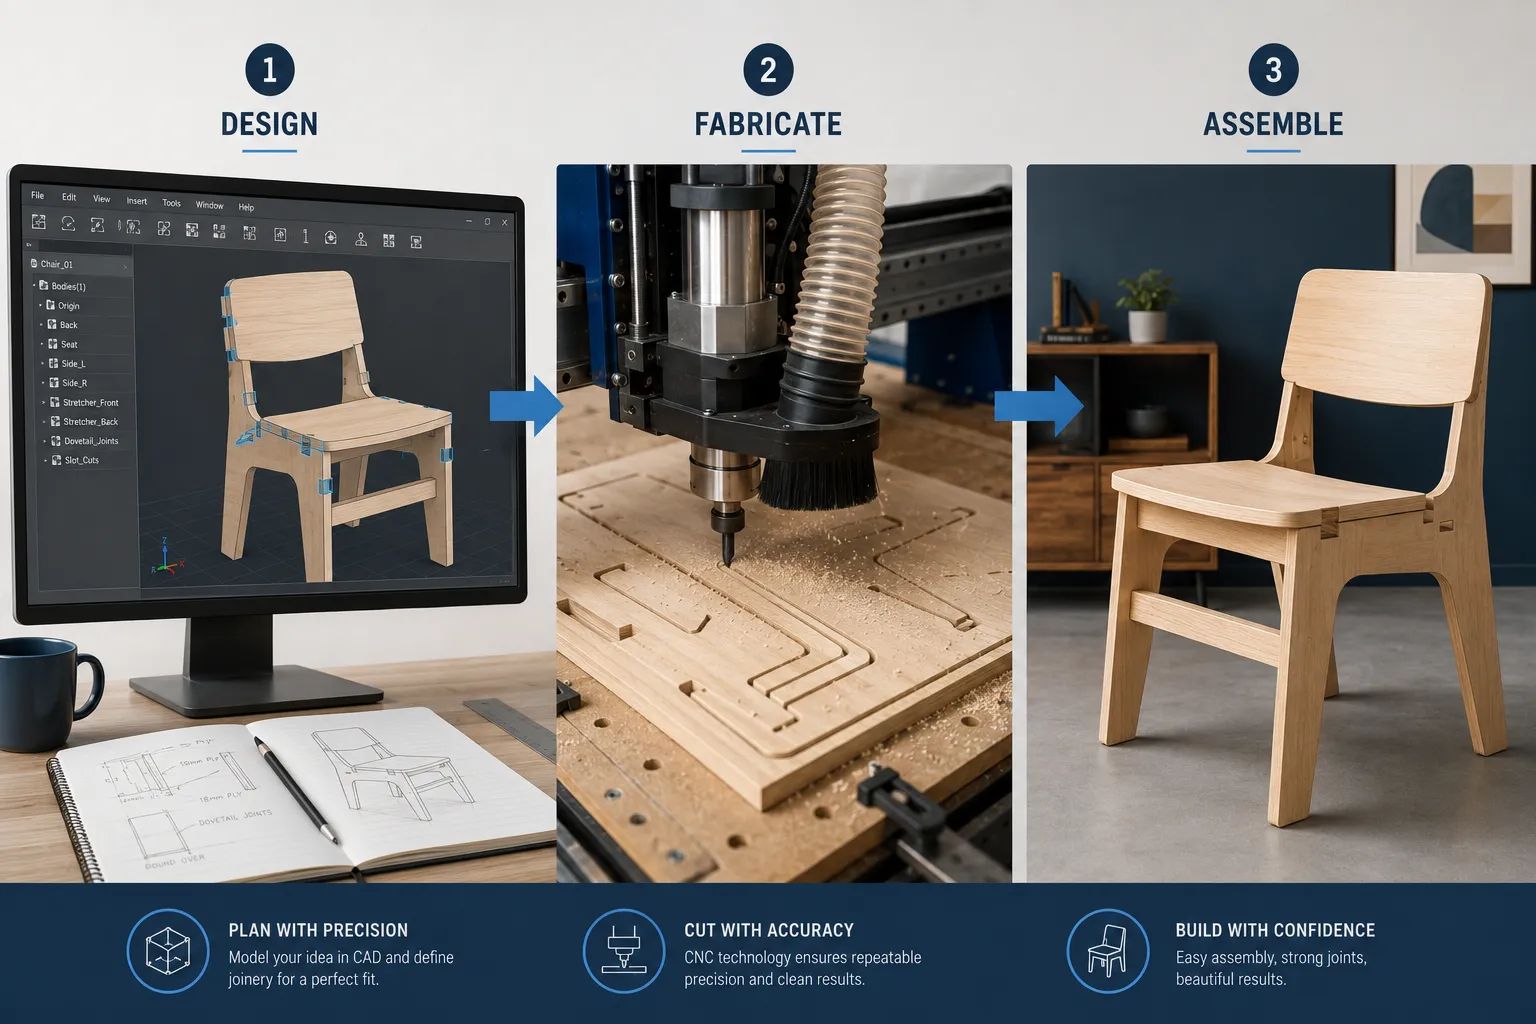
3. CNC Fabrication
With your G-code ready, it’s time to bring your design to life.
- Material Preparation: Ensure your lumber is flat, square, and dimensioned correctly. Securely clamp it to the CNC spoil board.
- Set Up CNC: Install the correct router bit, home the machine, and set your origin point (where the CNC starts its cutting operations).
- Run the Program: Load your G-code file and initiate the cutting process. Monitor the machine closely, ensuring safety and proper operation.
- Post-CNC Processing: Once the CNC has finished cutting, carefully remove your components.
4. Assembly and Finishing
This is where your handcrafted touch comes back into full play.
- Dry Fit: Always perform a dry fit of all components before applying glue. This allows you to check for any discrepancies and make minor adjustments if necessary. The CNC’s precision should make this a smooth step.
- Assembly: Apply wood glue to your traditional joints and assemble the furniture. Use clamps to hold everything securely while the glue dries. The precision of the CNC-cut joints will make alignment much easier.
- Sanding: Once the glue is dry, sand the entire piece smooth, progressing through various grits of sandpaper. Pay attention to edges and surfaces.
- Finishing: Apply your chosen finish, following the product’s instructions. This protects the wood and enhances its natural beauty. For small, high-value projects, consider creating Handcrafted Jewelry Boxes and Serving Trays: Building Heirloom Quality which would benefit immensely from CNC-assisted joinery.
By following these steps, beginners can confidently tackle furniture projects that combine the best of traditional craftsmanship with modern technological precision.
Conclusion
The landscape of woodworking is constantly evolving, and in 2026, the integration of CNC technology with traditional joinery stands out as a powerful enabler for beginners. This hybrid approach demystifies complex joinery, allowing new woodworkers to create durable, beautiful, and precise furniture pieces from their very first attempt. By leveraging the accuracy of CNC for critical cuts and focusing human effort on design, assembly, and finishing, the journey into furniture making becomes more accessible and rewarding than ever before.
For those eager to dive into beginner furniture builds using CNC-assisted traditional joinery, the path is clear: start with accessible CNC equipment and user-friendly software, select simple yet engaging projects, and always prioritize safety. The satisfaction of seeing perfectly interlocking joints, cut with digital precision and assembled with your own hands, is an experience that bridges the gap between old-world craftsmanship and 21st-century innovation. This method not only equips you with practical skills but also opens up a world of creative possibilities, allowing you to design and build furniture that is both structurally sound and aesthetically pleasing. Embrace this powerful synergy, and transform your woodworking aspirations into tangible, lasting creations.
References
- Harding, J. (2024). Modern Woodworking: Integrating CNC for Craftsmanship. Timberline Press.