

The modern home often grapples with a perennial challenge: the unruly chaos of entryways. Shoes scattered, coats piled, and keys misplaced contribute to a less-than-welcoming first impression. Imagine reclaiming this vital space, transforming it into an organized, functional, and aesthetically pleasing area. This comprehensive guide will empower you to construct a DIY Entryway Bench with Shoe Storage and Coat Rack: Complete Build Guide for Beginners, offering a practical solution that marries convenience with custom style for your home in 2026.
Key Takeaways:
- Building an entryway bench with integrated shoe storage and a coat rack is an accessible woodworking project for beginners.
- Careful planning, accurate measurements, and appropriate material selection are crucial for a successful and durable build.
- Pocket hole joinery and basic cutting techniques simplify the construction process, making it manageable for those new to woodworking.
- Finishing touches, including sanding and protective coatings, elevate the project’s appearance and longevity.
- This DIY project provides a customizable storage solution, enhancing both the functionality and aesthetics of your home’s entryway.
Planning Your DIY Entryway Bench with Shoe Storage and Coat Rack
Effective planning is the cornerstone of any successful woodworking project, especially when embarking on a DIY Entryway Bench with Shoe Storage and Coat Rack: Complete Build Guide for Beginners. Before making your first cut, it is essential to consider several critical factors, from design and dimensions to material selection and tool preparation.
Design Considerations and Measurements
Begin by assessing the available space in your entryway. Measure the width, depth, and height to determine the maximum dimensions for your bench. Consider the natural flow of traffic and ensure the bench does not impede movement. A typical entryway bench might be 36-48 inches wide, 14-18 inches deep, and 18-20 inches high, providing comfortable seating and ample storage. The coat rack component will extend upwards from the bench’s back, so account for ceiling height and desired hook placement.
When planning for shoe storage, decide on the number of cubbies or shelves needed. For instance, two shelves can create three compartments for shoes. Ensure each compartment is tall enough for boots and wide enough for average shoe sizes. For the coat rack, plan for adequate spacing between hooks to accommodate coats without excessive crowding.
Consider the aesthetic you wish to achieve. Do you prefer a modern, minimalist look, or something more rustic? This will influence your wood choice, joinery methods, and finishing options. For inspiration, you might explore various woodworking projects that sell to see different styles and finishes.
Essential Tools and Materials
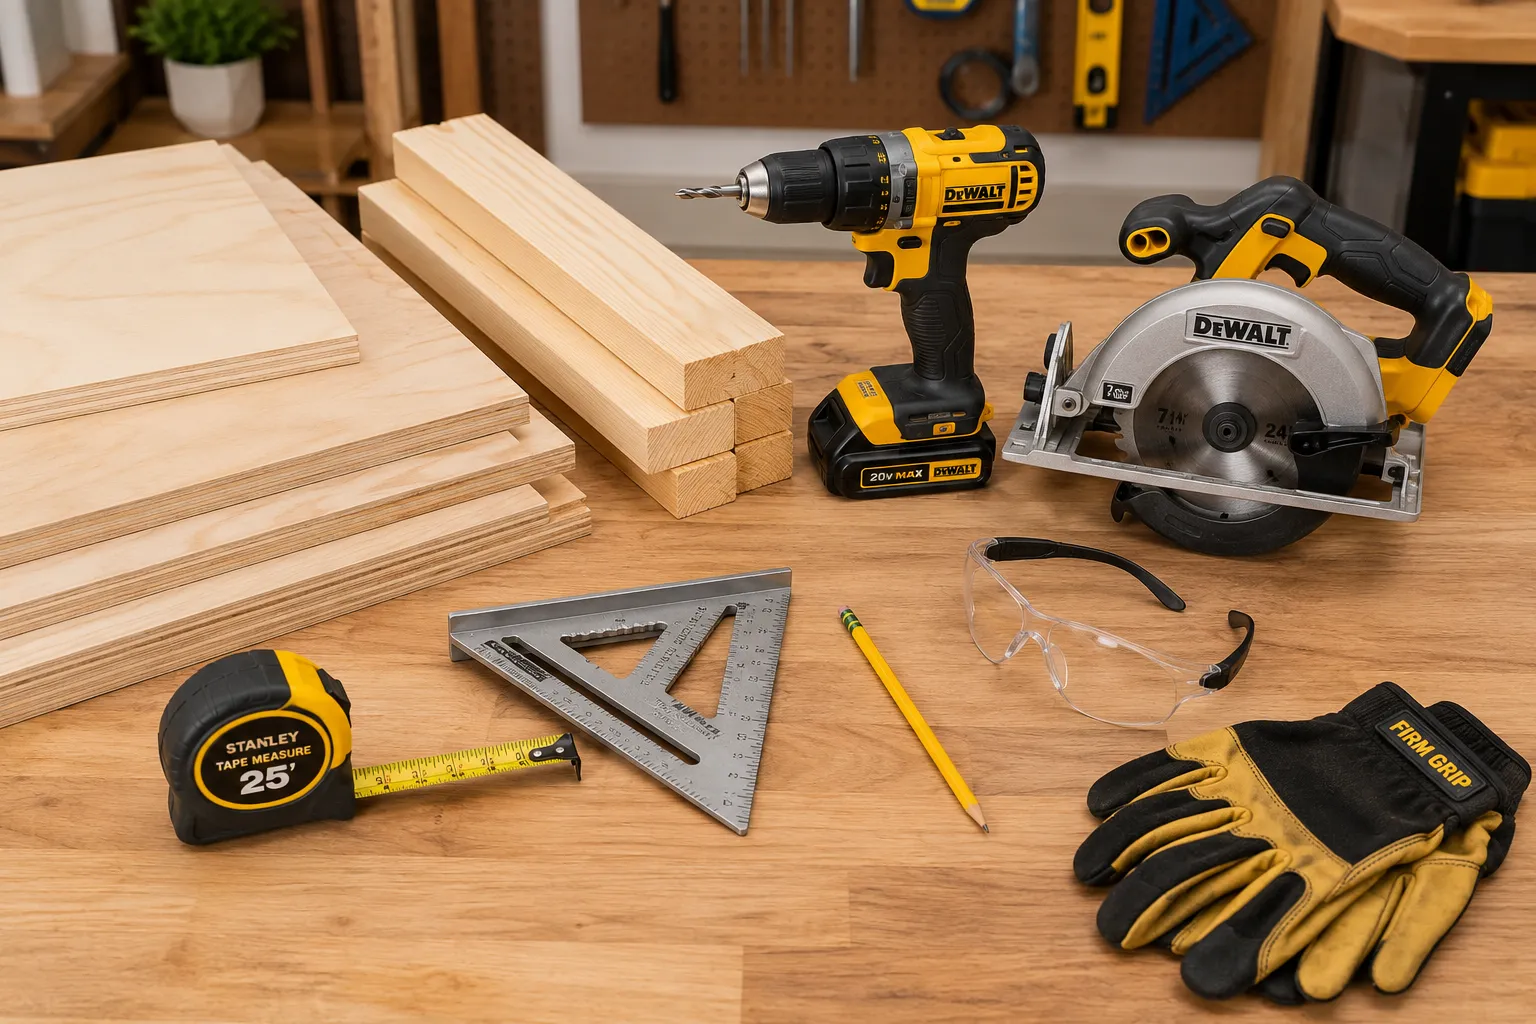
A successful DIY project relies on having the right tools and materials at hand. For this entryway bench, many of the necessary tools are common in a beginner’s woodworking shop.
Tools You Will Need:
- Measuring Tape and Pencil: For accurate layout and marking.
- Safety Glasses and Hearing Protection: Always prioritize safety.
- Circular Saw or Miter Saw: For precise cuts on lumber and plywood. A miter saw offers excellent accuracy for repeatable cuts.
- Drill/Driver: Essential for drilling pilot holes and driving screws.
- Pocket Hole Jig: Highly recommended for strong, concealed joints, especially beneficial for beginners.
- Clamps: Various sizes to hold pieces securely during assembly.
- Sander (orbital or block): For smoothing surfaces and preparing for finishing.
- Wood Glue: For added strength to all joints.
- Router (optional): For decorative edges or dados, if desired.
- Stud Finder: For securely mounting the coat rack to the wall.
Materials List:
- Plywood (3/4 inch thickness): A good quality hardwood plywood (like birch or maple) is excellent for the benchtop, sides, and shelves, offering stability and a smooth surface for finishing. Consider a full sheet (4×8 ft) or half sheet, depending on your design.
- Dimensional Lumber (e.g., 1×3, 1×4, 2×2): For the bench frame, cleats, and back support for the coat rack. The specific dimensions will depend on your design.
- Pocket Hole Screws: Appropriate length for your wood thickness (e.g., 1 1/4 inch for 3/4 inch material).
- Wood Screws: Various lengths for attaching the coat rack panel and other components.
- Wood Filler: To fill any gaps or screw holes.
- Sandpaper: Various grits (80, 120, 180, 220) for progressive sanding.
- Wood Finish: Stain, paint, polyurethane, or a combination, depending on your desired look. Explore natural wood finishing without chemicals for eco-friendly options.
- Coat Hooks: Choose hooks that complement your design.
- Wall Anchors (if not mounting into studs): Heavy-duty toggle bolts or similar for secure wall attachment of the coat rack.
By carefully planning your design and gathering all necessary tools and materials, you set yourself up for a smooth and enjoyable building experience.
Building the DIY Entryway Bench with Shoe Storage and Coat Rack
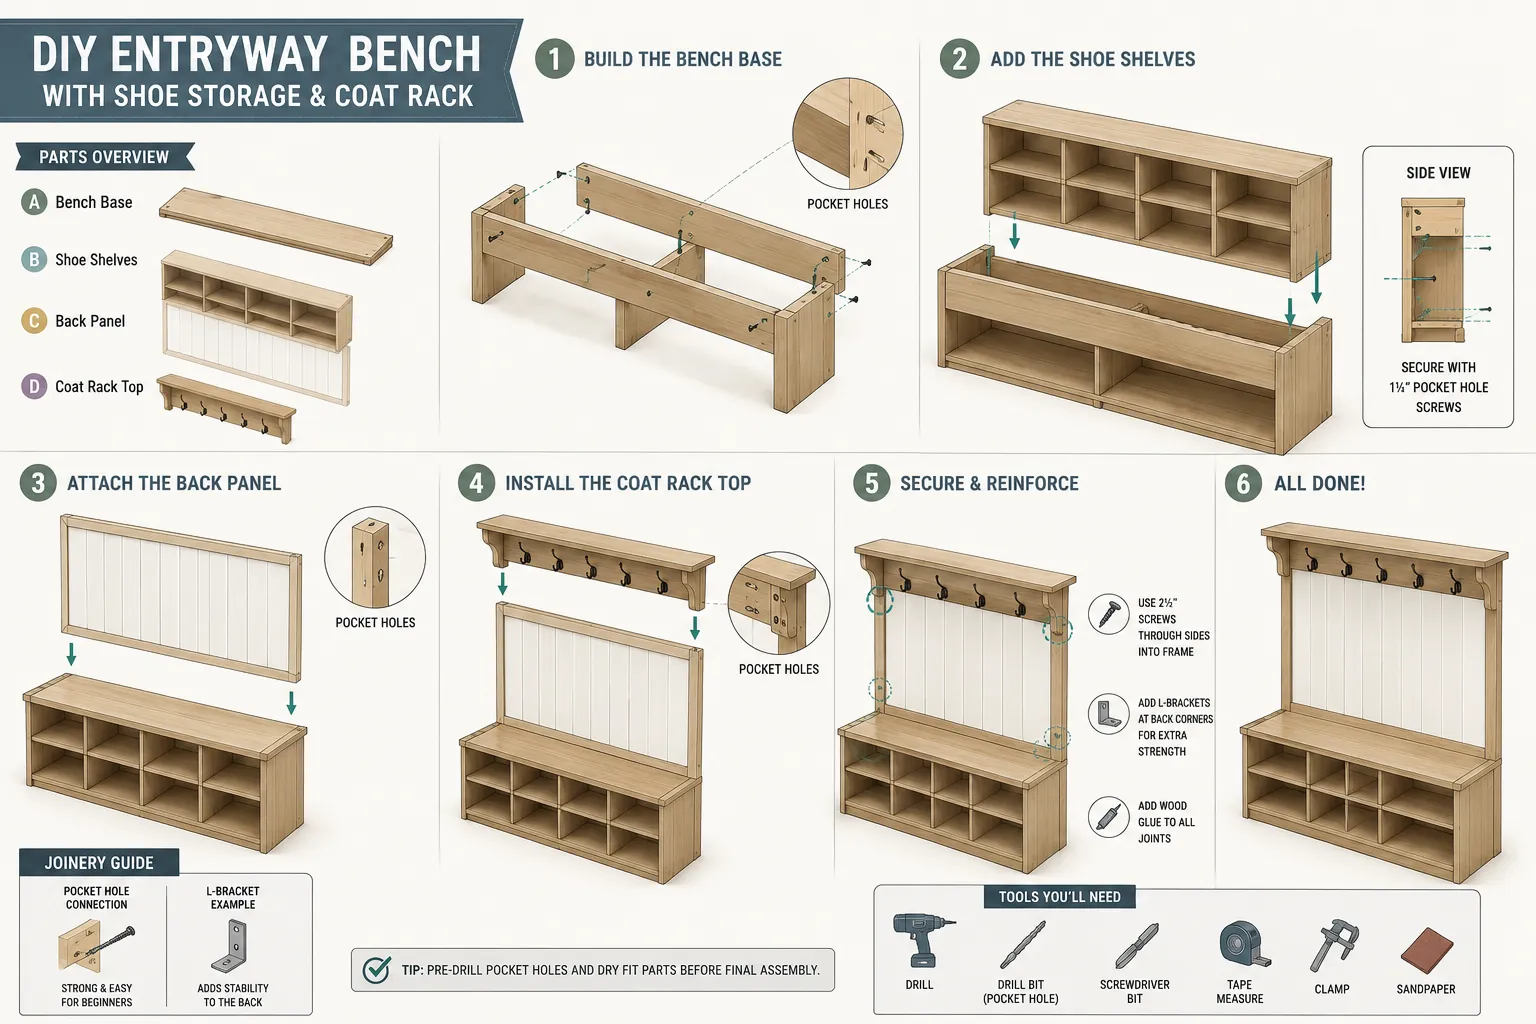
Constructing your DIY Entryway Bench with Shoe Storage and Coat Rack: Complete Build Guide for Beginners involves several distinct stages. This section breaks down the process into manageable steps, focusing on techniques suitable for beginner woodworkers.
Cutting and Assembling the Bench Base
Accurate cuts are paramount. Begin by marking all your plywood and lumber according to your cut list from the planning stage.
- Cut Plywood Panels: Use a circular saw with a straight-edge guide or a miter saw for precision. Cut the benchtop, side panels, bottom panel, and any interior shelf dividers for the shoe storage.
- Cut Support Lumber: Cut 1×3 or 1×4 lumber for the front, back, and middle supports of the bench frame. These will provide structural integrity.
- Create Pocket Holes: For strong, hidden joints, use a pocket hole jig. Drill pocket holes along the edges of the side panels, bottom panel, and shelf dividers where they will connect to other pieces. For instance, drill pocket holes on the ends of your bottom panel to attach it to the side panels.
- Assemble the Shoe Storage Cubbies:
- Attach the bottom panel to the two side panels using wood glue and pocket hole screws. Ensure everything is square.
- Install the vertical dividers next. You can create dados (grooves) with a router for a more integrated look, or simply attach them with pocket holes and glue from the top and bottom panels.
- Add horizontal shelves within the cubbies, if your design includes them, securing them with pocket holes.
- Attach Front and Back Supports: Secure 1×3 or 1×4 lumber to the front and back edges of the bench base, either flush with the top edge or slightly recessed, using pocket holes or screws from the outside (which you’ll later fill). These supports stiffen the structure and can act as anchor points for a decorative trim.
- Secure the Benchtop: Place the plywood benchtop onto the assembled base. Apply wood glue to all contact surfaces and secure it with screws driven up from inside the frame into the underside of the benchtop. Alternatively, use pocket holes on the top edges of the frame pieces, screwing downwards into the benchtop.
Consider building a dedicated DIY woodworking bench for beginners if you find yourself frequently working on projects like this.
Constructing the Coat Rack Back Panel
The coat rack section typically consists of a back panel that extends upwards from the bench, offering vertical space for hooks.
- Cut the Back Panel: Cut a piece of 3/4 inch plywood or solid wood to the desired height and width for your coat rack. This panel should match the width of your bench.
- Prepare Mounting Cleats: Cut two pieces of 1×3 or 1×4 lumber to the width of the bench. These will act as cleats to attach the back panel to the wall. One cleat will attach to the very top edge of the back panel, and the other near the bottom, just above where it meets the bench.
- Attach Back Panel to Bench: Secure the back panel to the back of the bench using wood glue and screws driven from the underside of the benchtop into the bottom edge of the back panel. Add additional support by driving screws through the back support lumber of the bench frame into the back panel.
- Install Top Shelf (Optional): If your design includes a small shelf above the coat hooks, cut the shelf piece and side supports. Attach the shelf to the top of the back panel using pocket holes or small brackets. This shelf is ideal for hats, gloves, or decorative items.
- Pre-Drill for Coat Hooks: Mark the desired locations for your coat hooks on the back panel. Pre-drill pilot holes to prevent splitting the wood when installing the hooks later.
Mounting the Entire Unit and Finishing Touches
This stage brings the entire piece together and prepares it for use.
- Wall Mounting: Carefully position the assembled bench and coat rack against the wall in your entryway. Use a stud finder to locate wall studs. Mark the stud locations on the mounting cleats of the coat rack.
- Secure the top cleat of the coat rack to the wall studs using long wood screws (e.g., 2.5-3 inches).
- If no studs are available at your desired mounting height, use heavy-duty wall anchors appropriate for the weight of your unit and its potential load.
- For added stability, you can also consider anchoring the bottom part of the back panel to the wall, especially if the unit is tall.
- Sanding: Now that the primary assembly is complete, it’s time for thorough sanding. Start with 80-grit sandpaper to remove any major imperfections or milling marks. Progress to 120-grit, then 180-grit, and finally 220-grit for a smooth, ready-to-finish surface. Pay attention to all edges and corners.
- Finishing:
- Wipe down the entire piece with a tack cloth to remove all dust.
- Apply your chosen stain or paint according to the manufacturer’s instructions. Allow adequate drying time between coats.
- Once the stain or paint is dry, apply a protective topcoat such as polyurethane or a clear oil finish. This protects the wood from wear and moisture. Apply 2-3 thin coats, sanding lightly with 220-grit sandpaper between coats for optimal smoothness.
- Install Coat Hooks: Once the finish is completely dry and cured, attach your chosen coat hooks using the pre-drilled pilot holes.
- Add Cushion (Optional): A custom cushion on the benchtop can add comfort and style. You can purchase one or make a simple one yourself using foam and fabric.
Following these steps will result in a sturdy and functional DIY Entryway Bench with Shoe Storage and Coat Rack: Complete Build Guide for Beginners that enhances your home’s organization and aesthetic.
Customization and Maintenance for Your DIY Entryway Bench
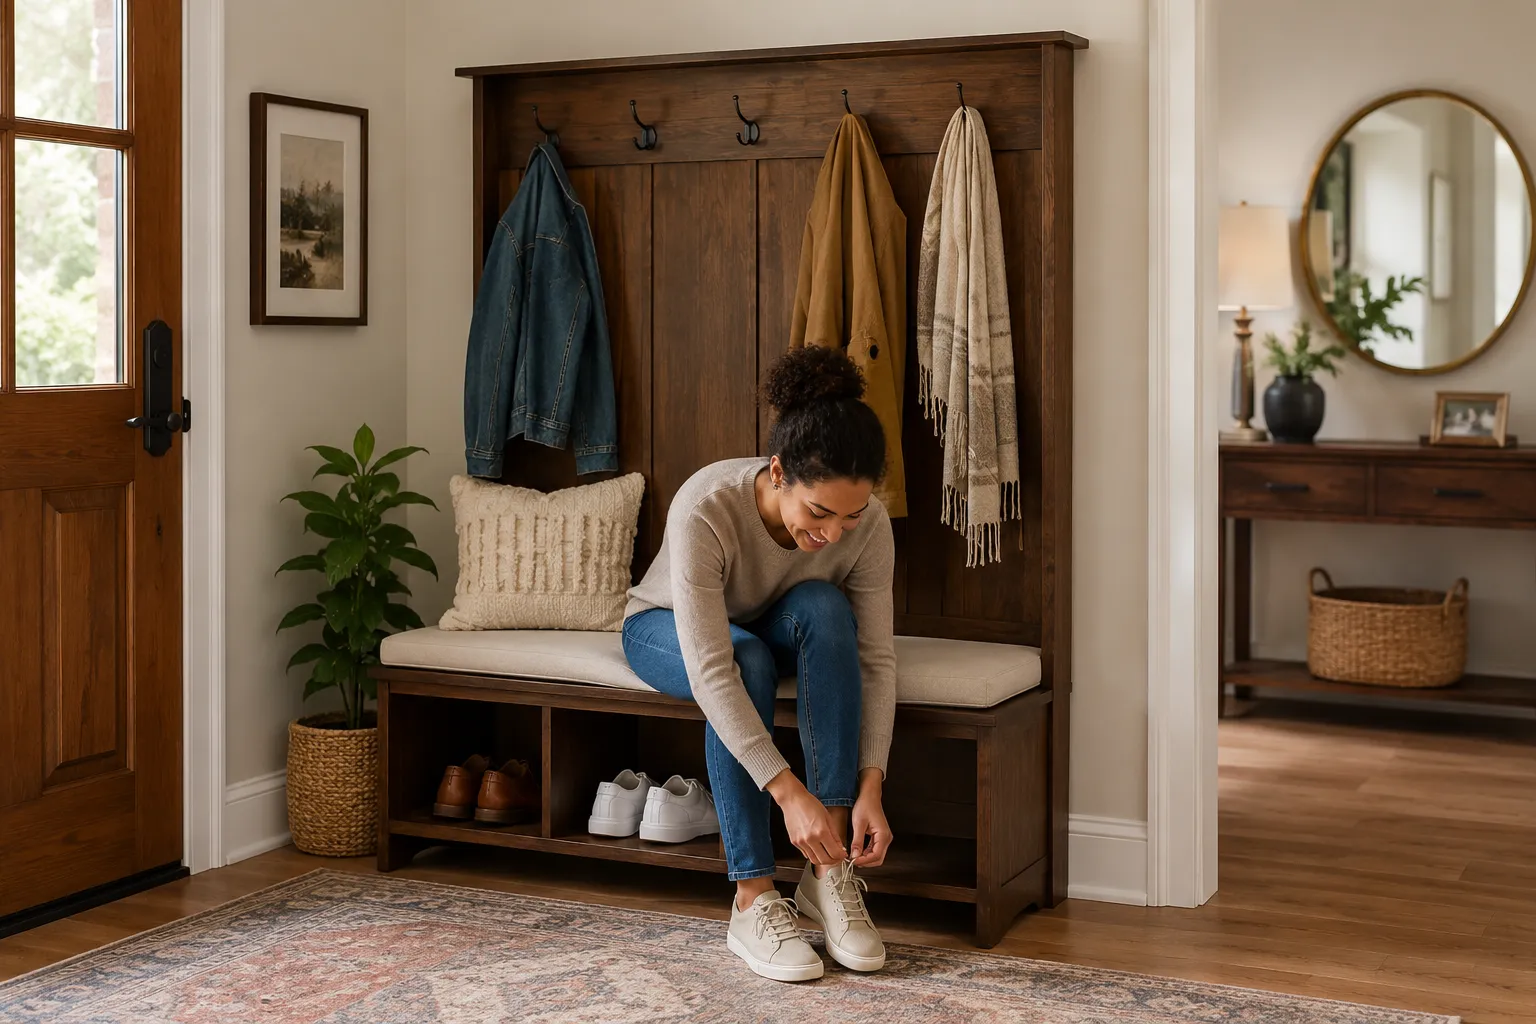
A significant advantage of building your own DIY Entryway Bench with Shoe Storage and Coat Rack: Complete Build Guide for Beginners is the ability to tailor it precisely to your needs and aesthetic preferences. Beyond the initial build, proper maintenance ensures its longevity and continued appeal.
Personalizing Your Entryway Bench
The design described in this guide is a solid foundation, but there are numerous ways to personalize your bench and make it truly unique.
- Wood Species: While plywood is practical, consider using solid hardwood like oak, maple, or walnut for certain components, such as the benchtop or decorative trim, for a more premium feel. Different wood species offer varying grain patterns and colors, influencing the final look. For more on selecting materials, see the essential guide to wood species for beginner furniture makers.
- Finishing Techniques: Experiment with different stains, paints, or even distressing techniques to match your home décor. A whitewash finish can brighten a space, while a dark stain adds sophistication. Consider two-tone paint schemes or adding a contrasting benchtop for visual interest.
- Hardware Selection: The choice of coat hooks can dramatically alter the style. Opt for sleek, modern hooks for a contemporary look, or antique-style hooks for a farmhouse feel. Consider adding drawer pulls to pull-out shoe drawers if your design incorporates them.
- Integrated Features:
- Drawers: Instead of open cubbies, integrate small drawers for storing keys, mail, or other small items. This adds a layer of organization and keeps clutter out of sight.
- Charging Station: Incorporate a small cutout for a multi-device charging station within one of the cubbies or on the top shelf, making it a convenient spot to power up electronics.
- Mirror: Mount a decorative mirror above the coat rack for a quick check before heading out the door.
- Shelving above Coat Rack: Expand the storage upwards by adding more open shelving above the coat hooks for decorative items, baskets, or seasonal accessories.
- Bench Cushion: A custom-made or store-bought cushion can add comfort and a pop of color or pattern to your entryway. Choose durable, easy-to-clean fabrics.
Your personal touches will transform a functional piece into a statement of your home’s style.
Tips for Longevity and Maintenance
Even the most robust furniture requires some care to look its best and function well for years to come.
- Regular Cleaning: Dust the bench and coat rack regularly with a soft cloth. For tougher grime, use a damp cloth with a mild wood cleaner, then wipe dry immediately. Avoid harsh chemicals that can damage the finish.
- Protect from Moisture: Entryways are prone to moisture from wet shoes and coats. Ensure the wood is well-sealed with a durable topcoat like polyurethane. Promptly wipe up any spills or puddles to prevent water damage or warping.
- Tighten Hardware: Periodically check and tighten any screws on the coat hooks, hinges (if applicable), or structural components. Wood can expand and contract with humidity, potentially loosening fasteners over time.
- Touch-ups and Refinishing: Over years of use, the finish may show signs of wear, especially on the benchtop or around the shoe cubbies. Keep a small amount of your original stain or paint on hand for minor touch-ups. For significant wear, a light sanding and reapplication of the topcoat can revitalize the piece.
- Weight Distribution: While the bench is built to be sturdy, avoid placing excessively heavy items on the top shelf or overloading the coat hooks. Distribute weight evenly to prevent undue stress on the joints and mounting hardware.
By implementing these customization options and maintenance practices, your handmade entryway bench will not only serve its purpose effectively but also remain a cherished, integral part of your home for many years.
Advanced Techniques and Finishing Options for a Polished Look
Once you have mastered the basic construction of your DIY Entryway Bench with Shoe Storage and Coat Rack: Complete Build Guide for Beginners, you might consider incorporating advanced techniques and refining your finishing process to achieve a truly professional-grade piece. These steps can significantly elevate the aesthetic and durability of your project.
Incorporating Advanced Joinery and Features
While pocket holes are excellent for beginners, exploring other joinery methods can enhance strength, appearance, and your woodworking skills.
- Dado and Rabbet Joints: These joints involve cutting grooves (dados) or rebates (rabbets) into wood pieces to create interlocking connections. They are particularly effective for shelves and dividers in shoe storage cubbies, offering a clean, strong, and glue-friendly fit. A router or table saw can be used for these cuts. Learning about building a portable woodworking assembly table with integrated clamping and storage solutions can aid in precision for these cuts.
- Mortise and Tenon Joints: For the most robust and traditional construction, especially if using solid wood for the frame, consider mortise and tenon joints. These create strong, interlocking connections that are difficult to pull apart. While more challenging, mastering them is a hallmark of skilled woodworking. Refer to guides on introduction to traditional hand tool joinery exploring mortise and tenon with chisels and saws for detailed instructions.
- Edge Banding for Plywood: If using plywood, visible plywood edges can be covered with iron-on edge banding for a cleaner, more finished look that mimics solid wood. This is a simple yet effective technique to hide raw edges.
- Integrated Lighting: Consider adding subtle LED strip lighting beneath the top shelf of the coat rack or within the shoe cubbies. This not only adds a modern touch but also improves visibility in a typically darker entryway. Ensure proper wiring and power source considerations.
Achieving a Flawless Finish
The finish is what people see and touch, making it crucial for the overall success of your project.
- Grain Filling: For open-grain woods like oak or ash, grain filler can create an incredibly smooth, glass-like surface. Apply it after initial sanding and before staining or sealing, working it into the pores, then wiping off the excess.
- Conditioning Wood: If you plan to stain pine or other softwoods, apply a pre-stain wood conditioner. This helps the wood absorb stain more evenly, preventing blotchiness.
- Wiping Varnish/Oil Finishes: Instead of thick polyurethane, explore wiping varnishes or oil finishes (like Danish oil or tung oil). These penetrate the wood, offer good protection, and provide a more natural, hand-rubbed look. They are often easier to apply without streaks.
- Spray Finishing: For the smoothest, most professional finish, consider applying clear coats (lacquer or polyurethane) with a spray gun or aerosol cans. This eliminates brush marks and provides an even coat. Practice on scrap wood first to get the technique right. Ensure good ventilation when spray finishing.
- Buffing and Polishing: After the final coat of finish has fully cured, you can buff the surface with very fine abrasives (like 0000 steel wool or polishing compounds) to achieve a satin or high-gloss sheen, depending on your preference.
By applying these advanced techniques and focusing on a meticulous finishing process, your DIY entryway bench will not only be highly functional but also a beautiful, custom-made piece of furniture that rivals store-bought options. It will stand as a testament to your growing woodworking skills and attention to detail in your home in 2026.
Conclusion
Building a DIY Entryway Bench with Shoe Storage and Coat Rack: Complete Build Guide for Beginners is a rewarding project that offers immense practical benefits and an opportunity to enhance your woodworking skills. From the initial planning and precise cutting to the careful assembly and detailed finishing, each step contributes to a piece of furniture that is both functional and a reflection of your personal craftsmanship. In 2026, a well-organized entryway is more than just convenient; it contributes to a sense of calm and order in the home, setting a positive tone for all who enter.
By following this guide, even those new to woodworking can create a durable and attractive solution for entryway clutter. The ability to customize dimensions, wood types, and finishes ensures the final product perfectly integrates into your home’s unique aesthetic. The journey of building this bench provides not only a valuable piece of furniture but also a deeper understanding of materials, tools, and the satisfaction of creating something with your own hands.
Take the first step today: gather your tools, plan your design, and embark on this fulfilling woodworking adventure. Your organized and inviting entryway awaits.
SEO Meta Title: DIY Entryway Bench with Shoe Storage: Beginner Build Guide SEO Meta Description: Build a DIY entryway bench with shoe storage and coat rack in 2026. This complete guide for beginners covers planning, tools, assembly, and finishing.