
The whisper of a perfectly sharpened plane iron shearing through grain, leaving behind a silken surface, is a hallmark of true woodworking mastery. It’s a skill that transcends mere tool use, delving into the nuanced interplay of mechanics, material science, and keen human perception. This article offers an in-depth guide to “Hand Plane Mastery: Tuning, Sharpening, and Advanced Techniques for Precision Joinery and Surface Prep,” focusing on the nuanced art required to achieve perfectly flat surfaces, precise joinery, and superior finishes.
In an era dominated by power tools, the hand plane remains an indispensable instrument for the discerning woodworker. Its unique ability to produce surfaces unrivaled by sandpaper, to create perfectly square edges for joinery, and to remove material with exquisite control makes it a cornerstone of fine craftsmanship. Mastering the hand plane is not about abandoning modern conveniences but about embracing a level of precision and finish that often eludes them.
Key Takeaways
- Tuning is Fundamental: A well-tuned hand plane is crucial for effective use; this includes sole flatness, frog adjustment, and chipbreaker setting.
- Sharpening is an Art: Achieving a razor-sharp edge with the correct bevel and microbevel is non-negotiable for smooth, tear-out-free planing.
- Advanced Techniques Expand Capabilities: Beyond basic flattening, techniques like shooting boards, cambering, and fine-tuning mouth openings unlock precision joinery and finishing.
- Practice and Feedback: Mastery comes through consistent practice, learning to “read” the wood, and interpreting the shavings produced.
The Foundation of Hand Plane Mastery: Tuning Your Tool
A hand plane is more than just a block of metal with a blade; it is a precision instrument whose performance hinges entirely on its setup. Neglecting proper tuning is akin to trying to write with a broken pencil, frustration is inevitable. The process of tuning ensures the plane acts as an extension of your intent, delivering consistent, clean results.
Ensuring Sole Flatness
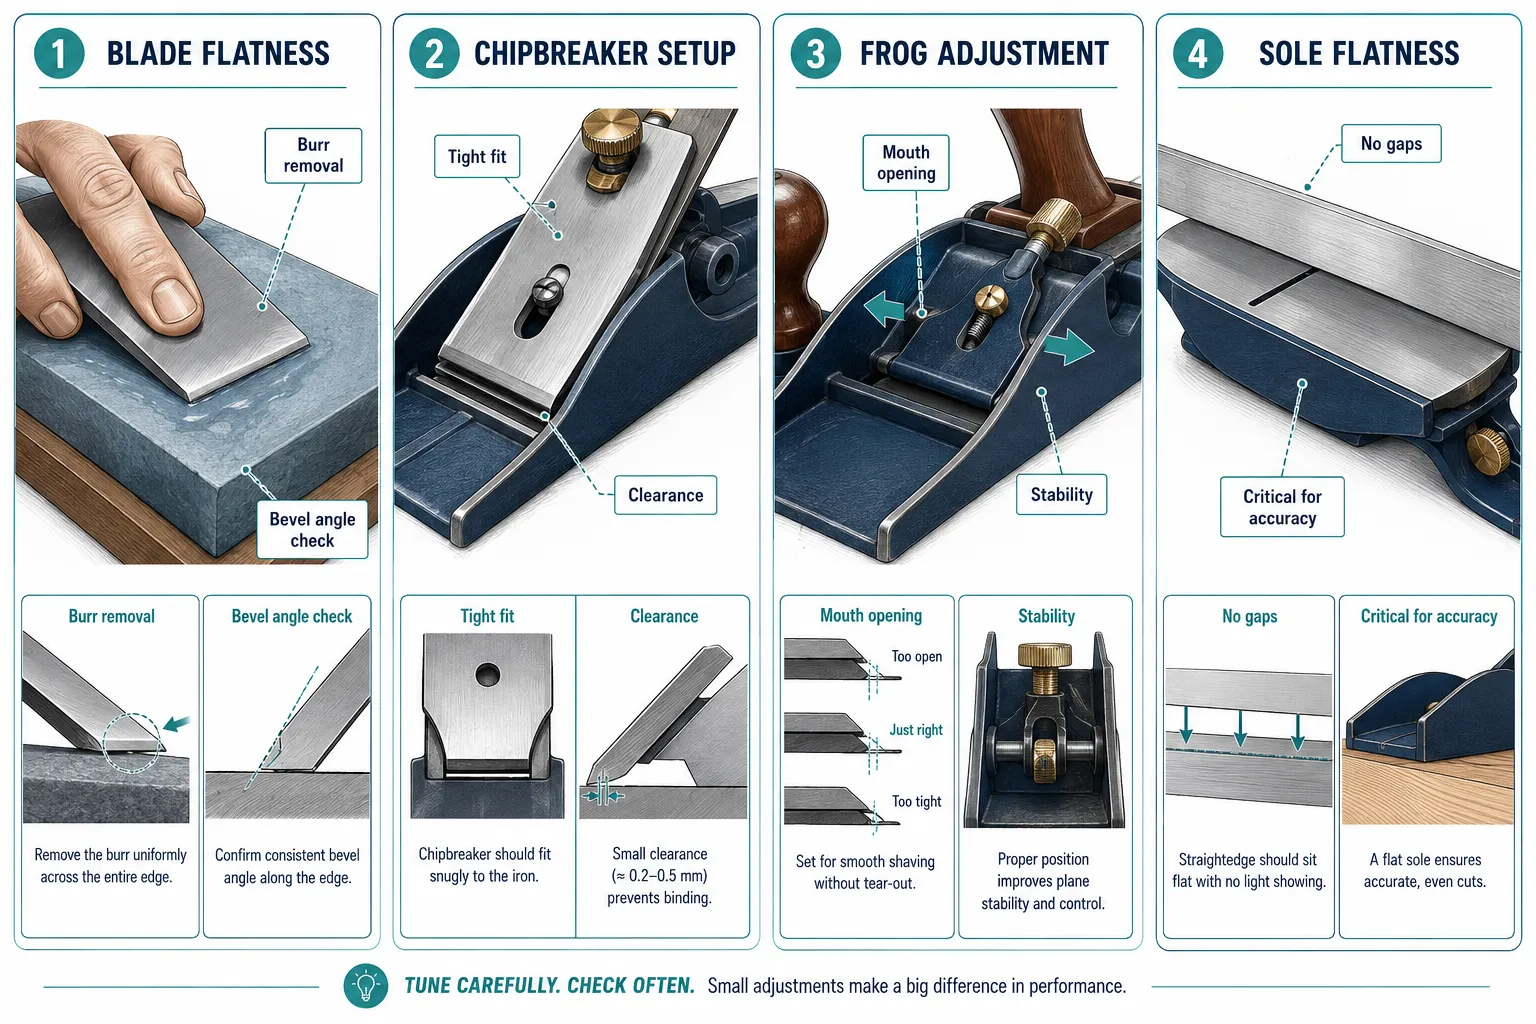
The sole of a hand plane, particularly for bench planes (jointers, fore planes, and smoothers), must be perfectly flat and square to its sides. An uneven sole will create hollows or humps, preventing you from achieving a truly flat surface on your workpiece.
Here’s how to check and flatten your plane’s sole:
- Check Flatness: Place a high-quality straightedge across the sole diagonally, lengthwise, and widthwise. Look for gaps under the straightedge, especially around the mouth.
- Lapping Process: Use abrasive paper (starting around 100-150 grit and progressing to 320-400 grit) adhered to a known flat surface, such as a granite plate, thick glass, or cast iron machine bed.
- Visual Feedback: Mark the sole with a permanent marker. Lap until the marks are evenly removed, indicating uniform contact.
A properly flattened sole provides a stable reference for the blade, allowing for consistent material removal. This foundational step is often overlooked but is critical for any serious woodworking project, especially when pursuing advanced wood joinery for fine furniture.
Optimizing Frog and Chipbreaker Settings
The frog is the adjustable bed on which the plane iron (blade) and chipbreaker rest. Its position directly affects the size of the mouth opening and the support provided to the blade.
- Frog Adjustment: Move the frog forward for a tighter mouth, ideal for fine finishing cuts and figured wood to prevent tear-out. Move it back for a wider mouth, suitable for heavier stock removal. For general use, a minimal opening, just enough for shavings to pass through, is often preferred.
- Chipbreaker Function: The chipbreaker, or cap iron, curls and breaks the shaving immediately after it’s cut, reducing tear-out, particularly on difficult grain. It also stiffens the plane iron.
- Setup: Ensure the chipbreaker’s leading edge is perfectly flat and burr-free. Place it very close to the cutting edge, typically 1/32″ to 1/64″ for smoothing, or slightly further back (1/16″ to 1/8″) for heavier cuts. The closer it is, the more effective it is at preventing tear-out, but it also increases resistance.
Blade Depth and Lateral Adjustment
Once the plane is tuned, the final adjustments before planing are crucial for optimal performance.
- Blade Depth: Advance the blade incrementally until it protrudes just enough to take a whisper-thin shaving. This is typically done with a knurled nut at the rear of the frog.
- Lateral Adjustment: Use the lateral adjustment lever to ensure the blade’s cutting edge is parallel to the sole. Uneven exposure will result in a thicker shaving on one side and potential tracking issues.
These adjustments, though seemingly minor, dictate the plane’s effectiveness and the quality of the finish. For more details on choosing and using hand planes, consider exploring resources on beginner woodworking: how to choose and use hand planes, chisels, and saws for precision joinery.
The Edge of Excellence: Sharpening for Hand Plane Mastery
A sharp blade is not just important; it is everything. A dull plane tears wood fibers, produces rough surfaces, and demands excessive force, leading to fatigue and poor results. True “Hand Plane Mastery: Tuning, Sharpening, and Advanced Techniques for Precision Joinery and Surface Prep” hinges on the ability to consistently achieve and maintain a razor-sharp edge.
Sharpening Principles: Bevels and Microbevels
The goal of sharpening is to create two intersecting planes that form a keen, durable cutting edge.
- Primary Bevel: This is the main angle ground onto the blade. For most bench plane irons, an angle between 25 and 30 degrees is common. A shallower angle cuts more easily but is more fragile; a steeper angle is more durable but requires more force.
- Microbevel (or Secondary Bevel): A slightly steeper, small bevel (typically 2-5 degrees steeper than the primary bevel) ground or honed onto the very tip of the primary bevel.
- Advantages: It significantly reduces sharpening time as you only need to refine a small area, and it creates a more robust cutting edge without increasing the overall planing angle too much.
- Technique: Use a sharpening jig to maintain a consistent angle, or develop a freehand technique.
Sharpening Abrasives and Progression
Sharpening involves a progression of abrasives, from coarse to very fine, to remove metal and then refine the edge.
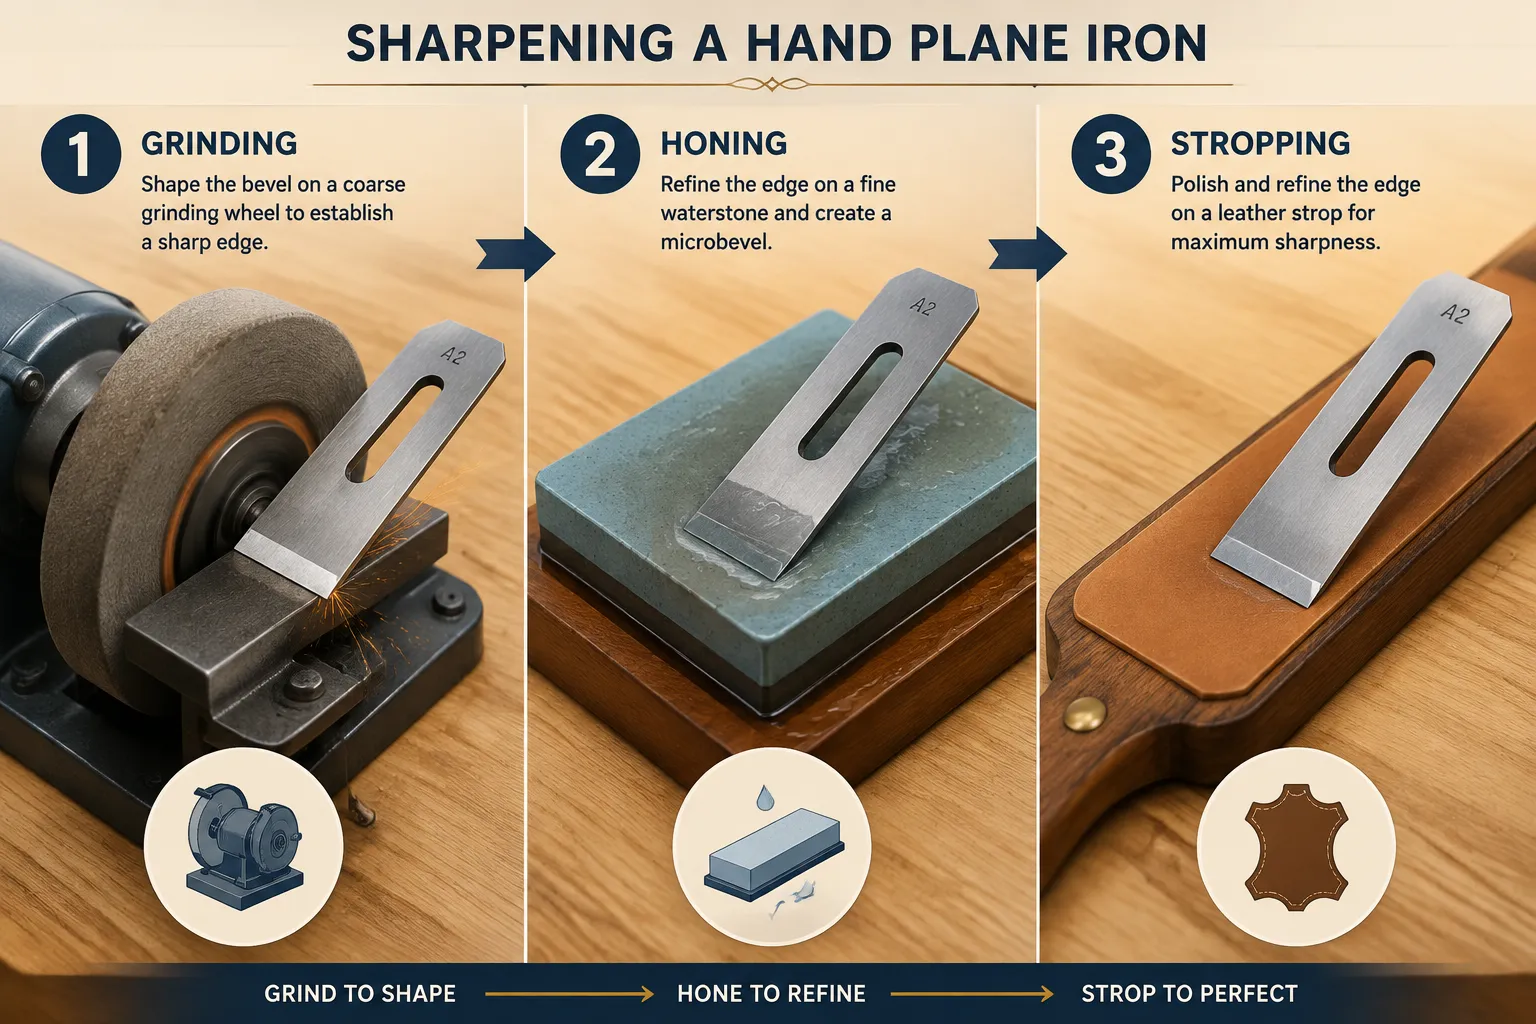
- Coarse Grits (e.g., 100-1000 grit): Used to establish the primary bevel, remove nicks, or correct significant damage. This can be done on a grinding wheel or coarse sharpening stone.
- Medium Grits (e.g., 1000-4000 grit): Refine the bevel and begin to develop a sharp edge.
- Fine Grits (e.g., 6000-12000+ grit): Create the microbevel and polish the edge to a mirror finish, essential for smooth, tear-out-free cuts. Waterstones, oilstones, or diamond plates are common choices.
- Stropping: The final step, often using a leather strop charged with honing compound, removes any remaining burr and polishes the edge to its keenest possible state.
Cambering for Smoothing Planes
For smoothing planes (typically a No. 4 or No. 4 1/2), a slight curve, or camber, is often introduced to the cutting edge.
- Purpose: The camber prevents the corners of the blade from digging into the wood, especially during very fine cuts, and helps eliminate plane tracks, resulting in a cleaner, smoother surface ready for finishing.
- Method: When honing, apply slightly more pressure to the corners of the blade, or use a specific jig designed for cambering. The amount of camber is subtle, often just enough to be visible to the naked eye.
Regular and meticulous sharpening is a habit that separates the novice from the master. It ensures that every pass of the plane is efficient and effective, preserving the quality of your wood and the integrity of your work.
Advanced Techniques for Precision Joinery and Surface Prep
Beyond basic flattening and smoothing, hand planes offer a myriad of advanced techniques that elevate woodworking to an art form, allowing for unparalleled precision in joinery and exquisite surface preparation.
Using Shooting Boards for Perfect End Grain and Angles
A shooting board is a simple yet incredibly effective jig used with a plane (typically a block plane or a low-angle jack plane) to precisely trim end grain and perfect angles.
- End Grain Trimming: For perfectly square and smooth end grain on small parts, essential for tight-fitting joints like tenons and half-laps. When building components like a DIY dining table for beginners, precise end grain is vital.
- Angle Trimming: With specialized fences, shooting boards can trim precise 45-degree miters or other angles for picture frames, box corners, or decorative elements.
- Technique: Place the workpiece against a fence on the shooting board, and slide the plane on its side against the edge of the board, taking fine shavings. This method offers exceptional control and accuracy.
Preparing Surfaces for Glue-Up with Joinery Planes
For strong, invisible glue joints, the edges of boards must be perfectly straight and square to their faces. Joinery planes (like a No. 7 or No. 8 jointer plane) excel at this.
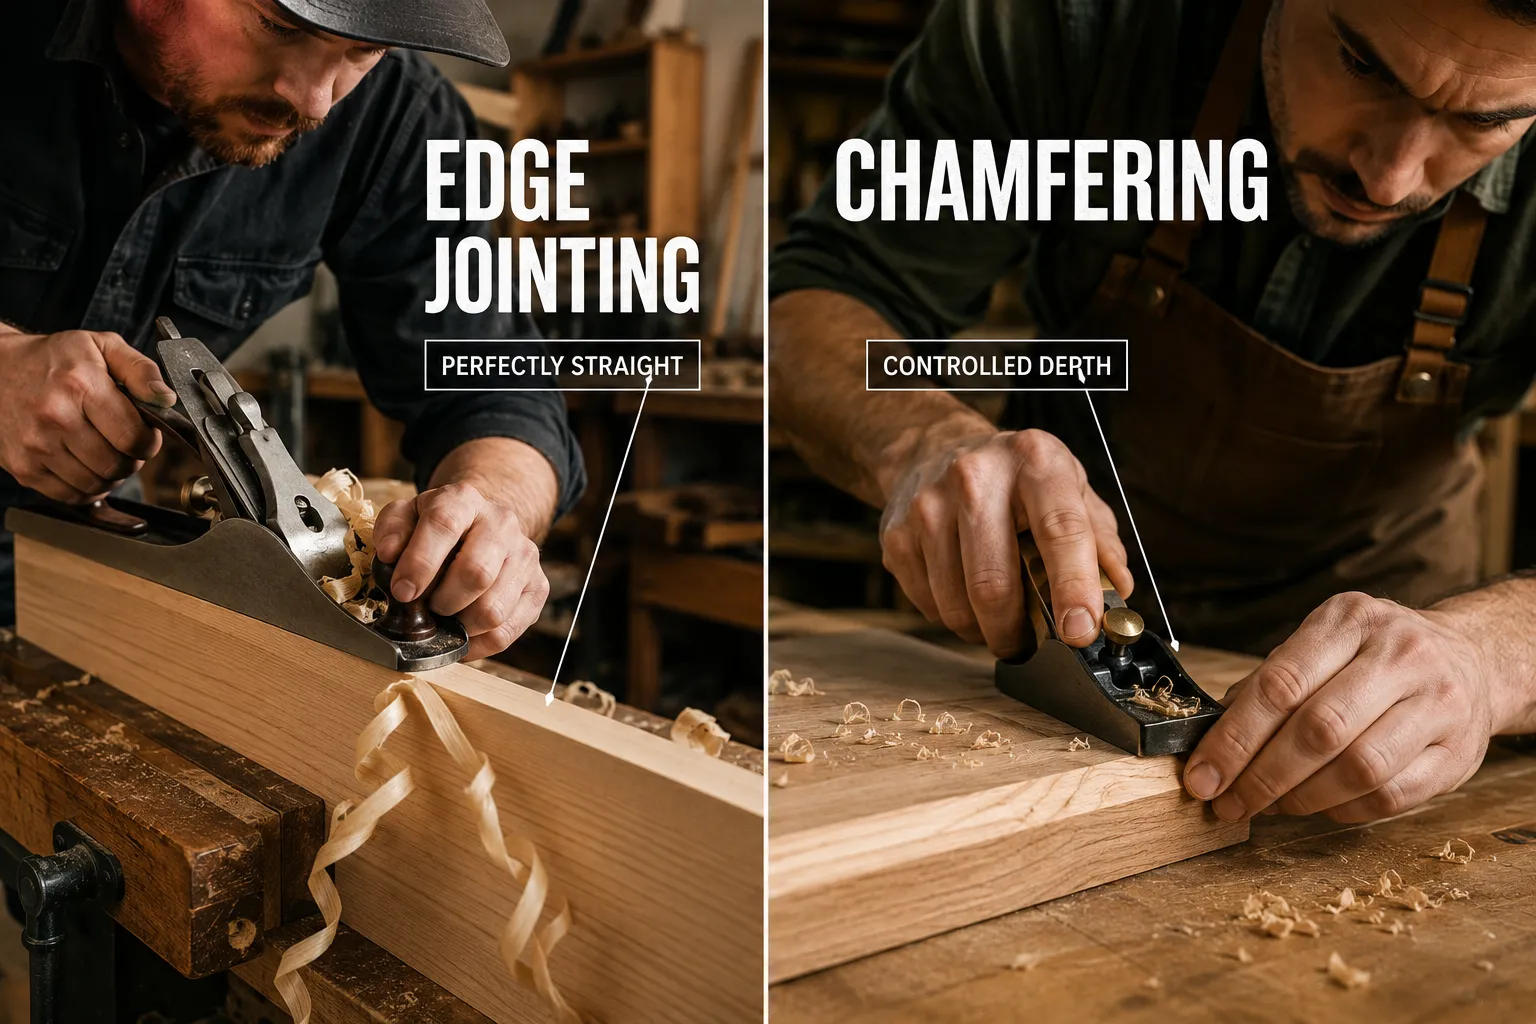
- Edge Jointing: Use a long jointer plane to take long, continuous shavings down the edge of boards. The length of the plane’s sole registers against the entire edge, ensuring straightness.
- Squareness: Ensure the blade is set square to the sole, and maintain consistent pressure to keep the plane upright, producing an edge that is 90 degrees to the face.
- “Sprung” Joints: For even tighter glue joints, some woodworkers intentionally plane a very slight hollow (a “sprung” joint) in the middle of a board’s edge. When clamped, the ends pull together with greater force, resulting in a stronger joint.
Sculpting and Shaping with Specialty Planes
Beyond flat surfaces, various specialty planes allow for intricate shaping and sculpting.
- Block Planes: Excellent for chamfering edges, trimming end grain, and fitting small parts. Their low angle and adjustable mouth make them versatile.
- Rabbet and Shoulder Planes: Designed to cut rabbets (grooves along an edge) and clean up shoulders of tenons, ensuring perfect fit in joinery. This is particularly useful when crafting building your first mortise and tenon joints by hand.
- Router Planes: Used to cut dados, grooves, and recesses to a precise, consistent depth, perfect for fitting inlays or creating stopped dados.
- Molding Planes: Traditional planes designed to cut specific decorative profiles, from simple beads to complex ogees.
Mastering these tools and techniques is a journey, not a destination. Each pass of the plane offers feedback, allowing the woodworker to refine their touch, listen to the wood, and produce results of exceptional quality. When combining these hand plane skills with hybrid techniques, such as CNC assisted mortise and tenon joinery, woodworkers can achieve a remarkable blend of efficiency and traditional craftsmanship.
Reading the Grain and Troubleshooting Common Planing Issues
A significant part of “Hand Plane Mastery: Tuning, Sharpening, and Advanced Techniques for Precision Joinery and Surface Prep” involves understanding the wood itself and how it reacts to the plane. “Reading the grain” means observing the direction in which the wood fibers run and planing in a way that minimizes tear-out.
Understanding Grain Direction
Wood grain refers to the arrangement of the wood fibers. When planing, it is generally best to work “downhill” or with the grain.
- Planing with the Grain: The plane iron lifts the wood fibers away from the surface. This produces smooth, continuous shavings and a clean cut.
- Planing Against the Grain: The plane iron dives into the wood fibers, potentially lifting and tearing them out ahead of the blade. This results in a rough, pockmarked surface (tear-out) and requires significantly more force.
- Identifying Grain Direction: Look at the edge of the board. The grain often appears to “run” in a particular direction. If the wood feels like it’s splintering or resisting heavily, reverse direction.
Sometimes, highly figured woods (like bird’s eye maple or curly cherry) have unpredictable or reversing grain, making tear-out difficult to avoid. In these cases, a very finely set smoothing plane with a tightly set chipbreaker, or even a scraper plane, may be necessary.
Common Planing Issues and Solutions
Even with a well-tuned and sharp plane, issues can arise. Knowing how to diagnose and correct them is key to effective planing.
| Issue | Description | Common Cause | Solution |
|---|---|---|---|
| Tear-out | Rough, splintered areas where wood fibers have been ripped from the surface. | Planing against the grain; dull blade; mouth too wide; chipbreaker too far back. | Plane with the grain; sharpen blade; tighten mouth opening; set chipbreaker closer to the edge; use a higher angle plane (e.g., bevel-up plane); use a cabinet scraper. |
| Plane Tracks | Parallel lines or grooves left by the corners of the blade. | Blade corners digging in; blade not cambered (for smoothing); uneven lateral adjustment. | Introduce a slight camber to the blade (for smoothing planes); ensure even blade projection; adjust lateral lever; ease off pressure on the sides of the plane. |
| Chatter | Vibrations causing an uneven, rippled surface. | Loose blade or cap iron; loose frog; thin blade; blade too far extended. | Tighten cap iron screw; ensure frog screws are tight; use a thicker blade if possible; reduce depth of cut; check blade for proper seating. |
| Gaps in Shavings | Shavings are broken or uneven; plane is not cutting full width. | Uneven blade projection; sole not flat; wood surface uneven. | Adjust lateral blade lever to ensure even projection; re-flatten plane sole; pre-flatten surface with a larger plane (e.g., jointer plane) or scrub plane. |
| Excessive Force | Requires significant effort to push the plane. | Dull blade; blade set too deep; planing against grain; mouth too tight (for heavy cuts). | Sharpen blade; reduce depth of cut; plane with the grain; widen mouth opening (for heavy cuts); wax the sole for lubrication. |
By systematically troubleshooting these issues, woodworkers can refine their technique and achieve consistent, high-quality results. The ability to “feel” the wood and the plane, adjusting based on the resistance and the quality of the shaving, is a learned skill that comes only with practice.
Conclusion
Hand plane mastery, encompassing meticulous tuning, razor-sharp sharpening, and the application of advanced techniques, is a journey that profoundly enriches the woodworking experience. In an age of rapid production, the deliberate, precise act of planing offers a unique connection to the material and a level of finish that few other tools can replicate. From perfectly flat surfaces ready for advanced wood finishing to the tightest, most visually appealing joinery, a well-mastered hand plane is an indispensable asset.
Embrace the process of tuning your tools, commit to the discipline of sharpening, and explore the diverse range of advanced techniques. Each whisper-thin shaving, each perfectly jointed edge, and each silken surface will be a testament to your growing skill. Start by tuning your most-used bench plane, practice consistent sharpening routines, and then experiment with a shooting board or shoulder plane to elevate your joinery. The satisfaction of creating truly refined work with hand tools is an enduring reward.